


一、环境配置
Github项目:CausalTransformer
论文:Causal Transformer for Estimating Counterfactual Outcomes. ICML 2022.
1、环境安装
要加速可以在pip命令的末尾加上 -i http://mirrors.aliyun.com/pypi/simple --trusted-host mirrors.aliyun.com
- (1)基础环境
conda create -n causaltrans python=3.10
conda activate causaltrans
# cd 切换到项目路径
pip install -r requirements.txt
如果在pip install -r requirements.txt过程中出现连接问题(Could not connect、Connection was reset),看三、1的部分解决。
- (2)安装hydra
Hydra 是一个开源的 Python 框架,简化了科研和其他复杂应用的开发。关键功能是能够通过组合动态创建层级配置,并通过配置文件和命令行覆盖该配置。hydra这个名字来源于它能够执行多个类似任务——就像拥有多个头颅的九头蛇一样。官方说明文档:https://hydra.cc/docs/intro/
pip install hydra-core
# 如果失败,可能缺这几个 pip install cycler fonttools kiwisolver pillow pyparsing python-dateutil
- (3)(可选)其他包安装
#如果不调整版本,之后可能会报错 No module named 'pkg_resources'
python -m pip install setuptools==77.0.3
#numpy版本问题可能会在运行时报错
pip install "numpy<2"
- (4)安装torch-gpu
参考博客 快速安装torch-gpu安装torch和torchvision,我的windows,cuda11.7,安装torch2.0.1和vision0.15.1,如果是linux就载其对应的系统
pip install torch-2.0.1+cu117-cp310-cp310-win_amd64.whl
pip install torchvision-0.15.1+cu117-cp310-cp310-win_amd64.whl
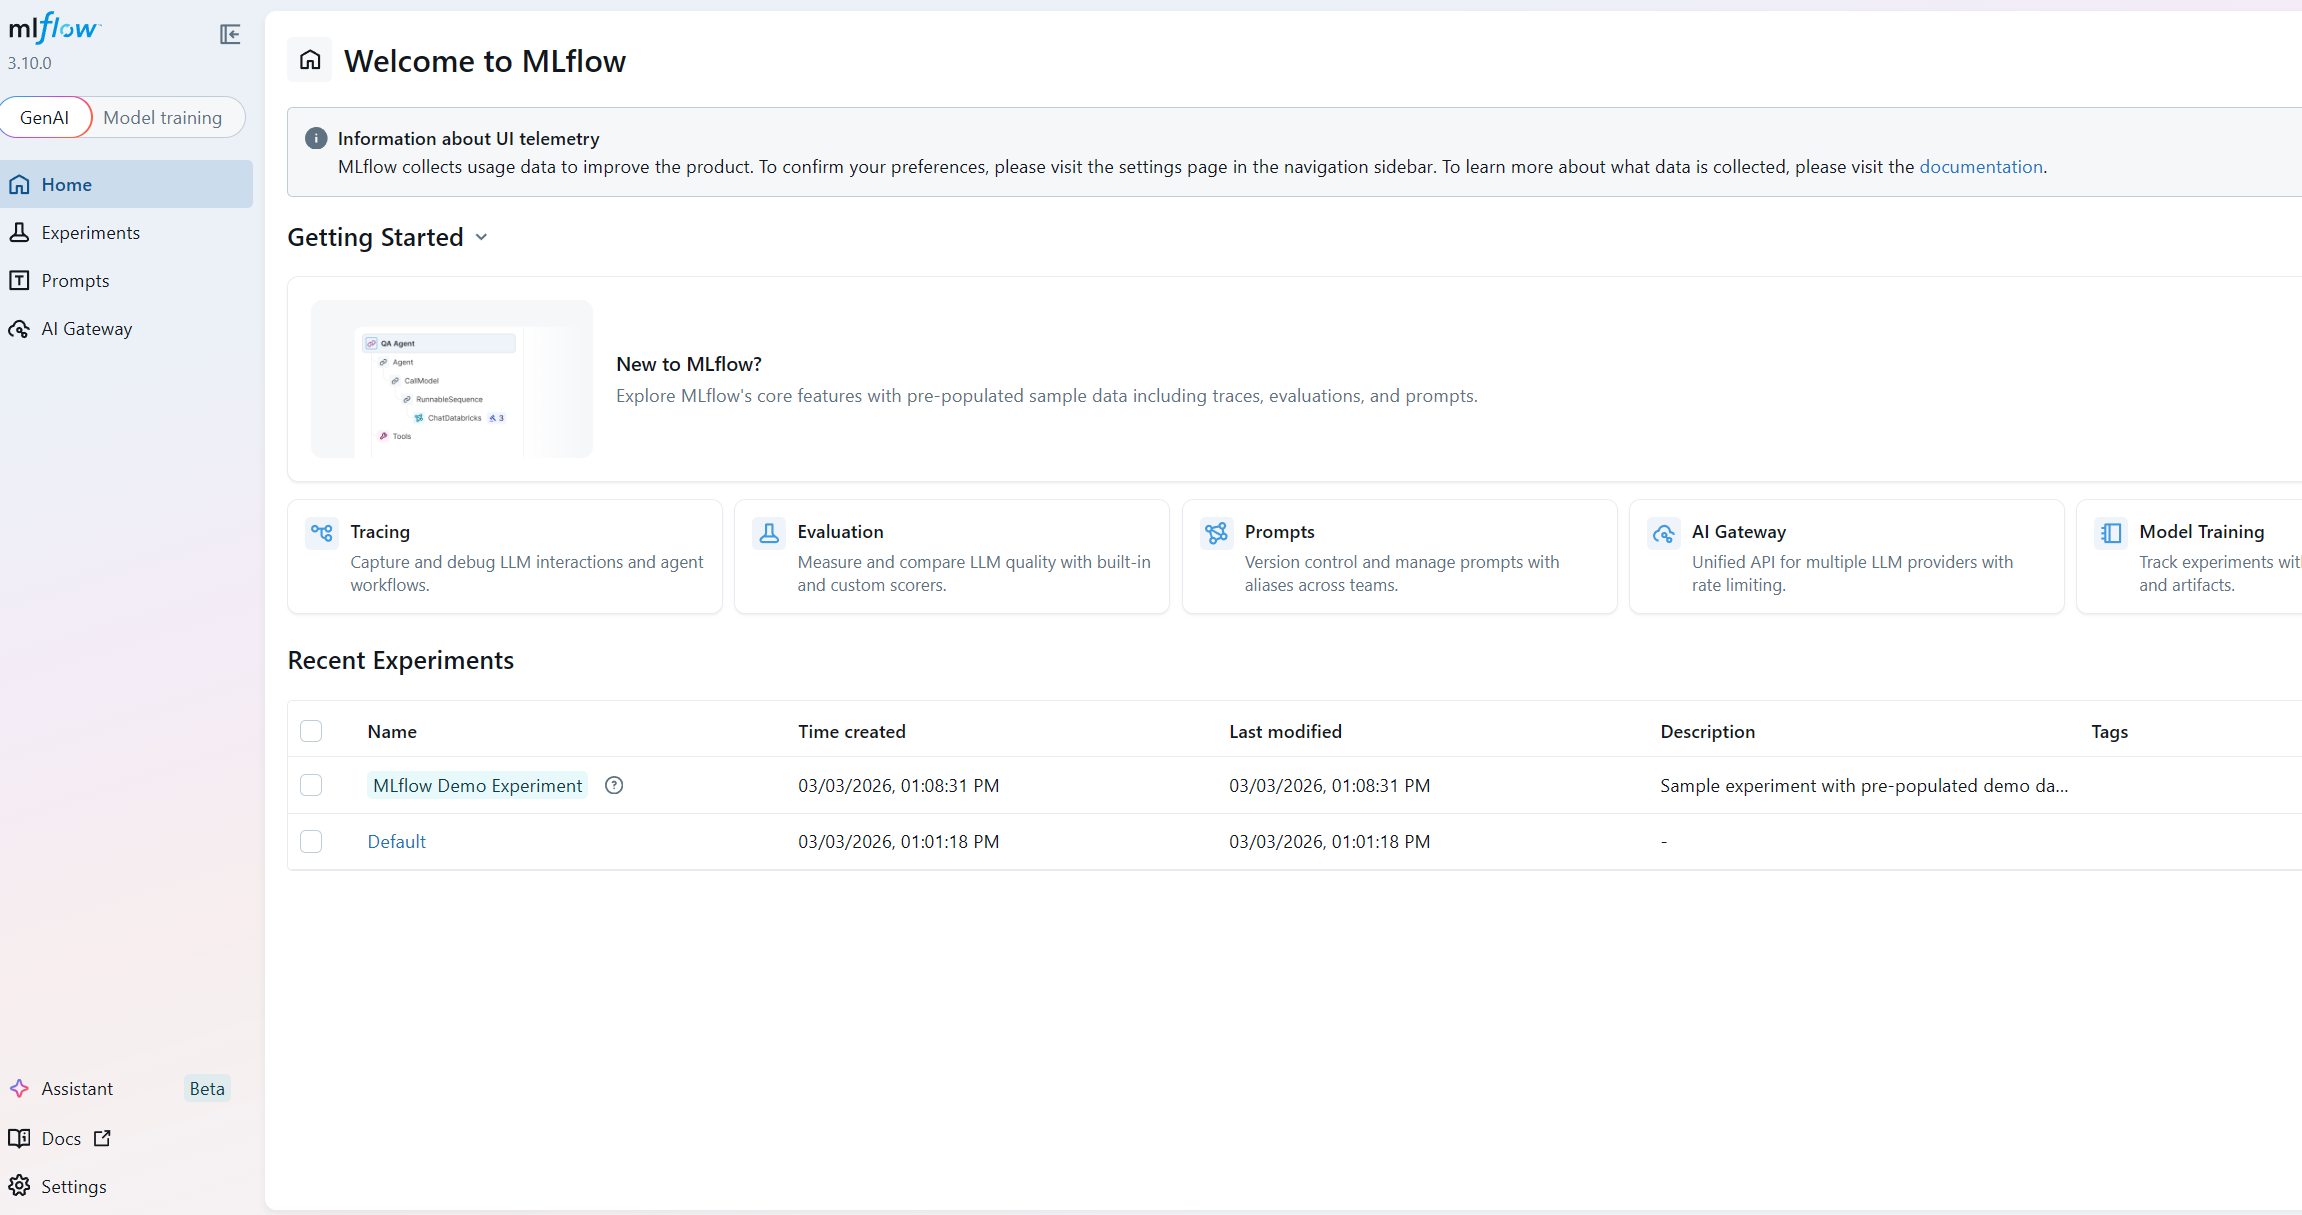
2、MLFlow 监控
MLflow 是一个开源平台,用于管理机器学习项目的完整生命周期,主要包括实验跟踪、模型管理、项目打包和模型服务等功能。
MLFlow使用说明:MLflow 用于管理 ML 模型生命周期
- 启动本地服务器
mlflow server --port=5000
- (可选)远程服务器
# 如果远程服务器,就执行下面这句
ssh -N -f -L localhost:5000:localhost:5000 <username>@<server-link>
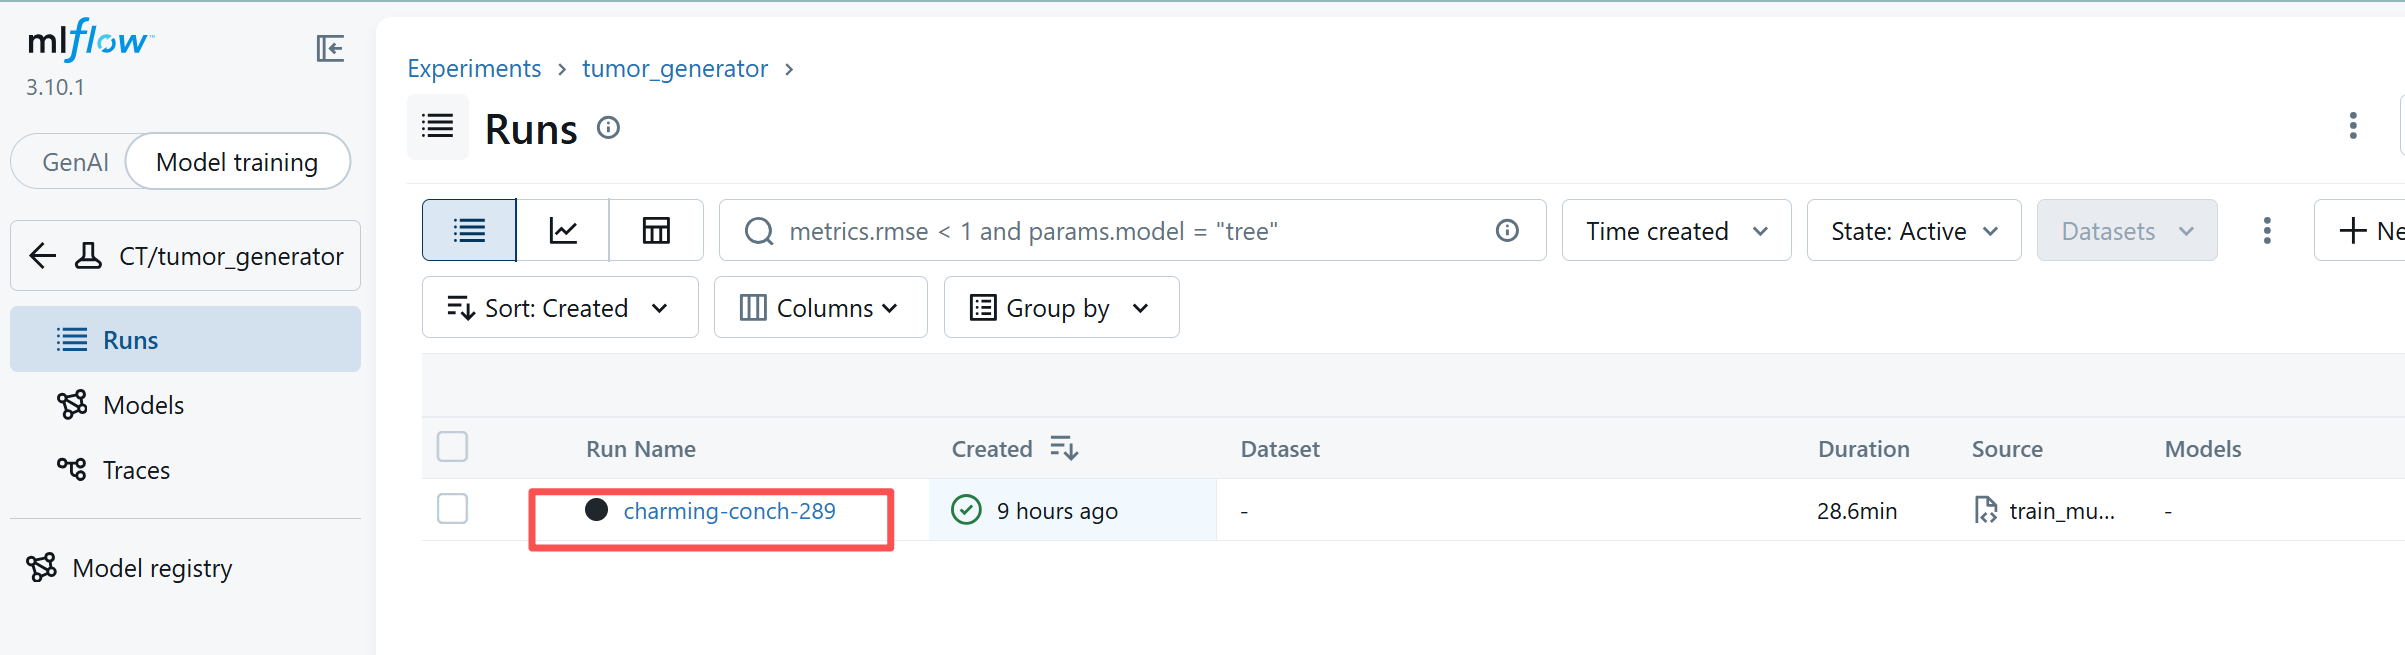
- 访问浏览器 http://localhost:5000。在这里就可以监控查看我们的项目了
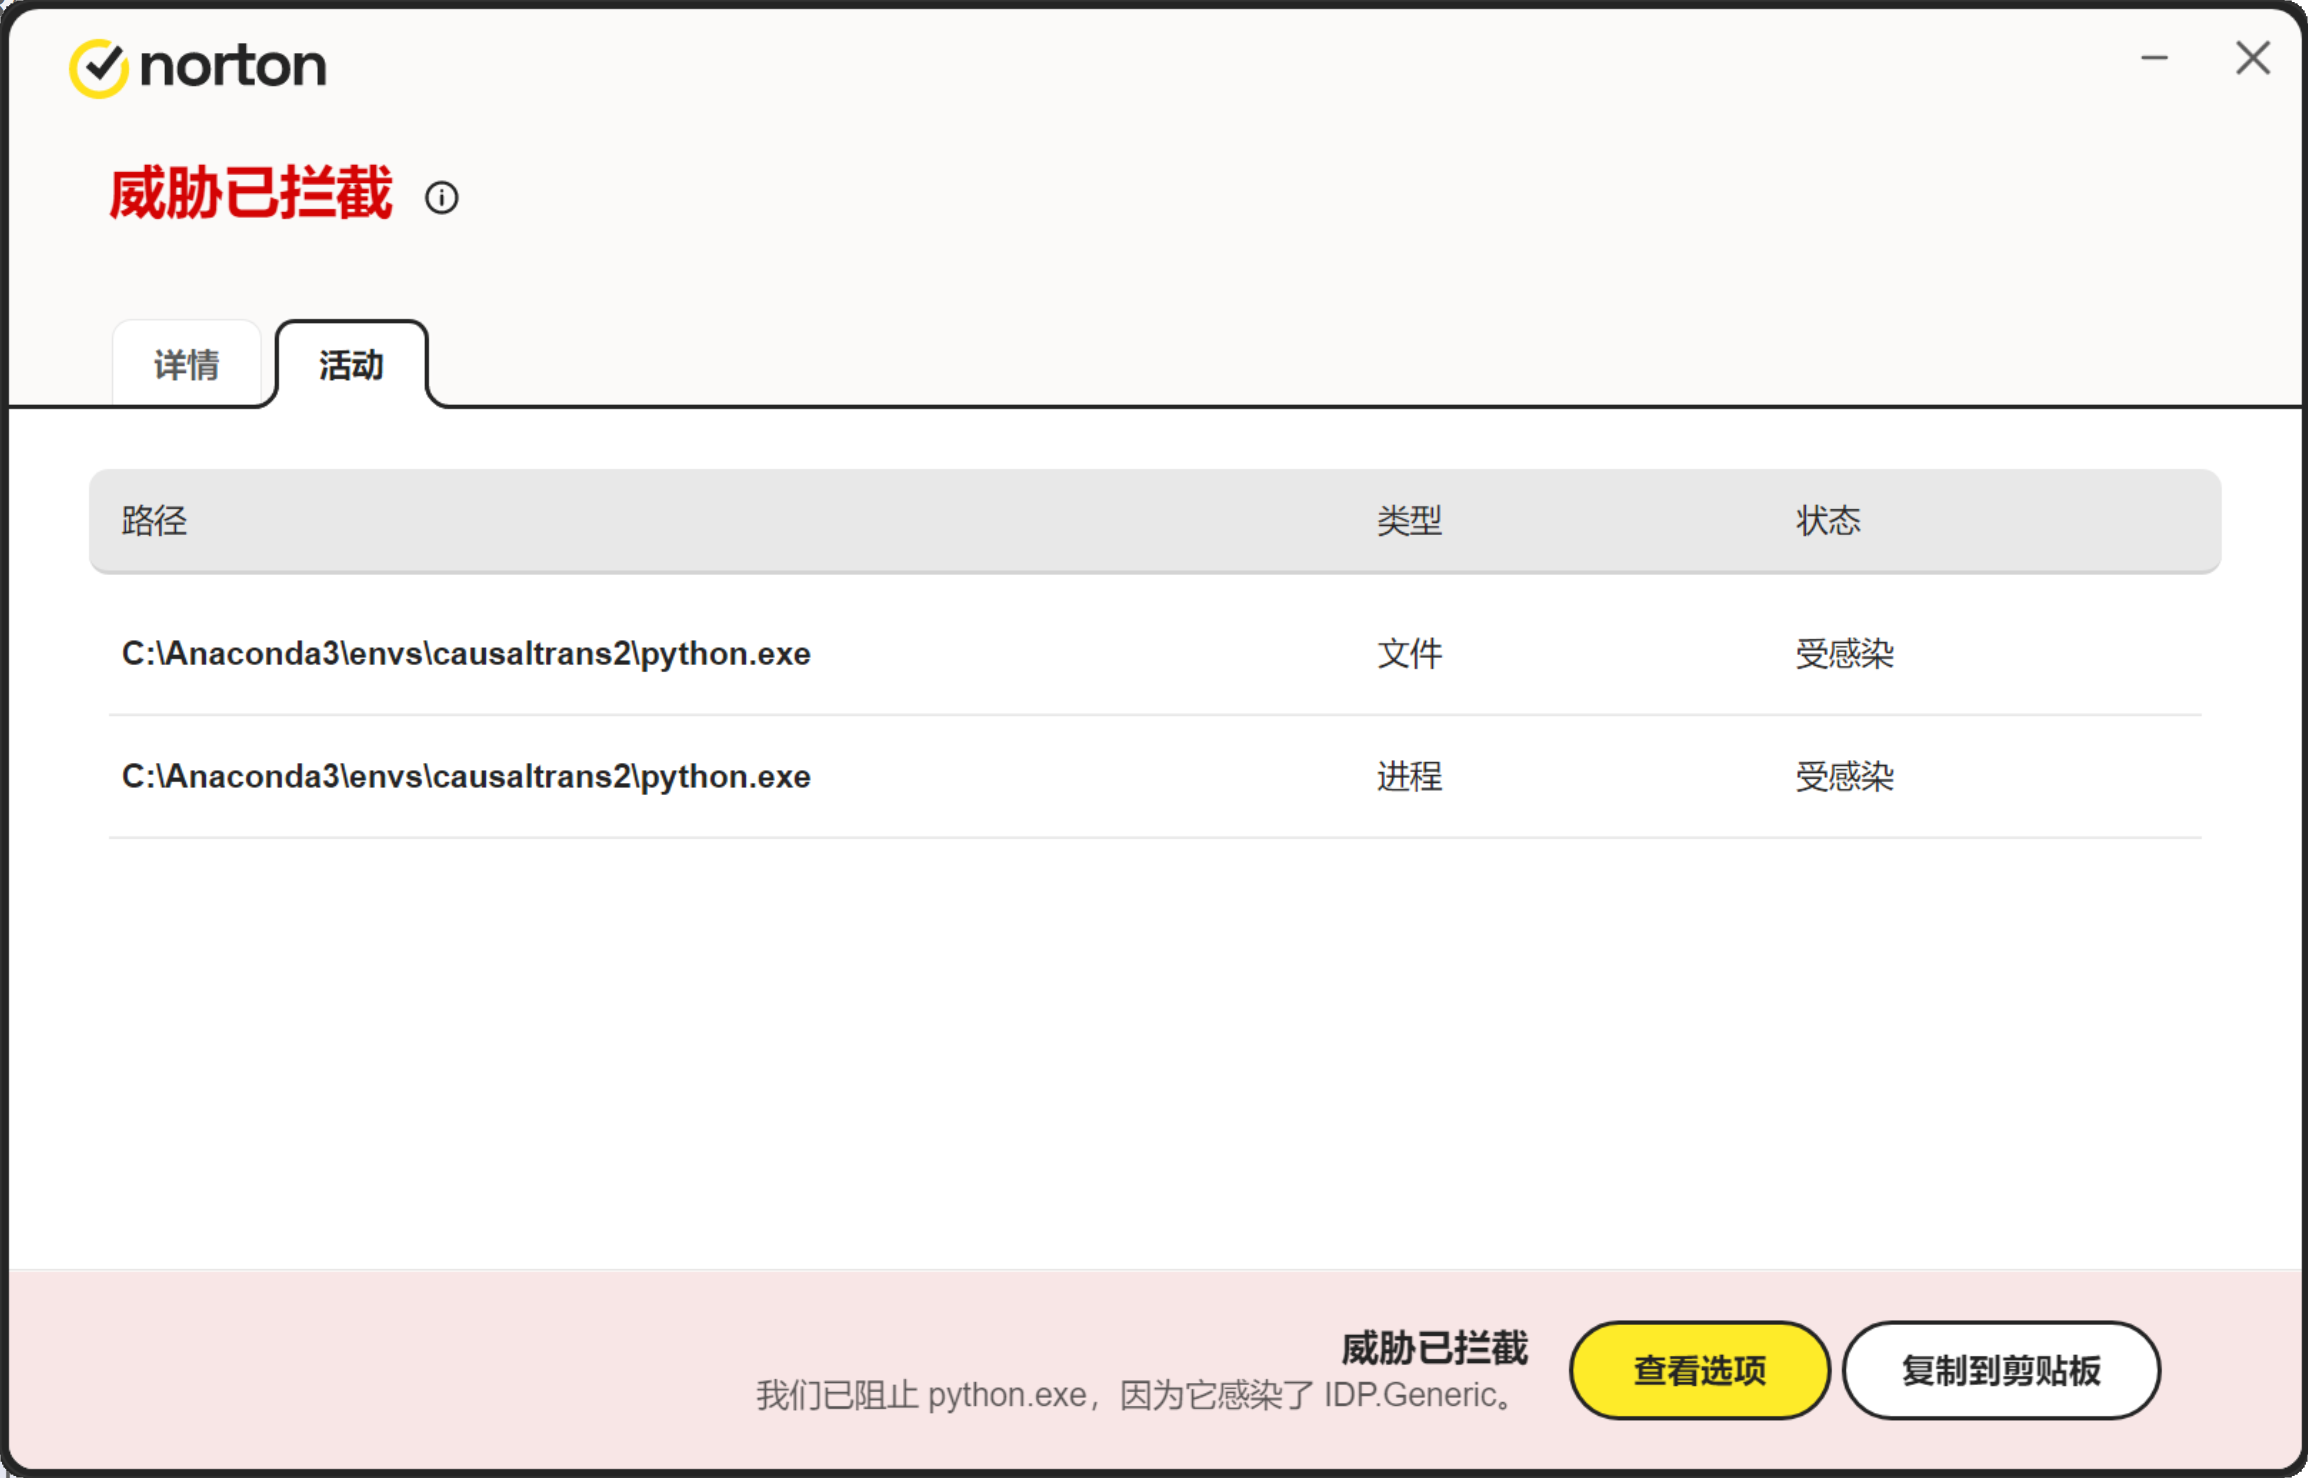
在运行MLFlow的过程中,杀毒软件可能会把python.exe程序识别成威胁!删除掉python.exe,导致整个环境失效!出现这个问题的几个操作整理在报错解决三、3
二、代码运行
运行后如果出现 No module named 'pkg_resources',看三、2的解决
运行后如果出现 np.Inf was removed in the NumPy 2.0 release.',看三、4的解决
运行后如果出现 'CT' object has no attribute 'br_treatment_outcome_head' ',看三、5的解决
1、配置
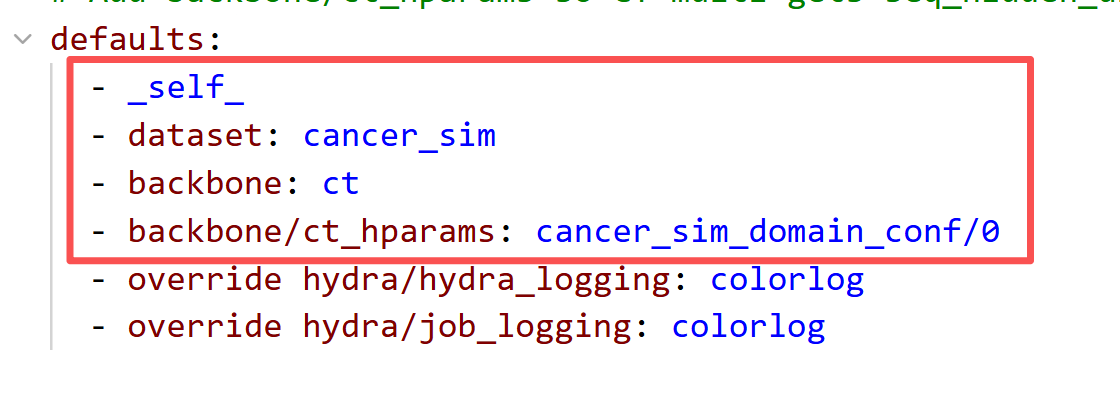
- (1)配置文件
在 config/config.yaml文件中配置 dataset 和 backbone及其超参:
defaults:
  - _self_
  - dataset: cancer_sim
  - backbone: ct
  - backbone/ct_hparams: cancer_sim_domain_conf/0
  - override hydra/hydra_logging: colorlog
  - override hydra/job_logging: colorlog
- (2)混杂系数设置
设置了dataset为cancer_sim后,在config\dataset\cancer_sim.yaml中设置混杂系数

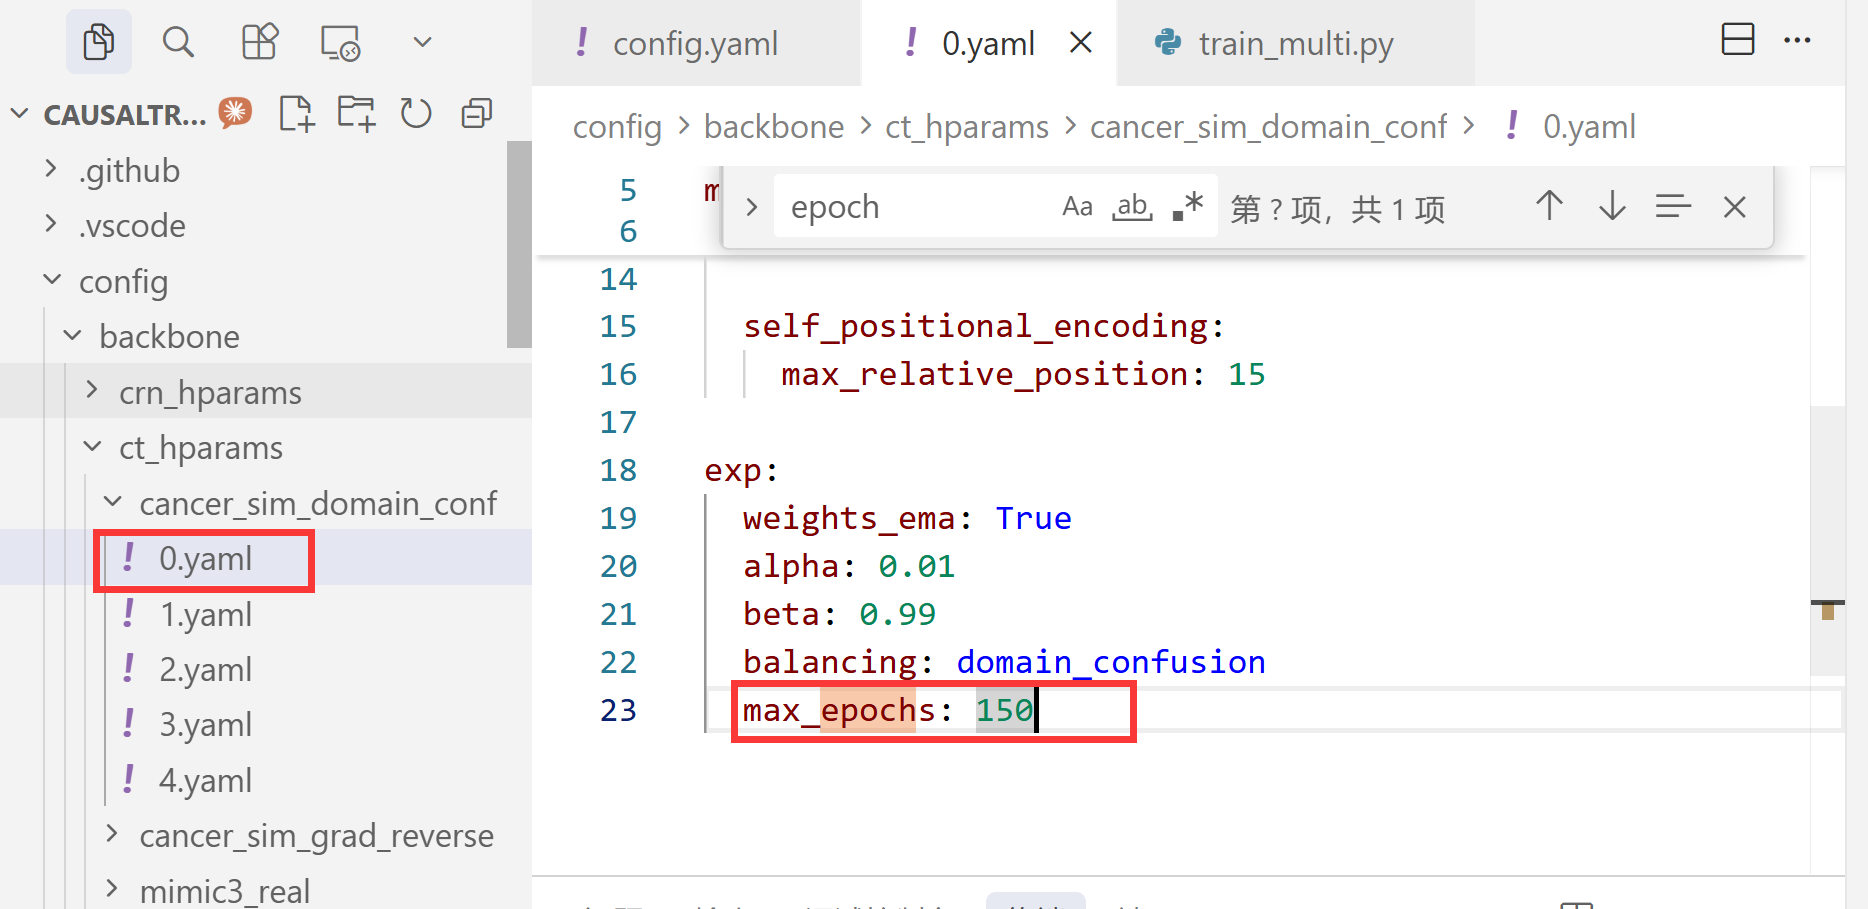
- (3)max_epoch设置
注意,配置了cancer_sim_domain_conf为0之后,max_epoch要在 config\backbone\ct_hparams\cancer_sim_domain_conf\0.yaml里设置
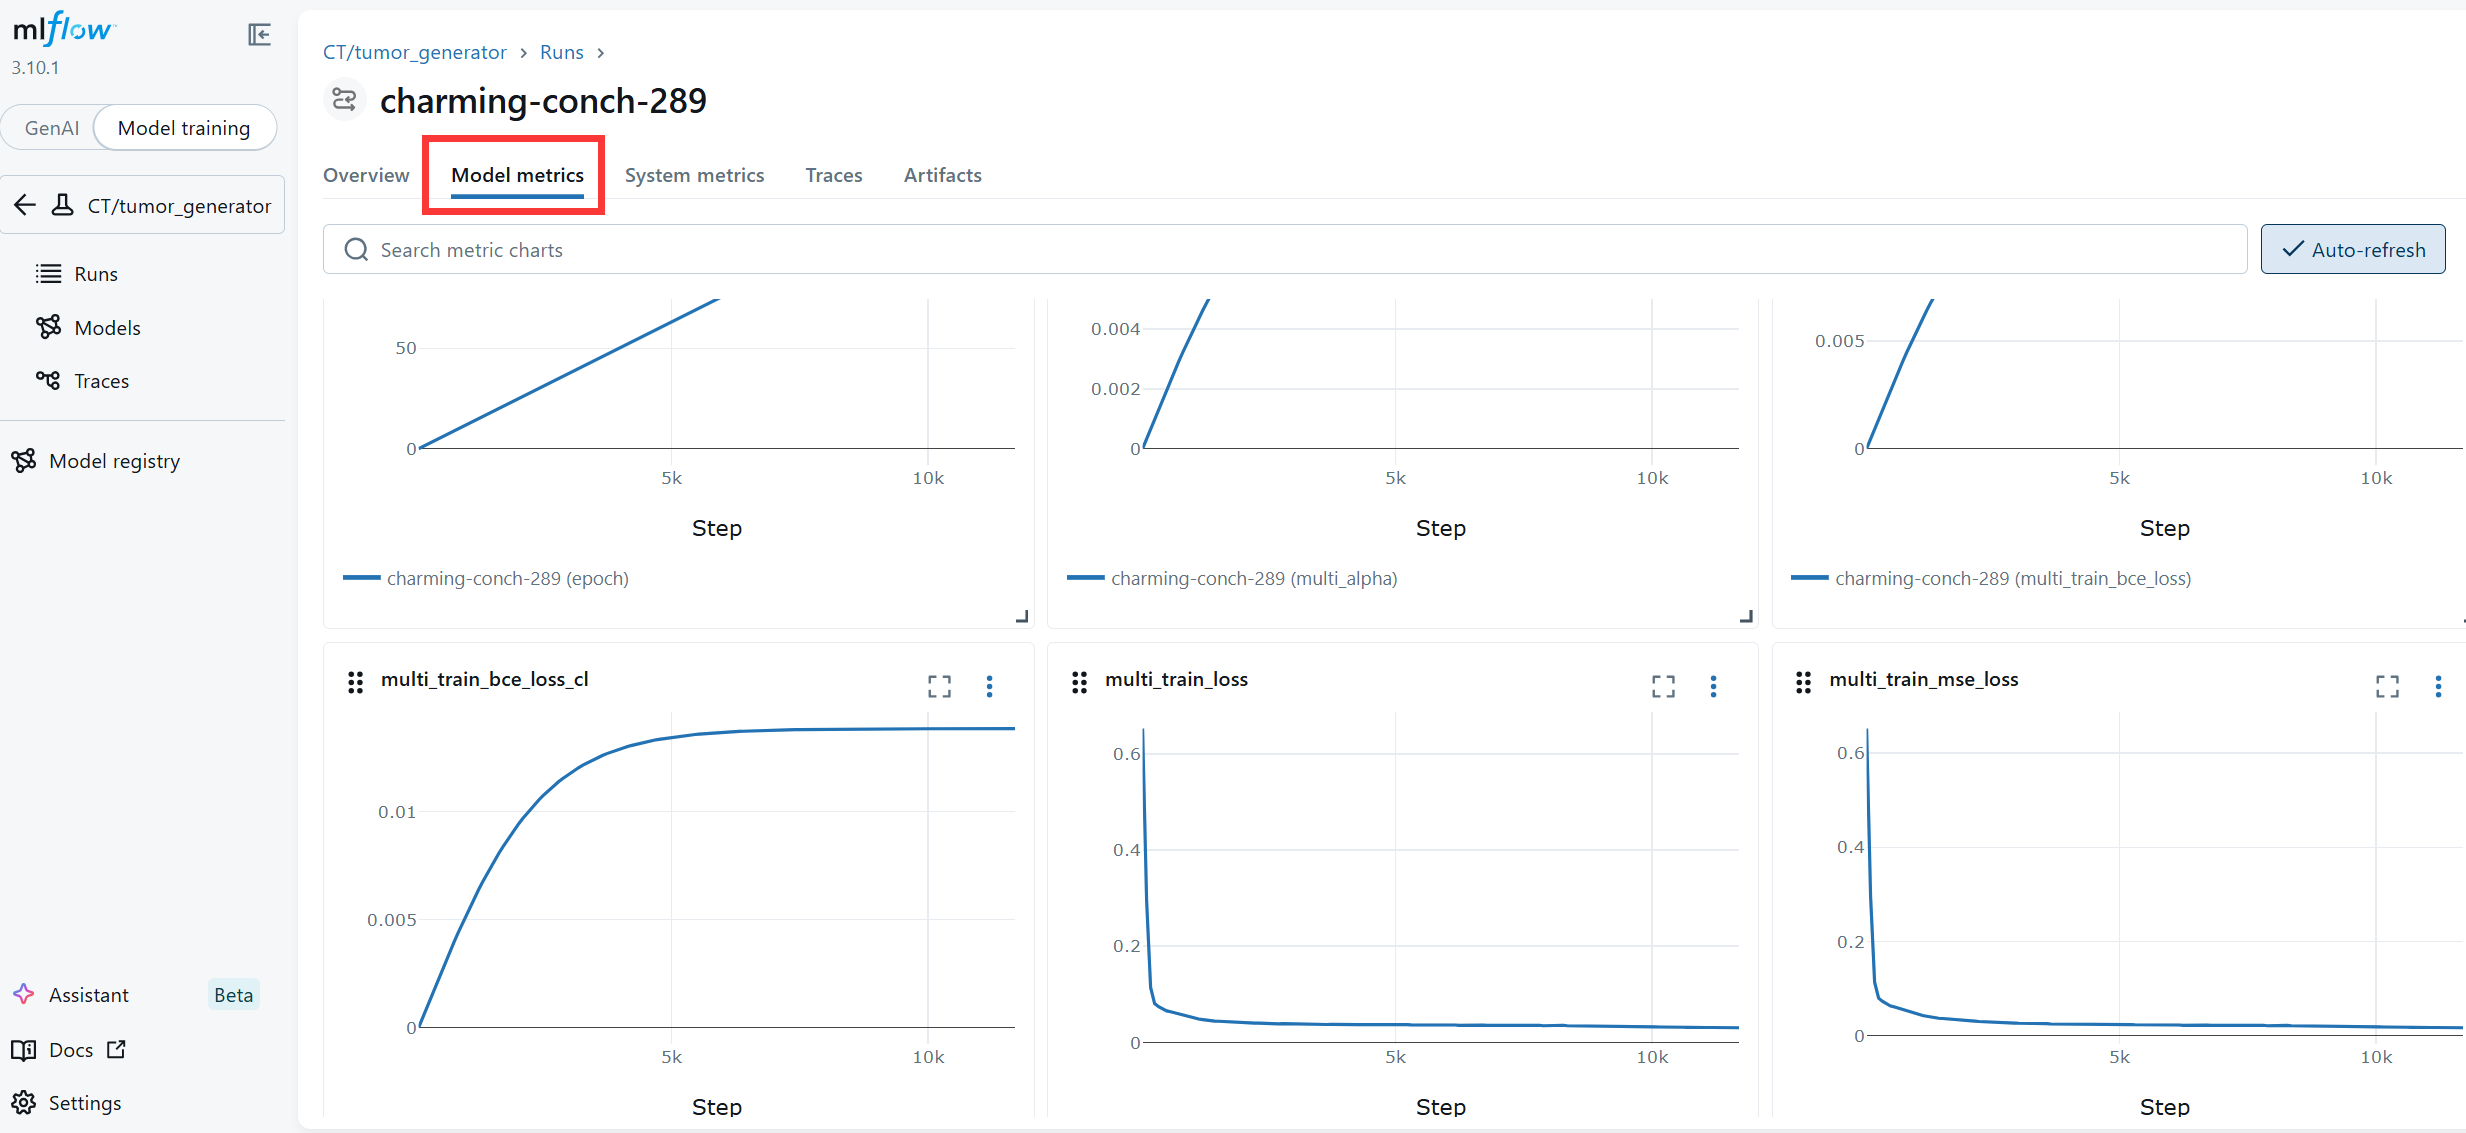
2、运行
配置完以上内容后,就可以直接运行啦(python ./runnables/train_multi.py),在MLFlow(http://localhost:5000/)会展示模型训练情况
如果想一次跑多种参数,可以在命令行运行
# 测试混杂分别=1,3,10,序列长度分别=64,128,256
python runnables/train_multi.py -m dataset.coeff=1,3,10 dataset.max_seq_length=64,128,256
三、报错解决
1、Failed to connect to github.com、Connection was reset
如果在pip install -r requirements.txt过程中出现连接问题,例如
fatal: unable to access ‘https://github.com/fadel/pytorch_ema/’: Failed to connect to github.com port 443 after 21614 ms: Could not connect to server
fatal: could not fetch c737386b3790082cc1c42df8b6b1addb7701bf49 from promisor remote
warning: Clone succeeded, but checkout failed.
You can inspect what was checked out with ‘git status’
and retry with ‘git restore --source=HEAD 😕’note: This error originates from a subprocess, and is likely not a problem with pip.
ERROR: Failed to build ‘git+https://github.com/fadel/pytorch_ema’ when git clone --filter=blob:none --quiet https://github.com/fadel/pytorch_ema
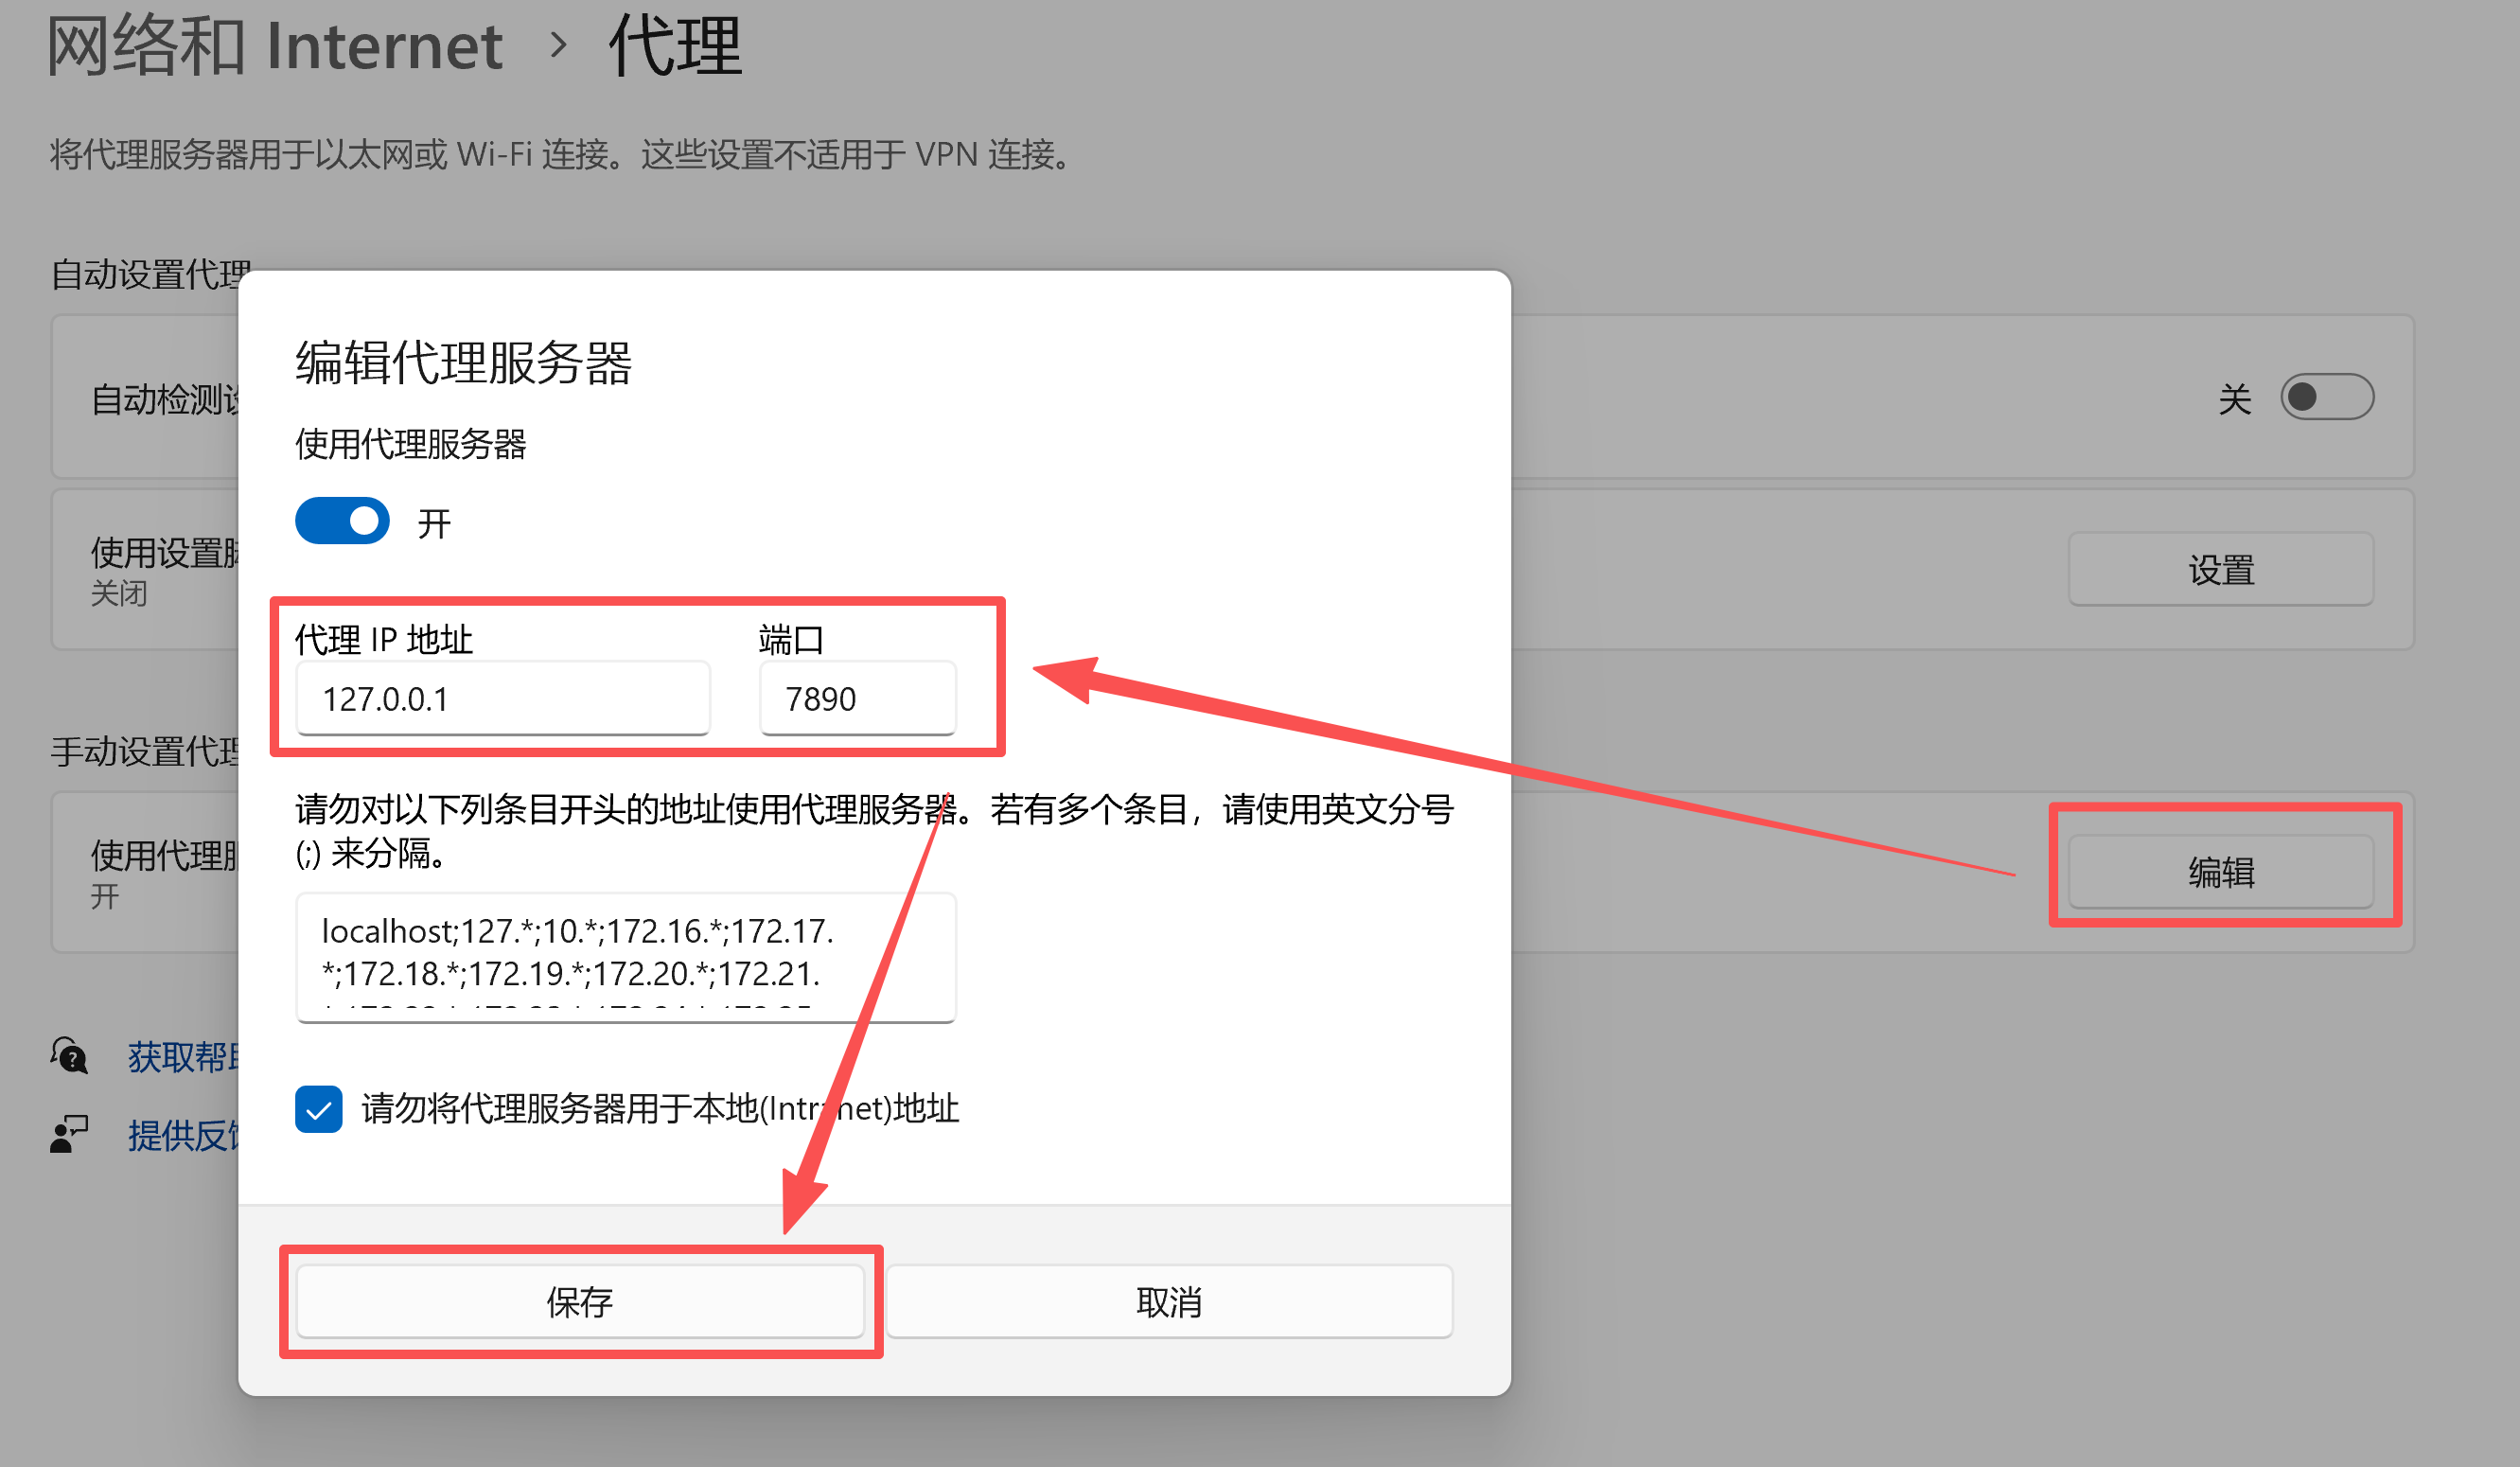
- 方法一(有效)
(1)打开电脑代理服务器设置,手动设置代理-编辑,将端口设置为7890
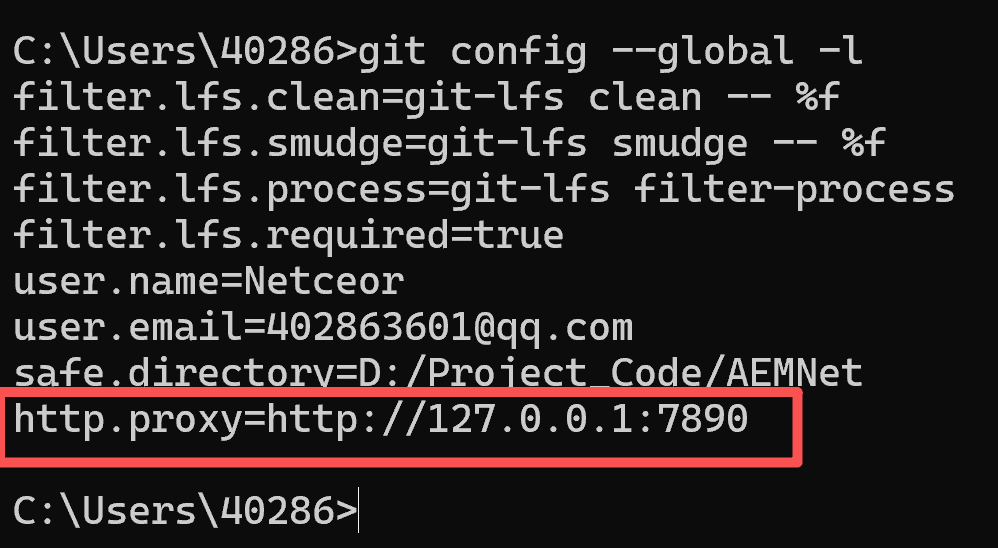
(2)在终端设置 Git 使用本地代理
git config --global http.proxy http://127.0.0.1:7890
(3)检验是否成功
git config --global -l
- 方法二(我试了无效)
在终端执行以下命令,可以取消 Git 的代理设置
git config --global --unset http.proxy
git config --global --unset https.proxy
参考博客解决 git 报错 “fatal: unable to access ‘https://github.com/…/.git‘: Recv failure Connection was rese
2、ModuleNotFoundError: No module named ‘pkg_resources’
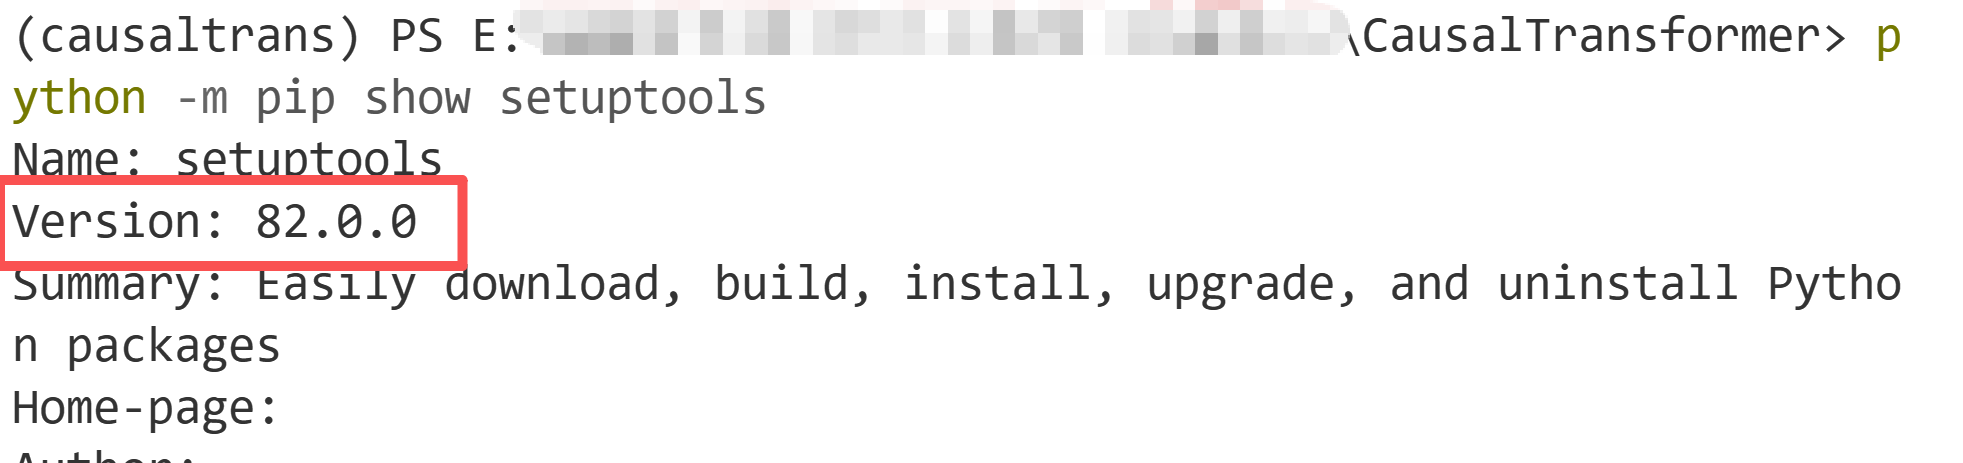
是由于setuptools的版本问题(82.0.0)
(1)先查看版本
python -m pip show setuptools
(2)将 setuptools 降级至 77.0.3 或 81.0.0 等兼容版本。
python -m pip install setuptools==77.0.3
# 测试,显示“导入成功”则解决
python -c "import pkg_resources; print('pkg_resources 导入成功')"
参考博客 ComfyUI 更新后 ModuleNotFoundError: No module named ‘pkg_resources‘报错修复指南
3、python.exe被识别成病毒
在运行MLFlow的过程中,杀毒软件可能会把python.exe程序识别成威胁!删除掉python.exe,导致整个环境失效,出现这个问题做如下几个操作:
- 禁用或关掉杀毒软件
- 允许该程序(python.exe)的运行,我的软件是将其设置成“例外”,就不会误删了
- 如果python.exe已经被删了,尝试用命令
conda install -n causaltrans python=3.10 -y恢复python,但可能出现权限问题。建议直接删了这个,重新create一个新环境。
所以要记得允许它的运行(或设置成例外),关掉杀毒再尝试
4、AttributeError: np.Inf was removed in the NumPy 2.0 release. Use np.inf instead.
AttributeError: np.Inf was removed in the NumPy 2.0 release. Use
np.infinstead.Set the environment variable HYDRA_FULL_ERROR=1 for a complete stack trace.
numpy版本问题,降低到<2就行
pip install "numpy<2"
5、AttributeError: ‘CT’ object has no attribute ‘br_treatment_outcome_head’
应该是少配置了ct_hparams
在 config/config.yaml文件中配置 dataset 和 backbone及其超参:
defaults:
  - _self_
  - dataset: cancer_sim
  - backbone: ct
  - backbone/ct_hparams: cancer_sim_domain_conf/0
  - override hydra/hydra_logging: colorlog
  - override hydra/job_logging: colorlog
参考链接


 1663
1663

 被折叠的 条评论
为什么被折叠?
被折叠的 条评论
为什么被折叠?
 到【灌水乐园】发言


