


 本文详细介绍了如何在CentOS 8.2或RHEL 8上安装和配置VNC服务,特别是TigerVNC服务器。首先,确保安装了GNOME桌面环境,然后安装TigerVNC服务器并配置相关服务,包括设置开机启动、添加防火墙规则。同时,解决了可能出现的连接问题,如SELinux权限和端口占用。
centos 8.2 RHEL 8 安装VNC服务
一、安装GNOME桌面环境
在CentOS 8 / RHEL 8中安装VNC服务器之前,请确保已安装了桌面环境(GUI)。 如果已经安装了GNOME桌面或使用gui选项安装了服务器,则可以跳过此步骤。
在CentOS 8 / RHEL 8中,GNOME是默认的桌面环境。 如果您的系统中没有它,请使用以下命令进行安装:
dnf groupinstall "workstation"
或者
dnf groupinstall "Server with GUI
成功安装上述软件包后,请运行以下命令以启用图形模式
systemctl set-default graphical
现在重新启动系统,以便获得GNOME登录屏幕。
reboot
一旦系统成功重启,取消注释文件
“ /etc/gdm/custom.conf”中的“ WaylandEnable=false”行 即把这行前面#号删除
以便通过vnc进行的远程桌面会话请求由GNOME桌面的xorg处理,代替了Wayland显示管理器。
注意:Wayland是GNOME中的默认显示管理器(GDM),并且未配置为处理X.org等远程呈现API。
二、安装VNC服务器(tigervnc-服务器)
接下来,我们将安装VNC服务器,有许多可用的VNC服务器,并且出于安装目的,我们将安装TigerVNC服务器。 它是最受欢迎的VNC服务器之一,并且是高性能且独立于平台的VNC,它使用户可以轻松地与远程计算机进行交互。
现在,使用以下命令安装TigerVNC Server:
dnf install tigervnc-server tigervnc-server-module -y
Installed:
tigervnc-server-1.9.0-15.el8_1.x86_64 tigervnc-server-module-1.9.0-15.el8_1.x86_64
Complete!
-
配置VNC
需要在/etc/systemd/system/目录里创建一个配置文件。可以将 /lib/systemd/sytem/vncserver@.service 拷贝一份配置文件范例过来。
cp /lib/systemd/system/vncserver@.service /etc/systemd/system/vncserver@:1.service使用下面的命令编辑配置文件:
vim /etc/sysconfig/vncservers
VNCSERVERS="1:root"
VNCSERVERARGS[1]="-geometry800x600"
VNCSERVERS="2:chrome"
VNCSERVERARGS[1]="-geometry800x600"
这个是配置远程桌面登录的用户名,
如果两个用户,则使用VNCSERVERS=“1:user1 2:user2” ,,
-
开机自动启动vncserver
在/etc/rc.d/rc.local文件中加入下面行
/etc/init.d/vncserver start -
修改配置文件
vim /etc/systemd/system/vncserver@:1.service将用户名进行替换成root
ExecStart=/usr/bin/vncserver_wrapper root %i -
重启
systemdsystemctl daemon-reload永久开启VNC服务。
systemctl enable vncserver@1.service -
启动vnc服务
编辑配置之前,需要使用vncserver命令创建默认配置文件
[root@oracle ~]# vncserver
输入口令:123456 (密码要求最少六位)
确认口令:123456用户可以自定义启动号码如:
vncserver :1 #注意:1前面一定要有空格。杀死vncserver进程
vncserver -kill:1 #这里你启动vncserver时是什么端口号要对应上。编辑配置之前,需要使用vncserver命令创建默认配置文件
[root@oracle ~]# vncserver
输入口令:123456 (密码要求最少六位)
确认口令:123456 -
验证vncserrver
ss -tunlp |grep 5901
[root@localhost sysconfig]# ss -tunlp |grep 5901
tcp    LISTEN   0        5                 0.0.0.0:5901           0.0.0.0:*      users:(("Xvnc",pid=59322,fd=6))
tcp    LISTEN   0        5                    [::]:5901              [::]:*      users:(("Xvnc",pid=59322,fd=7))
-
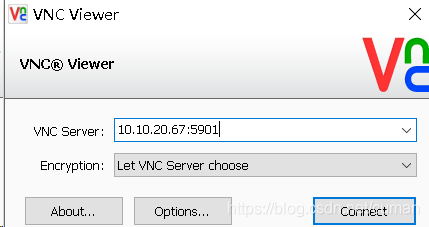
vnc客户端连接服务器
windows下安装vnc viewer客户端,安装后打开,输入服务器ip:端口
其中vnc在linux默认端口为5900+n,n为打开的第几个vnc进程。 本文这里是1 所以端口号是5901
常见问题:
- 临时关闭防火墙
systemctl stop firewalld - 永久防火墙开机自关闭
systemctl disable firewalld - 临时关闭SELinux
setenforce 0 - 临时打开SELinux
setenforce 1 - 查看SELinux状态
getenforce - 开机关闭SELinux
编辑**/etc/selinux/config**文件,如下图,将SELINUX的值设置为disabled。下次开机SELinux就不会启动了。
Warning: localhost.localdomain:1 is taken because of /tmp/.X11-unix/X1
Remove this file if there is no X server localhost.localdomain:1
解决办法:
删除 / tmp/.X11-unix/的内容
rm -rf /tmp/.X11-unix/*
重启vnvserver
# systemctl restart vncserver@:1.service
-
提示socket监听创建失败
WARNING: The first attempt to start Xvnc failed, possibly because the font
catalog is not properly configured.  Attempting to determine an appropriate
font path for this system and restart Xvnc using that font path ...
Could not start Xvnc.

_XSERVTransSocketUNIXCreateListener: ...SocketCreateListener() failed
解决办法
touch /tmp/.X11-unix/X1 chmod 777 /tmp/.X11-unix/X1 -
查看端口是否启动的办法
lsof -i tcp:5901 如果被占用 试试
lsof -i tcp:5902
[root@localhost .X11-unix]# lsof -i tcp:5901
[root@localhost .X11-unix]# lsof -i tcp:5902
COMMAND  PID USER   FD   TYPE DEVICE SIZE/OFF NODE NAME
Xvnc    3804 root    6u  IPv4  53893      0t0  TCP *:5902 (LISTEN)
Xvnc    3804 root    7u  IPv6  53894      0t0  TCP *:5902 (LISTEN)
这里5902端口开放
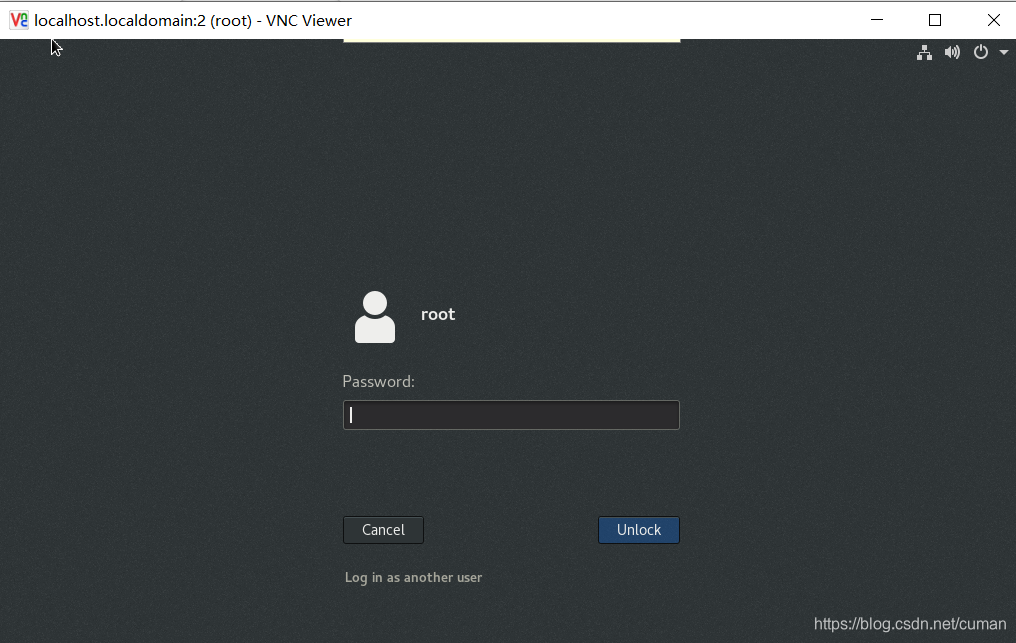
连接后输入之前设置的密码,本文设置的是(123456)


 1413
1413

 被折叠的 条评论
为什么被折叠?
被折叠的 条评论
为什么被折叠?
 到【灌水乐园】发言


