


 本文详细介绍如何在Java中使用gRPC,包括Maven配置、代码生成、客户端调用及服务器端业务逻辑运行方式。提供了三种Maven配置方法,演示了生成gRPC Java代码的两种方式,并展示了客户端调用的不同模式及服务器端处理请求的策略。
目录
以下简单介绍一下如何在java中使用gRPC。
1.开发gRPC应用时,maven需要如何配置?
方式一:
<dependency>
<groupId>io.grpc</groupId>
<artifactId>grpc-all</artifactId>
<version>1.26.0</version>
</dependency>
方式二:
<dependency>
<groupId>io.grpc</groupId>
<artifactId>grpc-netty-shaded</artifactId>
<version>1.26.0</version>
</dependency>
<dependency>
<groupId>io.grpc</groupId>
<artifactId>grpc-protobuf</artifactId>
<version>1.26.0</version>
</dependency>
<dependency>
<groupId>io.grpc</groupId>
<artifactId>grpc-stub</artifactId>
<version>1.26.0</version>
</dependency>
方式三:
<dependency>
<groupId>io.grpc</groupId>
<artifactId>grpc-netty</artifactId>
<version>1.26.0</version>
</dependency>
<dependency>
<groupId>io.grpc</groupId>
<artifactId>grpc-protobuf</artifactId>
<version>1.26.0</version>
</dependency>
<dependency>
<groupId>io.grpc</groupId>
<artifactId>grpc-stub</artifactId>
<version>1.26.0</version>
</dependency>
三种方式的区别:
a.
方式一会把与gRPC相关的所有jar都引入,不管实际项目中是否会用到。引入相关jar较多,但其配置简单。
方式三只会引入与gRPC和netty相关的jar,如果要使用OkHttp,则要再引入。配置相对较多,但引入jar相对较少。
方式二引入的jar的数量介于方式一与方式三之间。
b.
方式一中netty是以原始jar引用的。这样方便在使用的过程中查看netty源代码,方便开发。
方式二中netty被放入grpc-netty-shaded-1.26.0.jar的io.grpc.netty.shaded包中。这样的好处是当项目中有多个模块使用了不同版本的netty时,gRPC功能不会受到影响。但坏处就是不方便查看netty源代码了。
方式三与方式一相同,但不会引入像OkHttp这样与netty与gRPC不相关的jar。
总之,方式一和方式三都适合用在只需要使用单一netty版本的环境,方式二适合用在多个netty版本共存的环境 。
2.如何生成gRPC java代码?
使用官方提供的例子helloworld.proto,加以说明:
syntax = "proto3";
option java_package = "com.example.tutorial";
option java_outer_classname = "HelloWorld";// The greeting service definition.
service Greeter {
// Sends a greeting
rpc SayHello (HelloRequest) returns (HelloReply) {}
// Sends another greeting
rpc SayHelloAgain (HelloRequest) returns (HelloReply) {}
}// The request message containing the user's name.
message HelloRequest {
string name = 1;
}// The response message containing the greetings
message HelloReply {
string message = 1;
}
方式一、使用maven
maven中的配置:
<build>
<plugins>
<plugin>
<groupId>org.xolstice.maven.plugins</groupId>
<artifactId>protobuf-maven-plugin</artifactId>
<version>0.6.1</version>
<configuration>
<protocArtifact>com.google.protobuf:protoc:3.11.0:exe:${os.detected.classifier}</protocArtifact>
<pluginId>grpc-java</pluginId>
<pluginArtifact>io.grpc:protoc-gen-grpc-java:1.26.0:exe:${os.detected.classifier}</pluginArtifact>
<outputBaseDirectory>${project.build.directory}/generated-sources/protobuf</outputBaseDirectory>
</configuration>
<executions>
<execution>
<goals>
<goal>compile</goal>
<goal>compile-custom</goal>
</goals>
</execution>
</executions>
</plugin>
</plugins>
</build>
compile:用于生成protobuf类
compile-custom:生成rpc调用类,其中会用到compile过程中生成的protobuf类
在64位window环境下使用的命令:
mvn protobuf:compile -Dos.detected.name=windows -Dos.detected.arch=x86_64 -Dos.detected.classifier=windows-x86_64
mvn protobuf:compile-custom -Dos.detected.name=windows -Dos.detected.arch=x86_64 -Dos.detected.classifier=windows-x86_64
其中需要传入的三个参数:
os.detected.name
os.detected.arch
os.detected.classifier
这些参数的取值,可以从如下文档中找到:
https://github.com/trustin/os-maven-plugin
对于protobuf-maven-plugin需要用到的参数的详细说明,可参考文档:
Maven Protocol Buffers Plugin
https://www.xolstice.org/protobuf-maven-plugin/
对于如何生成gRPC-Java代码的详细说明,可参考:
gRPC-Java - An RPC library and framework
https://github.com/grpc/grpc-java/blob/master/README.md
方式二、使用命令
// 生成protobuf类
protoc.exe --java_out="D:/Temp" --proto_path="D:/Temp" helloworld.proto
// 生成rpc调用类
protoc.exe --plugin=protoc-gen-grpc-java=D:/Temp/protoc-gen-grpc-java-1.26.0-windows-x86_64.exe --grpc-java_out="D:/Temp" --proto_path="D:/Temp" helloworld.proto
Protocol Buffers下载地址:
https://github.com/protocolbuffers/protobuf/releases
protoc-gen-grpc-java可执行文件,下载地址:
https://search.maven.org/search?q=a:protoc-gen-grpc-java
gRPC Java代码生成,参考文档:
gRPC Java Codegen Plugin for Protobuf Compiler
https://github.com/grpc/grpc-java/tree/master/compiler
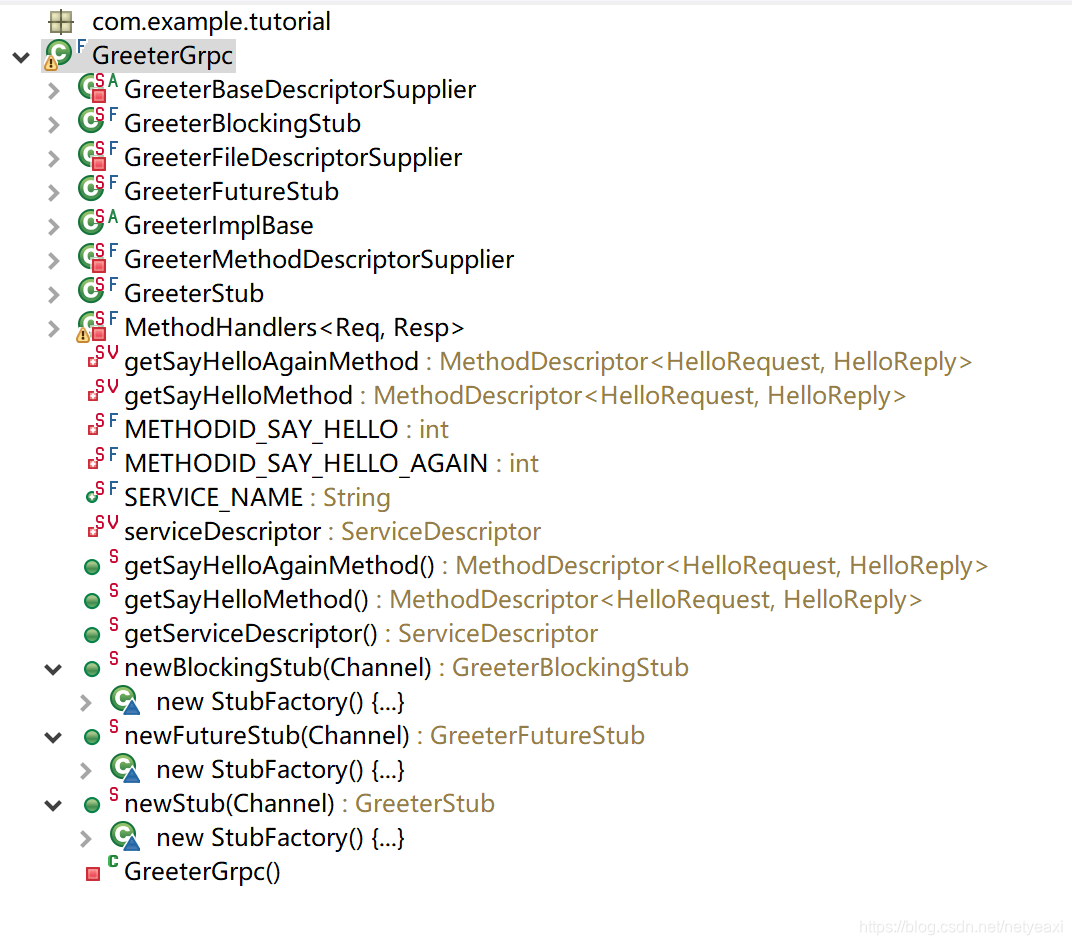
生成的代码结构:

3.客户端调用方式
官方提供的例子,包括客户端代码和服务器端代码,可以在如下地址找到:
https://github.com/grpc/grpc-java/tree/master/examples/src/main/java/io/grpc/examples/helloworld
其中,客户端例子中使用的是同步调用的方式。
gRPC客户端支持3种调用方式:
a.同步调用
b.基于回调的异步调用
c.基于Future的异步调用
以下提供实现了以上3 种调用方式的客户端代码:
package com.example.tutorial;

import java.util.concurrent.ExecutionException;
import java.util.logging.Level;
import java.util.logging.Logger;

import com.example.tutorial.HelloWorld.HelloReply;
import com.example.tutorial.HelloWorld.HelloRequest;
import com.google.common.util.concurrent.ListenableFuture;

import io.grpc.ManagedChannel;
import io.grpc.ManagedChannelBuilder;
import io.grpc.StatusRuntimeException;
import io.grpc.stub.StreamObserver;

public class HelloWorldClients {
    private static final Logger logger = Logger.getLogger(HelloWorldClients.class.getName());

    private String host;
    private int port;

    public HelloWorldClients(String host, int port) {
        this.host = host;
        this.port = port;
    }

    public ManagedChannel getChannel() {
        return ManagedChannelBuilder.forAddress(host, port).usePlaintext().build();
    }
    public static void main(String[] args) throws Exception {
	HelloWorldClients client = new HelloWorldClients("localhost", 50051);

	String user;

	user = "world0";
	client.doSync(user);

	user = "world1";
	client.doAsync(user);

	user = "world2";
	client.doFuture(user);
    }
}
a.同步调用
//  a.同步调用
public void doSync(String name) {
	GreeterGrpc.GreeterBlockingStub blockingStub = GreeterGrpc.newBlockingStub(getChannel());

	logger.info("Will try to doSync");
	HelloRequest request = HelloRequest.newBuilder().setName(name).build();
	HelloReply response;
	try {
		response = blockingStub.sayHello(request);
	} catch (StatusRuntimeException e) {
		logger.log(Level.WARNING, "RPC failed: {0}", e.getStatus());
		return;
	}
	logger.info("Greeting: " + response.getMessage());
}
b.基于回调的异步调用
//  b.基于回调的异步调用
public void doAsync(String name) {
	GreeterGrpc.GreeterStub stub = GreeterGrpc.newStub(getChannel());

	logger.info("Will try to doAsync");
	HelloRequest request = HelloRequest.newBuilder().setName(name).build();

	stub.sayHello(request, new StreamObserver<HelloWorld.HelloReply>() {

		@Override
		public void onNext(HelloReply response) {
			logger.info("Greeting: " + response.getMessage());
		}

		@Override
		public void onError(Throwable t) {
			logger.log(Level.WARNING, "RPC failed: {0}", t);
		}

		@Override
		public void onCompleted() {
		}
	});
}
c.基于Future的异步调用
//  c.基于Future的异步调用
public void doFuture(String name) {
	GreeterGrpc.GreeterFutureStub futureStub = GreeterGrpc.newFutureStub(getChannel());

	logger.info("Will try to doFuture");
	HelloRequest request = HelloRequest.newBuilder().setName(name).build();
	HelloReply response;
	try {
		ListenableFuture<HelloWorld.HelloReply> future = futureStub.sayHello(request);
		response = future.get();
	} catch (InterruptedException e) {
		logger.log(Level.SEVERE, "RPC failed: {0}", e);
		return;
	} catch (ExecutionException e) {
		logger.log(Level.SEVERE, "RPC failed: {0}", e);
		return;
	}
	logger.info("Greeting: " + response.getMessage());
}
4.服务器端业务逻辑运行方式
业务逻辑运行方式主要分2种:
a.在单独线程池中运行
b.在io-worker线程池中运行
gRPC默认是在单独线程池中运行的:
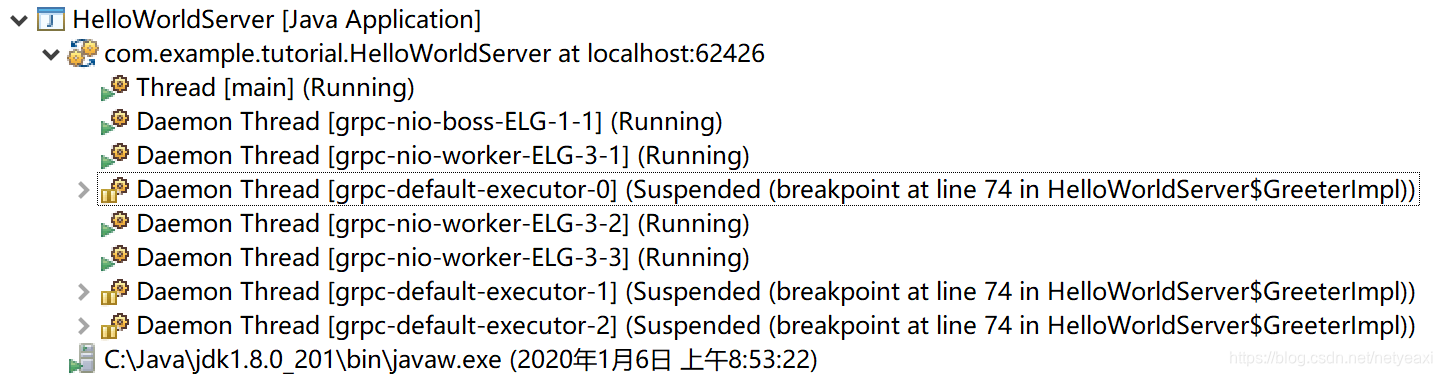
默认线程池中线程的名字为:grpc-default-executor-X,使用如下代码就会使用默认线程池,默认线程池为CachedThreadPool:
int port = 50051;
Server server = ServerBuilder.forPort(port).addService(new GreeterImpl()).build().start();
也可以设置自己的线程池来运行业务逻辑:
String NAME = "grpc-worker-executor";
Executor executor = Executors.newFixedThreadPool(5, GrpcUtil.getThreadFactory(NAME + "-%d", true)) ;
int port = 50051;
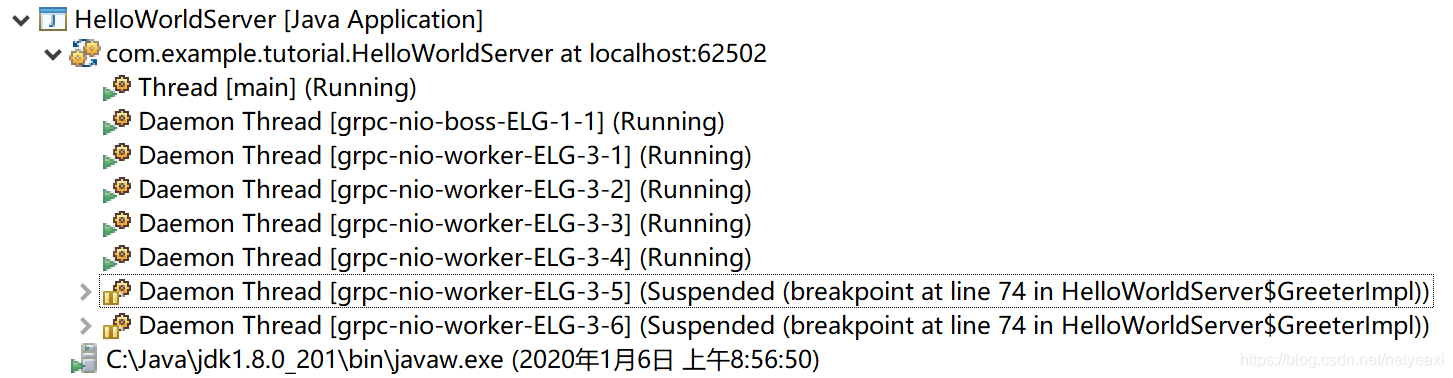
Server server = ServerBuilder.forPort(port).addService(new GreeterImpl()).executor(executor).build().start();有时,业务代码运行速度很快,不存在阻塞,可以让其在io-worker线程池中运行:
int port = 50051;
Server server = ServerBuilder.forPort(port).addService(new GreeterImpl()).directExecutor().build().start();
此时,就不会有grpc-default-executor-X出现:
参考文档
google开发者中国区网站:
https://developers.google.cn
protocol-buffers官方网站:
https://developers.google.cn/protocol-buffers
protobuf java代码生成方式:
https://developers.google.cn/protocol-buffers/docs/reference/java-generated
Protocol Buffers下载地址:
https://github.com/protocolbuffers/protobuf/releases


 730
730

 被折叠的 条评论
为什么被折叠?
被折叠的 条评论
为什么被折叠?
 到【灌水乐园】发言


