


 本文详细介绍了Vue动态路由的概念、使用步骤和示例,强调了其灵活性。同时,讨论了命名路由的用法和优势。此外,还深入探讨了vue-router的history模式,包括配置方法和前端、服务端的注意事项,帮助开发者理解如何在实际项目中应用。
文章目录
1.动态路由的概念
定义
可以根据不同的需求加载不同的路由
在某些情况下,一个页面的path路径可能是不确定的,比如我们进入用户界面时,希望是如下路径:
/user/aaa或/user/bbb
除了有前面的/user之外,后面还跟上了用户ID
这种path和Component匹配关系,我们称之为动态路由(也是路由传递数据的一种方式)
目的
完成不同的实现及页面的渲染。
分类
动态的路由存储可分为两种:
一种是将路由存储到前端
另一种是将路由存储到数据库
优点
灵活,无需手工维护,可以使用一个页面对路由进行维护
2.动态路由的使用步骤
step1:router下index.js配置路由
{
    path:'/user/:id',
    component: User
}
step2:进入user页面点击路径
<template>
  <div id="detail">
    <router-link :to="'/user/'+userId"></router-link>
  </div>
</template>
<script>
  export default {
    name: 'detail',
    data() {
    	return {
    		userId: '1001'
    	}
    }
  }
step3:user模板·页面获取id方式
<h2>{{$route.params.id}}</h2>
3.动态路由例子
nowPlaying.vue
在nowPlaying路由中设置点击跳转到Detail动态路由,用到的方法是:
this.$router.push(‘/Detail’);
想要点击跳转到哪个页面,就在点击事件函数中push 到哪个页面
<template>
  <div>nowPlaying...
      <ul>
        <!-- step1: 把datalist的数据渲染出来-->
        <li v-for="data in datalist" :key="data" @click="handleChangePage(data)">
          {{data}}
        </li>
  </ul>
  </div>

</template>
<script>

export default {
  data(){
    return{
      // step0:此处是获取后端返回的数据
      datalist:["1111","2222","3333"]
      // datalist:["商品1","商品2","商品3"]
    }
  },
  methods:{
    // step2:点击li后跳转到详情页
    handleChangePage(id){
      console.log(id);
      // 编程式导航(相对于声明式导航)
      // 下面的router是router/index.js中的:const router=new VueRouter()
      // 即:this.$router等价于index.js中创建出来的router对象
      // this.$router.push('/Center');//效果:点击1111,2222,3333的任意一个都能跳转到Center

      // 这就是设置详情页的逻辑,代码改成点击商品1,跳转到其详情页
      // this.$router.push('/Detail');//效果:点击"商品1","商品2","商品3"的任意一个都能跳转到Detail页面
      this.$router.push(`/Detail/${id}`);//效果:点击"商品1","商品2","商品3"的任意一个都能跳转到各自的Detail页面

    }
  }
}
</script>
router/index.js
引入和配置动态路由Detail:注意加一个冒号 path: ‘/Detail/:id’
// 引入vue-router
import VueRouter from "vue-router"
// 引入路由
import Film from '../views/Film'
import Cinema from '../views/Cinema'
import Center from '../views/Center'
//引入详情页路由
import Detail from '../views/Detail'
import nowPlaying from '../views/Film/nowPlaying'
import comingSoon from '../views/Film/comingSoon'
const router = new VueRouter({
        routes: [
            //配置路由路径
            {
                path: '/Film',
                component: Film,
                // 路由嵌套:配置Film下的二级路由路径
                children: [{
                    //写法一:写相对路径,省略Film
                    path: "nowPlaying",
                    component: nowPlaying
                }, {
                    //写法二:写绝对路径,保留Film
                    path: "/Film/comingSoon",
                    component: comingSoon
                }, {
                    // 重定向
                    path: "",
                    redirect: "/Film/nowPlaying"
                }]
            },
            {
                path: '/Center',
                component: Center
            },
            {
                path: '/Cinema',
                component: Cinema
            },
            // 配置Detail路由
            {
                // step3:动态路由
                path: '/Detail/:id', //只要后面有东西即可
                component: Detail,
                // 此处要让每个商品都有其各自详情页
                // 但是children: []不能解决路由数量不确定的问题
                // 故采用动态路由
            },
            // 重定向:输入路径错误时自定返回Film页
            {
                path: "*",
                redirect: '/Film'
            }
        ]
    })
    // 路由引出
export default router;
views/Detail.vue
在mount(){}中console.log(this.$route.params.id)
<template>
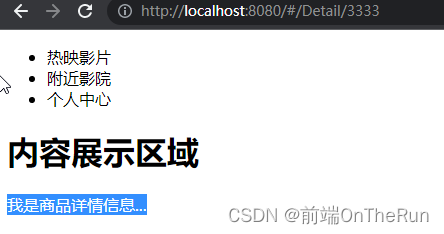
<div>我是商品详情信息...</div>
</template>
<script>
export default {
// step4:最终目的是为了在detail页面中获取唯一的id
// 利用此id再ajax请求后端详情页面数据
mounted(){
// console.log("要id,获取信息:",this.$route);//看到router对象中有params:id属性(与index.JS的 path: '/Detail/:id'保持一致)
console.log("要id,获取信息:",this.$route.params.id);
// 这就是列表详情跳转页中,在路由中所做的配置--动态路由
}
}
</script>
结果
点击1111,跳转到http://localhost:8080/#/Detail/1111
点击输出:
1111
要id,获取信息: 1111
3333
要id,获取信息: 3333
2222
要id,获取信息: 2222
4.命名路由
有时候,通过一个名称来标识一个路由显得更方便一些,
特别是在链接一个路由,或者是执行一些跳转的时候。
你可以在创建 Router 实例的时候,在 routes 配置中给某个路由设置名称
用法
routes:[
	...
	,{
		path:"/Login"
		name:"Denglu"//命名路由
		component:Login
	}
]
示例:接上例
router.index.js
 {
            // 动态路由
            path: '/Detail/:id',
            //命名路由
            name: 'renameDetail',
            component: Detail
        }
nowPlaying.vue
  methods:{
    // step2:点击li后跳转到详情页
    handleChangePage(id){
      // this.$router.push(`/Detail/${id}`);
      this.$router.push({name:'renameDetail',params:{id:id}});
    }
  }
5.vue-router的history模式
5.1.vue-router可以设置两种模式:hash和history
router.index.js
const router = new VueRouter({
  mode: "hash",//默认
  // mode: "history",
  routes:[...]
});
5.2.history模式的配置
使用history模式,前端和服务端要做一定的设置
(否则一旦发布到测试或生产环境,则会出现页面白屏或者刷新页面白屏的现象)
前端配置
1.设置路由的mode和base两个值
router.index.js
const routes = [...]
const router = new VueRouter({
  mode: "history",
  base: process.env.BASE_URL,  // 如果使用history模式,必须设置base参数
  routes
});
2.设置vue.config.js里的publicPath
vue.config.js
module.exports = {
  // publicPath默认值是'/',即你的应用是被部署在一个域名的根路径上
  // 设置为'./',可以避免打包后的静态页面空白
  // 当在非本地环境时,这里以项目test-daily为例,即打包后的h5项目部署服务器的test-daily目录下
  // 那么这里就要把publicPath设置为/test-daily/,表示所有的静态资源都在/test-daily/里
  // 打包部署后,会发现index.html引用的静态资源都添加了路径/test-daily/
  publicPath: process.env.NODE_ENV == 'development' ? './' : '/test-daily/',
  ......
服务端配置(以nginx为例)
在服务器添加一个覆盖所有 情况的候选资源
nginx:
locations / {
	//如果URL匹配不到任何静态资源,则应返回同一个index.html页面,这个页面就是app依赖的页面
	try files $url $url/ /index.html
}
浏览器效果:地址栏URL没有"#"了
hash:

history:


 2842
2842

 被折叠的 条评论
为什么被折叠?
被折叠的 条评论
为什么被折叠?
 到【灌水乐园】发言


