


 本文详细介绍如何使用Spring和CXF框架集成WebServices服务端与客户端的开发过程,包括maven项目搭建、依赖引入、接口定义与实现、Spring与CXF配置、web.xml配置以及客户端调用。
Spring、CXF集成WebServices服务端与客户端开发
服务端
maven创建webapp项目,并引入相关依赖
<?xml version="1.0" encoding="UTF-8"?>

<project xmlns="http://maven.apache.org/POM/4.0.0" xmlns:xsi="http://www.w3.org/2001/XMLSchema-instance"
         xsi:schemaLocation="http://maven.apache.org/POM/4.0.0 http://maven.apache.org/xsd/maven-4.0.0.xsd">
    <modelVersion>4.0.0</modelVersion>

    <groupId>com.lxf</groupId>
    <artifactId>lxf-ims-server</artifactId>
    <version>1.0-SNAPSHOT</version>
    <packaging>war</packaging>

    <name>lxf-ims-server</name>
    <!-- FIXME change it to the project's website -->
    <url>http://www.example.com</url>

    <properties>
        <project.build.sourceEncoding>UTF-8</project.build.sourceEncoding>
        <maven.compiler.source>1.8</maven.compiler.source>
        <maven.compiler.target>1.8</maven.compiler.target>
        <junit.version>4.11</junit.version>
        <cxf.version>3.1.4</cxf.version>
        <spring.version>4.3.2.RELEASE</spring.version>
        <slf4j.version>1.7.7</slf4j.version>
    </properties>


    <dependencies>
        <!-- 单元测试依赖包 -->
        <dependency>
            <groupId>junit</groupId>
            <artifactId>junit</artifactId>
            <version>${junit.version}</version>
            <scope>test</scope>
        </dependency>

        <!-- CXF Dependencies -->
        <dependency>
            <groupId>org.apache.cxf</groupId>
            <artifactId>cxf-rt-frontend-jaxws</artifactId>
            <version>${cxf.version}</version>
        </dependency>
        <dependency>
            <groupId>org.apache.cxf</groupId>
            <artifactId>cxf-rt-transports-http</artifactId>
            <version>${cxf.version}</version>
        </dependency>

        <!-- Spring Dependencies ${spring.version} -->
        <dependency>
            <groupId>org.springframework</groupId>
            <artifactId>spring-context</artifactId>
            <version>${spring.version}</version>
        </dependency>

        <dependency>
            <groupId>org.springframework</groupId>
            <artifactId>spring-web</artifactId>
            <version>${spring.version}</version>
        </dependency>

        <dependency>
            <groupId>org.slf4j</groupId>
            <artifactId>slf4j-log4j12</artifactId>
            <version>${slf4j.version}</version>
            <type>jar</type>
            <scope>compile</scope>
        </dependency>
    </dependencies>


    <build>
        <finalName>hnepri-ims-server</finalName>
         <pluginManagement><!-- lock down plugins versions to avoid using Maven defaults (may be moved to parent pom) -->
            <plugins>
                <plugin>
                    <groupId>org.apache.tomcat.maven</groupId>
                    <artifactId>tomcat7-maven-plugin</artifactId>
                    <version>2.2</version>
                </plugin>
            </plugins>
        </pluginManagement>
        <plugins>
            <plugin>
                <groupId>org.apache.maven.plugins</groupId>
                <artifactId>maven-war-plugin</artifactId>
                <version>2.2</version>
            </plugin>
            <plugin>
                <groupId>org.apache.tomcat.maven</groupId>
                <artifactId>tomcat7-maven-plugin</artifactId>
                <configuration>

                    <!--https开启的端口-->
                    <!--<httpsPort>8443</httpsPort>-->
                    <!--指向keystore存放的位置-->
                    <!--<keystoreFile>/Users/admin/.tomcat.keystore</keystoreFile>-->
                    <!--指keystore的密码-->
                    <!--<keystorePass>123456</keystorePass>-->
                    <port>8080</port>
                    <uriEncoding>UTF-8</uriEncoding>
                    <path>/ims</path>
                </configuration>
            </plugin>

        </plugins>
    </build>
</project>
测试代码
- 创建接口,添加
@WebService注解,表示你要“暴露”的接口(服务类)。
@WebService
public interface IMSServer{
	public String sayHello(String name) ;
}
- 实现接口
//实现类上可以不添加@Webservice注解
public class IMSServerImp implements IMSServer{
	@Override
	public String sayHello(String name) {
		return "大家好,我是"+name;
	}
}
- 添加
Spring及cxf配置文件
spring-cxf.xml
<?xml version="1.0" encoding="UTF-8"?>
<beans xmlns="http://www.springframework.org/schema/beans"
   xmlns:xsi="http://www.w3.org/2001/XMLSchema-instance"
xmlns:context="http://www.springframework.org/schema/context"
  xmlns:jaxws="http://cxf.apache.org/jaxws" <!-- 别忘记添加命名空间 -->
xsi:schemaLocation="http://www.springframework.org/schema/beans
                    http://www.springframework.org/schema/beans/spring-beans-3.0.xsd
                    http://www.springframework.org/schema/context
                    http://www.springframework.org/schema/context/spring-context-3.0.xsd
                    http://cxf.apache.org/jaxws
                    http://cxf.apache.org/schemas/jaxws.xsd">

     <!--其中id是自己定义的,implementor是接口实现类,address就是访问的地址 -->
     <!-- 相当于Endpoint.publish("http://localhost:8080/service", new HelloServiceImp()); -->

     <jaxws:endpoint id="cxfService" implementor="com.lxf.server.impl.IMSServerImpl" address="/imsServer" />

</beans>
spring.xml
<?xml version="1.0" encoding="UTF-8"?>
<beans xmlns="http://www.springframework.org/schema/beans"
   xmlns:xsi="http://www.w3.org/2001/XMLSchema-instance"
xmlns:context="http://www.springframework.org/schema/context"
xsi:schemaLocation="http://www.springframework.org/schema/beans
                    http://www.springframework.org/schema/beans/spring-beans-3.0.xsd
                    http://www.springframework.org/schema/context
                    http://www.springframework.org/schema/context/spring-context-3.0.xsd">

    <import resource="spring-cxf.xml" />

</beans>
补充:
1、至于以前还需引入的 cxf.xml 和 cxf-servlet.xml,网上说是cxf3.0以后就不需要了,至于为什么,原因在这里。
<import resource="classpath:META-INF/cxf/cxf.xml" />
<import resource="classpath:META-INF/cxf/cxf-servlet.xml" />
- 配置
web.xm
<!DOCTYPE web-app PUBLIC
        "-//Sun Microsystems, Inc.//DTD Web Application 2.3//EN"
        "http://java.sun.com/dtd/web-app_2_3.dtd" >
<web-app>
    <display-name>Lxf-IMS-Server</display-name>
    <!-- 在启动Web项目时,容器(比如Tomcat)会读web.xml配置 将参数名和参数值以键值对的形式加载到容器-->
    <context-param>
        <param-name>contextConfigLocation</param-name>
        <param-value>classpath:spring.xml</param-value>
    </context-param>
    <!-- 容器创建<listener>中的类实例,创建监听器。  -->
    <listener>
        <listener-class>org.springframework.web.util.IntrospectorCleanupListener</listener-class>
    </listener>
    <listener>
        <listener-class>org.springframework.web.context.ContextLoaderListener</listener-class>
    </listener>
    <!-- 用来声明一个servlet,CXFServlet是 -->
    <servlet>
        <servlet-name>CXFServlet</servlet-name>
        <servlet-class>org.apache.cxf.transport.servlet.CXFServlet</servlet-class>
        <load-on-startup>1</load-on-startup>
    </servlet>

    <servlet-mapping>
        <servlet-name>CXFServlet</servlet-name>
        <url-pattern>/*</url-pattern>
    </servlet-mapping>

    <welcome-file-list>
        <welcome-file>index.jsp</welcome-file>
    </welcome-file-list>
</web-app>
- 运行
地址是:http://localhost:8080/项目名
本项目地址:http://localhost:8080/ims

客户端
定义接口IMSServer
接口名可与服务器名不同但路径必须相同
@WebService
public interface IMSServerClient {
    /**
     * 测试接口
     * @return
     */
    String sayHello(String name);
}
添加spring配置文件
applicationContext.xml
<?xml version="1.0" encoding="UTF-8"?>
<beans xmlns="http://www.springframework.org/schema/beans"
       xmlns:xsi="http://www.w3.org/2001/XMLSchema-instance"
       xmlns:context="http://www.springframework.org/schema/context"
       xmlns:jaxws="http://cxf.apache.org/jaxws"
       xsi:schemaLocation="http://www.springframework.org/schema/beans
                    http://www.springframework.org/schema/beans/spring-beans-3.0.xsd
                    http://www.springframework.org/schema/context
                    http://www.springframework.org/schema/context/spring-context-3.0.xsd
                    http://cxf.apache.org/jaxws
                    http://cxf.apache.org/schemas/jaxws.xsd">
    <context:annotation-config/>
    <context:component-scan base-package="com.lxf"/>
    <!--  serviceClass:接口  address:endpoint服务端地址-->
    <jaxws:client id="imsServerClient"
                  serviceClass="com.lxf.server.IMSServerClient"
                  address="http://localhost:8080/ims/imsServer"></jaxws:client>
</beans>
创建测试类
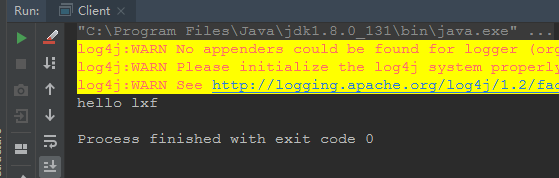
public class Client {

    public static void main(String[] args) {
        ApplicationContext context = new ClassPathXmlApplicationContext("applicationContext.xml");
        //imsServerClient为jaxws:client id
        IMSServerClient service = (IMSServerClient) context.getBean("imsServerClient");
        System.out.println(service.sayHello("lxf"));
    }
}


 2381
2381

 被折叠的 条评论
为什么被折叠?
被折叠的 条评论
为什么被折叠?
 到【灌水乐园】发言


