
Tokyo Travel Basics for First-Time Visitors

Tokyo is one of the safest and most exciting cities in the world—
but first-time visitors often get overwhelmed by trains, etiquette, Wi-Fi, and emergencies.
This guide summarizes the exact essentials you need to travel confidently in Tokyo.
If you're visiting Japan for the first time, start here.
Tokyo Travel Basics for First-Time Visitors
A Practical Guide to Enjoy Tokyo Without Stress
Chapter 1: Before You Arrive – Setting Yourself Up for a Smooth Trip
Tokyo is one of the safest and most convenient cities in the world.
But for first-time visitors, it can feel complex and overwhelming – too many trains, too much information, and unfamiliar customs.
With just a bit of preparation before you arrive, your trip can become much easier and more enjoyable.
■ Must-Have Apps (with reasons)
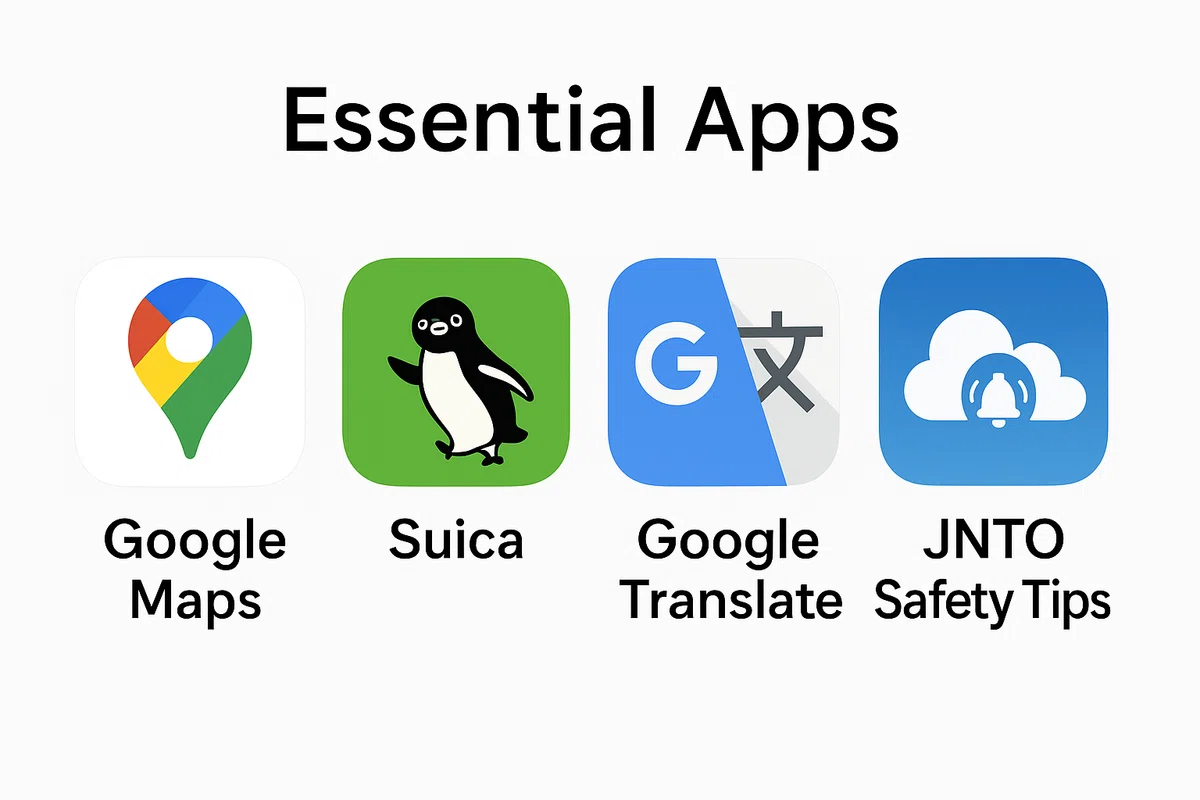
— maps, trains, translation, and safety alerts all in one.”
● Google Maps
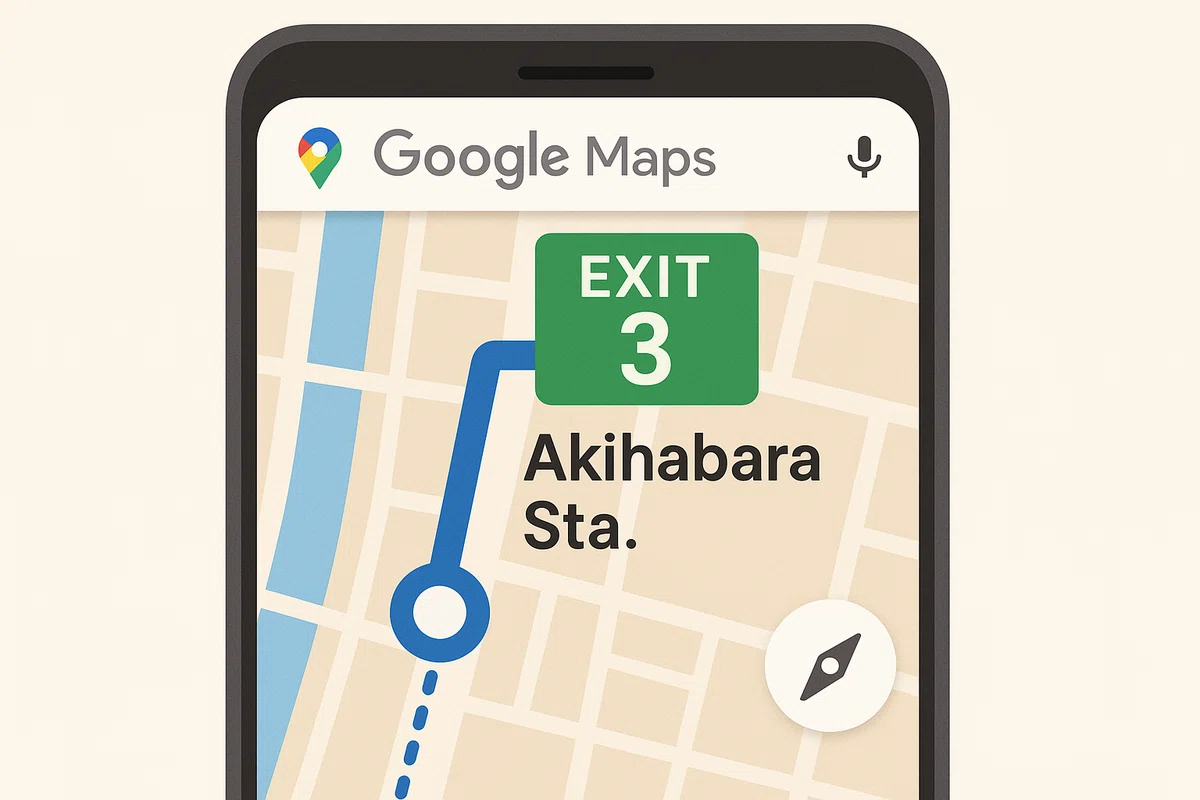
The most important feature is exit numbers at train stations.
Tokyo stations are huge. Choosing the wrong exit can easily add 10–20 extra minutes of walking.
Google Maps shows the recommended exit number, helping you reach your destination smoothly.
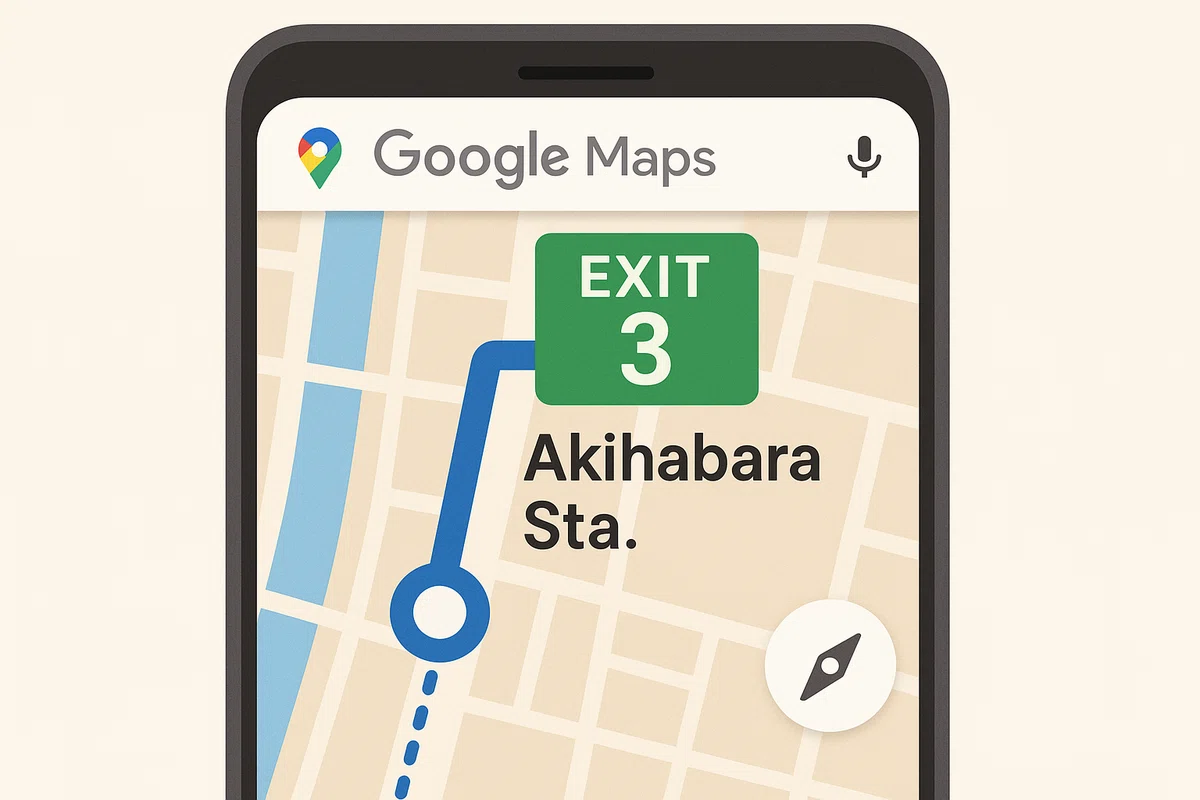
A single wrong exit can add 10–20 minutes to your walk.”
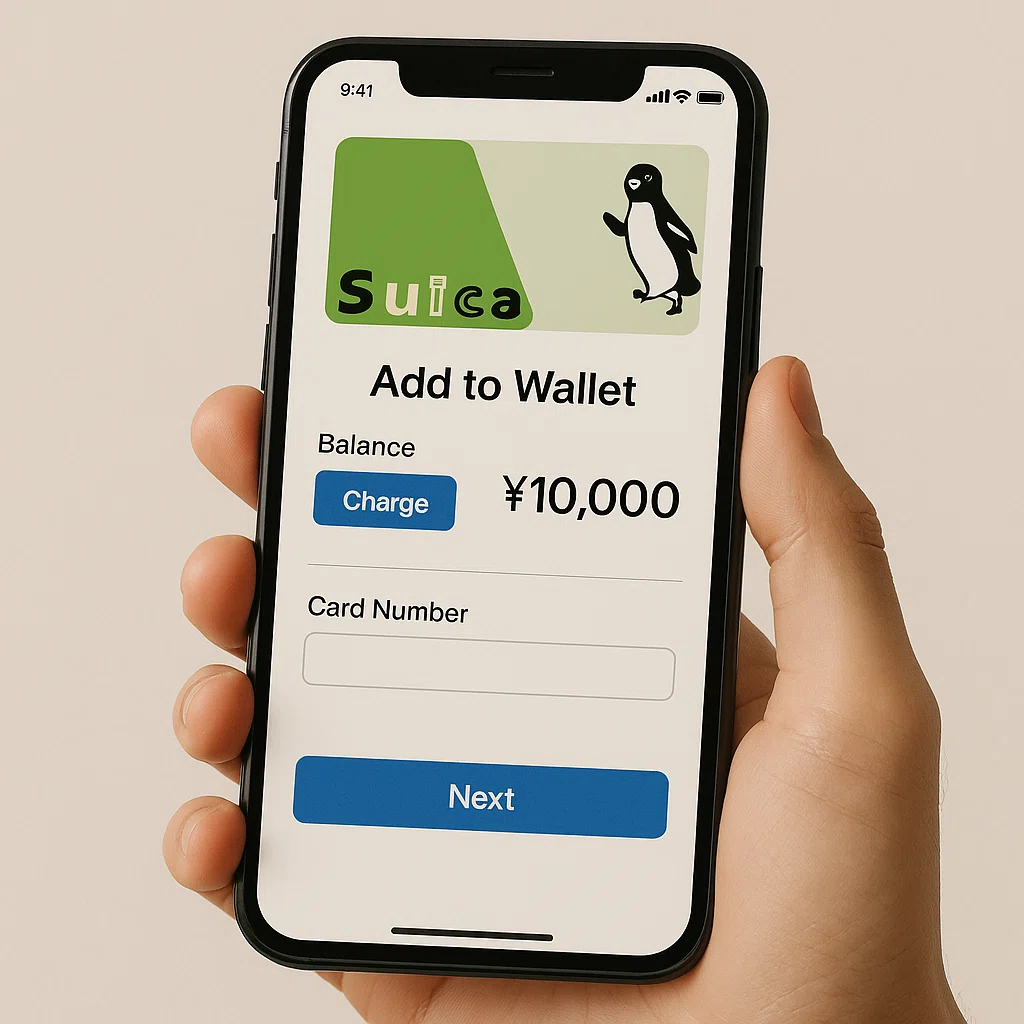
● Suica (mobile version)
Important: As of 2025, physical Suica cards are very hard to get at stations.
The best option is to add a Suica card to your iPhone or Android wallet before or right after arriving in Japan.
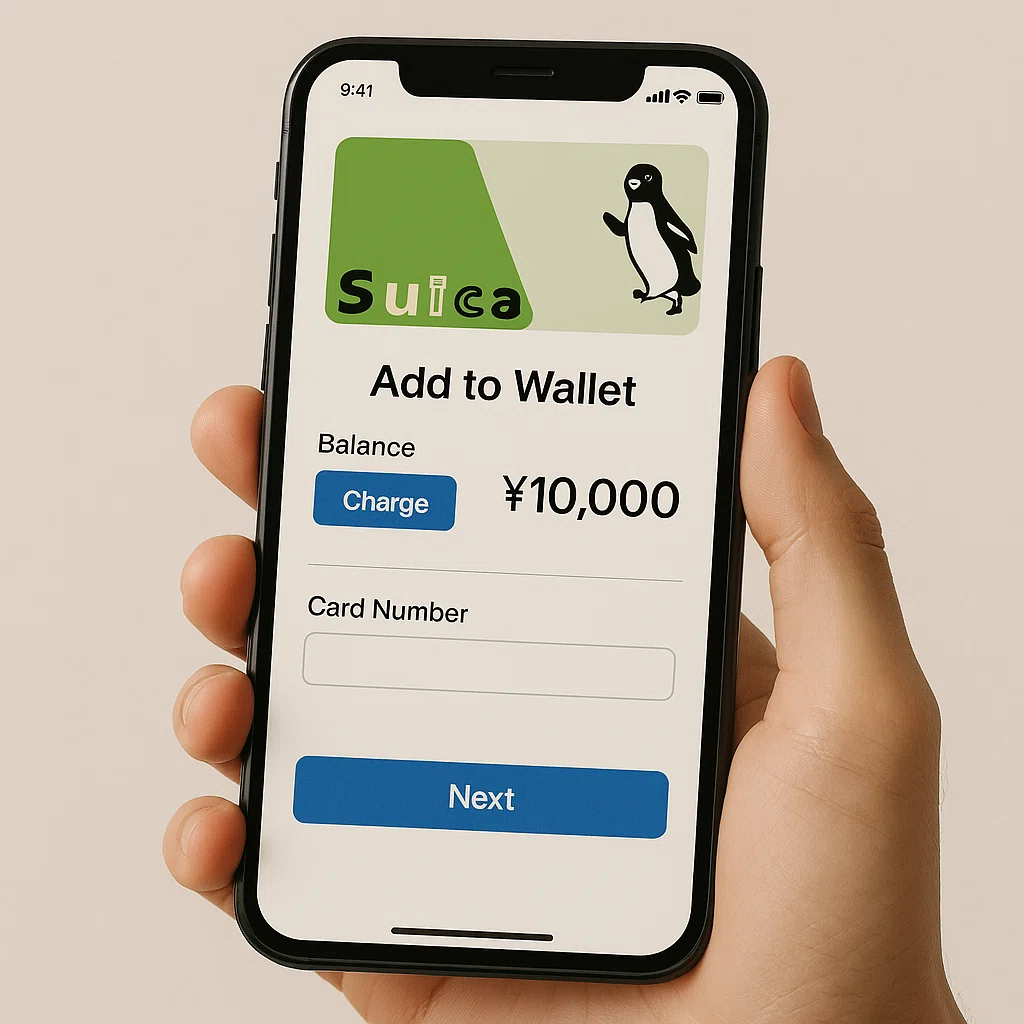
It’s the easiest way to use trains and pay at shops in Tokyo.”
Charging with Mastercard or Amex works most reliably.
Many overseas-issued Visa cards fail due to security restrictions.
● Google Translate
Use the camera feature to instantly translate signs, menus, posters, and instructions.
Very helpful at local restaurants without English menus.
● JNTO “Safety Tips”
An official app from the Japan National Tourism Organization (JNTO).
It sends alerts for earthquakes, tsunamis, typhoons, and other emergencies.
A must-have for any visitor.
■ Do You Still Need Cash?
Japan is becoming more cashless, but cash is not completely unnecessary.
You may still need coins and bills for:
Small ramen shops and family-run restaurants
Shrines and temples (offerings, charms, amulets)
Old-fashioned shopping streets
Some older taxis
Certain coin lockers
For withdrawing Japanese yen, the Seven Bank ATMs at 7-Eleven are the most reliable.
They usually accept foreign cards, operate 24/7, and support English.
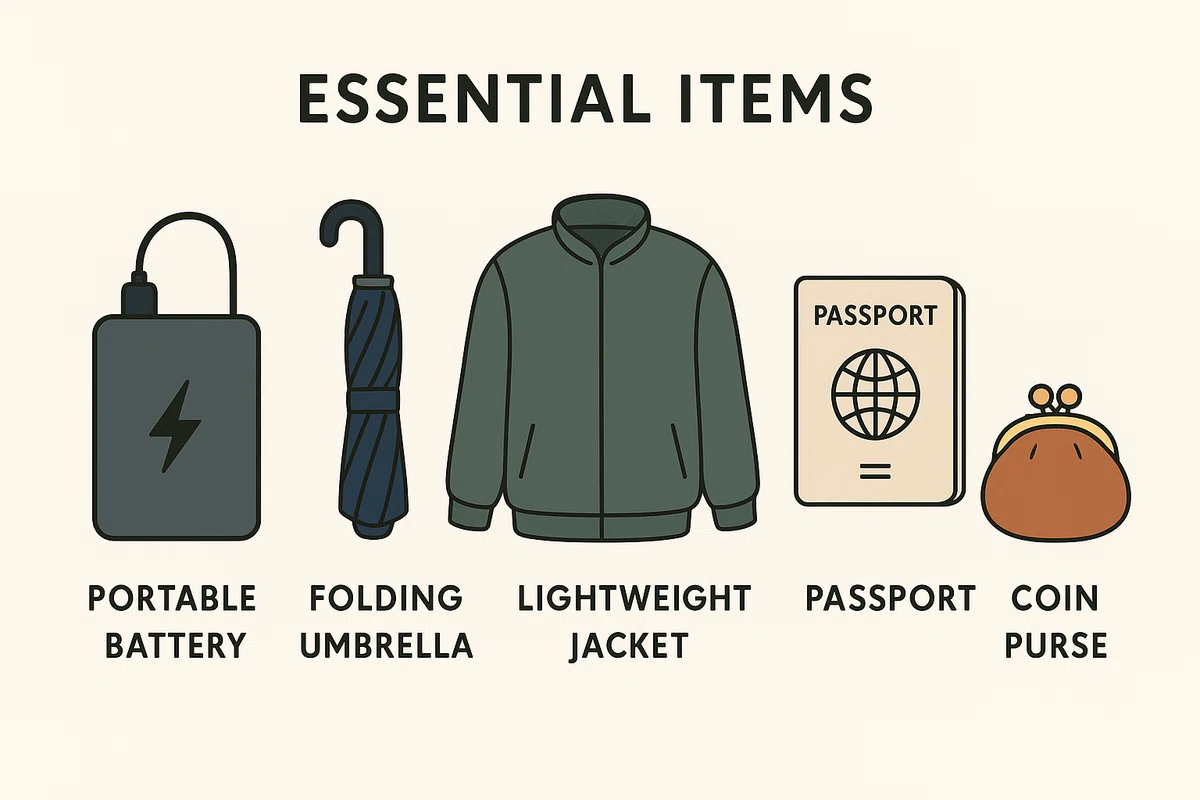
■ What to Pack (Basic List)
Power bank (map apps drain your battery quickly)
Foldable umbrella (sudden rain is common)
Light jacket (big temperature differences between indoors and outdoors)
A copy of your passport (for emergencies)
Coin pouch (coins pile up quickly in Japan)
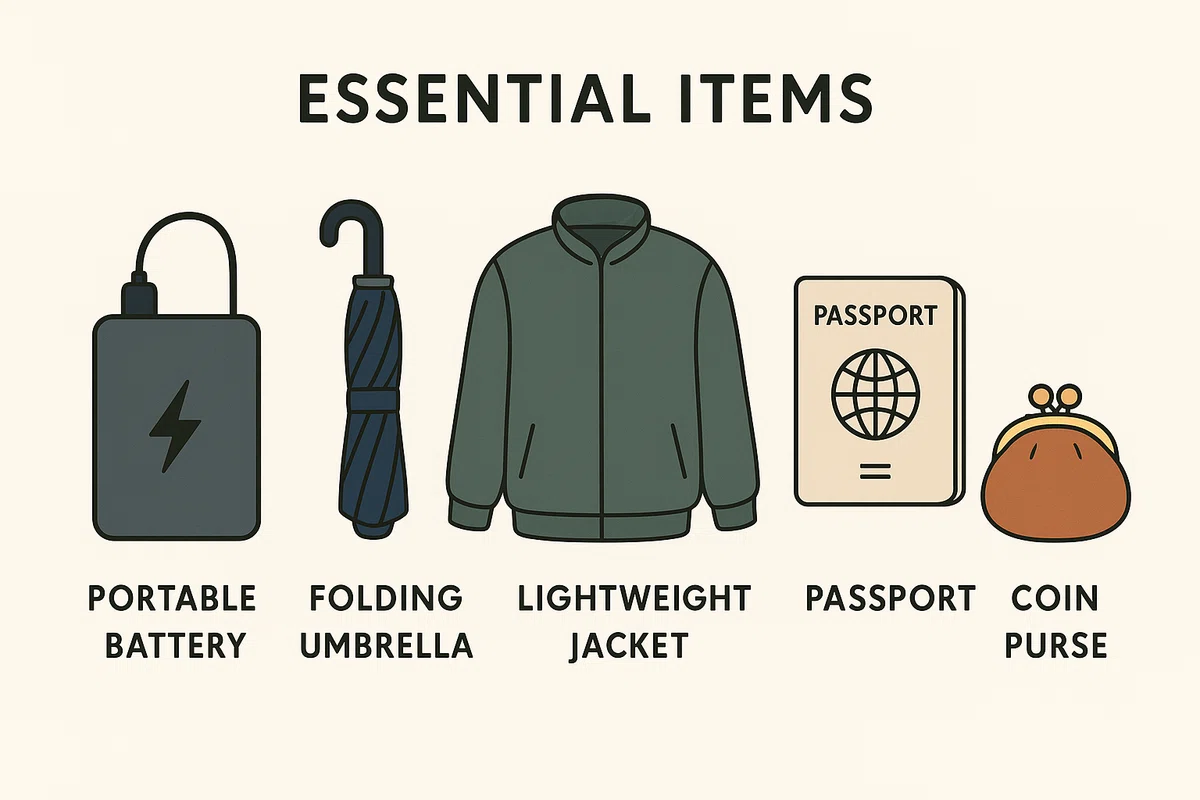
Weather changes fast, and maps drain your battery quickly.”
Chapter 2: Making Tokyo’s Train System Simple
Tokyo’s train network is famous for being accurate, clean, and safe—
but also one of the most complex in the world.
If you follow a few simple rules, even first-time visitors can use it without getting lost.
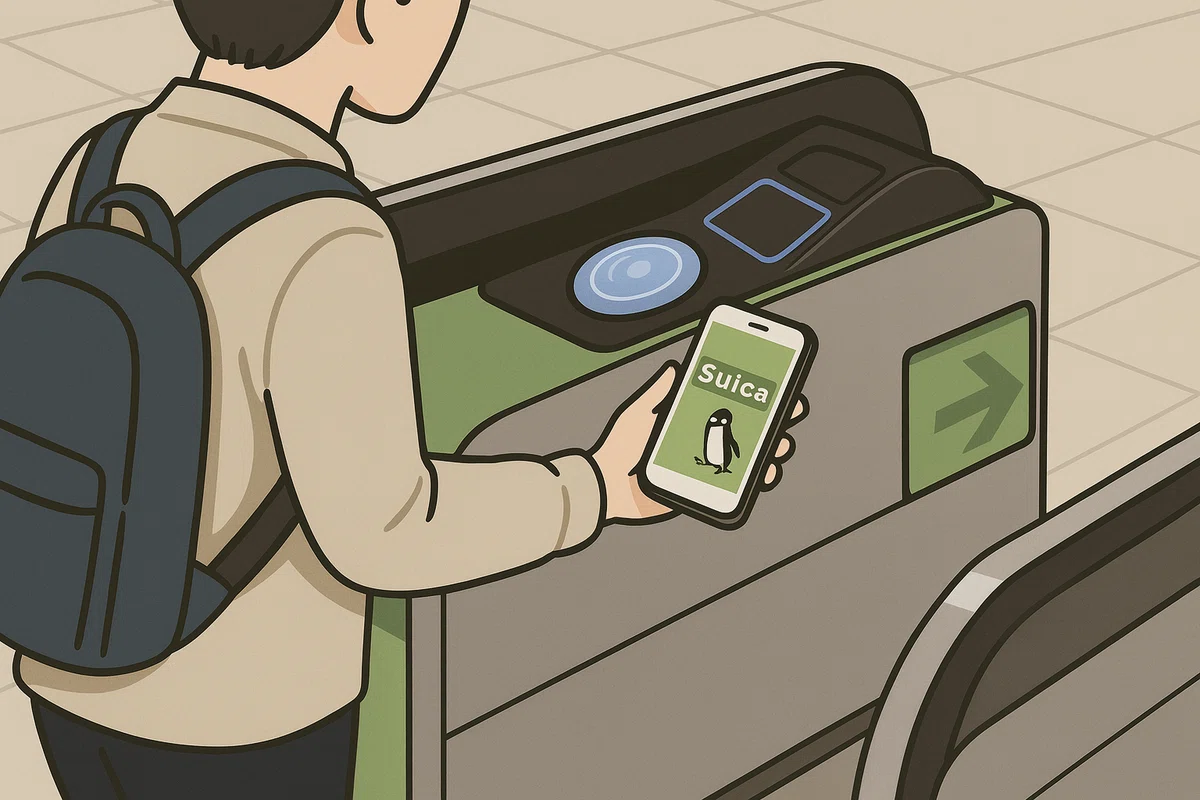
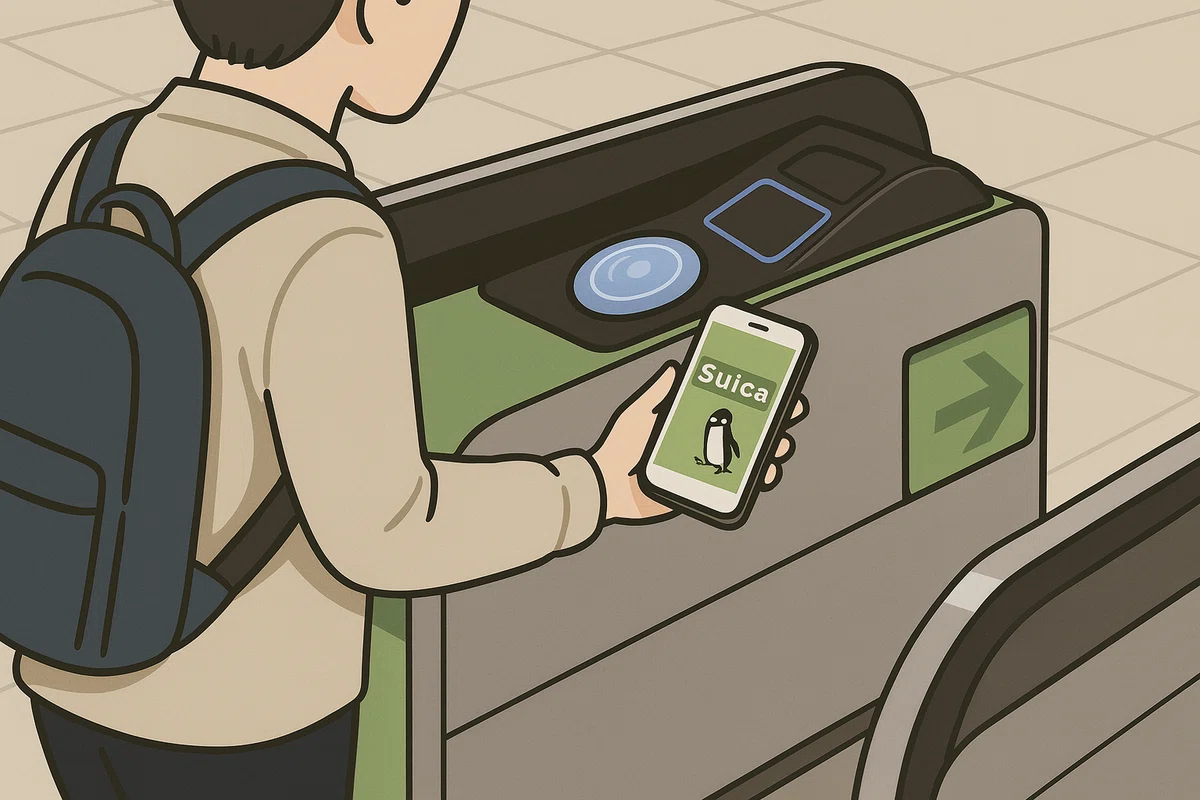
You can enter the ticket gates simply by tapping your smartphone if you use Mobile Suica.
It works instantly and is the easiest way to move around Tokyo without buying paper tickets.
■ Golden Rule: When in Doubt, Use “JR + Tokyo Metro”
Tokyo has many private railway companies, but for beginners:
Just remember JR and Tokyo Metro.
With these two, you can reach almost all major areas easily.
Here you can download the official Tokyo Metro Subway Map (English).
It’s useful for planning your trip and navigating Tokyo easily.
🔗 Download (Tokyo Metro Official PDF)
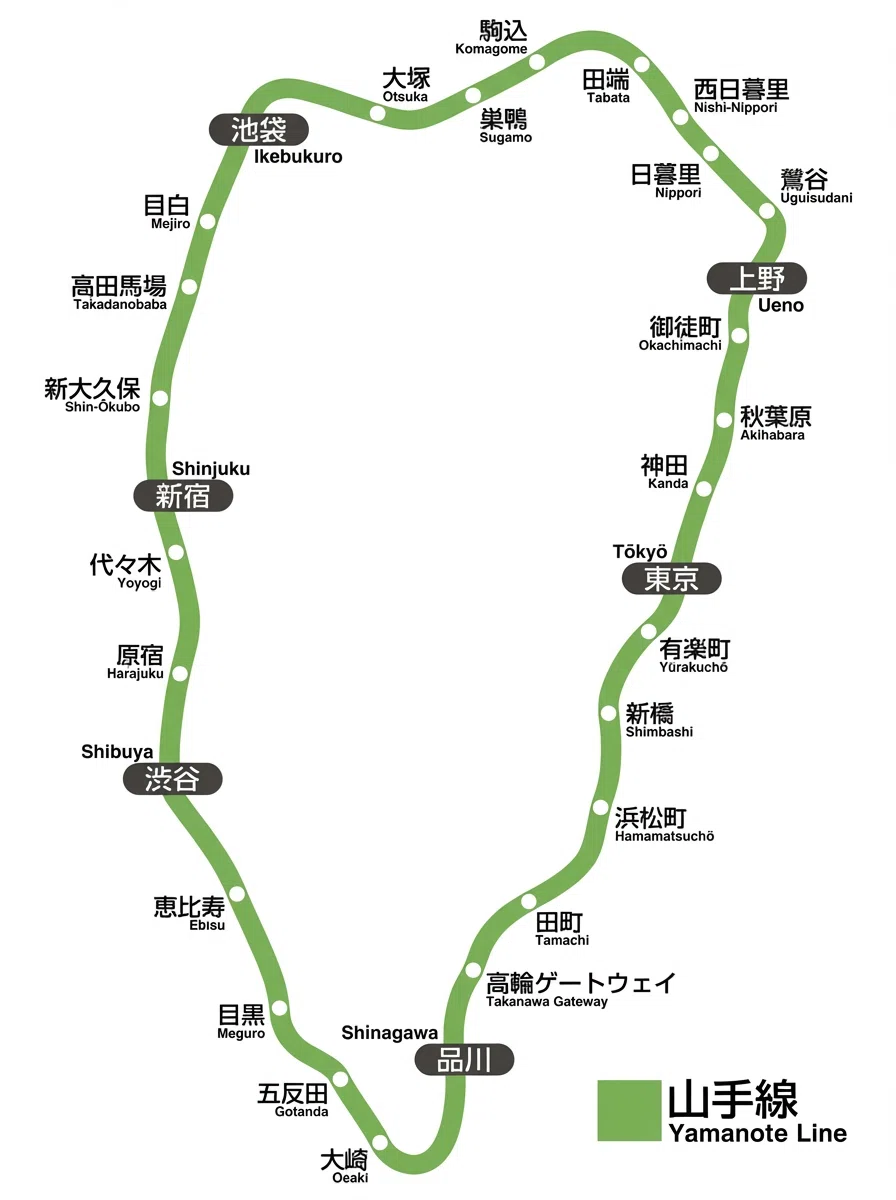
■ JR Yamanote Line – Your Best Friend
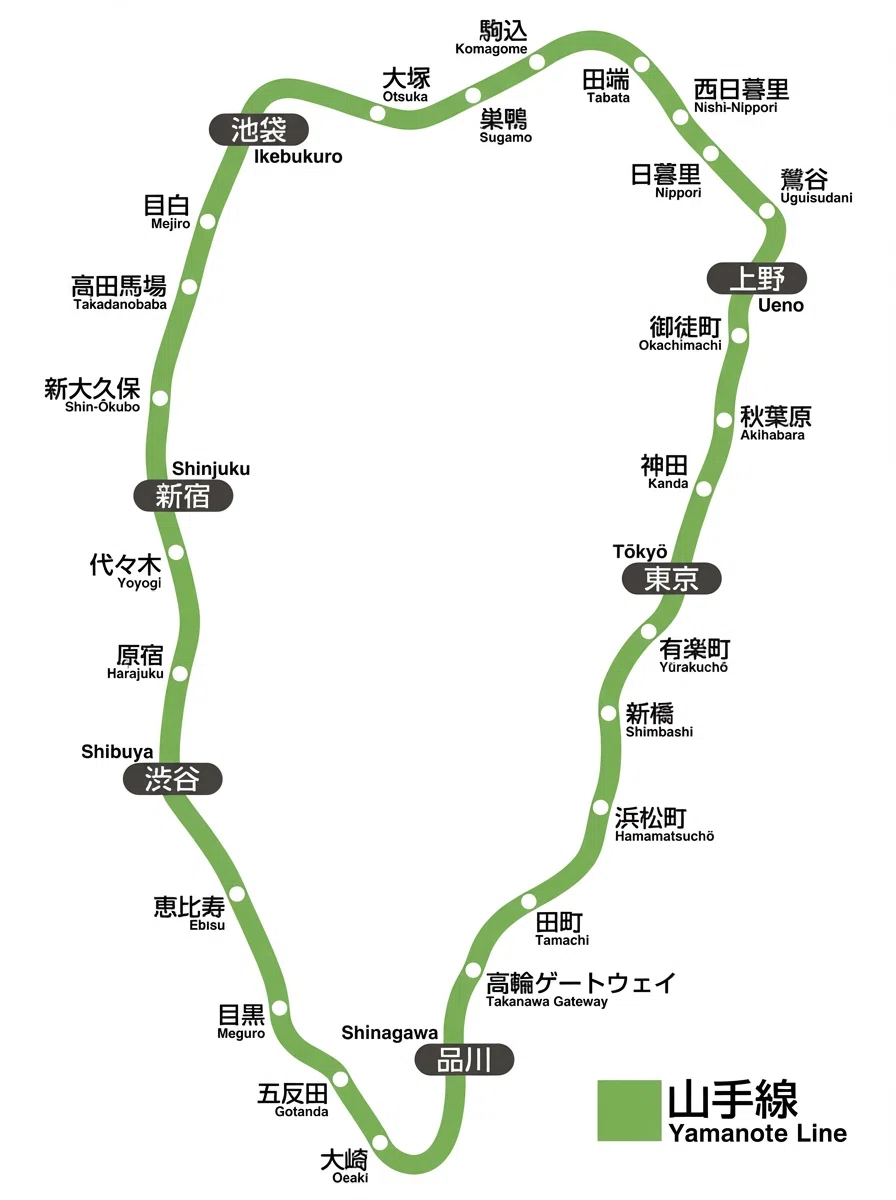
The green Yamanote Line is a loop line that connects:
Shinjuku, Shibuya, Harajuku, Yoyogi, Tokyo Station, Akihabara, Ueno, Ikebukuro, and more.
If you feel lost, try to get back to a Yamanote Line station.
From there, it’s much easier to re-orient yourself.
■ Getting From the Airport to the City
From Narita Airport:
Skyliner – Fastest and very comfortable
Narita Express (N’EX) – Direct access to major stations like Tokyo, Shinjuku, Shibuya
From Haneda Airport:
Tokyo Monorail → JR Yamanote Line
Keikyu Line – Fastest way toward Shinagawa / Yokohama
■ Mobile Suica Is the Standard Now
Because of the shortage of physical Suica cards, the mobile version is now the default.
If your phone runs out of battery or Suica doesn’t work:
You can still buy a paper ticket with cash from the ticket machines at any station.
■ The Three “Dungeon” Stations (Easy to Get Lost)
Shinjuku Station – Over 100 exits, extremely complex
Shibuya Station – Multi-level maze of underground passages
Tokyo Station – Two main sides: Marunouchi (Imperial Palace side) and Yaesu (Shinkansen side). Don’t mix them up.
Chapter 3: Staying Connected – Internet Options That Actually Work
Free Wi-Fi does exist in Tokyo, but it’s often unstable or requires tedious registration.
To use maps and translation smoothly, it’s best to secure your own internet connection.
■ eSIM (Highly Recommended)
The most convenient option:
No physical SIM swap needed
You can set it up before your trip
Activate it as soon as your plane lands
Reliable for solo travelers
Popular providers include Airalo and Ubigi.
■ Pocket Wi-Fi
Good for groups of two or more:
Large data allowance
Easy to share among friends or family
Often cheaper when split between people
Just remember: someone must always carry it (and charge it)
■ Airport SIM Card
You can buy a physical SIM at the airport counters:
Easy, but often more expensive than eSIM
Make sure your phone is unlocked (no carrier lock) before your trip
Chapter 4: Essential Manners in Tokyo
Japan places a high value on public manners and consideration for others.
Many “problems” foreign visitors face are actually caused by cultural differences, not bad intentions.
Knowing a few key rules will help you avoid uncomfortable situations.
■ On Trains
No phone calls – Messaging is fine, but talking on the phone is discouraged.
Keep your voice down – Loud conversations may draw negative attention.
Priority seats – Offer your seat to the elderly, pregnant people, or those with injuries.
■ About Eating While Walking
In Japan, eating while walking is generally seen as bad manners, especially in busy tourist areas like Asakusa or Kamakura.
Food can spill onto other people or onto shop displays.
OK example:
Eating what you bought while standing still near the shop or in a designated space is usually acceptable.
■ Trash Cans Are Rare
Public trash cans are extremely limited in Tokyo.
The basic rule is:
Carry your trash with you and throw it away at your hotel,
or in the trash bin of the convenience store where you bought the item.
■ No Tipping Culture
You do not need to tip in restaurants, taxis, or hotels.
Good service is already included in the price.
A simple “Arigatou” (Thank you) is the best way to show appreciation.
■ Escalator Etiquette
In Tokyo: Stand on the left, leave the right side open.
In Osaka: Stand on the right, leave the left open.
(Officially, people are encouraged not to walk on escalators, but the “one side open” habit still remains.)
Chapter 5: Emergencies & Disasters – What to Do and Where to Call
Tokyo is safe, but emergencies do happen:
lost items, accidents, sudden illness, earthquakes, typhoons, and so on.
This chapter is a “save this page” section for foreign visitors.
■ Most Important Contacts
● Japan Visitor Hotline (JNTO)
TEL: 050-3816-2787 (24/7, 365 days | English available)
They can help with:
Accidents
Illness and hospitals
Natural disasters
Trouble during travel
General tourist information
● Police: 110
● Ambulance / Fire Department: 119
■ Lost & Found
Japan is famous for returning lost items. Don’t give up too early.
Police Lost & Found Center: 0570-550-142 (English available)
JR Lost & Found counters at major stations (Tokyo, Shinjuku, Shibuya, etc.) – Some staff can speak English.
■ Medical Help
AMDA International Medical Information Center
https://www.amdamedicalcenter.com
They can:
Help explain your symptoms
Introduce hospitals with foreign language support
Assist with communication in multiple languages
■ Disasters: Earthquakes & Typhoons
Safety Tips (App)
Sends real-time alerts for:
Earthquakes
Tsunamis
Typhoons
Evacuation information
Basic behavior:
Earthquake: Don’t rush outside. Protect yourself from falling objects. In stations or buildings, follow staff instructions.
Typhoon: Trains may stop in advance. Avoid going out and stay safe in your hotel.
■ Embassies (via Live Japan)
https://livejapan.com/ja/emergency/
You can look up your country’s embassy address and phone number.
If you lose your passport, the embassy is your most important contact.
Chapter 6: Recommended Areas & Best Time to Visit
Many guides list “famous places,” but what visitors really want to know is:
“When is the best time to go there?”
Here are key areas with ideal visiting times.
🛒 How to Purchase This Guide (For English Readers)
➤ Price: 300 yen
1️⃣ Tap the black button below
This is the purchase button.
Even if it appears in Japanese, just tap the black button.
2️⃣ Log in / Sign up
You can continue with:
✉️ Email
🔵 Google
🍎 Apple
🐦 X (Twitter)
3️⃣ Confirm the price and proceed
Just press “purchase” to complete the payment.
4️⃣ Full article unlocks immediately
Once the payment is done, all sections will be available.
💡 If you see Japanese text, don’t worry — just tap the black button and follow the prompts.
Need help? Contact me on X: @JapanTrip_Notes
■ Shinjuku – Best at Night
Neon lights
Omoide Yokocho (old alley with tiny restaurants and bars)
Golden Gai (small bar district)
Perfect for experiencing Tokyo’s nightlife and atmosphere.
■ Shibuya – Late Afternoon to Evening
The world-famous Shibuya Scramble Crossing
Hachiko statue
Center-Gai shopping streets
Great for photos and people-watching.
■ Asakusa – Early Morning (8:00–9:00)
Visit Senso-ji Temple before it gets crowded
Walk through Nakamise shopping street while it’s still calm
Ideal time for peaceful sightseeing and photography.
■ Akihabara – Noon to Late Afternoon
The area becomes liveliest around midday:
Electronics shops
Anime and manga stores
Maid cafés
■ Ginza – Afternoon
Luxury brand shopping
Department store food halls (depachika)
Stylish cafés and restaurants
A sophisticated side of Tokyo.
■ Ueno – Morning
Ueno Park
Museums and zoo
Ameyoko shopping street gets busy after noon
Chapter 7: Eating & Ordering – How to Survive Tokyo’s Food Scene
Tokyo’s food is amazing—but the ordering system can be confusing.
■ Ticket Machines (Shokken-ki)
Common at ramen shops and some fast-food restaurants.
Put cash into the machine near the entrance.
Press the button for what you want to eat (many machines have an English button).
Take the printed ticket.
Give it to the staff and wait to be seated or served.
■ Convenience Stores (Konbini)
Japanese convenience stores are incredibly useful:
Open 24 hours
Safe, cheap, and surprisingly high quality
7-Eleven – Very reliable overall, great rice balls and hot snacks
FamilyMart – Famous for “Famichiki” fried chicken and hearty snacks
Lawson – Good sweets and more health-conscious options
Perfect for breakfast, late-night snacks, or when you’re too tired to find a restaurant.
■ Free Water and Wet Towels
In most restaurants:
Water (or tea) is free
Refills are also free
You often receive a wet towel (oshibori) to clean your hands
No need to buy bottled water with your meal.
■ Izakaya Culture: “Otoshi”
In many izakaya (Japanese pubs), a small dish will be served automatically when you sit down.
This is called “Otoshi” and acts as a small cover charge (usually 300–500 yen).
You didn’t order it, but it’s normal and generally cannot be refused.
Chapter 8: Cash, ATMs, and Payments
■ Seven Bank ATM – Your Best Friend
Located in almost every 7-Eleven store:
High success rate with foreign cards
English interface
24/7 operation
You can withdraw just the amount you need, when you need it.
■ Situations Where Cash Is Still Needed
Offerings and charms at shrines and temples
Local buses and small regional trains
Some family-run restaurants
Certain coin lockers
■ Cashless Payment Tips
Suica is king – Works on trains, buses, vending machines, convenience stores, and many shops.
QR Codes – Japanese apps like PayPay are usually not available to tourists without a Japanese bank account or phone number.
Some stores accept Alipay or WeChat Pay, but Suica and credit cards are more universal.
Chapter 9: Top 10 Common Mistakes & How to Avoid Them
Getting lost by taking the wrong exit
→ Always check the exit number on Google Maps before leaving the ticket gates.Insufficient Suica balance at the gate
→ Keep at least 1,000 yen on your card. You can charge with cash at station machines or at convenience stores.Riding the Yamanote Line in the wrong direction
→ Look at the electronic sign and confirm the next station before boarding.Panicking because there are no trash cans
→ Carry a small plastic bag and bring your trash back to the hotel.Struggling to explain destinations to taxi drivers
→ Show the address or place name in Japanese on Google Maps. Or use ride-hailing apps like GO or Uber.Getting exhausted at overcrowded tourist spots
→ Use the recommended time slots in Chapter 6. Start your day early.Confused by Japanese addresses
→ Japanese addresses follow the order: Ward → Block (Chome) → Number.
Instead of reading, rely on the pin location in your map app.Panicking during an earthquake
→ Buildings are highly earthquake-resistant. Don’t rush outside. Protect yourself first and check information via the Safety Tips app.Worried about language at hospitals
→ Call the AMDA International Medical Information Center for help and guidance.Losing your sense of direction completely
→ Use the compass feature in Google Maps so the map rotates to match the direction you’re facing.
Chapter 10: 1-Day Tokyo Model Course for First-Time Visitors
(Active itinerary – best if you’re okay with a full day of walking)
This route lets you experience many of Tokyo’s “must-see” spots in a single day:
Asakusa → Ueno → Akihabara → Shibuya → Shinjuku
● Morning (around 8:30) – Asakusa
Take photos at Kaminarimon Gate before the crowds arrive
Walk through Nakamise shopping street
Visit Senso-ji Temple and enjoy the calm morning atmosphere
(Then take the Ginza Line to Ueno.)
● Late Morning (around 10:30) – Ueno Park
Stroll through Ueno Park
Visit museums or the zoo if you like
Have an early lunch at nearby Ameyoko market street
(Then take the Yamanote Line or Hibiya Line to Akihabara.)
● Early Afternoon (around 13:00) – Akihabara
Explore the electronics district
Visit anime / manga shops
Try a maid café if you’re curious
(Then take the Yamanote Line to Shibuya.)
● Late Afternoon (around 16:00) – Shibuya
Experience the Shibuya Scramble Crossing
Visit Hachiko Statue
Shop or relax in cafés around the station
Optionally, book SHIBUYA SKY for a great sunset view
(Then take the Yamanote Line to Shinjuku.)
● Evening (from 19:00) – Shinjuku
Enjoy dinner – there are endless options
Walk through Kabukicho or Omoide Yokocho for classic Tokyo night scenes
For a beautiful night view, visit the Tokyo Metropolitan Government Building observatory (often free of charge)
🇯🇵 【日本語版】以下は英語本文の日本語版です。
Tokyo Travel Basics(東京旅行 基本ガイド)
― 初めての東京を、迷わず安心して楽しむために ―
第1章:来日前にしておきたい準備
東京は、世界でもトップクラスに安全で便利な都市です。
しかし、初めて訪れる旅行者にとっては、電車の多さ、情報量の多さ、文化の違いから「少し難しい街」に感じられることも多いです。
ですが、出発前にほんの少しだけ準備をしておくだけで、旅のスムーズさと安心感は大きく変わります。
■ 入れておくべきアプリ(理由つき)
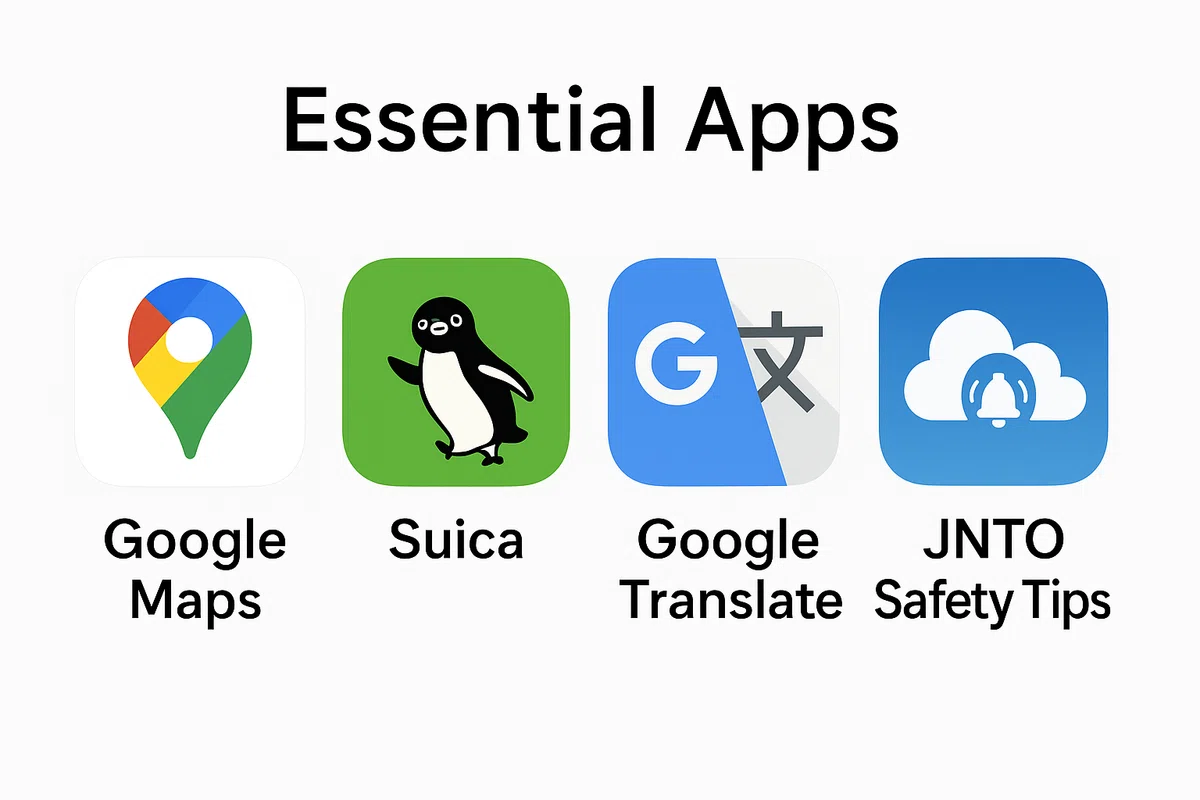
東京旅行が格段にラクになります。)
1.Googleマップ
一番のポイントは、駅の 「出口番号」 を表示してくれることです。
東京の駅は非常に大きく、出口を1つ間違えるだけで10〜20分余計に歩くことも珍しくありません。
Googleマップで「おすすめ出口番号」を確認すれば、目的地まで最短ルートでスムーズに移動できます。
2.モバイルSuica(スマホ版Suica)
重要: 2025年現在、駅で販売される「物理カードのSuica」は非常に入手しづらい状況です。
そのため、iPhoneやAndroidのウォレットアプリにSuicaを追加して使う方法が、もっとも現実的で便利な選択肢です。
電車・買い物でそのまま使えます。)
チャージは Mastercard / Amex が比較的スムーズ
海外発行のVisaカードは、セキュリティ上の仕様により決済が弾かれるケースが多めです
3.Google翻訳
カメラ機能を使えば、看板・メニュー・ポスター・案内表示などをその場で翻訳できます。
英語メニューのないローカルなお店でも、これさえあればかなり安心です。
4.JNTO「Safety Tips」アプリ
日本政府観光局(JNTO)が提供する公式アプリで、
地震・津波・台風・避難情報などの緊急アラートを通知してくれます。
「万が一」の備えとして、必ず入れておきたいアプリです。
■ 現金はまだ必要か?
日本ではキャッシュレス化がかなり進んできていますが、完全に現金不要というわけではありません。
以下のような場面では、いまでも現金が必要になることがあります。
小さなラーメン店や家族経営の飲食店
神社やお寺(お賽銭・お守り・おみくじなど)
昔ながらの商店街のお店
一部の古いタクシー
コインロッカーの一部
日本円を引き出す場合は、**セブンイレブンにある「セブン銀行ATM」**がもっとも確実で安心です。
海外発行カードに対応していることが多く、24時間稼働・英語表示にも対応しています。
■ 持っていくと安心なもの(基本リスト)
モバイルバッテリー(地図アプリや翻訳アプリで電池消費が激しいため)
折りたたみ傘(突然の雨に備えて)
薄手の上着(室内と外気の温度差が大きいことがあります)
パスポートのコピー(紛失・盗難時の対応がスムーズになります)
コインケース(小銭入れ):日本は今でも硬貨を使う場面が多く、すぐに小銭がたまります
天気は急変し、地図アプリは電池を消耗します。)
第2章:複雑な東京の電車をシンプルに使うコツ
東京の鉄道ネットワークは、正確・清潔・安全で世界的に有名です。
一方で、乗り入れ会社や路線が多く、世界屈指の「複雑さ」でも知られています。
しかし、いくつかのルールさえ押さえておけば、初めての旅行者でも十分に使いこなせます。
モバイルSuicaを使えば、スマートフォンをタッチするだけで改札を通過できます。
紙の切符を買う必要がなく、東京をスムーズに移動できる最も便利な方法です。
■ ゴールデンルール:「迷ったら JR + 東京メトロ」
東京には多くの私鉄(私営鉄道会社)が走っていますが、ビギナーはこう覚えておけばOKです。
「JR」と「東京メトロ」だけ使うことを意識する
この2つだけで、ほとんどの主要エリアをカバーできます。
東京メトロの英語版公式路線図PDFです。
旅の計画や移動に役立ちます。
👉 Download (Tokyo Metro Official PDF)
■ JR山手線(Yamanote Line)は最強の味方
緑色のラインで表示される 山手線 は、東京の主要エリアを一周する環状線です。
新宿・渋谷・原宿・代々木・東京駅・秋葉原・上野・池袋 など、
名前を聞いたことがある場所の多くは山手線沿線にあります。
「道に迷ったかも」と思ったら、まずは 山手線の駅を目指す のが安全策です。
東京で最も便利な環状線です。
■ 空港から市内へのアクセス
成田空港から:
スカイライナー:最速で快適、日暮里・上野方面へ
成田エクスプレス(N’EX):乗り換えなしで東京・新宿・渋谷など主要駅へ
羽田空港から:
東京モノレール → JR山手線:浜松町経由で都心へ
京急線:品川方面へ行くなら最速ルート
■ モバイルSuicaが標準
物理カードのSuicaがほとんど手に入らない現状では、モバイルSuicaが事実上の標準になっています。
もし、
・スマホの電池が切れた
・アプリがうまく動かない
という場合は、
どの駅でも「現金で紙の切符」を購入できます。
■ 迷いやすい「三大ダンジョン駅」
新宿駅:出口が100以上。世界トップクラスの迷宮駅。
渋谷駅:地下通路や複数階が重なり合い、構造が非常に複雑。
東京駅:
「丸の内側(皇居方面)」
「八重洲側(新幹線・商業施設側)」
この2つは真逆の方向なので、出口を間違えると大きくロスします。
第3章:東京でのインターネット環境
東京には無料Wi-Fiもありますが、接続が不安定だったり、メールアドレス登録が必要だったりと、ストレスになるケースも少なくありません。
地図や翻訳アプリを安定して使うためにも、自分専用の回線を持っておくことをおすすめします。
■ eSIM(もっともおすすめ)
最も便利で、最近の主流になりつつある方法です。
物理SIMの入れ替えが不要
渡航前に設定しておき、到着後すぐに利用開始できる
ソロ旅行者にとても向いている
代表的なサービス:Airalo, Ubigi など。
■ ポケットWi-Fi
複数人での旅行には、ポケットWi-Fiも良い選択肢です。
データ容量が多い
1台をみんなで共有できる
費用も割り勘にすればお得
ただし、
持ち歩きが必要
モバイルバッテリー同様、充電を忘れないようにする必要があります。
■ 空港SIM
到着後、空港のカウンターで
「◯日間使えるデータ専用SIM」を購入する方法もあります。
手軽に契約できる一方、
eSIMに比べると割高なことも多いです
事前にスマホが SIMロック解除済み か確認しておきましょう
第4章:東京で守りたい基本マナー
日本では、「周りに迷惑をかけないこと」「公共の場でのマナー」が非常に重視されます。
悪気がなくとも、文化の違いからトラブルにつながることもあります。
ここでは、旅行中に最低限知っておきたいマナーをまとめます。
■ 電車の中でのマナー
通話はNG:緊急時を除き、電話で話すのは避けましょう。
会話は控えめに:大声での会話はトラブルの元になります。
優先席:高齢者・妊婦・身体の不自由な方・乳幼児連れの方には席を譲るのが一般的です。
■ 「食べ歩き」は基本NG
日本では、歩きながら食べる行為はあまり好まれません。
特に浅草や鎌倉など観光地では、食べ物が他人の服や店の商品を汚してしまうリスクがあり、トラブルの原因になります。
OKな例:
屋台や店で買ったものを、そのお店の前や決められたスペースで「立ち止まって食べる」こと。
■ ゴミ箱がほとんどない理由
東京の街はきれいですが、その背景には
「各自が自分のゴミを持ち帰る」という文化
があります。
公共のゴミ箱は非常に少ない
コンビニで購入したもののゴミは、そのコンビニのゴミ箱に捨てるのが基本ルールです
■ チップは不要
レストラン、タクシー、ホテルなど、チップは一切不要です。
むしろ、お金を置いていくと不審に思われる場合もあります。
良いサービスには、
「Arigatou(ありがとう)」 の一言を添えれば十分気持ちは伝わります。
■ エスカレーターの立ち位置
東京:左側に立ち、右側を歩く人のために空ける
大阪:右側に立ち、左側を空ける
近年は「歩かずに両側とも立ちましょう」という呼びかけも増えていますが、まだ片側を空ける習慣が根強く残っています。
第5章:緊急時・災害時のためのフルガイド
東京は非常に安全な都市ですが、
落し物・事故・急病・地震・台風 など、予期せぬ事態がまったく起きないわけではありません。
この章は、外国人旅行者が
「何かあったとき、どこに連絡すればいいか」
をひと目で分かる“保存版ガイド”です。
■ 最重要の連絡先
● Japan Visitor Hotline(日本政府観光局 JNTO)
電話:050-3816-2787(24時間・年中無休・英語対応可)
対応内容:
事故・トラブル
体調不良・病院案内
災害時の行動相談
旅行中の困りごと全般
一般的な観光案内
迷ったら、まずここに電話すれば大きく道を誤ることはありません。
● 警察:110(事件・事故)
● 救急・消防:119(怪我・急病・火災)
■ 落とし物(Lost & Found)
日本は世界でも有数の「落とし物が戻ってくる国」です。
スマホ・財布・カバンなどを失くしても、すぐに行動すれば戻ってくる可能性は十分あります。
警察 遺失物センター:0570-550-142(一部英語対応)
JR主要駅の「Lost & Found」カウンター:東京駅・新宿駅・渋谷駅などでは、英語対応できるスタッフがいる時間帯もあります。
■ 医療サポート
AMDA国際医療情報センター
https://www.amdamedicalcenter.com
英語などで症状を伝えるサポート
外国語対応可能な病院の紹介
「病院に行くべきかどうか」迷ったときの相談
■ 地震や台風などの災害
Safety Tips(アプリ)
地震速報
津波警報
台風情報
避難情報
がリアルタイムで通知されます。
基本的な行動指針:
地震のとき:
あわてて外へ飛び出さない
落下物から頭を守る
駅やデパートでは係員の指示に従う
台風のとき:
計画運休で電車が止まることがあります
無理な外出は避け、ホテルや建物内で安全を確保する
■ 各国大使館(Live Japan 経由)
https://livejapan.com/ja/emergency/
自国の大使館・領事館の住所・電話番号を確認できます。
パスポートを紛失した場合などは、大使館が最重要の窓口になります。
第6章:エリア別・訪問ベストタイム
多くのガイドが「有名スポット」を紹介していますが、
旅行者が本当に知りたいのは、
「どの時間帯に行けば、いちばん楽しめるか?」
という点です。
(外国人向け・購入ガイド)
👉 日本語訳:料金は300円です
1️⃣ 下の 黒いボタン をタップしてください。
これが「購入ボタン」です。
日本語で表示されていても、黒いボタンを押せばOK です。
2️⃣ ログイン / 新規登録
以下から選んでログインできます:
✉️ メール
🔵 Google
🍎 Apple
🐦 X(旧Twitter)
3️⃣ 金額を確認して進む
「購入(purchase)」ボタンを押すだけで決済が完了します。
4️⃣ 購入が完了すると全文がすぐに解放されます。
すべてのセクションが読めるようになります。
👉 日本語訳
サポートが必要な場合は、X(@JapanTrip_Notes)までご連絡ください。
■ 新宿 – ベストタイム:夜
無数のネオン
思い出横丁のレトロな路地
ゴールデン街の小さなバーがひしめく一角
「これぞ東京の夜」という雰囲気を味わえます。
■ 渋谷 – ベストタイム:夕方〜夜
世界的に有名な「渋谷スクランブル交差点」
ハチ公像
センター街周辺のショッピング・飲食店
夕暮れから夜にかけてが、とくに写真映えします。
■ 浅草 – ベストタイム:朝(8:00〜9:00)
雷門や浅草寺がまだ混雑していない時間帯
仲見世通りをゆっくり歩くことができる
写真撮影にも最適
■ 秋葉原 – ベストタイム:正午〜夕方
電気街が最も活気づく時間帯
アニメショップ、ゲームセンター、メイドカフェなどが賑わう
■ 銀座 – ベストタイム:午後
ブランドショップでのショッピング
デパ地下グルメの食べ歩き
カフェで一息つきながら、街並みを眺める
落ち着いた大人のエリアです。
■ 上野 – ベストタイム:午前
上野公園の散策
博物館や美術館めぐり
アメ横は昼以降に賑わいます
第7章:東京の食事と注文のしかた
東京の食文化は世界トップレベルですが、
「注文方法がよく分からない」 というハードルがあります。
■ 券売機スタイルの店(ラーメンなど)
特にラーメン店や牛丼店で多いシステムです。
店の入口近くにある券売機で、
現金を入れてメニューのボタンを押す出てきた食券を取る
席につき、店員に食券を渡す
最近は、英語表示に切り替えできる券売機も増えています。
■ コンビニエンスストア(Konbini)
日本のコンビニは、
「24時間営業の小さなスーパー兼レストラン」 のような存在です。
セブンイレブン:全体的なクオリティが安定して高い
ファミリーマート:ホットスナックやボリュームある惣菜が人気
ローソン:スイーツやヘルシー志向のパンが充実
朝食・軽食・夜食、すべてコンビニで問題なくまかなえます。
■ 水とおしぼりは無料
多くの飲食店では、
無料の水またはお茶
手を拭くための「おしぼり」
が自動的に出てきます。
水のおかわりも無料です。
■ 居酒屋の「お通し」文化
居酒屋に入ると、注文していない小皿料理が運ばれてくることがあります。
これは 「お通し(Otoshi)」 と呼ばれるもので、席料のような位置づけです(300〜500円程度)。
基本的には断れないことが多いですが、
「日本の居酒屋文化の一部」として楽しむのがおすすめです。
第8章:現金・ATM・キャッシュレスのポイント
■ セブン銀行ATMが最有力
ほぼすべてのセブンイレブンに設置されている セブン銀行ATM は、
外国人旅行者にとってもっとも頼れる存在です。
海外発行クレジットカード/デビットカードに高い対応率
画面表示は英語に切り替え可能
24時間利用できる店舗が多い
■ 現金が必要になる代表的な場面
神社・お寺でのお賽銭・お守り・おみくじ
一部のバスやローカル線
個人経営の飲食店
コインロッカー(古いタイプ)
■ キャッシュレスの注意点
Suicaが最も汎用性が高い:交通機関からコンビニ、自販機、飲食店まで幅広く利用可能
日本独自のQRコード決済(PayPayなど)は、基本的に日本の銀行口座や電話番号が必要で、旅行者にはハードルが高い
中国や一部エリアでは Alipay / WeChat Pay に対応している店舗もありますが、
全体的には Suica+クレジットカード があれば困ることはほぼありません
第9章:旅行者がやりがちなミスと、その防ぎ方(10選)
駅の出口を間違え、全然違う場所に出てしまう
→ 対策:改札を出る前に、Googleマップで「出口番号」を確認し、駅の黄色い案内表示でその番号を探す。Suicaの残高が足りず、改札で止められる
→ 対策:常に1,000円以上チャージしておく。駅の券売機やコンビニレジで現金チャージが可能。山手線を逆方向に乗ってしまう
→ 対策:ホームの電光掲示板で「次の停車駅」を必ず確認する。ゴミ箱が見つからず、ゴミを持ち歩き続けて困る
→ 対策:小さなビニール袋を1つ持ち歩き、ホテルに戻ったタイミングでまとめて捨てる。タクシーで行き先がうまく伝わらない
→ 対策:Googleマップで目的地の「日本語住所」または地図画面を運転手に見せる。配車アプリGOやUberも便利。人気観光地のピークタイムに行ってしまい、疲れ果てる
→ 対策:第6章の「ベスト時間帯」を参考に、朝早めに行動する。日本の住所表記に混乱する
→ 対策:無理に住所を読み取ろうとせず、地図アプリの「ピン」が指している場所を信じる。地震でパニックになる
→ 対策:日本の建物は耐震性が高く設計されています。慌てて外に飛び出さず、まずは落下物から身を守り、Safety Tipsなどの情報を確認する。病院での言葉の壁が不安で、受診を迷う
→ 対策:AMDA国際医療情報センターに連絡し、対応可能な病院や伝え方のサポートを受ける。地図を見ても自分がどちらを向いているか分からなくなる
→ 対策:Googleマップのコンパス機能をオンにし、自分の向きと地図の向きを合わせる。
第10章:初めての人向け・東京1日モデルコース
※ ややアクティブな「1日フルコース」です
このルートでは、東京の「定番スポット」を1日で一気に回ることができます。
浅草 → 上野 → 秋葉原 → 渋谷 → 新宿
● 朝(8:30頃)– 浅草
雷門で記念撮影
仲見世通りを歩きながら、和菓子やお土産をチェック
浅草寺に参拝し、ゆったりと雰囲気を味わう
(その後、銀座線で上野へ移動)
● 午前(10:30頃)– 上野公園
広い上野公園を散策
興味に応じて、国立博物館・美術館・動物園などを訪問
昼食は近くの「アメ横」でローカルフードを楽しむのもおすすめ
(山手線または日比谷線で秋葉原へ移動)
● 昼(13:00頃)– 秋葉原
電気街を歩き、家電・ガジェット・アニメグッズをチェック
ゲームセンターで遊んだり、興味があればメイドカフェも体験可能
(山手線で渋谷へ移動)
● 夕方(16:00頃)– 渋谷
渋谷スクランブル交差点を実際に渡り、上から写真を撮る
ハチ公像に立ち寄る
ショッピングやカフェで一息つく
事前予約ができれば「SHIBUYA SKY」で夕景を楽しむのもおすすめ
(山手線で新宿へ移動)
● 夜(19:00以降)– 新宿
多種多様なレストランの中から気になる店で夕食
昔ながらの雰囲気が残る「思い出横丁」で、赤提灯の路地を楽しむ
余力があれば、東京都庁の展望室(無料の場合あり)から東京の夜景を見るのも一案
以上が、英語版に対応した 日本語翻訳版です。
いいなと思ったら応援しよう!
 If you’d like to support my work, your tip would mean a lot.
Your support helps me create better travel guides.
Thank you so much!
If you’d like to support my work, your tip would mean a lot.
Your support helps me create better travel guides.
Thank you so much!