There are adequate choices on the tools and workflows for building dynamic applications. After a reasonable amount of time on research, you might agree with me that Vue and Tailwind CSS are on the top of the list. To me, the next logical step is to try it before making a commitment. The purpose of this writing is for you to get a taste of this setup without spending too much time, so you can make your own decision.
Overview
Vue is a progressive JavaScript framework, which means that you can start using it before knowing the whole.
Vue aims at building user interfaces, but with styling. In other words, Vue needs to work with a CSS framework. Tailwind is a rising star in the CSS landscape, it will grow on you if you patiently give Tailwind a chance. I like the sleek and fresh free coming with Tailwind, in comparison to the commercially proven but often boring counterpart of Bootstrap.
Two obvious ways to integrate Vue with Tailwind CSS are: 1) Initialize the project with Tailwind, then add Vue or 2) Initialize in Vue, then add Tailwind
My experience showed that the latter works better. The documentation from the Tailwind site is more accurate than what was provided from the Vue website. Let’s get started of the integration with the following steps:
- Create a Vue app
- Install Tailwind into the app
Create the App in Vue
To create your project, run npm init vite project-name. You should see this:
% npm init vite v901Need to install the following packages:
create-vite
Ok to proceed? (y)✔ Select a framework: › vue
✔ Select a variant: › vueScaffolding project in /Users/seanzhai/www/v901...
Done. Now run:cd v901
npm install
npm run devThe last command npm run dev is not necessary for now. But it won’t hurt to test. It creates a local web server on port 3000. You can verify that in any browser.
Configure Development Server
You probably noticed that the vite development server runs on port 3000 of the localhost. If you want to make your development server available for access from other machines, you can do so by changing vite.config.js file.
export default defineConfig({
  plugins: [vue()],
  server: {
    port: '3030',
    host: '0.0.0.0'
  }
})
With the settings as shown above, when you do npm run dev , you can see you are serving on port 3030 to the world. You probably know that you might need to take care of your firewall settings to make this work.
Install Tailwind CSS
Install Tailwind and create its initial configuration.
npm install -D tailwindcss@latest postcss@latest autoprefixer@latest
npx tailwindcss init -p
The second command generated the file tailwind.config.js . Edit the line content so the file looks like what is shown below.
module.exports = {
  content: [
    "./vitesrc/index.html",
    "./vitesrc/**/*.{vue,js,ts,jsx,tsx}",
  ],
  theme: {
    extend: {},
  },
  variants: {
    extend: {},
  },
  plugins: [],
}
Then, create index.css under src folder.
/* ./src/index.css */
@tailwind base;
@tailwind components;
@tailwind utilities;
The src is used for all source code, and there is a folder components underneath for Vue components. We need to import the index.css file to main.js, which is the entry point of all apps.
// src/main.js
import { createApp } from 'vue'
import App from './App.vue'
import './index.css'createApp(App).mount('#app')Up until this point, you should have a functional Vue application that supports Tailwind CSS. Congratulations on your success in the integration.
Beautiful Vue with Tailwind
The most common criticism of Tailwind is its lacking of pre-built components, which is probably the main reason for people with a background in bootstrap to reject Tailwind.
The remedy by Tailwind is promoting a paid service of tailwindui.com. If budget is not a concern, you could certainly give it a try; it showcases many layouts and gadgets, but they are not easy to use as templates. You need to adapt the components provided by tailwindui with some effort.
What I find most useful is the Headless UI, which is specifically designed to work with Tailwind. It is developed by the same people behind tailwindui.
Installation and First Steps
Headless UI installation is very easy.
npm install @headlessui/vue @heroicons/vue -DTake a look at its official site.
Note its components support both React and Vue. The default setting is React, please click on Vue before getting into a specific component. I once forgot this and stumbled into React section, I found the code is a little foreign. Out of curiosity to compare, there are almost always fewer lines required in Vue than in React to achieve the same result.
Stylize with Headless UI
You can learn a lot by taking a little time to dissect one component. The Menu(Dropdown) is good as an example. Let’s do this together using Visual Studio Code.
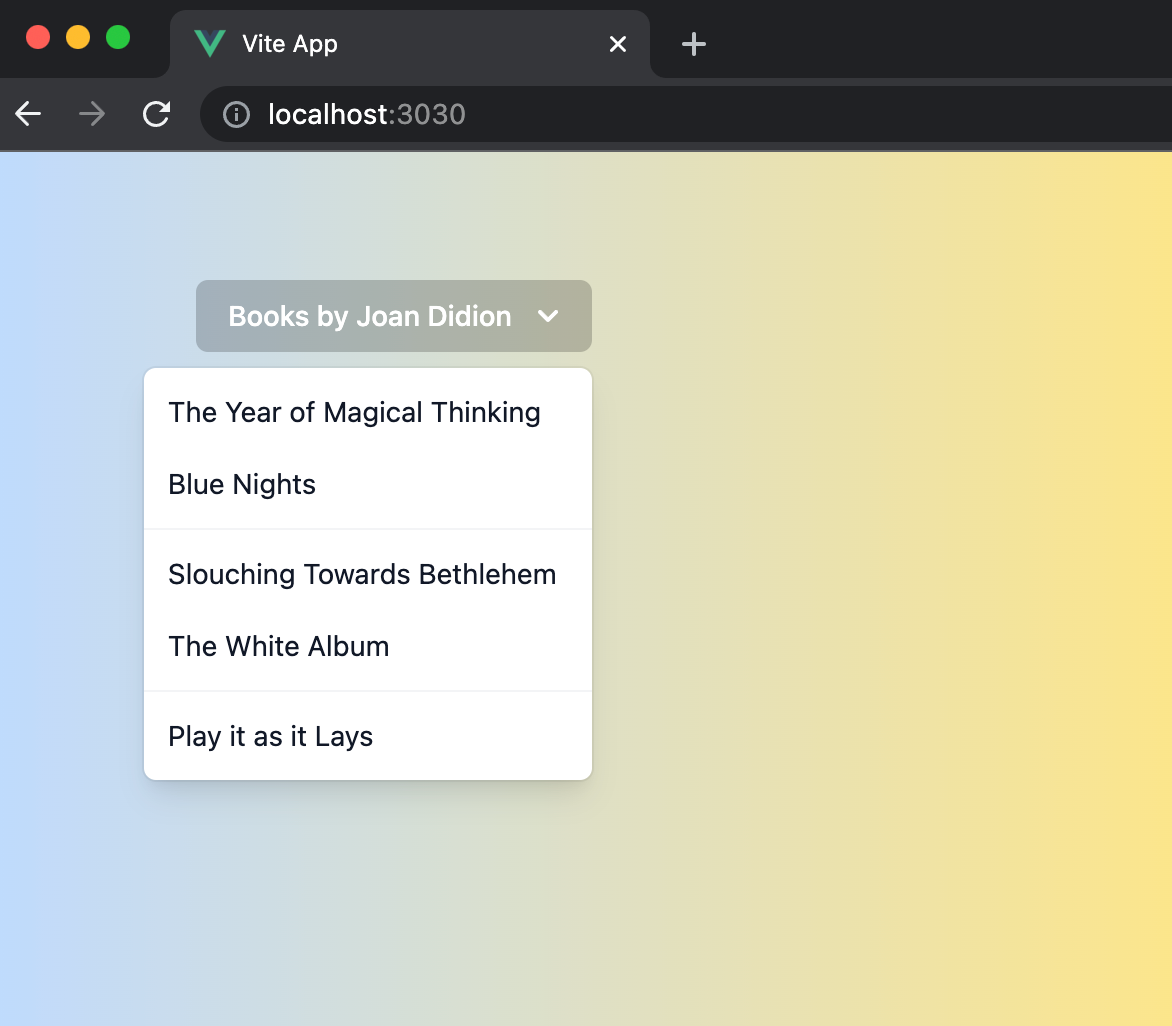
Open the project root folder with VS Code, locate src. Created a folder called components, then add a file Dropdown.vue. Let’s populate the menu with Joan Didion’s most famous books. The file is as follows. It is based on the example from the HeadlessUI website. I simplified it a little and make it a standalone page so it is easier to follow.
To use this component, we just need to reference it from the main App. I added some basic style to make the component easy to see.
The result looks like this:
Epilogue
Both Vue and Tailwind are amazing tools. What I enjoyed most about using Vue with Tailwind is that it allows you to stay in the same context most of the time, and there is no jumping around the JavaScript, CSS, and HTML files; the auto-reload of the development server is also a time saver. This is a workflow that allows you to improve, and you will find yourself becoming more productive and less stressed.
It is fun and beautiful.