Progressive Web Apps (PWAs) are web applications built using standard web technologies like HTML, CSS, and JavaScript. They offer a native app-like experience, including the ability to work offline, send push notifications, and be installed on a user’s device. PWAs are cross-platform, meaning they can run on any operating system, and they can be submitted to app stores like the Google Play Store using technologies like Trusted Web Activity (TWA).

This guide will walk you through the process of creating a simple PWA and submitting it to the Google Play Store in an easy-to-understand way. Whether you’re a beginner or an experienced developer, you’ll find clear steps to follow.
What is a Progressive Web App (PWA)?
A PWA is a web application that combines the best of web and native apps. It’s accessible via a browser but can be installed on a user’s device, offering features like:
- Offline functionality: Works even without an internet connection.
- App-like experience: Provides a full-screen, immersive interface.
- Push notifications: Engages users with timely updates.
- Cross-platform compatibility: Runs on Android, iOS, Windows, and more.
Popular examples of PWAs include Google Maps Go, Twitter Lite, and Instagram Lite. These apps are lightweight and don’t require traditional APK files for installation, making them easier to develop and distribute.
Step-by-Step Guide to Building a PWA
Creating a basic PWA is straightforward and can be done in just a few steps. You’ll need two key files: a manifest.json file and a serviceworker.js file. Below is a simple guide to get started.
Follow Making a simple PWA under 5 minutes tutorial to build a PWA (or) follow the steps given below to create a PWA.
Step 1: Create a manifest.json file in the same directory where index.html file is placed. This file contains the app name, start URL, theme color and some more basic information about the app in JSON format
{
"name": "Django Blogiee",
"short_name": "Django Blogiee",
"description": "PWA for django Blogiee",
"start_url": "/",
"display": "standalone",
"scope": "/",
"orientation": "any",
"background_color": "#ffffff",
"theme_color": "#000000",
"status_bar": "default",
"icons": [
       {
       "src": "/static/icons/Django-Blogiee.1b98d36d50a7.png",
       "sizes": "512x512",
       "purpose": "any maskable"
       }
       ],
   "dir": "ltr",
"lang": "en-US" }
Step 2: Create serviceworker.js, a JavaScript file in the same directory as manifest.json which handles installing and caching of the PWA app.
var staticCacheName = "django-blogiee-v" + new Date().getTime();
var filesToCache = [
    '/static/icons/Django-Blogiee.1b98d36d50a7.png',
];

self.addEventListener("install", event => {
    this.skipWaiting();
    event.waitUntil(
        caches.open(staticCacheName)
            .then(cache => {
                return cache.addAll(filesToCache);
            })
    )
});

self.addEventListener("fetch", event => {
    event.respondWith(
        caches.match(event.request)
            .then(response => {
                return response || fetch(event.request);
            })
            .catch(() => {
                return caches.match('/offline/');
            })
    )
});
});
Step 3: Link serviceworker.js to index.html using <script> tag in index.html.
<script type="application/javascript">
    // Initialize the service worker
    if ('serviceWorker' in navigator) {
        navigator.serviceWorker.register('/serviceworker.js', {
            scope: '/'
        }).then(function (registration) {
            // Registration was successful
            console.log('django-blogiee: ServiceWorker registration successful with scope: ', registration.scope);
        }, function (err) {
            // registration failed <img draggable="false" class="emoji" alt="????"
            // src="https://s.w.org/images/core/emoji/11/svg/1f641.svg">
            console.log('django-blogiee: ServiceWorker registration failed: ', err);
        });
    }
</script>
Finally, you have made a PWA. PWA's can help you to make your website into an app in your user's smartphone. Some examples of Google Map Go, Twitter lite, and Instagram Lite. If you look at PWA's clearly, they are not using traditional APK files for installation. So these PWA can be submitted to the play store, but we can install all the above examples from the play store. This made possible by Google using a technology called Trusted Web Activity(TWA).
Google says “A Trusted Web Activity lets your Android App launch a full-screen Browser Tab without any browser UI. This capability is restricted to websites that you own, and you prove this by setting up Digital Asset Links. Digital Asset Links consist essentially of a file on your website that points to your app and some metadata in your app that points to your website. When you launch a Trusted Web Activity, the browser will check that the Digital Asset Links check out, this is called verification. If verification fails, the browser will fall back to displaying your website as a Custom Tab."
For this tutorial, we use the website django-blogiee.herokuapp.com. You can look into its manifest.json and serviceworker.js.
There are three ways to do this as follows:
- If you are an Android developer you can build yourself and you have no need to follow this tutorial (Hard way)
- Even you are not an Android developer but have experience with NodeJs, NPM, JDK, and android command-line tools and command-line interface you can use the Bubblewrap project.(Medium way but need a lot of downloads)
- If you are running your blog using pre-built Content Management Systems (CMS) like WordPress, Ghost, and its plugins, You can follow this tutorial. (Easy way)
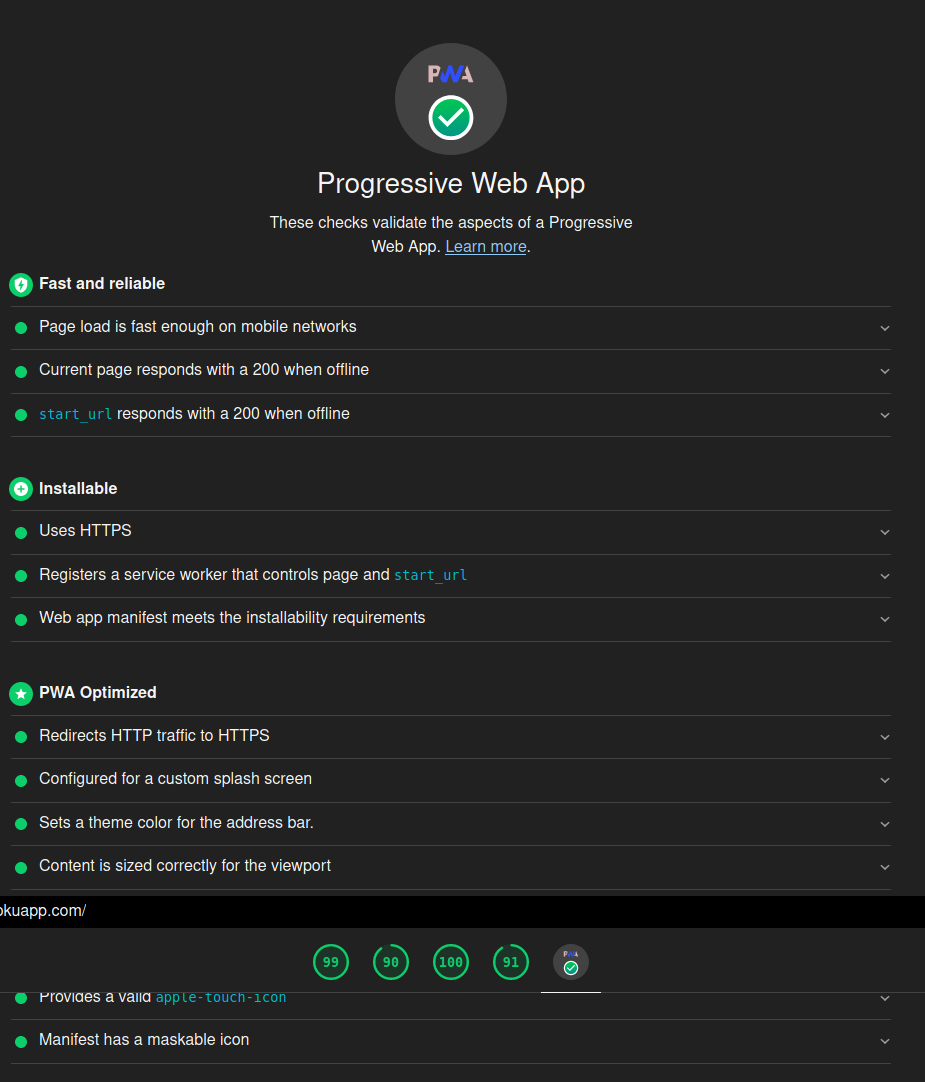
Make sure your website is a fully compatible PWA. You can use the Google LightHouse tool to look like the below picture.
Now if you are Good with your PWA, go to website PWABuilder by Microsoft and place the URL of your website and click start. if you see your website score as 100, then click build my PWA. you will see something like the below picture.
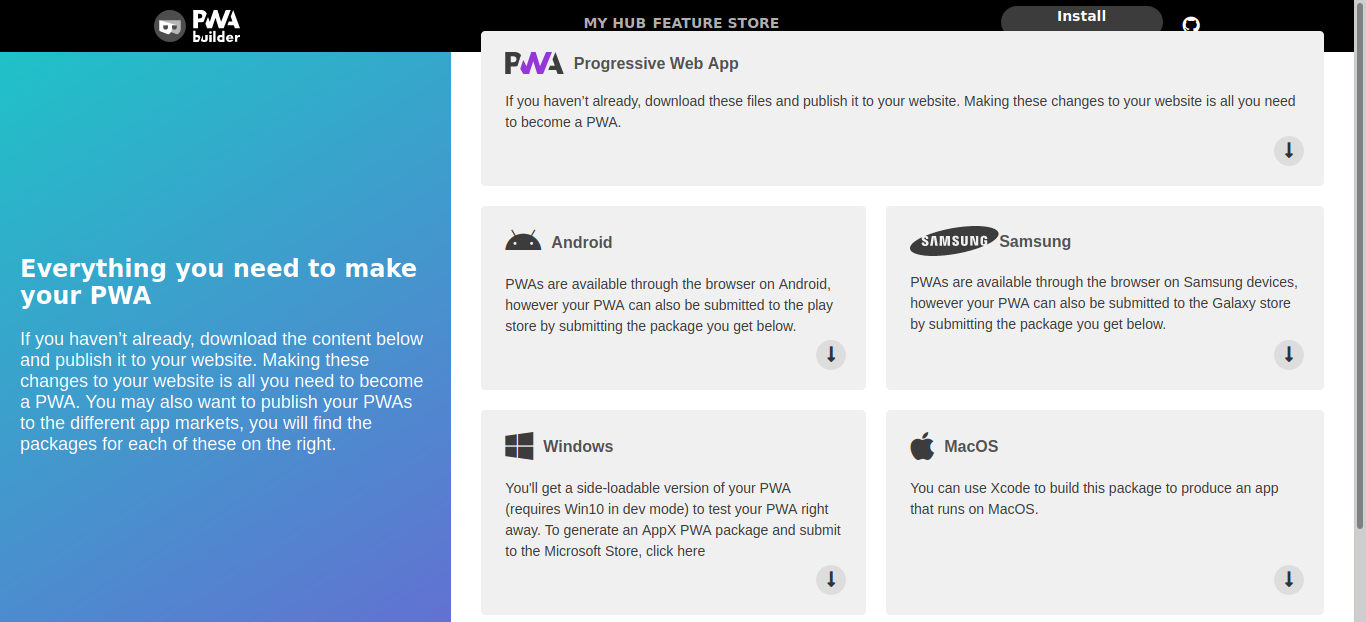
Then you can download your android package which can be submitted to the play store. Even you can download packages for Apple App Store, Windows Store, and Galaxy store.
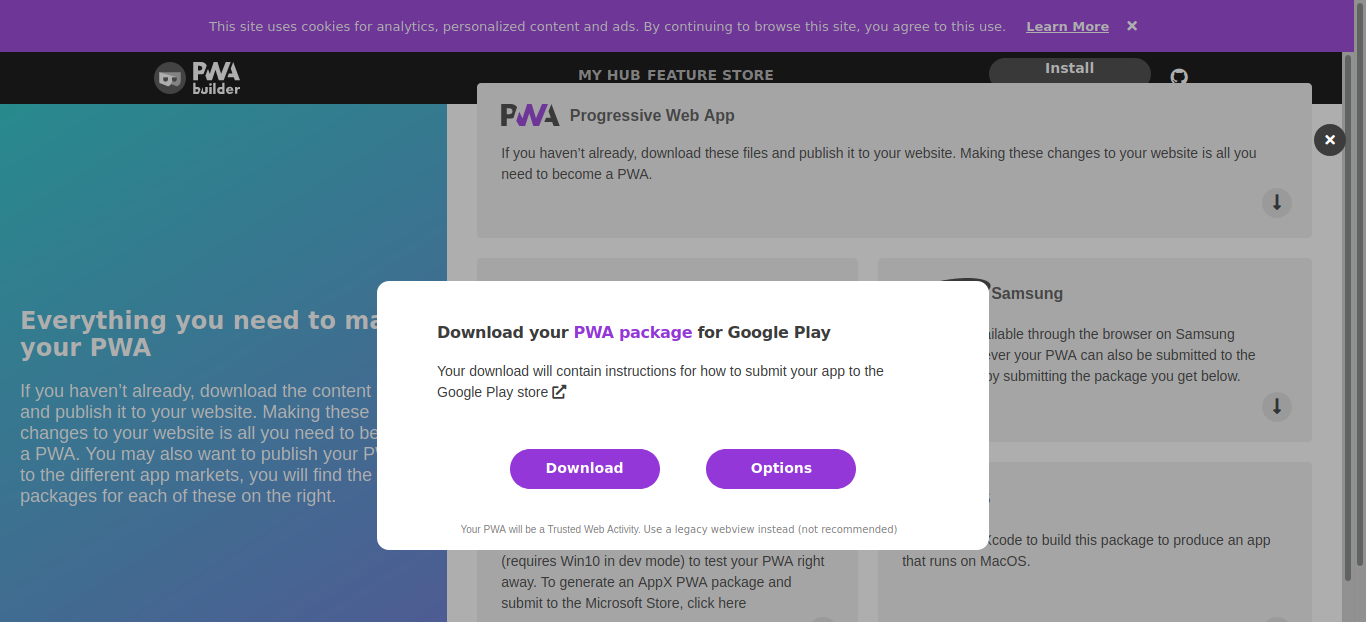
Extract the Downloaded Zip to get the APK file to add the Digital Asset file “assetlinks.json". Make sure your assetlinks.json file can be found at URL https://<your domain>/.well-known/assetlinks.json.
Conclusion
Building a Progressive Web App is a quick and cost-effective way to create a cross-platform app that feels native. By adding a manifest.json and serviceworker.js to your website, you can turn it into a PWA in minutes. To submit it to the Google Play Store, use tools like PWABuilder or Bubblewrap to package your PWA as a TWA, set up Digital Asset Links, and upload the APK to the Play Console.
With this approach, you can reach a wider audience by making your PWA available on the Google Play Store, just like popular apps such as Twitter Lite and Google Maps Go. Start building your PWA today and take your web presence to the next level!
