How to Adjust PPT Slide Size: Quick Steps
- Open Your Presentation >> Go to the Design Tab
- Click on the Slide Size >> Choose your Preferred Slide Size
- Apply Changes >> Adjust Content if Needed
- Save your Presentation
Have you ever created a PowerPoint presentation only to realize that the slide size doesn’t fit your screen or printing format? Choosing the right slide size is crucial for delivering a professional and visually appealing presentation. Whether you’re designing a business report, an online webinar, or a social media graphic, adjusting your slide dimensions ensures that your content looks sharp and well-formatted across different platforms.
This guide will walk you through step-by-step methods to change slide sizes in PowerPoint, prevent distortion, and optimize your presentation for any display.
How to Change Slide Size in PowerPoint: Step-by-Step Methods
Changing slide size helps you adapt your presentation to different screens, print layouts, and digital formats. Below are the best methods to resize slides in PowerPoint, along with their advantages.
Method 1: Change Slide Size Using the Design Tab (Quick & Easy)
If you want a fast and straightforward way to change slide size, the Design tab method is your best option. It allows you to switch between standard, widescreen, and custom dimensions with just a few clicks.
Step 1: Open Your Presentation
Launch PowerPoint and open the file you want to modify.

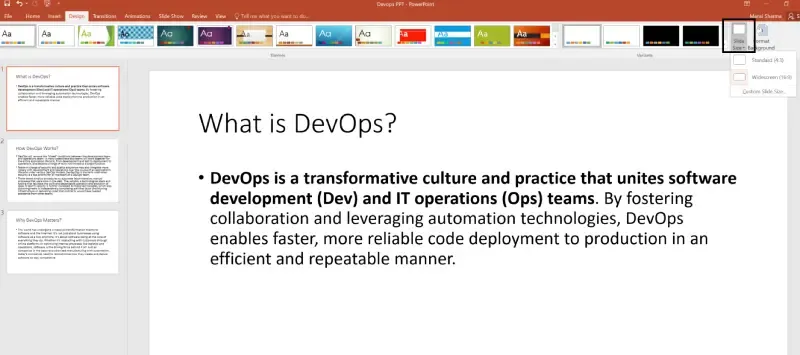
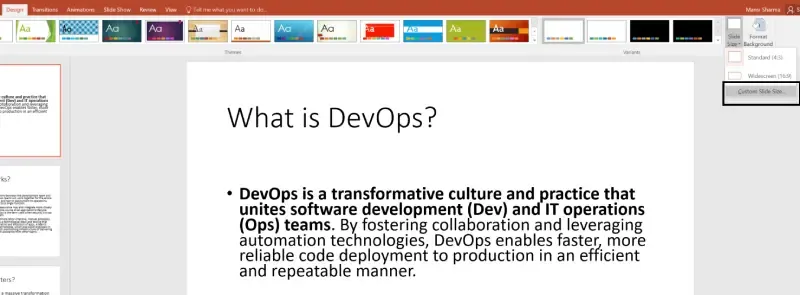
Step 2: Navigate to the Design Tab
Click on the "Design" tab at the top of the screen.

Step 3: Click on Slide Size
Under the Customize group, click on Slide Size > Custom Slide Size.
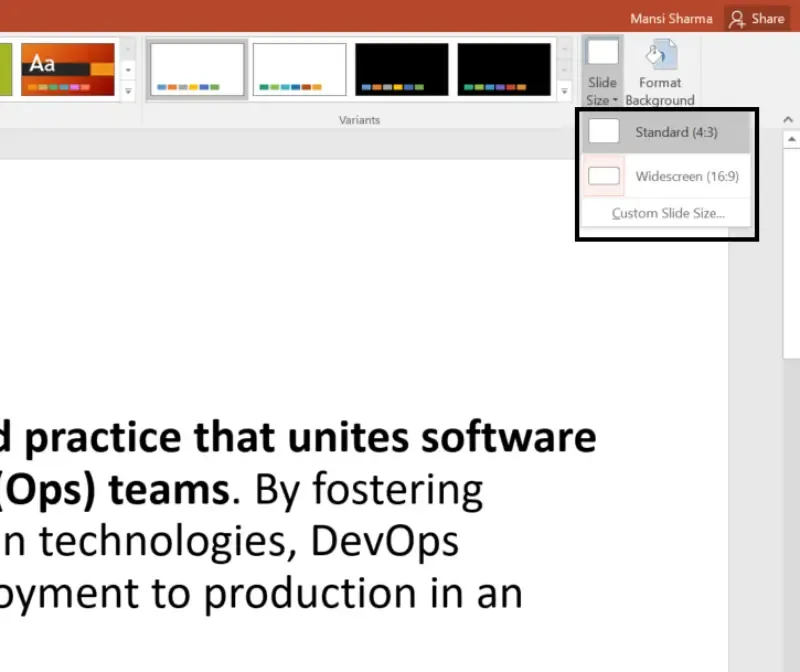
Step 4: Choose the Preferred Slide Size
You will see three options:
- Standard (4:3) – Ideal for older projectors and printed documents.
- Widescreen (16:9) – Best for modern screens and online presentations.
- Custom Slide Size – Enter specific width and height for unique layouts.
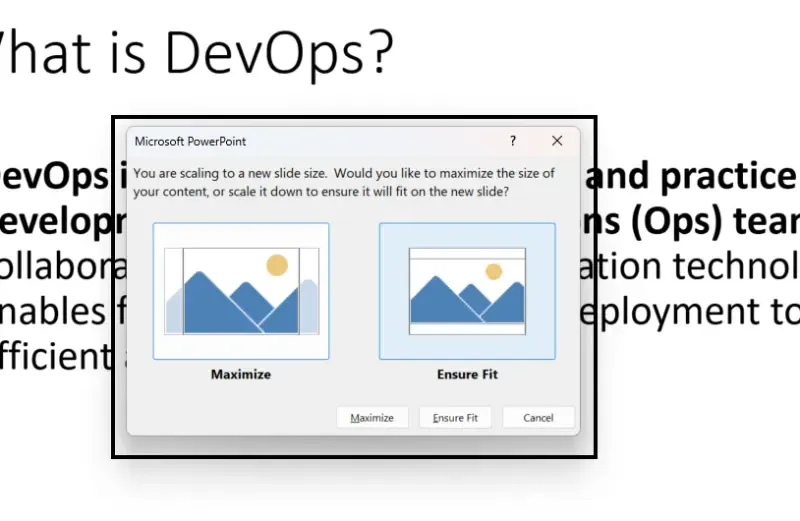
Step 5: Click OK and Adjust Content
PowerPoint will ask:
- Maximize – Keeps content but may crop some elements.
- Ensure Fit – Scales content to fit the new slide size.
This method is quick, beginner-friendly, and ideal for most users who need an immediate size change.
Method 2: Set a Custom Slide Size for Print & Digital Media
For users who need precise dimensions for printing or social media, this method allows you to manually enter width and height to match your project needs.
Step 1: Go to the Design Tab & Open Slide Size
Click Design > Slide Size > Custom Slide Size.
Step 2: Enter Custom Dimensions
In the Width and Height fields, enter the desired slide size. Examples:
- A4 (Portrait for Print): 8.27 x 11.69 inches
- Instagram Post: 1080 x 1080 pixels
- YouTube Thumbnail: 1280 x 720 pixels

Step 3: Click OK and Adjust Layout
After applying, reposition text, images, and graphics to fit the new size properly.
This method is perfect for marketing materials, digital content, and high-resolution printing.
How to Switch Between Portrait and Landscape Orientation
Sometimes, a portrait layout is better for posters, reports, or mobile-friendly presentations. PowerPoint allows you to switch slide orientation effortlessly.
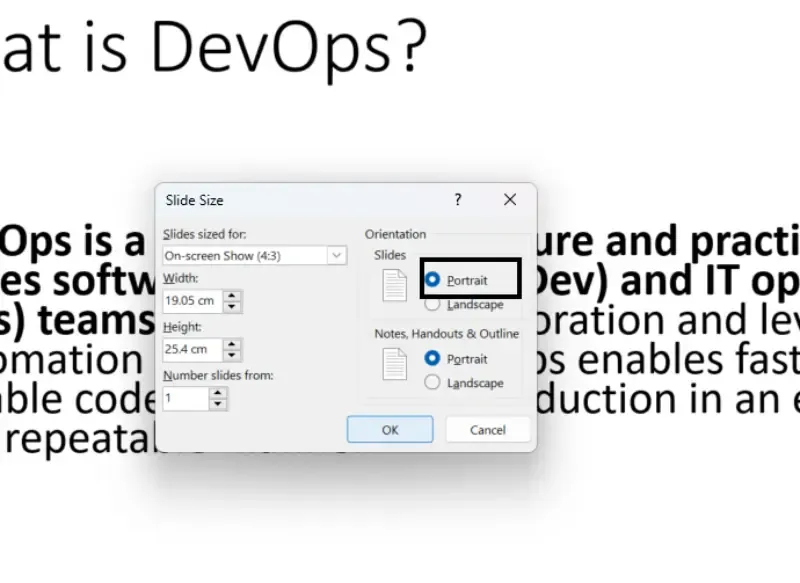
Step 1: Go to the Design Tab
Click Design > Slide Size > Custom Slide Size.
Step 2: Select Orientation
Under Orientation, choose:
- Portrait – Best for posters, reports, and documents.
- Landscape – Default mode for presentations.
Step 3: Click OK and Apply Changes
Check and adjust text or images if necessary.

This method is ideal for printed handouts, reports, and vertical content.
How to Set Default Slide Size for Future Presentations
If you frequently use a specific slide size, you can set it as the default for all new presentations.
Step 1: Open PowerPoint and Set Your Slide Size
Create a new presentation and adjust slide dimensions using one of the methods above.
Step 2: Save as a PowerPoint Template
Click File > Save As > Choose PowerPoint Template (.potx).
Step 3: Use the Template for Future Presentations
Open this template whenever you start a new project to maintain consistent formatting.
This method is great for businesses, educators, and designers who use a fixed slide format regularly
Common Issues & Fixes When Changing Slide Size
Even after changing slide size, you might face formatting issues. Here’s how to fix them:
1. Slide Content Gets Cropped or Distorted
- Fix: Select "Ensure Fit" instead of "Maximize" when resizing.
2. PowerPoint Resets Slide Size After Closing
- Fix: Save as a template file (.potx) to retain custom sizes.
3. Text or Images Look Stretched After Resizing
- Fix: Manually adjust shapes and font sizes for better alignment.
Best Practices for Choosing the Right Slide Size
- Use 16:9 for Business & Online Presentations – Best for widescreen displays.
- Use 4:3 for Printed Handouts & Reports – Avoids cropping issues when printing.
- Use Custom Sizes for Social Media & Digital Marketing – Optimize for Instagram, YouTube, or LinkedIn.
Conclusion
Mastering how to change slide size in PowerPoint is essential for creating polished, professional, and visually engaging presentations. Whether you need widescreen (16:9) for online slideshows, standard (4:3) for printed materials, or custom dimensions for marketing graphics, PowerPoint provides multiple ways to resize your slides without losing quality.
By using the Design tab for quick resizing, custom dimensions for print and digital formats, and Slide Master for consistency, you can optimize your presentation for any platform. Next time you create a PowerPoint, don’t forget to choose the right slide size—because the perfect fit makes all the difference!
