AWS Elemental MediaConvert is a professional-grade, file-based video transcoding service that allows broadcasters and streaming platforms to format raw video files for multi-screen delivery. It serves as the modern, high-performance successor to the legacy AWS Elastic Transcoder service.
- Encodes resolutions up to 8K Ultra HD using modern codecs like HEVC (H.265), AV1, and Apple ProRes.
- Features Quality-Defined Variable Bitrate (QVBR) control to reduce file sizes while maintaining peak visual quality.
- Supports processing of high-fidelity color profiles including HDR10, HLG, and Dolby Vision.
- Formats and segments outputs natively into streaming standards like Apple HLS and DASH ISO.
- Eliminates server management, offering a highly available transcoding engine with tiered pay-as-you-go pricing.
Core Concepts
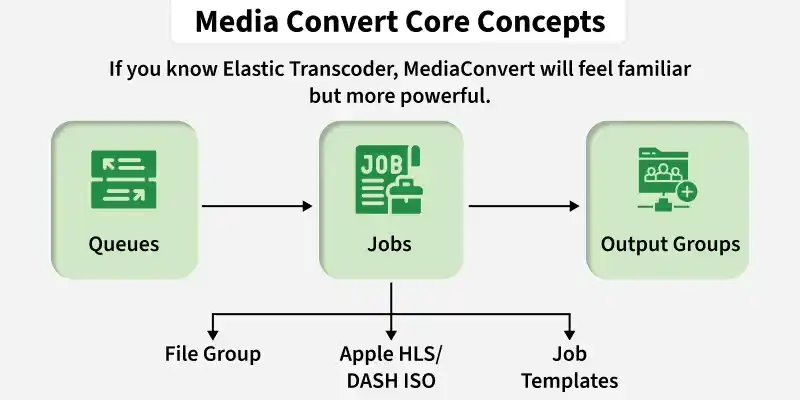
MediaConvert organizes computational resources and transcoding tasks using four primary logical components:
- Queues: Pipelines that govern the concurrency, scheduling, and execution speed of active processing jobs.
- Jobs: The transactional work units that ingest a raw file from S3 and write transcode configurations to defined outputs.
- Output Groups: Formatting targets categorizing deliverables, such as standalone File Groups (MP4) or Segmented Streaming Groups (HLS).
- Job Templates: Reusable, pre-configured encoding presets that standardize audio, video, and caption settings across multiple jobs.
Creating Your First Transcoding Job in MediaConvert
Follow this sequential procedure to configure, submit, and execute an active video transcoding job.
1. Prepare Amazon S3 Buckets
Configure your input and output cloud storage folders:
- Create an input bucket (e.g., my-app-video-input) and upload your raw file (e.g., test.mp4).
- Create a separate output bucket (e.g., my-app-video-output) to store processed deliverables.
2. Create the IAM Delegation Role
Establish S3 security permissions for the MediaConvert service principal:
- Open the IAM Console, select Roles, and click Create Role.
- Select MediaConvert as the trusted service principal.
- Attach the "AmazonS3FullAccess policy" (or apply a scoped read/write policy for production) and save the role.
3. Configure and Submit the Job
Connect your source files to the transcoding engine:
- Open the MediaConvert console, select Create job, and choose your raw S3 file as the input source.
- Add a new File Group under Output Groups, and specify your S3 output bucket as the destination directory.
- Select a standard HD preset, such as "System-Generic_Hd_Mp4_Avc_Aac_16x9_1920x1080p_30Hz_5Mbps".
- Assign the delegated IAM role under Job settings and click Create to begin transcoding.
4. Monitor Progress and Verify Output
Track the transaction state within the MediaConvert dashboard:
- Monitor the job status as it transitions from SUBMITTED, through PROGRESSING, to COMPLETE.
- Navigate directly to your output S3 bucket once complete to download or stream your newly optimized video file.
Elastic Transcoder vs. AWS Elemental MediaConvert
The table below compares the limitations of the legacy transcoder service with the capabilities of MediaConvert:
| Feature | Elastic Transcoder (Legacy) | AWS Elemental MediaConvert (Modern) |
|---|---|---|
| Service Status | Legacy (Deprecated) | Active (AWS Recommended) |
| Max Resolution | 1080p (Full HD) | 8K Ultra HD |
| Codecs | H.264, VP8, VP9 | H.264, H.265 (HEVC), VP9, AV1, Apple ProRes |
| HDR Support | No | Yes (HDR10, HLG, Dolby Vision) |
| Pricing Tiers | Standard Duration-Based Rates | Basic and Professional Duration Tiers |
| Bitrate Control | Standard Constant/Variable Bitrate | QVBR (Quality-Defined Variable Bitrate) |
