Amazon Relational Database Service (RDS) is a distributed managed relational database service offered by AWS. It automates administrative tasks such as hardware provisioning, database setup, patching, and backups, allowing you to focus on your application.
- Enables database hosting without purchasing or managing dedicated physical servers.
- AWS handles patching, backups, and infrastructure maintenance.
- Supports MySQL, PostgreSQL, MariaDB, Oracle, SQL Server, and Amazon Aurora.
- Resize compute and storage resources with minimal downtime.
- Billed only for the resources consumed; no upfront capital investment.
Create a Database on AWS RDS
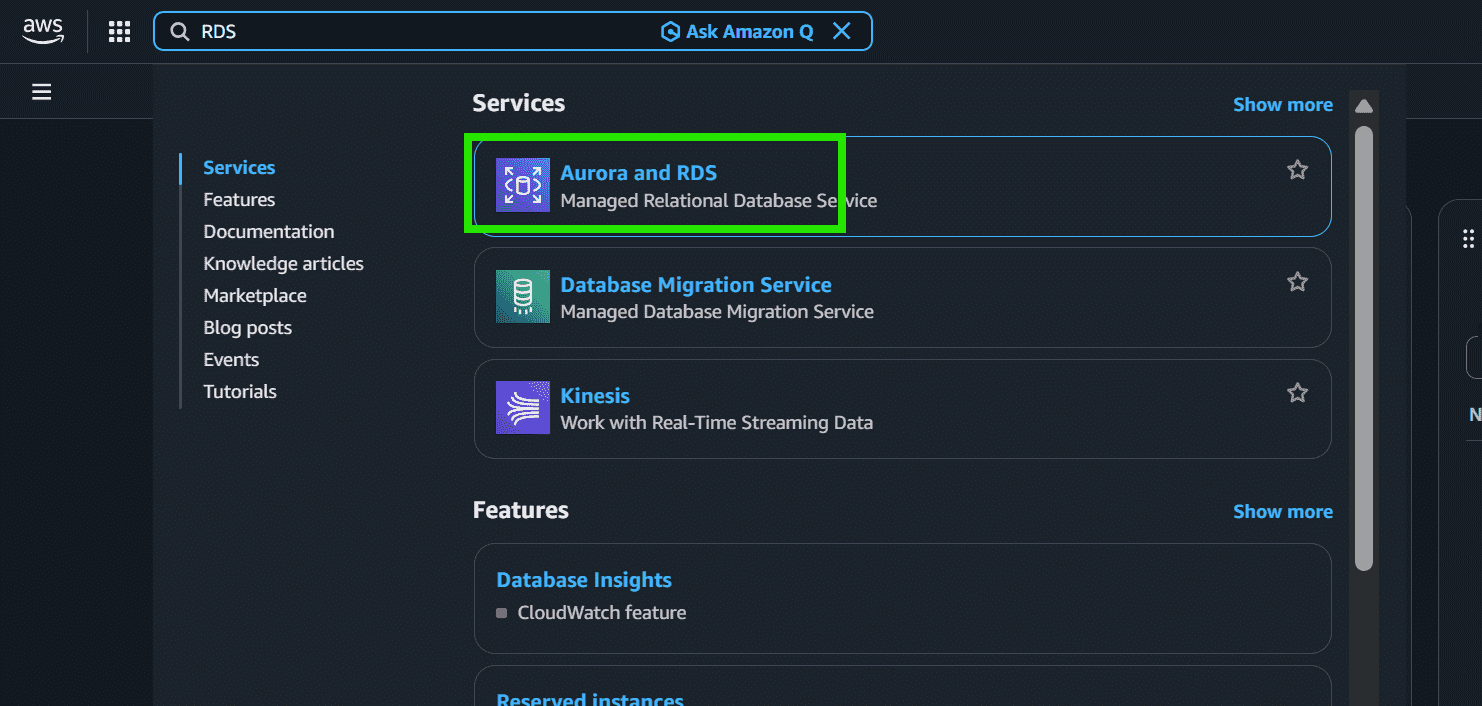
Step 1: Open the Amazon RDS Console
- Log in to your AWS account.
- Open the AWS Management Console.
- Search for RDS in the Services search bar.
- Select Amazon RDS.
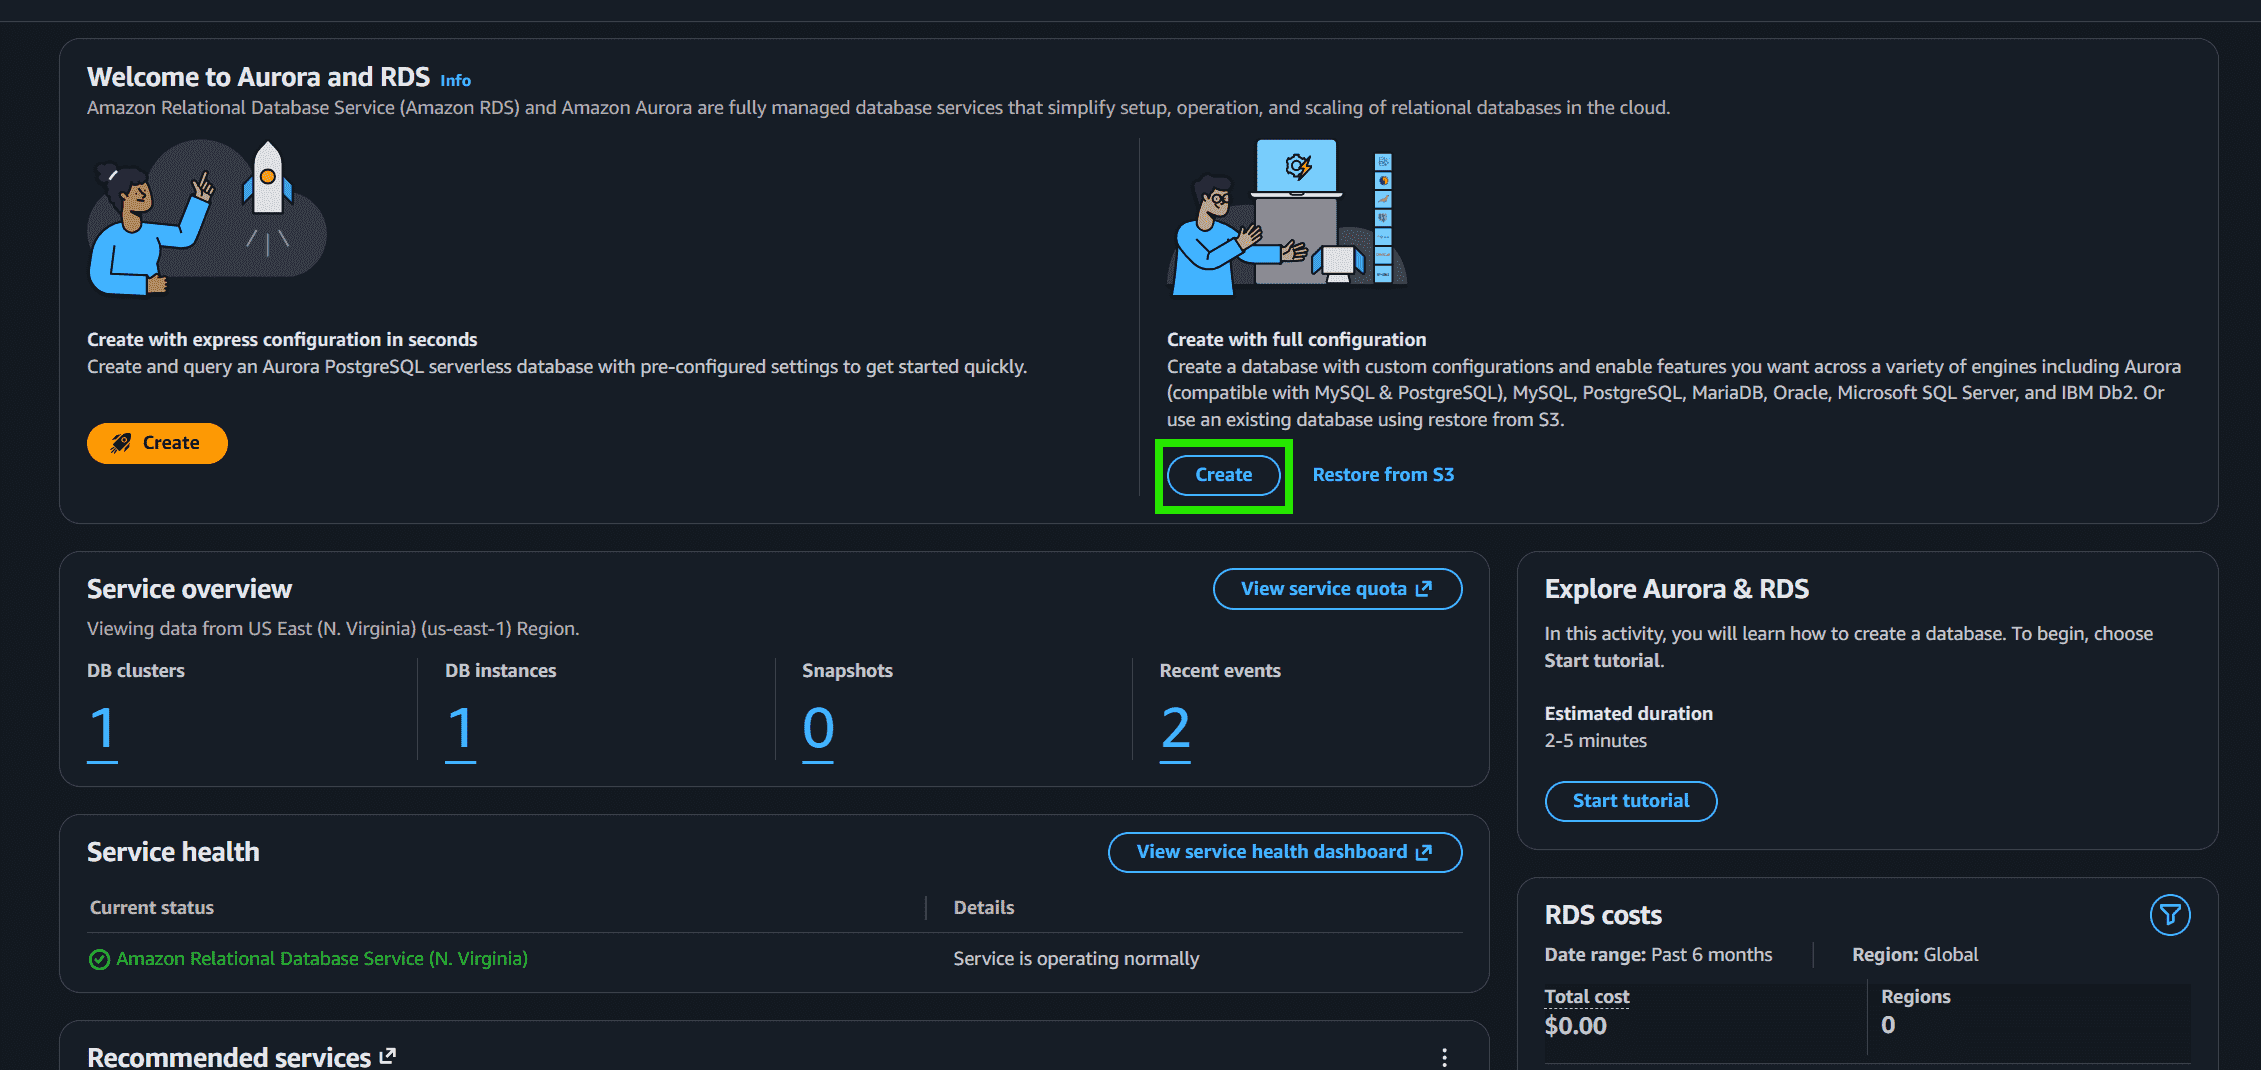
Step 2: Create a Database
- Click the blue Create button under Create with full configuration.
- This opens the database creation wizard.
Step 3: Select Database Engine
- In the Engine options section, choose MySQL as the database engine.

Step 4: Select Database Creation Method
- Choose:
- Easy create for automatic recommended settings, or
- Full configuration for manual setup.
- Select Full configuration for better customization.

Step 5: Choose a Template
- In the Templates section, select:
- Free Tier for learning and practice
- Dev/Test for development environments
- Production for live applications
- Choose Dev/Test Tier to avoid unnecessary charges while testing.

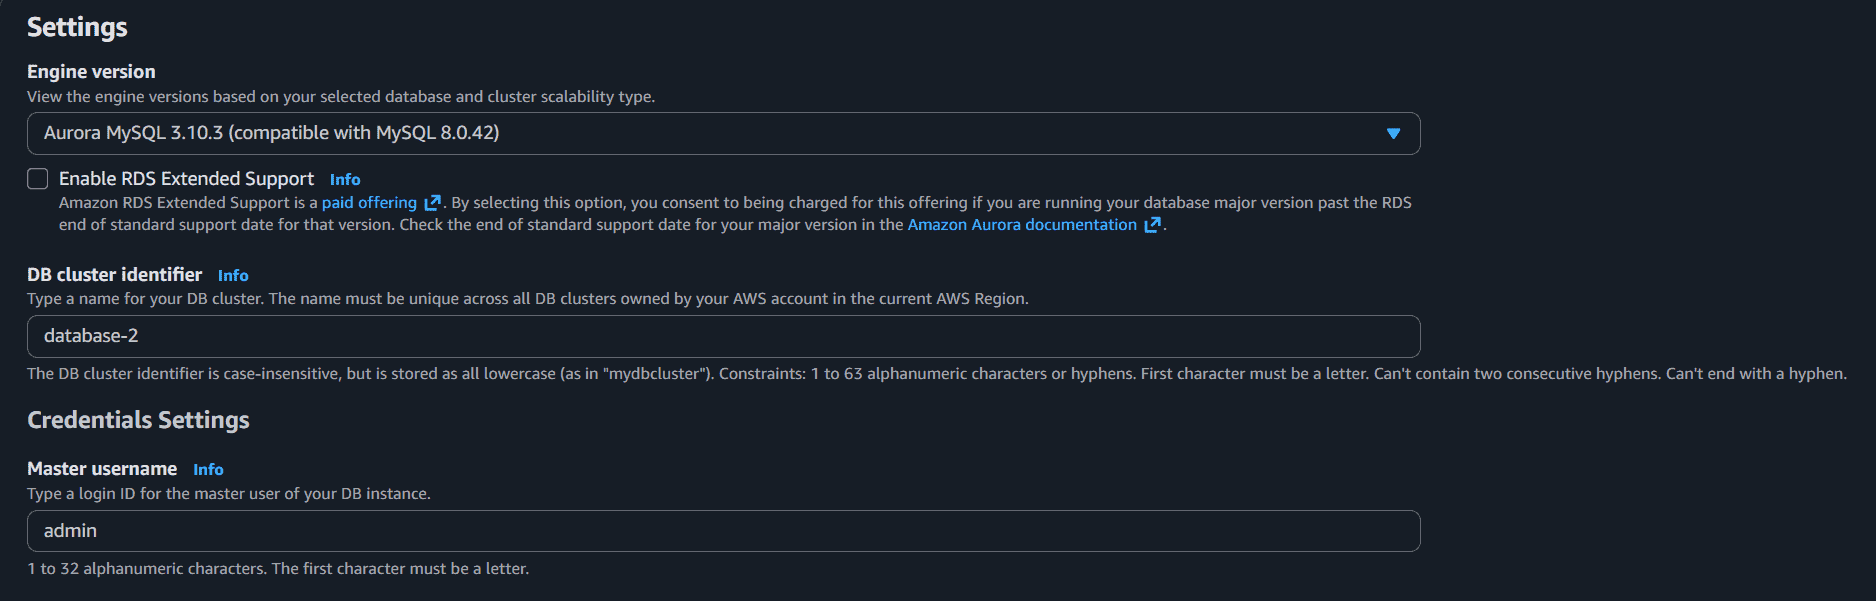
Step 6: Configure Database Settings
- Enter the following details:
- DB Instance Identifier
- Master Username
- Master Password
- Example:
- Identifier:
database-2 - Username:
admin
- Identifier:
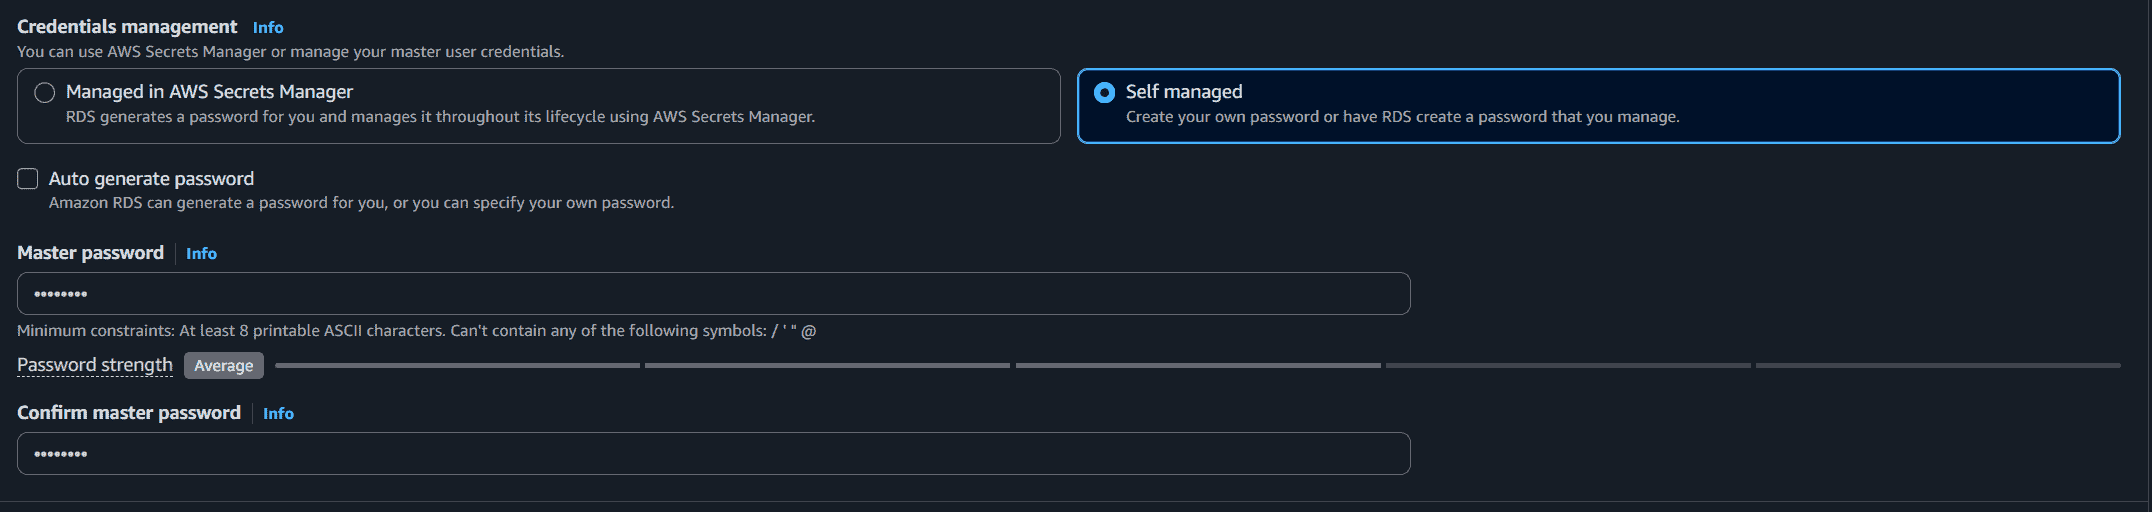
Step 7: Configure Credentials Management
- Select:
- Self managed to create your own password, or
- Managed in AWS Secrets Manager for automatic password management.
- Choose Self managed for simple setup and lower cost.
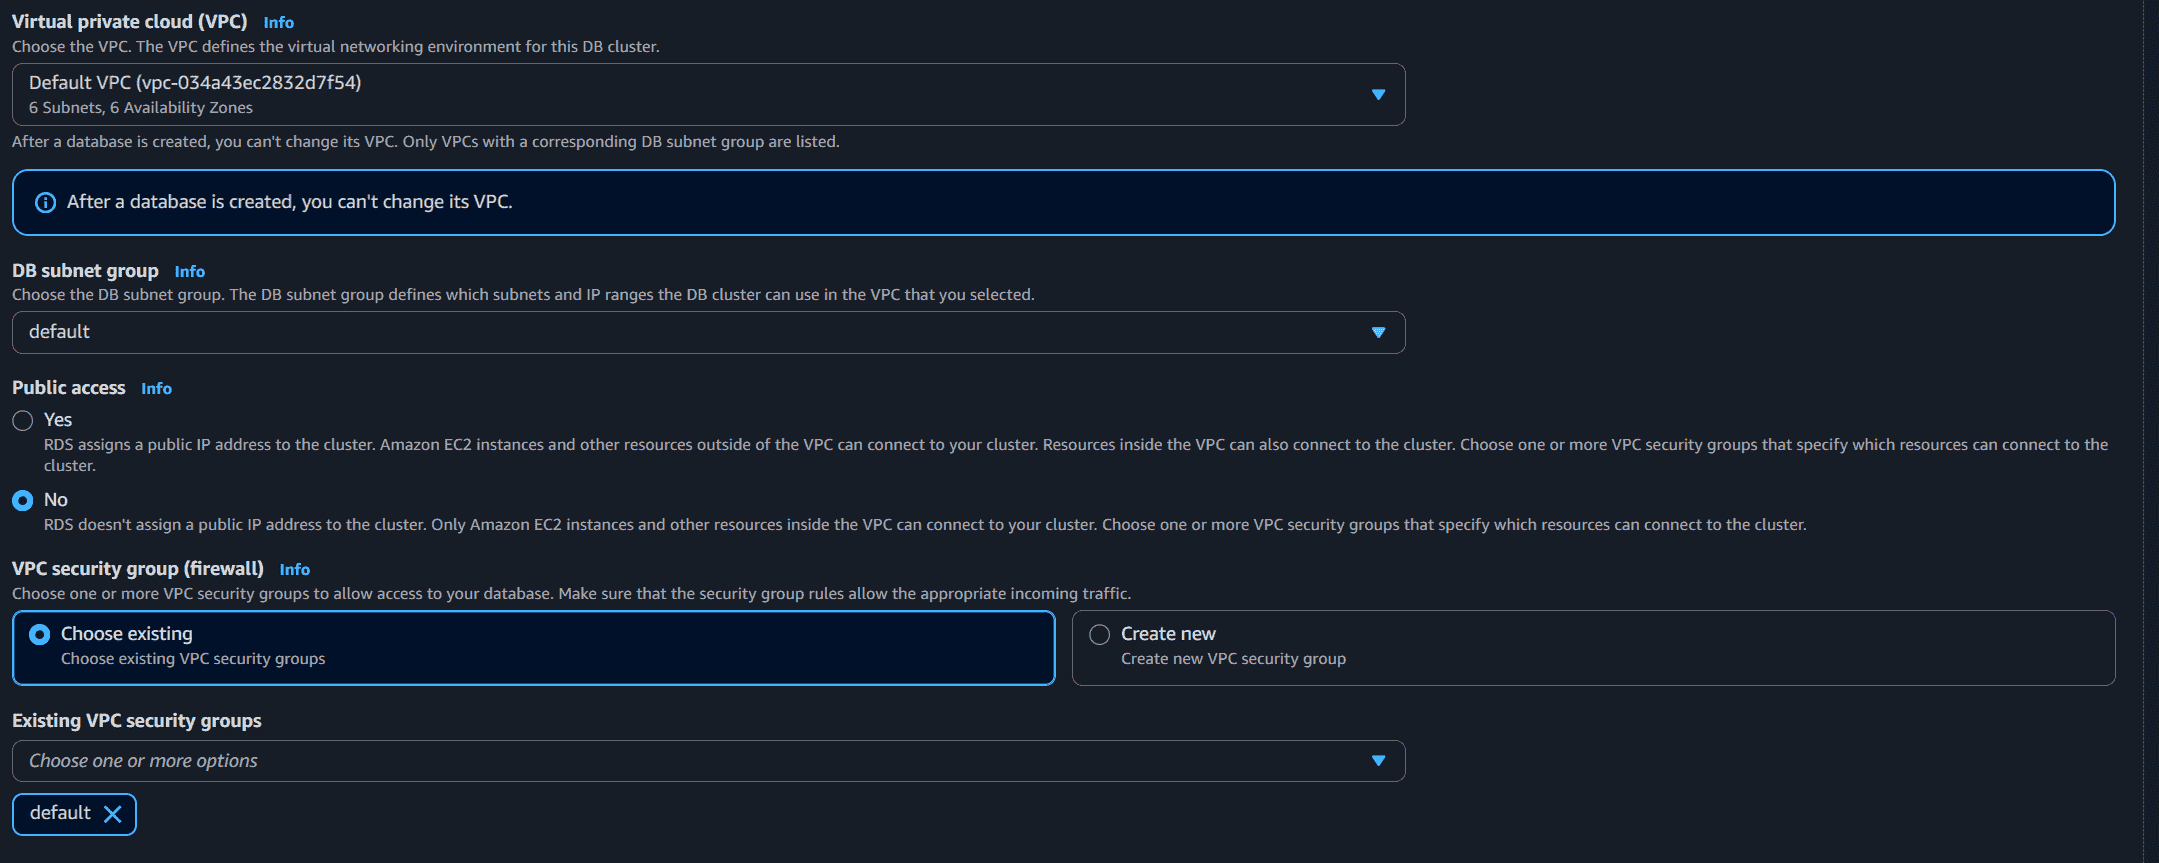
Step 8: Configure Connectivity
- In the Connectivity section:
- Select the default VPC
- Choose the default DB subnet group
- Choose Public Access "No"
- Select or create a VPC Security Group.
Step 9: Create the Database
- Review all configurations carefully.
- Click Create Database at the bottom of the page.
- AWS automatically starts provisioning the MySQL RDS instance.
- The database status will initially show as Creating.
- Wait until the status changes to Available.

Step 10: Connect to the Database
- Open the created database instance.
- Copy the Endpoint (DNS Name) from the Connectivity section.
- Use the endpoint, username, and password to connect through:
- MySQL Workbench
- DBeaver
- Command Line Interface (CLI)
Note: Always stop or delete your RDS instance when not in use. RDS is a paid service billed by the hour for running instances.
Advantages
- Cost Efficient: Eliminates on-premises hardware costs including power, cooling, and administration. Pay only for what you use.
- Reliability: AWS provides redundant infrastructure and automatic failover, making managed databases more resilient than typical on-premises setups.
- Simplified Management: Central administration, vendor-managed infrastructure, and SLA-backed uptime reduce operational burden.
