Resizing an image in Google Docs is a quick and easy way to adjust the visuals in your document to better fit your layout or design needs. Whether you're creating a report, a presentation, or a project, knowing how to resize images ensures that your content looks polished and professional. You can make an image larger or smaller, adjust its proportions, or fine-tune its placement—all directly within Google Docs. In this guide, we’ll walk you through the steps to resize an image in Google Docs, including tips on maintaining image quality and formatting it to match your document’s design. Whether you’re working on desktop or mobile, these methods will help you customize your images effortlessly.
Disclaimer: Always check the image quality after resizing to ensure it remains clear and sharp.

3 Easy Methods to Resize an Image in Google Docs
Resizing an image in Google Docs is crucial for keeping your document clean and visually appealing. You can easily adjust image sizes using a few simple methods. Below is a detailed breakdown of each method:
Method 1: Resize an Image Using Corner Handles (Recommended)
Resizing an image using corner handles ensures the image’s aspect ratio is maintained while adjusting its size. Here's how to do it:
Step 1: Insert an Image into Google Docs
- Open Google Docs and insert an image before resizing.
Step 2: Place Your Cursor
- Place your cursor where you want the image to appear in your document.
Step 3: Click on Insert in the Top Menu
- Click on Insert in the top menu and choose Image from the dropdown options.

Step 4: Select the Image Source
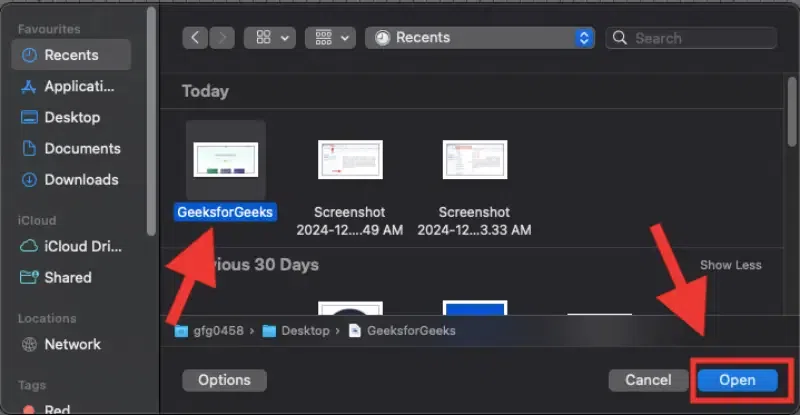
- Choose where you want to upload the image from (e.g., Upload from Computer, Search the Web, or Drive).

Step 5: Choose the Image
- Select the image you want to insert and click Open to insert it into your document.
Step 6: Select the Image to Resize
- Click on the image to select it. A blue border will appear around it, indicating it is ready for resizing.
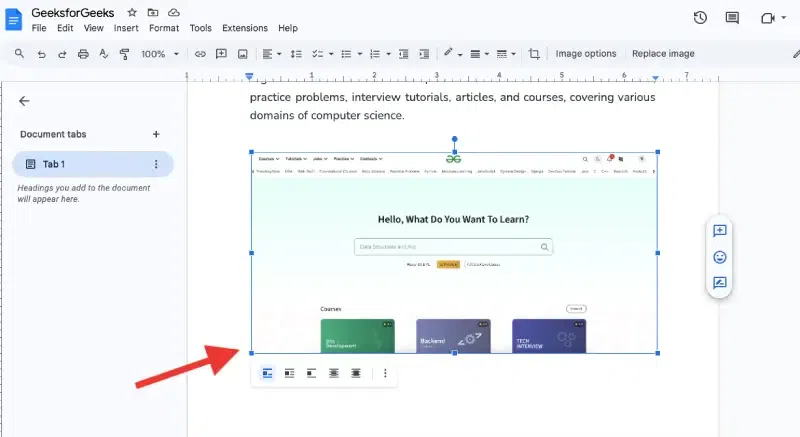
Step 7: Resize Using Corner Handles
- Hover over any of the small blue corner boxes around the image. Click and drag the corner handle inward to shrink the image or outward to enlarge it. Release the mouse button once you have resized the image to your liking.
Method 2: Resize an Image Using Image Options (For Precise Control)
For precise resizing, you can manually adjust the image's size using the Image options menu in Google Docs.
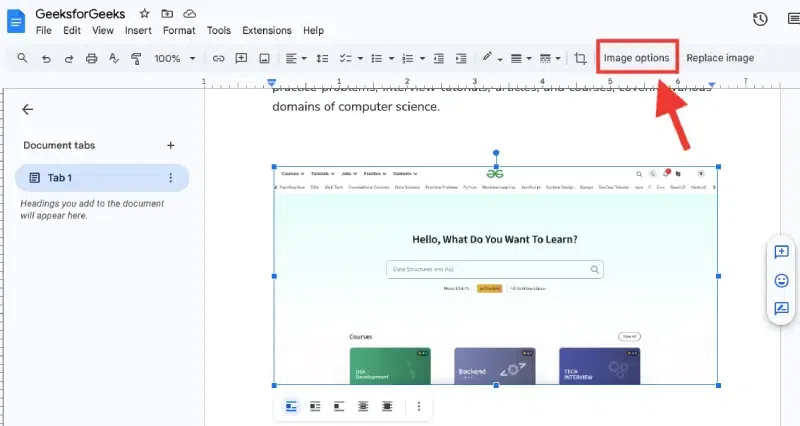
Step 1: Select the Image
- Click on the image to select it.
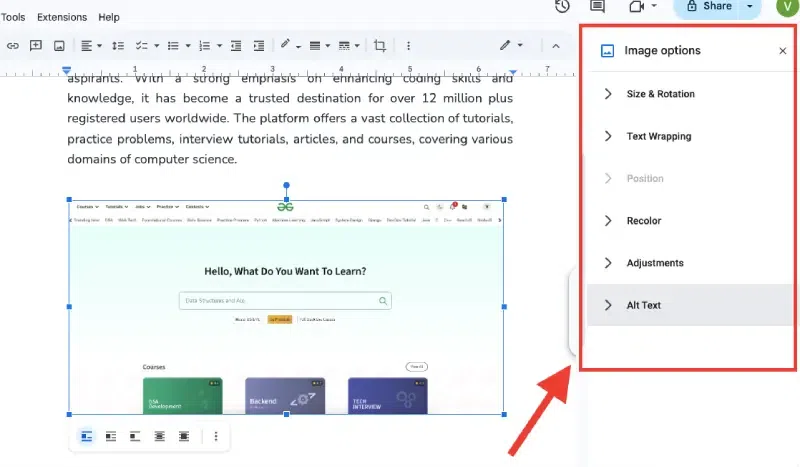
Step 2: Open the Image Options
- Click on Image options in the toolbar at the top of the page.
Step 3: Adjust the Size
- In the Size & Rotation section, manually adjust the Width and Height using the numeric fields for precise control.

Step 4: Confirm Changes
- Press Enter to apply the size adjustments.
Method 3: Resize an Image Using the Right-Click Menu
Google Docs also offers a quick resizing option through the right-click menu.
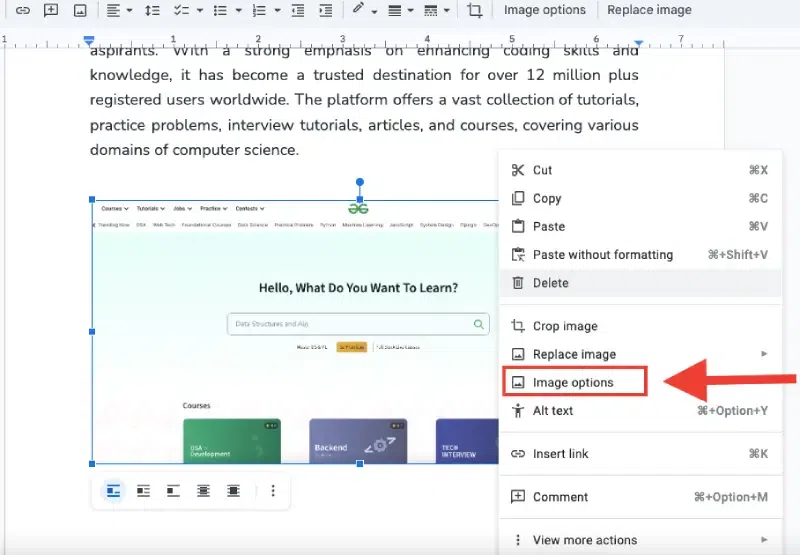
Step 1: Right-Click on the Image
- Right-click on the image you want to resize.
Step 2: Choose the Resize Option
- From the right-click menu, select Image options.
Step 3: Adjust the Image Size
- A dialog box will appear. You can enter the exact dimensions for the image width and height.
Step 4: Apply Changes
- Click OK to resize the image according to the specified dimensions.
Conclusion
Now that you know how to resize an image in Google Docs, you can easily adjust images to enhance the look of your document. Whether you need to make an image smaller to fit the page or enlarge it for better visibility, the process is quick and straightforward. With this simple skill, you can ensure your document looks clean, organized, and professional.
Also Read:
