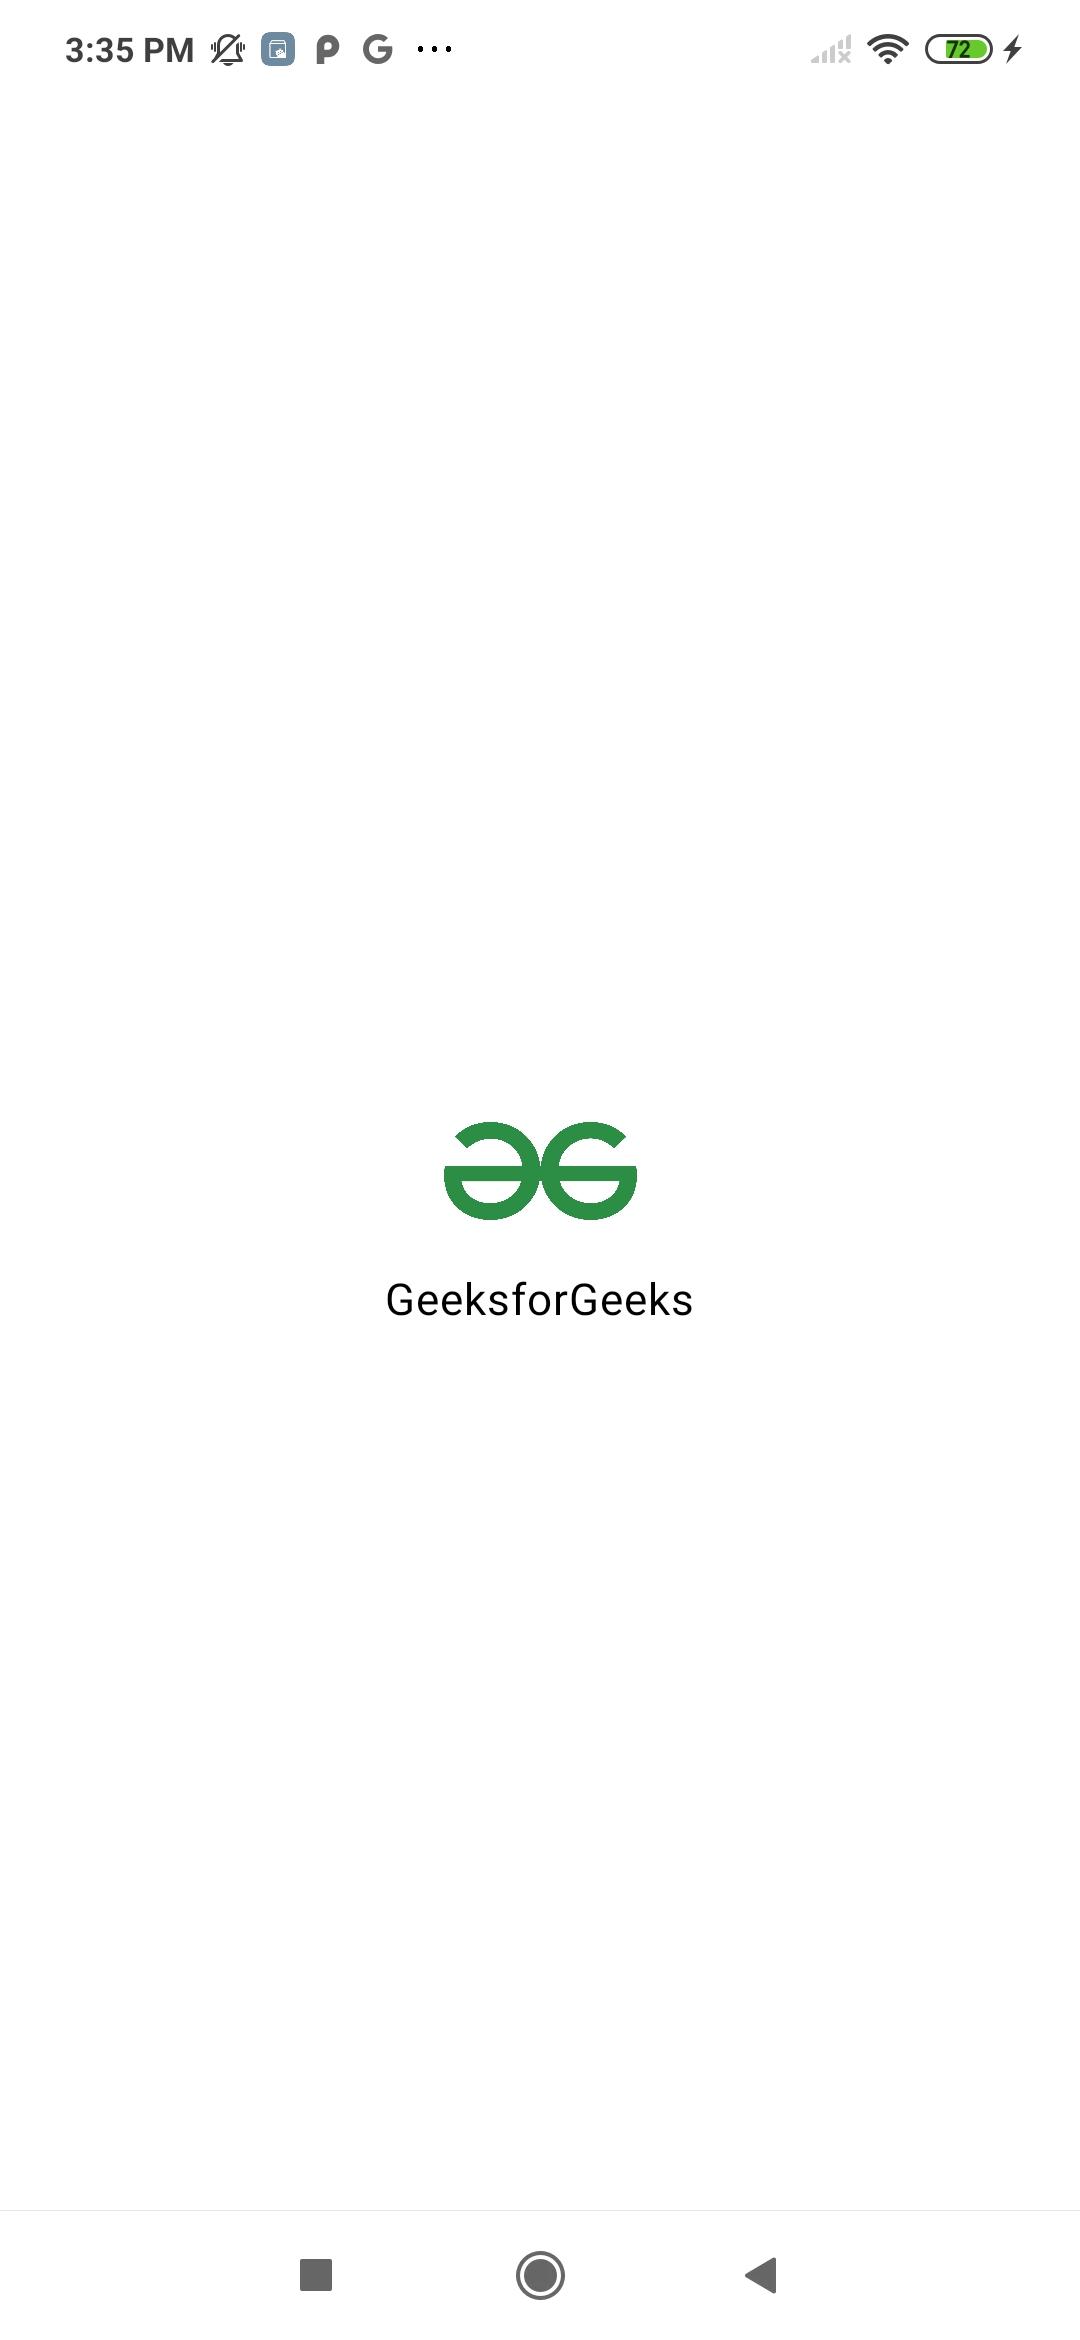
ConstraintLayout is the view system in a ViewGroup to place widgets relative to the position of other widgets on the screen. In jetpack compose, almost every layout can be created using Rows and Columns but if you want to create larger complicated Layouts you can also use Constraint Layout as an alternative to Rows and Columns. In this article, we are gonna create a simple Layout that demonstrates the use of ConstraintLayout in Jetpack Compose. First, grab the image from here or use any Image of your choice. We will be creating this layout. Let's look at the step-by-step guide.
Prerequisites:
- Knowledge of Kotlin.
- Good knowledge of creating layouts in XML Android.
- Knowledge of Jetpack Compose.
Step by Step Implementation
Step 1 : Create a New Project (Or use it in the existing Compose project)
To create a new project in the Android Studio, please refer to How to Create a new Project in Android Studio with Jetpack Compose.
Note: Select Kotlin as the programming language.
Step 2 : Adding Dependencies
Open build.gradle.kts (Module: app) and add the following dependency.
dependencies {
    ...
    implementation ("androidx.constraintlayout:constraintlayout-compose:1.0.1")
}
Step 3 : Working with the Composable
Create a Composable function named ConstraintLayoutExample. In Jetpack Compose we have Composable named ConstraintLayout in which we can put our other composable to position it relative to others.
In Compose we use createRefs() function to create references, similar to Id in View System.
val (image, text) = createRefs()Inside ConstaintLayoutExample function, put a ConstraintLayout Composable and create two references we will need, for the image and text.
Image (
    ...
    modifier = Modifier.constrainAs(image) {
            ...
        }
)
Text (
    ...
    modifier = Modifier.constrainAs(text) {
            ...
    }
)
MainActivity.kt:
package com.geeksforgeeks.demo

import android.os.Bundle
import androidx.activity.*
import androidx.activity.compose.*
import androidx.compose.foundation.*
import androidx.compose.foundation.layout.*
import androidx.compose.material3.*
import androidx.compose.runtime.*
import androidx.compose.ui.*
import androidx.compose.ui.graphics.*
import androidx.compose.ui.res.*
import androidx.compose.ui.tooling.preview.*
import androidx.compose.ui.unit.*
import androidx.constraintlayout.compose.*
import com.geeksforgeeks.demo.ui.theme.DemoTheme

class MainActivity : ComponentActivity() {
    override fun onCreate(savedInstanceState: Bundle?) {
        super.onCreate(savedInstanceState)
        enableEdgeToEdge()
        setContent {
            DemoTheme(dynamicColor = false, darkTheme = false) {
                Surface(color = Color.White) {
                    ConstraintLayoutExample()
                }
            }
        }
    }
}

@Preview
@Composable
fun ConstraintLayoutExample() {
    ConstraintLayout(
        modifier = Modifier
            .fillMaxSize()
    ) {
        val (image, text) = createRefs()
        Image(

            // Setting the image saved in drawable
            painter = painterResource(id = R.drawable.gfg_logo),
            contentDescription = "company logo",
            modifier = Modifier
                .size(70.dp)

                // Pass the reference
                .constrainAs(image) {

                    // top to bottom of topAppBar
                    top.linkTo(parent.top)

                    // start to parent start
                    start.linkTo(parent.start)

                    // end to parent end
                    end.linkTo(parent.end)

                    // bottom to top of bottom
                    bottom.linkTo(parent.bottom)
                })

        Text(
            text = "GeeksforGeeks",
            color = Color.Black,
            modifier = Modifier
                .constrainAs(text) {
                    top.linkTo(image.bottom)

                    // constraint start to parent start
                    start.linkTo(parent.start)

                    // constraint end to parent end
                    end.linkTo(parent.end)
            })
    }
}
Output: