Listview is used to display data in a vertically scrollable manner. We have seen How to create a simple ListView in Android Jetpack Compose. In this article, we will take a look at How to create a Custom ListView for displaying multiple data within it using Jetpack Compose. We will be creating a simple application in which we will be displaying different languages within our listview along with their names. On clicking on any of the languages we will be displaying a Toast message.
Step by Step Implementation
Step 1 : Create a New Project in Android Studio
To create a new project in the Android Studio, please refer to How to Create a new Project in Android Studio with Jetpack Compose.
Note: Select Kotlin as the programming language.
Step 2 : Creating a data class for list item model
Navigate to the app > kotlin+java > {package-name} and right click on the folder, then go to New > Kotlin Class/File and name the file as Model and add the following code.
File Structure of the Application:
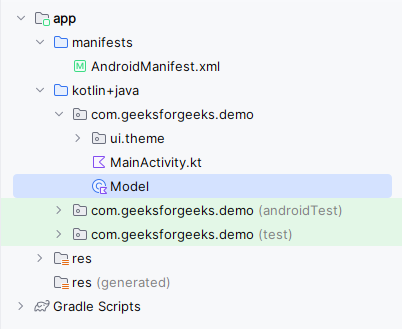
Model.kt:
package com.geeksforgeeks.demo

data class Model(
    val name: String,
    val image: Int
)
Step 3 : Adding images to the drawable folder
Copy all the images which you want to add to your grid view. Navigate to app > res > drawable. Right-click on it and paste all the images into the drawable folder.
Step 4 : Working with the MainActivity.kt file
Go to the MainActivity.kt file and refer to the following code. Below is the code for the MainActivity.kt file. Comments are added inside the code to understand the code in more detail.
MainActivity.kt:
package com.geeksforgeeks.demo

import android.os.Bundle
import android.widget.Toast
import androidx.activity.*
import androidx.activity.compose.*
import androidx.compose.foundation.Image
import androidx.compose.foundation.layout.*
import androidx.compose.foundation.lazy.*
import androidx.compose.material3.*
import androidx.compose.runtime.*
import androidx.compose.ui.*
import androidx.compose.ui.graphics.*
import androidx.compose.ui.platform.LocalContext
import androidx.compose.ui.res.painterResource
import androidx.compose.ui.text.style.TextAlign
import androidx.compose.ui.unit.*
import com.geeksforgeeks.demo.ui.theme.DemoTheme

class MainActivity : ComponentActivity() {
    override fun onCreate(savedInstanceState: Bundle?) {
        super.onCreate(savedInstanceState)
        setContent {
            DemoTheme(dynamicColor = false, darkTheme = false) {
                Surface(
                    modifier = Modifier.fillMaxSize(),
                    color = Color.White
                ) {
                    CustomListView()
                }
            }
        }
    }
}

@Composable
fun CustomListView() {

    val context = LocalContext.current
    val list = ArrayList<Model>()

    list.add(Model("Android", R.drawable.gfg_logo))
    list.add(Model("JavaScript", R.drawable.gfg_logo))
    list.add(Model("Python", R.drawable.gfg_logo))
    list.add(Model("C++", R.drawable.gfg_logo))
    list.add(Model("C#", R.drawable.gfg_logo))
    list.add(Model("Java", R.drawable.gfg_logo))
    list.add(Model("Node Js", R.drawable.gfg_logo))
    list.add(Model("Kotlin", R.drawable.gfg_logo))
    list.add(Model("Web Development", R.drawable.gfg_logo))
    list.add(Model("Machine Learning", R.drawable.gfg_logo))
    list.add(Model("Rust", R.drawable.gfg_logo))
    list.add(Model("Go", R.drawable.gfg_logo))
    list.add(Model("PHP", R.drawable.gfg_logo))
    list.add(Model("Flutter", R.drawable.gfg_logo))

    LazyColumn {
        itemsIndexed(list) { index, _ ->
            Card (
                onClick = {
                    Toast.makeText(context, list[index].name + " selected..", Toast.LENGTH_SHORT).show()
                },
                modifier = Modifier.padding(start = 24.dp, top = 24.dp, end = 24.dp).fillMaxWidth(),
                elevation = CardDefaults.cardElevation(12.dp),
                colors = CardDefaults.cardColors(MaterialTheme.colorScheme.onPrimary)
            ) {
                Row(modifier = Modifier.padding(8.dp).fillMaxWidth()) {
                    Spacer(modifier = Modifier.width(5.dp))
                    Image(
                        painter = painterResource(id = list[index].image),
                        contentDescription = null,
                        modifier = Modifier
                            .height(80.dp)
                            .width(80.dp)
                            .padding(16.dp)
                    )
                    Spacer(modifier = Modifier.width(5.dp))
                    Text(
                        text = list[index].name,
                        modifier = Modifier
                            .padding(start = 16.dp)
                            .align(Alignment.CenterVertically),
                        color = Color.Black, textAlign = TextAlign.Center
                    )
                }
            }
        }
    }
}
