In a video calling application, clients share audio/video streams using PeerJS, while Socket.io handles signaling and real-time communication between clients and the server.
Prerequisite
Setting Up the Environment
This step involves creating and initializing a new Node.js project.
mkdir VideoCallApp
cd VideoCallApp
npm init
Install Required Dependencies
Install the necessary packages for the application:
npm install express ejs socket.io uuid
npm install nodemon --save-dev- Express: Backend framework for Node.js
- EJS: Templating engine for dynamic HTML
- Socket.io: Enables real-time communication
- Nodemon (optional): Nodemon automatically restarts the server when file changes are detected.
- UUID: UUID is used to generate unique identifiers (IDs) for users or sessions.
Create Server File
Create a file named server.js
// Import Express framework
const express = require('express');
// Create an Express application
const app = express();
// Create an HTTP server using Express app
const server = require('http').Server(app);
// Integrate Socket.io with the HTTP server
const io = require('socket.io')(server);
// Set EJS as the templating/view engine
app.set("view engine", "ejs");
// Serve static files from the "public" folder
app.use(express.static("public"));
// Handle GET request for home route
const ROOM_ID = "room1";
app.get("/", (req, res) => {
res.render("index", {
RoomId: ROOM_ID,
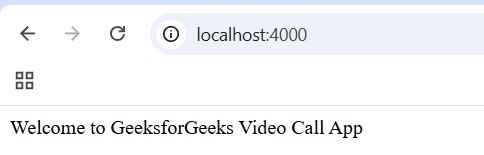
message: "Welcome to GeeksforGeeks Video Call App"
});
});
io.on('connection', (socket) => {
socket.on('newUser', (id) => {
socket.join(ROOM_ID);
socket.to(ROOM_ID).broadcast.emit("userJoined", id);
});
});
// Start the server on port 4000
server.listen(4000, () => {
console.log("Server running on port 4000");
});
Run the server:
node server.jsOpen in browser: http://localhost:4000
Create Project Structure
Create the following folders:

Index.ejs file:
<!DOCTYPE html>
<html lang="en" dir="ltr">
<head>
    <meta charset="utf-8" />
    <title>Video App</title>
    <style media="screen">
        * {
            margin: 0;
        }

        #videoDiv {
            display: grid;
            grid-gap: 10px;
            height: 80%;
            position: relative;
            grid-template-columns: repeat(auto-fill, 300px);
            grid-auto-rows: 300px;
        }

        #footer {
            width: 100%;
            height: 50px;
            background-color: white;
            display: flex;
            justify-content: center;
            flex: 1;
            border-bottom: 1px solid grey;
            margin-top: 10px;
        }

        button {
            height: 30px;
            width: 80px;
            margin-top: 10px;
            text-align: center;
            border-radius: 10px;
            outline: none;
            border: none;
            text-decoration: none;
            background-color: red;
            cursor: pointer;
        }

        video {
            width: 100%;
            height: 100%;
            object-fit: cover;
            border: 2px solid white;
        }
    </style>
    <script type="text/javascript">
        var roomID = "<%= RoomId %>"
    </script>
    <script src="https://unpkg.com/peerjs@1.3.1/dist/peerjs.min.js" defer></script>

    <script src="/socket.io/socket.io.js" defer>
    </script>

    <script src="index.js" charset="utf-8" defer>
    </script>
</head>
<body>
    <h2><%= message %></h2>
    <div id="videoDiv"></div>
</body>
</html>
Client-Side Script:
const socket = io('/');
const peer = new Peer();

peer.on('open' , (id)=>{
    socket.emit("newUser" , id);
});
- Each user gets a unique ID via PeerJS.
- The ID is sent to the server using Socket.io
- The server notifies other connected users.
Server-Side Handling:
io.on('connection', (socket) => {
  socket.on('newUser', (id) => {
    socket.join("room1");
    socket.to("room1").broadcast.emit("userJoined", id);
  });
});
Now, when this event occurs the server will tell all the other clients that the new user is connected.
Implementing Core Functionality
We capture the user's audio and video streams using the WebRTC getUserMedia API, which enables access to media devices and provides a media stream for peer-to-peer transmission.
Step 1: Capture User Media
let myVideoStream;

navigator.mediaDevices.getUserMedia({
  video: true,
  audio: true
}).then((stream) => {

  myVideoStream = stream;

  const myVideo = document.createElement('video');
  myVideo.muted = true;

  addVideo(myVideo, stream);

  // Client 2: Answers the Call
  peer.on('call', call => {

    // Answering the call and sending own stream
    call.answer(myVideoStream);

    const vid = document.createElement('video');

    // Receiving stream from Client 1
    call.on('stream', userStream => {
      addVideo(vid, userStream);
    });

    call.on('error', (err) => {
      alert(err);
    });
  });

  // Client 1: Initiates the Call
  socket.on('userJoined', id => {
    console.log("new user joined");

    // Calling other client and sending our stream
    const call = peer.call(id, myVideoStream);

    const vid = document.createElement('video');

    call.on('error', (err) => {
      alert(err);
    });

    // Receiving stream from other client
    call.on('stream', userStream => {
      addVideo(vid, userStream);
    });
  });

}).catch(err => {
  alert(err.message);
});
Step 2: Send Stream to Other Clients
To share the stream, we use PeerJS call(), which enables peer-to-peer media exchange.
- Client 1 (Caller): Initiates a call using peer.call() and sends its media stream.
- Client 2 (Receiver): Listens for incoming calls using peer.on('call') and responds using call.answer().
Output:
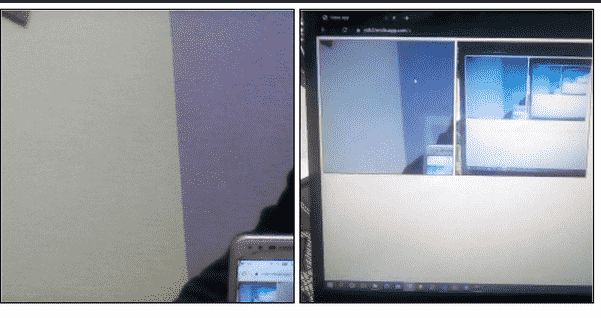
- Both clients successfully exchange audio and video streams.
- Real-time video communication is established.
- Each user can see the other’s video feed.
