The python-pptx library is a powerful tool for creating and editing PowerPoint (.pptx) files programmatically. It lets you manipulate elements like slides, shapes, text boxes, paragraphs and images with full control over text formatting (font size, style, bold, italics), slide layouts and more. This makes it ideal for automating PowerPoint creation or modifications. Key features:
- Create and Edit Slides: Add, remove, and customize slides.
- Shapes and Text: Add various shapes (rectangles, lines, circles, etc.) and text elements like paragraphs, headings and bullet points.
- Text Formatting: Customize font size, color, bold, italic and more.
- Images: Insert images into slides.
- Tables: Create and format tables with custom dimensions and cell styles.
- Graphs: Add charts or graphs (with some limitations).
Limitations: This library works only with .pptx files, meaning it won't work with PowerPoint 2003 or earlier versions, which use the .ppt format. .pptx is the modern XML-based format introduced with PowerPoint 2007.
Installation: To get started, you need to install the python-pptx library. You can easily install it via pip, which is the Python package manager. Open the command prompt (or terminal) and run the following command:
pip install python-pptx
Basic usage examples
Example 1: This example demonstrates how to create a simple presentation with a title slide.
from pptx import Presentation

# Create and add title slide
p = Presentation()
s = p.slides.add_slide(p.slide_layouts[0])
s.shapes.title.text = "Created By python-pptx"
s.placeholders[1].text = "This is an example of a title and subtitle slide."

p.save("output.pptx")
Output

Explanation:
- p = Presentation() creates a new PowerPoint presentation.
- p.slides.add_slide(p.slide_layouts[0]) adds a title slide.
- s.shapes.title.text = "Created By python-pptx" sets the title text.
- s.placeholders[1].text = "This is an example of a title and subtitle slide." sets the subtitle text.
Example 2: We can also add a custom text box to a slide.
from pptx import Presentation
from pptx.util import Inches, Pt

ppt = Presentation()
s = ppt.slides.add_slide(ppt.slide_layouts[6])

# Add textbox
txt_box = s.shapes.add_textbox(Inches(1), Inches(1), Inches(3), Inches(3))
txt_frame = txt_box.text_frame
txt_frame.text = "Text box."

# Add bold, italic, and larger text
p = txt_frame.add_paragraph()
p.text = "Bold and italic."
p.font.bold, p.font.italic = True, True

p = txt_frame.add_paragraph()
p.text = "Larger text."
p.font.size = Pt(40)
Output

Explanation:
- s.shapes.add_textbox(Inches(1), Inches(1), Inches(3), Inches(3)) adds a textbox at the specified position and size.
- txt_frame = txt_box.text_frame accesses the text frame and sets the initial text with txt_frame.text = "This is a text box."
- Adds a paragraph with p = txt_frame.add_paragraph() and applies bold and italic with p.font.bold, p.font.italic = True, True.
- Adds another paragraph and sets the font size to 40 points using p.font.size = Pt(40).
Example 3: We can extract the text content from a PowerPoint presentation and save it to a text file.
from pptx import Presentation

# Extract text to a file
with open("output.txt", "w") as f:
    for s in Presentation("output.pptx").slides:
        for shape in s.shapes:
            if shape.has_text_frame:
                for p in shape.text_frame.paragraphs:
                    f.write(''.join(run.text for run in p.runs))

print("Text extracted.")
Output
Text extracted.
Explanation:
- The presentation is loaded from output.pptx using Presentation("output.pptx").
- It loops through each slide and shape in the presentation, checking for shapes with text frames.
- For each paragraph in a shape’s text frame, the script concatenates the text runs and writes them to the output.txt file.
- The extracted text is saved in output.txt and a confirmation message is printed.
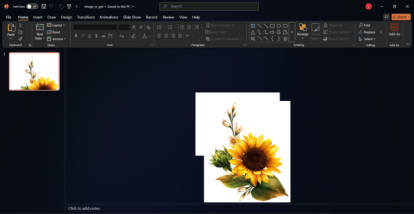
Example 4: In this example, we'll create a new PowerPoint presentation, add a blank slide, insert an image at a specified position.
from pptx import Presentation
from pptx.util import Inches

p = Presentation()
s = p.slides.add_slide(p.slide_layouts[6])
s.shapes.add_picture('path_to_image.png', Inches(1), Inches(1))
p.save('image.pptx')
Output
Explanation:
- A new PowerPoint presentation object is created using p = Presentation().
- A blank slide is added to the presentation using p.slides.add_slide(p.slide_layouts[6]).
- An image is inserted into the slide at position (1 inch from the top and left) with s.shapes.add_picture('path_to_image.png', Inches(1), Inches(1)).
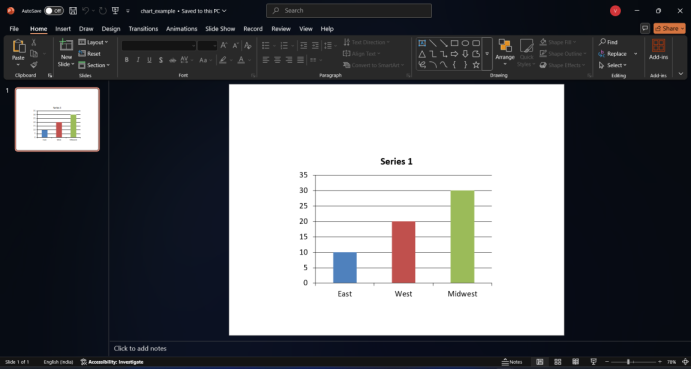
Example 5: In this example, we'll create a new PowerPoint presentation, add a blank slide, insert a clustered column chart with data.
from pptx import Presentation
from pptx.chart.data import CategoryChartData
from pptx.enum.chart import XL_CHART_TYPE
from pptx.util import Inches

p = Presentation()
s = p.slides.add_slide(p.slide_layouts[6])

d = CategoryChartData()
d.categories = ['East', 'West', 'Midwest']
d.add_series('S1', (10, 20, 30))

s.shapes.add_chart(XL_CHART_TYPE.COLUMN_CLUSTERED, Inches(2), Inches(2), Inches(6), Inches(4.5), d)

p.save('chart.pptx')
Output
Explanation:
- p.slides.add_slide(p.slide_layouts[6]) adds a blank slide.
- CategoryChartData() creates chart data with categories ('East', 'West', 'Midwest') and series (10, 20, 30).
- s.shapes.add_chart() adds a clustered column chart with specified position and size.
