To add an arbitrary file to the /public directory in a Gatsby project, you typically need to place the file in a directory that Gatsby recognizes during the build process. This article will guide you through adding arbitrary files, such as documents, or other assets, to the /public directory in a Gatsby project. It will also explain how to access and serve these files to enhance your website's performance and flexibility.
Approach
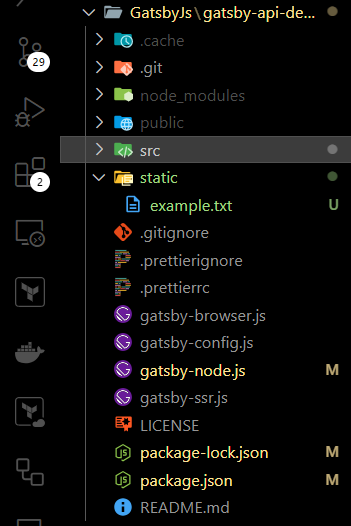
- Create a static folder at the root of your Gatsby project if it doesn't already exist. The static folder is a special directory where files are copied directly to the /public folder during the build process.
- Add your file to the static folder. For example, if you have a file called example.txt, place it there.
Steps to Create Gatsby Project
Step 1: Create a New Gatsby Project
If you don't have a Gatsby project set up yet, you can create a new one:
npx gatsby new my-gatsby-site
cd my-gatsby-site
Step 2: Add Your Arbitrary File
You have a couple of options for where to put your arbitrary file, depending on your needs:
Updated Dependencies
dependencies: {
    "gatsby": "^5.13.7",
    "gatsby-plugin-image": "^3.13.1",
    "gatsby-plugin-manifest": "^5.13.1",
    "gatsby-plugin-sharp": "^5.13.1",
    "gatsby-source-filesystem": "^5.13.1",
    "gatsby-transformer-sharp": "^5.13.1",
    "react": "^18.2.0",
    "react-dom": "^18.2.0"
  }
Step 3: Build the Project
After you've added your file to the static folder, build your project to ensure everything is processed correctly:
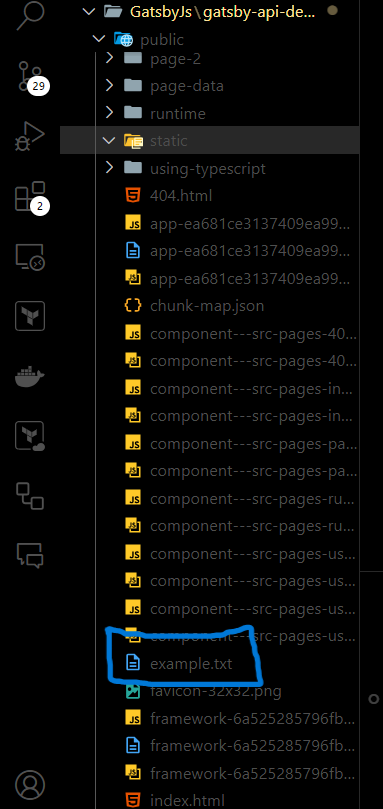
gatsby buildStep 4: Verify the File in /public
After building, your arbitrary file will be in the /public directory. You can check this by navigating to public/example.txt in your browser or via the file system.
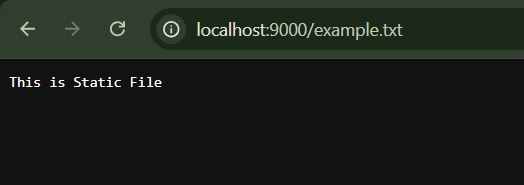
Step 5: Serve the Site Locally
To see your site in action, run:
gatsby serveOutput: You should now be able to access your arbitrary file at http://localhost:9000/example.txt.