Next.js provides built-in font optimization to automatically load and serve fonts efficiently, improving performance and reducing layout shift.
- Uses
next/fontfor automatic font optimization. - Supports Google Fonts and local fonts.
- Eliminates the need for external CSS imports.
- Automatically subsets fonts to reduce size.
- Enhances Core Web Vitals and page speed.
- Ensures consistent typography across pages.
Setting up the Next.js project
Step 1: Now it's time to get started with coding. We will be using npm and TypeScript for this demo but it is completely optional. Use the following command to initialise a new Next.js project in you desired directory
#npm
npx create-next-app@latest

#yarn
yarn create next-app

#pnpm
pnpm create next-app
Step 2: Start the dev server with the following command
#npm
npm run start

#yarn
yarn dev

#pnpm
pnpm dev
Dependencies:
"dependencies": {
    "react": "^18",
    "react-dom": "^18",
    "next": "14.2.5"
  },
  "devDependencies": {
    "typescript": "^5",
    "@types/node": "^20",
    "@types/react": "^18",
    "@types/react-dom": "^18",fallback
    "postcss": "^8",
    "tailwindcss": "^3.4.1",
    "eslint": "^8",
    "eslint-config-next": "14.2.5"
  }
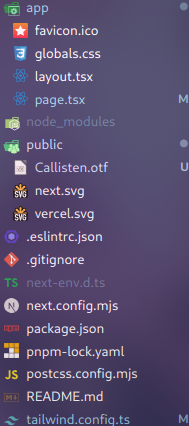
Project structure:
Adding fonts
Now apply it to HTML element using one of the following ways:
Using className:
<body className={crimsonPro.className}>{children}</body>Using style:
<body className={crimsonPro.style}>{children}</body>Google Fonts
When using with
Step 1: Go to Google Fonts and select a font that you like. Next.js team suggests using variable fonts as it improves performance of the website.
Step 2: Import the desired font from
import { Crimson_Pro } from "next/font/google"Step 3: Create a new instance of the font, which you have chosen. Important options include:
As previously discussed, variable fonts do need to specify weight and style.
import { Crimson_Pro } from "next/font/google"

const crimsonPro = Crimson_Pro({
  subsets: ["latin"],
  fallback: ["system-ui", "sans-serif"],
  display: "swap",
})
For non-variable fonts, you will need to specify weight:
import { Roboto } from "next/font/google";


const roboto = Roboto({
  weight: ["400", "500", "700"],
  style: "normal",
  subsets: ["latin"],
  fallback: ["system-ui", "sans-serif"],
  display: "swap",
});
Step 4: Now apply it to HTML element using the one of the methods we have discussed before.
Finally your root layout.tsx file should look like this:
import type { Metadata } from "next";
import "./globals.css";
import { Crimson_Pro } from "next/font/google"

const crimsonPro = Crimson_Pro({
	subsets: ["latin"],
	fallback: ["system-ui", "sans-serif"],
	display: "swap"
})


export const metadata: Metadata = {
	title: "Create Next App",
	description: "Generated by create next app",
};

export default function RootLayout({
	children,
}: Readonly<{
	children: React.ReactNode;
}>) {
	return (
		<html lang="en">
			<body className={crimsonPro.className}>{children}</body>
		</html>
	);
}
Output:

Local Fonts
First you have to download a custom font if one is not present in your computer. You can go to any reputable website to download it. For the below example I am using Callisten font from dafont website. You can use the link below to get the same:
https://www.dafont.com/callisten.font- After downloading the font. Copy the file and paste it in the public folder of your Next.js project.
In Linux, you can following command to move the file to desired location.
mv path/to/file path/to/project/publicNow you can follow the below steps.
Step 1: Import
import localFont from 'next/font/local'Step 2: Create a instance. Remember to specify src of the font file. Here is a example:
const callisten = localFont({
  src: '../public/Callisten.otf',
  weight: "400",
  fallback: ["system-ui", "sans-serif"],
  display: "swap"
})
Step 3: Now add the font to HTML elements.
Here is a example of using of local fonts in root layout.tsx.
//app/page.tsx
import type { Metadata } from "next";
import localFont from 'next/font/local'
import "./globals.css";

const callisten = localFont({
  src: '../public/Callisten.otf',
  weight: "400",
  fallback: ["system-ui", "sans-serif"],
  display: "swap"
})


export const metadata: Metadata = {
  title: "Create Next App",
  description: "Generated by create next app",
};

export default function RootLayout({
  children,
}: Readonly<{
  children: React.ReactNode;
}>) {
  return (
    <html lang="en">
      <body className={callisten.className}>{children}</body>
    </html>
  );
}
Output:

With Tailwind CSS
Step 1: First define the CSS variable in instance.
import localFont from "next/font/local";
import { Roboto } from "next/font/google";

const roboto = Roboto({
  variable: "--font-roboto",
  weight: ["400", "500", "700"],
  style: "normal",
  subsets: ["latin"],
  fallback: ["system-ui", "sans-serif"],
  display: "swap",
});

const callisten = localFont({
  src: "../public/Callisten.otf",
  variable: "--font-callisten",
  weight: "400",
  fallback: ["system-ui", "sans-serif"],
  display: "swap",
});
Step 2: Add font to HTML element using following:
<body className={`${roboto.variable} ${callisten.variable}`}>
        {children}
</body>
Step 3: Modify Tailwind config file
import type { Config } from "tailwindcss";

const config: Config = {
  content: [
    "./pages/**/*.{js,ts,jsx,tsx,mdx}",
    "./components/**/*.{js,ts,jsx,tsx,mdx}",
    "./app/**/*.{js,ts,jsx,tsx,mdx}",
  ],
  theme: {
    extend: {
      backgroundImage: {
        "gradient-radial": "radial-gradient(var(--tw-gradient-stops))",
        "gradient-conic":
          "conic-gradient(from 180deg at 50% 50%, var(--tw-gradient-stops))",
      },
      fontFamily: {
        callisten: ["var(--font-callisten)", "system-ui", "sans-serif"],
        roboto: ["var(--font-roboto)", "system-ui", "sans-serif"],
      }
    },
  },
  plugins: [],
};
export default config;
Step 4: Use font-callisten and font-roboto in Tailwind classes. To see this in effect, modify the root page.tsx file.
//app/page.tsx
export default function Page() {
	return (
		<main className="w-full h-screen flex flex-col justify-center items-center">
			<p className="font-roboto text-3xl">A Silent Voice</p>
			<p className=" font-callisten text-3xl">One of best manga of all time</p>
		</main>
	);
}
Output:

