Microsoft Outlook offers a powerful way to enhance productivity through add-ins, which integrate third-party tools and services directly into your inbox. Whether you need task management, email tracking, CRM integration, or calendar enhancements, enabling Outlook add-ins allows you to streamline your workflow without switching between different applications.
In this guide, we will walk you through how to enable add-ins in Outlook, covering both Outlook Desktop App and New Outlook (Web and Desktop versions). Follow these easy steps to unlock the full potential of Outlook and improve your email experience!

How to Enable Add-ins in Outlook Desktop App
Follow the below steps to enable add-ins in Outlook desktop app:
Step 1: Open Outlook
Launch the Outlook Desktop App on your computer and sign in if prompted.
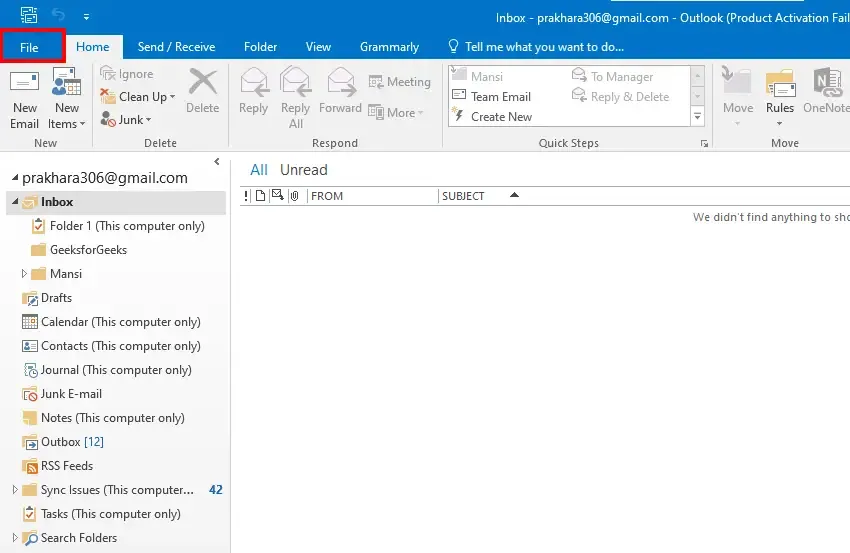
Step 2: Go to the File Tab
Click on the File tab in the ribbon at the top left corner of the screen.
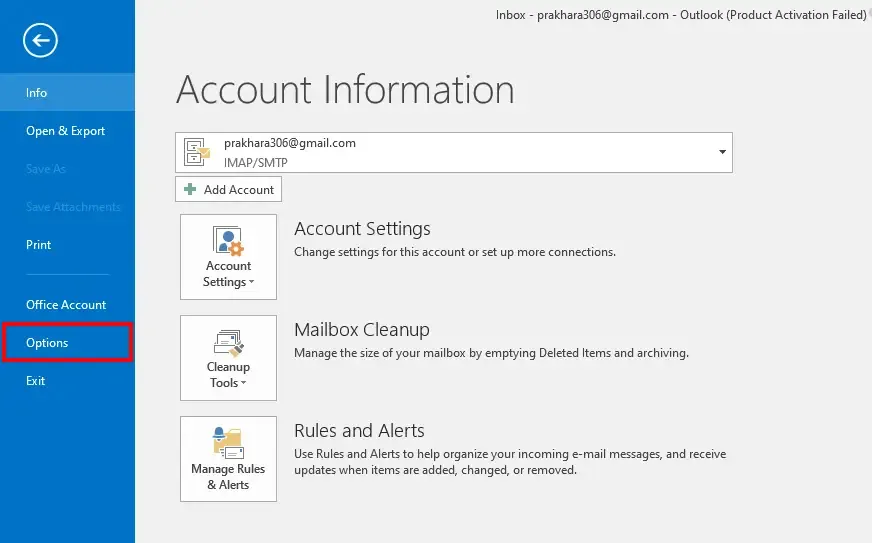
Step 3: Open Options
Select Options from the menu to open the Outlook Options window.
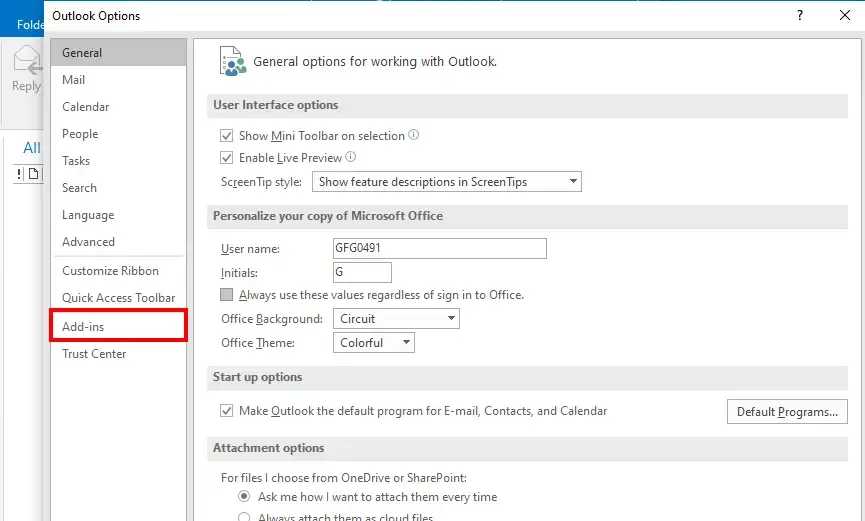
Step 4: Navigate to Add-ins
In the Outlook Options window, click on Add-ins from the list on the left-hand side.
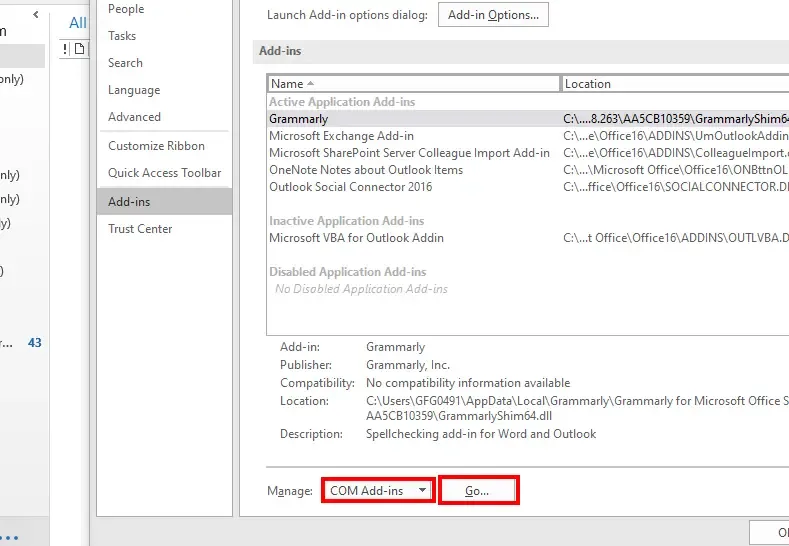
Step 5: Manage Add-ins
At the bottom of the Add-ins section, select COM Add-ins from the "Manage" dropdown menu, then click Go....
Step 6: Enable Add-ins
In the COM Add-ins window, check the box next to the add-ins you want to enable and click OK.

Step 7: Restart Outlook (if needed)
Restart Outlook if prompted for the changes to take effect.
How to Enable Add Ins in New Outlook
To enable add ins in New Outlook, follow the steps given below:
Step 1: Open the New Outlook
Launch the New Outlook on your computer or web browser.
Step 2: Access Settings
Click on the gear icon (Settings) in the top-right corner and select "View all Outlook settings".
Step 3: Go to Manage Add-ins
In the settings menu, select General and then click on Manage add-ins.
Step 4: Add Add-ins
- In the Manage Add-ins page, you’ll see the list of available add-ins.
- You can search for a specific add-in in the Find an App search bar or browse the available add-ins.
Step 5: Enable the Add-in
Click on the Add button next to the add-in you wish to enable.
Step 6: Use the Add-in
Once added, the add-in will be active and available for use in your Outlook interface.
Conclusion
Enabling add-ins in Outlook is a great way to customize and enhance your email experience, making it more efficient and tailored to your needs. Whether you're using Outlook Desktop or Outlook Web, the process is straightforward and provides access to a variety of tools that can boost productivity. From project management apps to calendar integrations, add-ins allow you to bring your favorite services directly into your inbox. By following the simple steps in this guide, you can easily enable and start using these powerful features to improve your daily email tasks.
