







Agentforce Vibes is the “new kid on the block” when it comes to powerful new tools that are accessible to everyone. It is an extremely powerful AI coding assistant that is readily available for existing paid Salesforce customers and can be easily installed in your code editor.
That’s great and all, but what’s the best way to get started? This is exactly what you’ll learn by reading this article. Get your typing fingers ready, it’s time to vibe!
Vibes in Browser vs. Vibes in VS Code
There are two primary methods to access Agentforce Vibes. Firstly, there’s the web version, which can be accessed when clicking on the Setup icon in applicable paid Salesforce orgs, just above Developer Console.

I’m not going to use this version for this example, but I wanted to mention that it was there and has almost identical capabilities to Agentforce Vibes IDE. The web method allows you to access a simple, web-based IDE with Agentforce Vibes readily available to you.
The web-based IDE is actually the next generation of the Code Builder tool that we’ve seen Salesforce promote in the past.

What we’re going to do today (primarily so we’re covering all bases) is use the Agentforce Vibes IDE version of the tool. This will need to be downloaded and installed on your computer so that it can be used alongside a code editor (we’ll be using Visual Studio Code, although some others are supported as well through Open VSX).

Personally, I prefer the IDE version as it lets me use my own Visual Studio Code, which is already set up just the way I like it.
Also, it makes more sense to me if I’m planning to use this across many different orgs that the tool I’m using should sit separately. At the end of the day, they’re almost identical, and it’s down to personal preference.
I will admit, I like the fact that the No-Software company offers the ability to do this in the browser rather than requiring a download. It’s true to the core of what Salesforce has always believed in, and feels like a new Developer Console in some respects.
Installing Vibes for VS Code
The first thing you’ll want to do is check that you’ve got your prerequisites ready – that includes having Visual Studio Code installed on your local machine, and that you’ve got the Salesforce CLI installed too. It’s a good idea to make sure these are up to date as well. Agentforce Vibes currently requires a minimum VS Code version of 1.101.x.
Checking Prerequisites
To check that Visual Studio Code is installed should be quite obvious – if you can see the icon and click on it on your local machine, and the application opens, then it’s good to go! If not, then you’ll need to go through the steps in the ‘Installing Visual Studio Code’ section below.
Checking that the Salesforce CLI is ready to go requires opening your Terminal and running the following command:
sf --version
If it’s installed, you should get a response similar to this, which tells you that it is installed and shows you the version that you have:
@salesforce/cli/2.117.7 darwin-arm64 node-v22.21.1
If you get something similar, but more like the below, then it is telling you that there is a later version available that you should probably update to:
›   Warning: @salesforce/cli update available from 2.67.7 to 2.116.6.
@salesforce/cli/2.67.7 darwin-arm64 node-v22.10.0
To update to the latest version, use this command:
sf update
Then, run sf --version again to make sure it has installed correctly – you should get a similar message to the first one, without the update warning line.
Otherwise, if you get something like the below, then you either don’t have the Salesforce CLI installed, or you have an issue with your installation:
sf: command not found
Refer to the ‘Installing Salesforce CLI’ section to fix this.
Installing Visual Studio Code and CLI
If one of the above tools is not installed or needs to be reinstalled, you can follow the detailed steps that I’ve laid out in my Salesforce CLI and Visual Studio Code for Admins article.
Installing Agentforce Vibes IDE
The final step! You’re almost there.
Once again, Salesforce has provided a great installation guide that you can refer to, but I’ve simplified it below.
Just like Agentforce Vibes Web is embedded into your Salesforce org, Agentforce Vibes IDE is embedded directly into the existing Salesforce Extension Pack and Salesforce Extension Pack (Expanded) bundles. To install one of these extensions, head to the extensions tab in Visual Studio Code and search for “Salesforce Extension Pack”.
You’ll see the popular extension available with the Salesforce developer name underneath it. Click the Install button, and it will install all the extensions within the bundle, including Agentforce Vibes.

Congratulations, you’re ready to get started with Agentforce Vibes IDE!
Creating a New Project
This isn’t the article to learn step-by-step through creating a new Salesforce Project in Visual Studio Code; for that, you can follow the directions here. When you’re ready to create your project, let’s continue.
For the project name, we’ll input helloAgentforceWorld. Great work! You’ve created your first Salesforce project. If you see a panel on the right that says “Build with Agent”, you can close this – this isn’t Agentforce Vibes, and it’s best to escape it now to avoid confusion in the future. It’s another AI-coding friend called GitHub Copilot, which doesn’t have the same Salesforce context that Vibes does.
Take a moment to look through your project files in the left-hand side panel. The arrows let you expand and collapse sections at will. If you expand the force-app folder, you’ll see that it automatically opens the main and default subfolders. This is because there is only one folder in each of those, and VS Code is avoiding adding clutter to your screen.
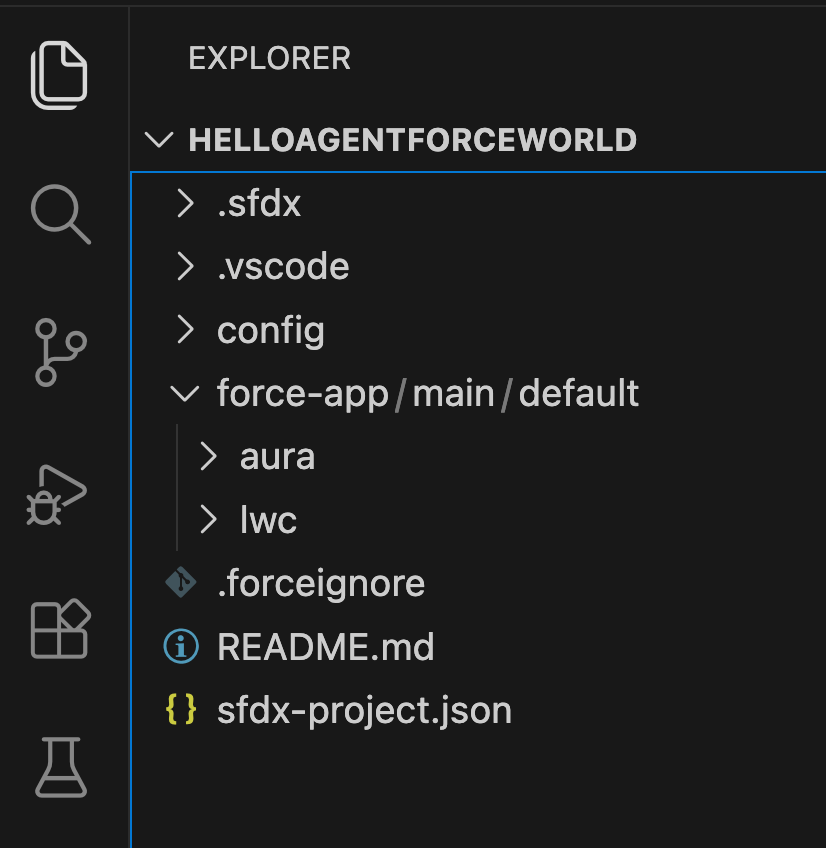
The force-app folder is where all of your metadata will be organized. You’ll see just what that looks like in a second.
Authenticating Your Org
Before you can work with Agentforce Vibes IDE, you’ll want to connect to an org that you want to be building for. As always, this shouldn’t be a Production environment first. If you have a sandbox, developer org, or even a scratch org, this is what you should be using to develop.
This is because Vibes actually runs within your Salesforce org, so without telling it which one you want to run it in, it technically can’t run at all.
Let’s continue on to the next step, which is using an authenticated org to activate Agentforce Vibes.

Click Connect to a Salesforce Org, which will open the command palette, and then click on your org, which should be at the bottom of that list.
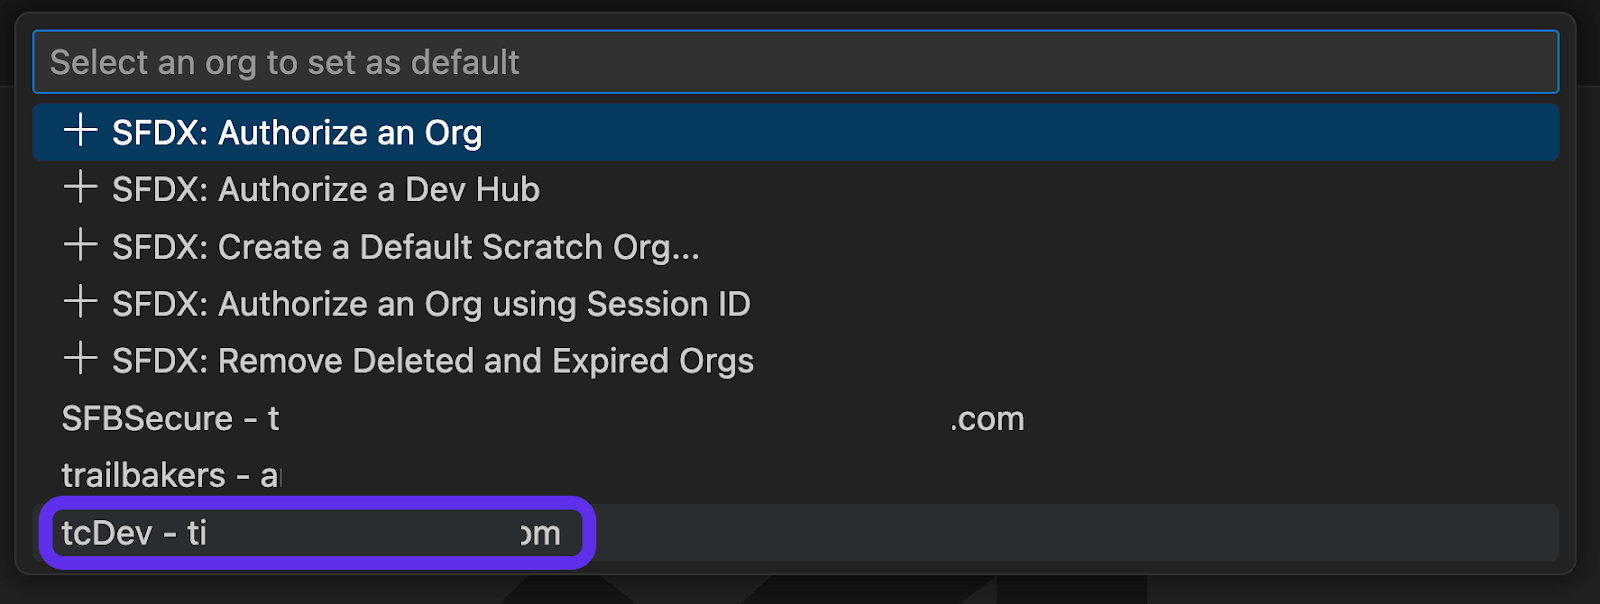
A few seconds later, you’ll see Agentforce Vibes spring to life. That’s it! You’re all connected and ready to power ahead with Agentforce Vibes IDE. Now, let’s start making magic!
Getting Started With Agentforce Vibes
Let’s start small with some building. To get the hang of Agentforce Vibes, we’re going to start in Plan Mode. We’ll keep things simple for now and simply add a custom field to the Case object. The custom field will be a checkbox field called “Supporting Legacy Product”.
We’re going to use Plan Mode to see if Agentforce Vibes picks up what we want to do by prompting it accordingly. It should suggest the simple Custom Field. Even though we’re in Plan Mode, I still have been careful to ensure Auto-approve Edit is unchecked (I don’t want Agentforce Vibes making changes to anything yet, despite the fact that there is no metadata in the project).
Note: Agentforce Vibes uses probabilistic models to determine your intent and take action accordingly. It will not respond the exact same way to the exact same prompt every time. Your experience may be different; please keep this in mind.
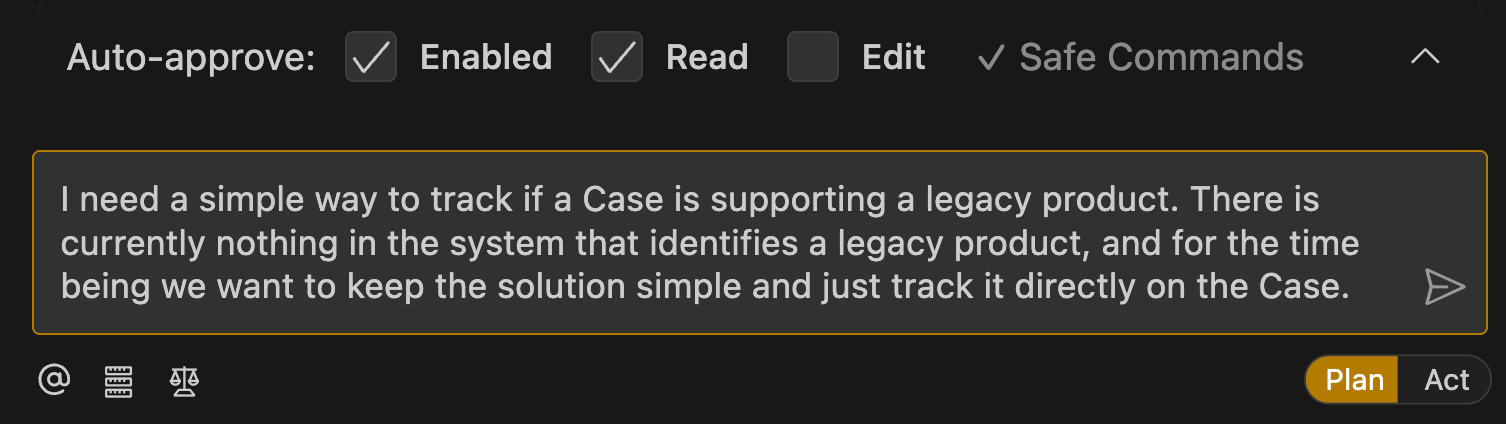
You can copy and paste the same prompt here:
I need a simple way to track if a Case is supporting a legacy product. There is currently nothing in the system that identifies a legacy product, and for the time being, we want to keep the solution simple and just track it directly on the Case.
In my case, I submitted the prompt, and it landed on the idea that a checkbox should do the job – just as we were expecting.
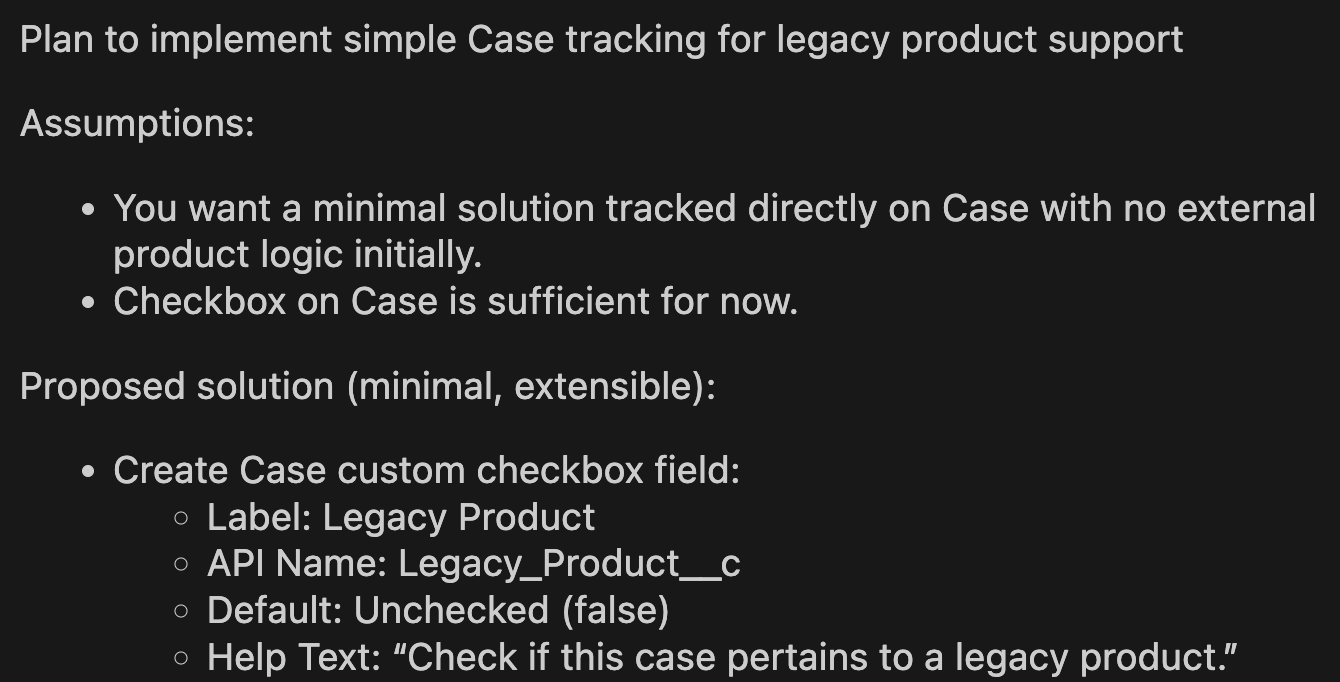
It went a bit further and suggested some logical next steps, such as adding it to page layouts, assigning permissions to relevant users, etc.
All very good points, but for the time being, we just want it to create the field itself. For this, we’re going to switch to Act Mode and ask it to continue with just the field:
Please go ahead with the field, but don’t change any Page Layouts, Permissions, etc. I want you to start simple and just create the field.
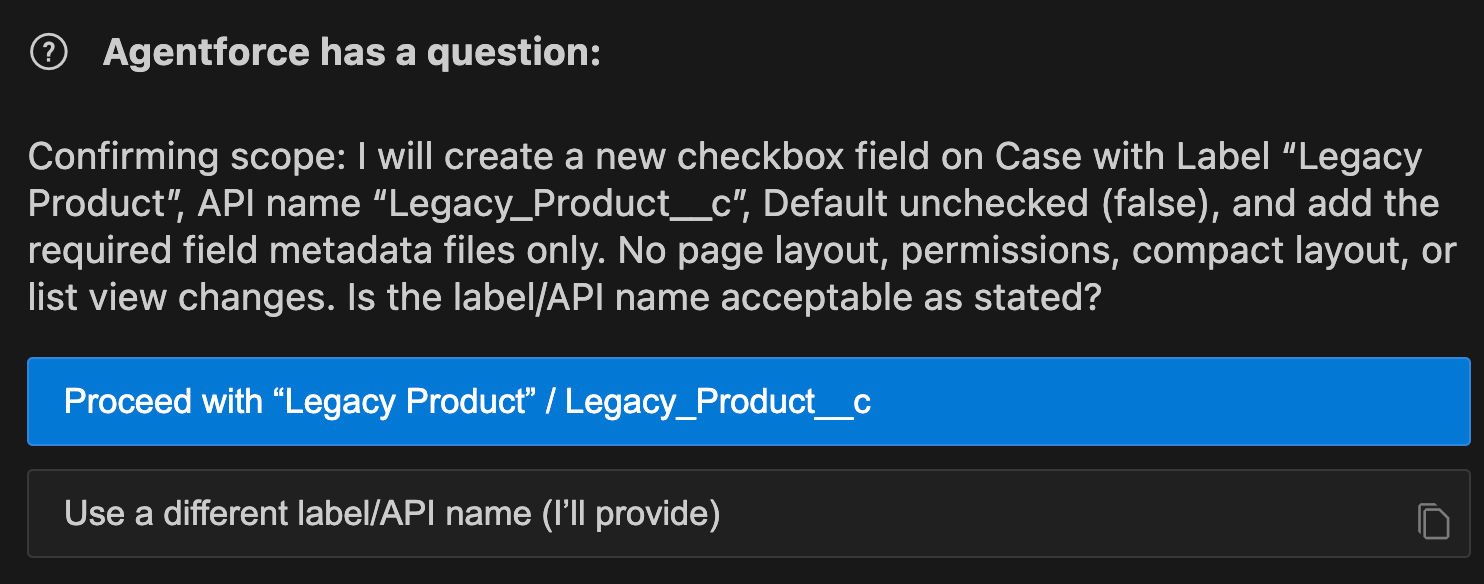
Once it is confident in your intent, Agentforce Vibes will then begin to take action on your prompt. For me, I didn’t think I was clear enough about what the field should be called (I was happy with what it suggested), so it asked me to confirm.
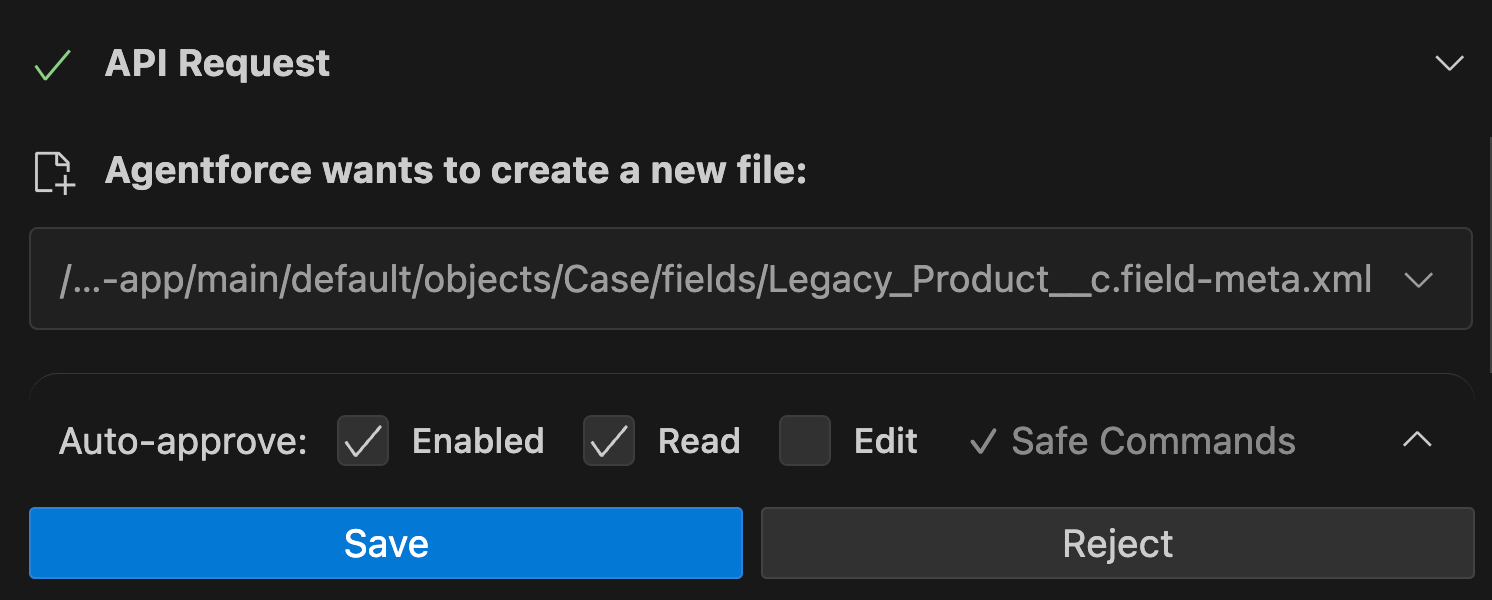
After writing the custom field metadata file, it prompted me to save the file. This is because I had switched off auto-approved edits, which I mentioned earlier.
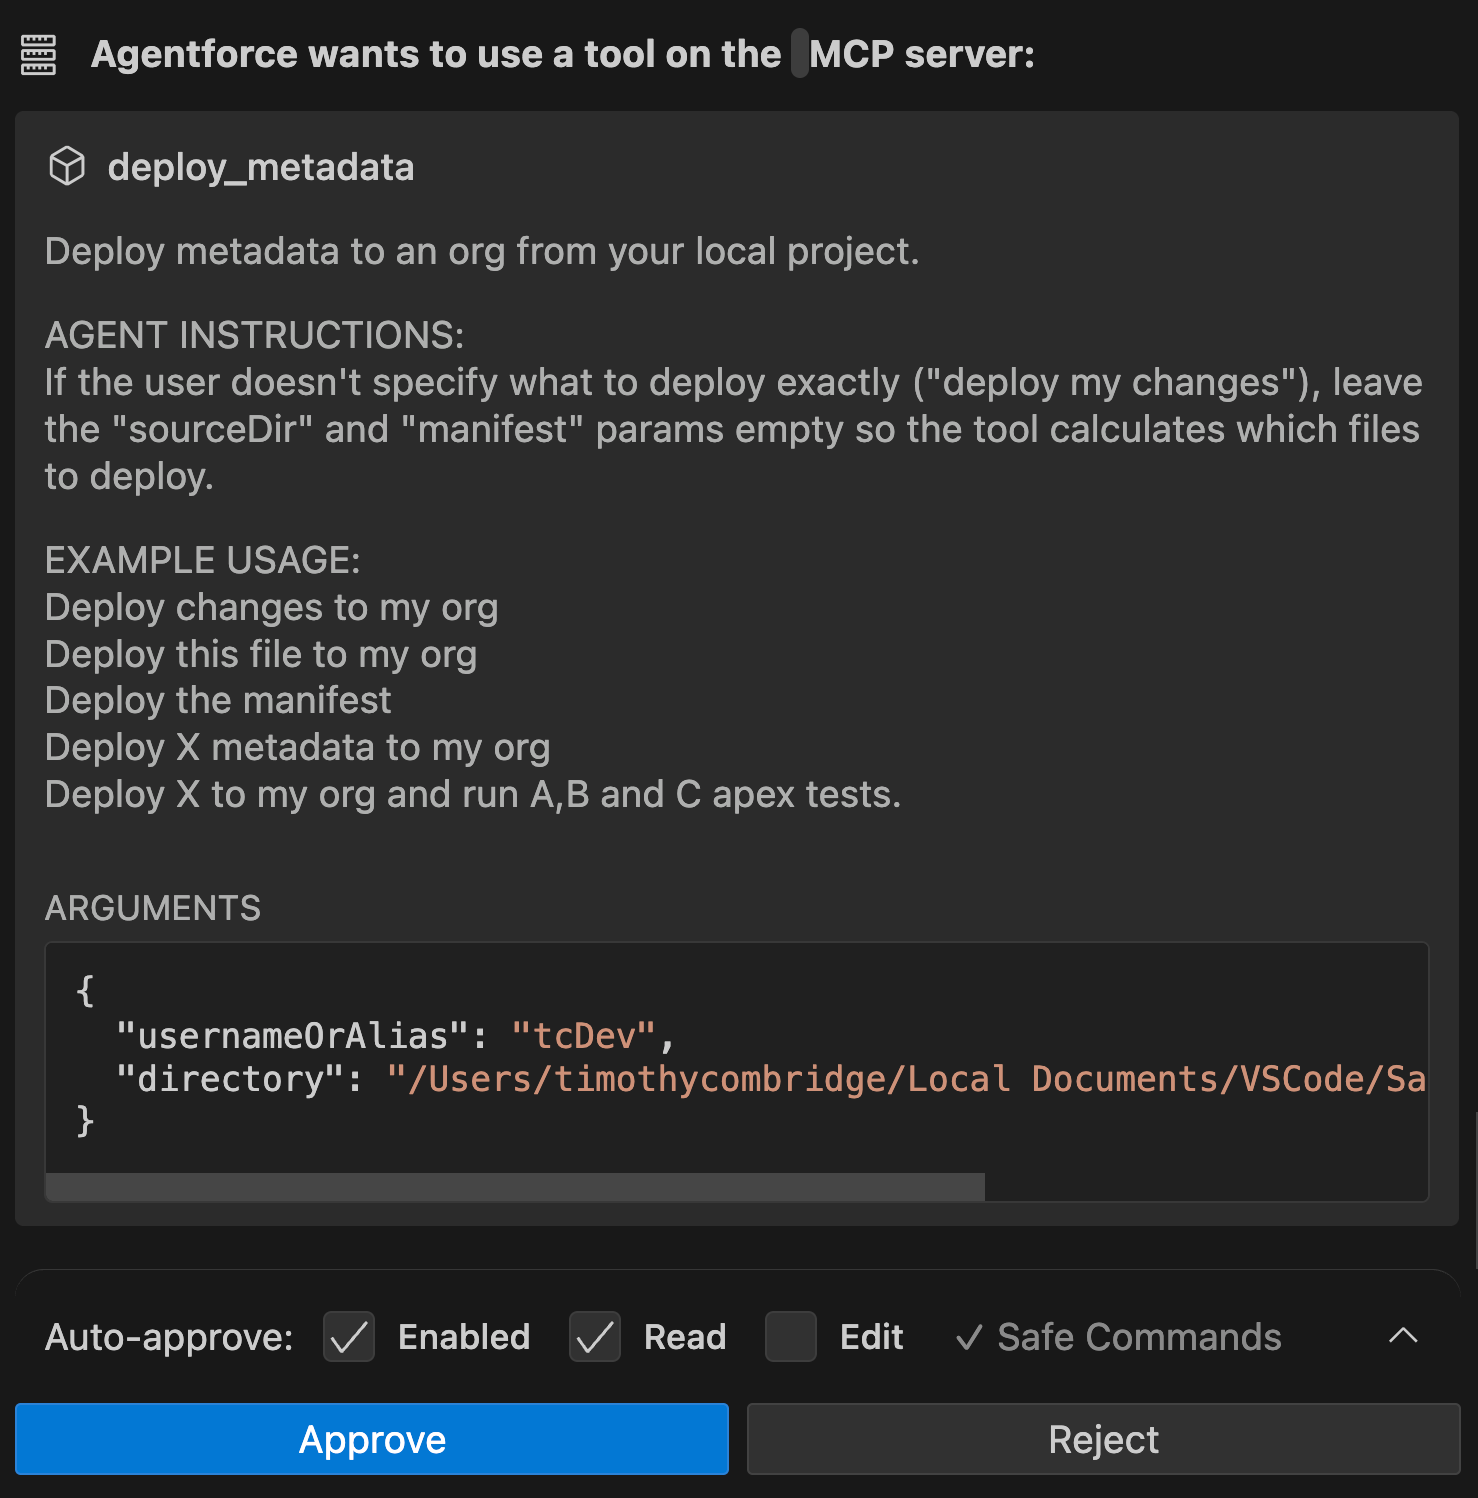
Now that it has built the field, Agentforce Vibes wants to use an MCP action to deploy the metadata to the default org.
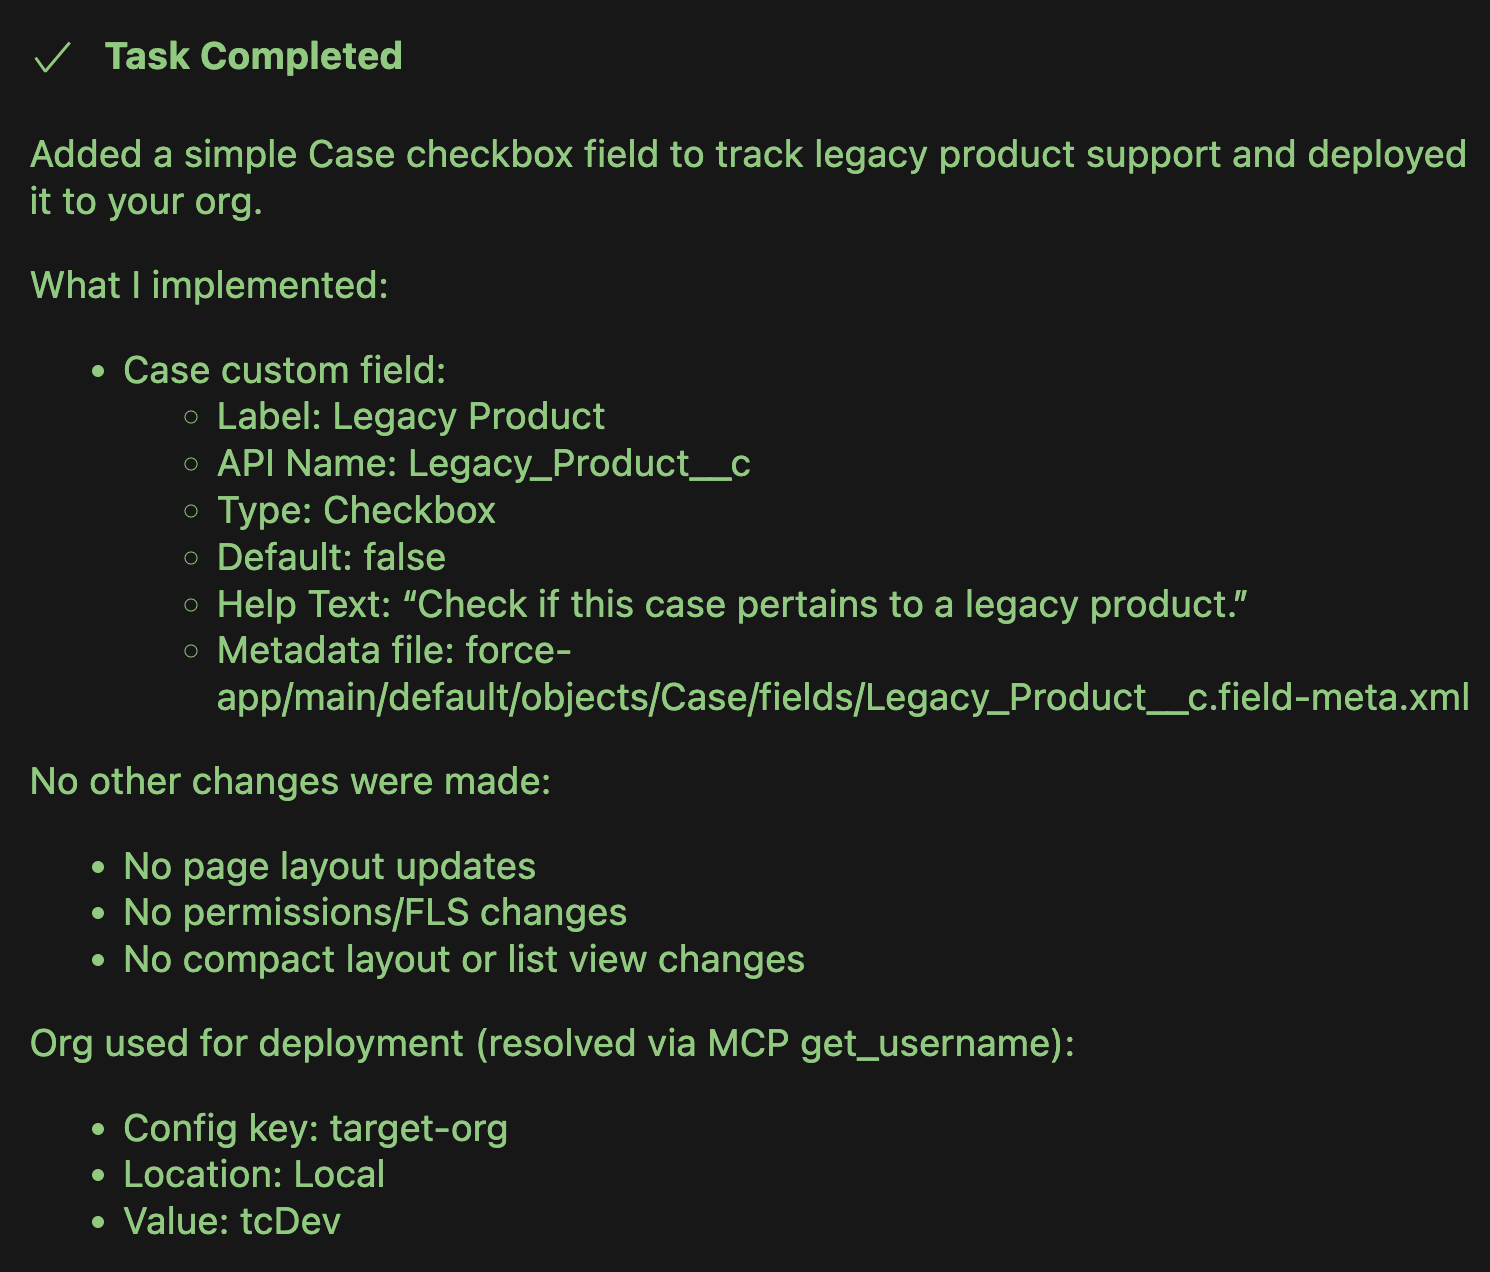
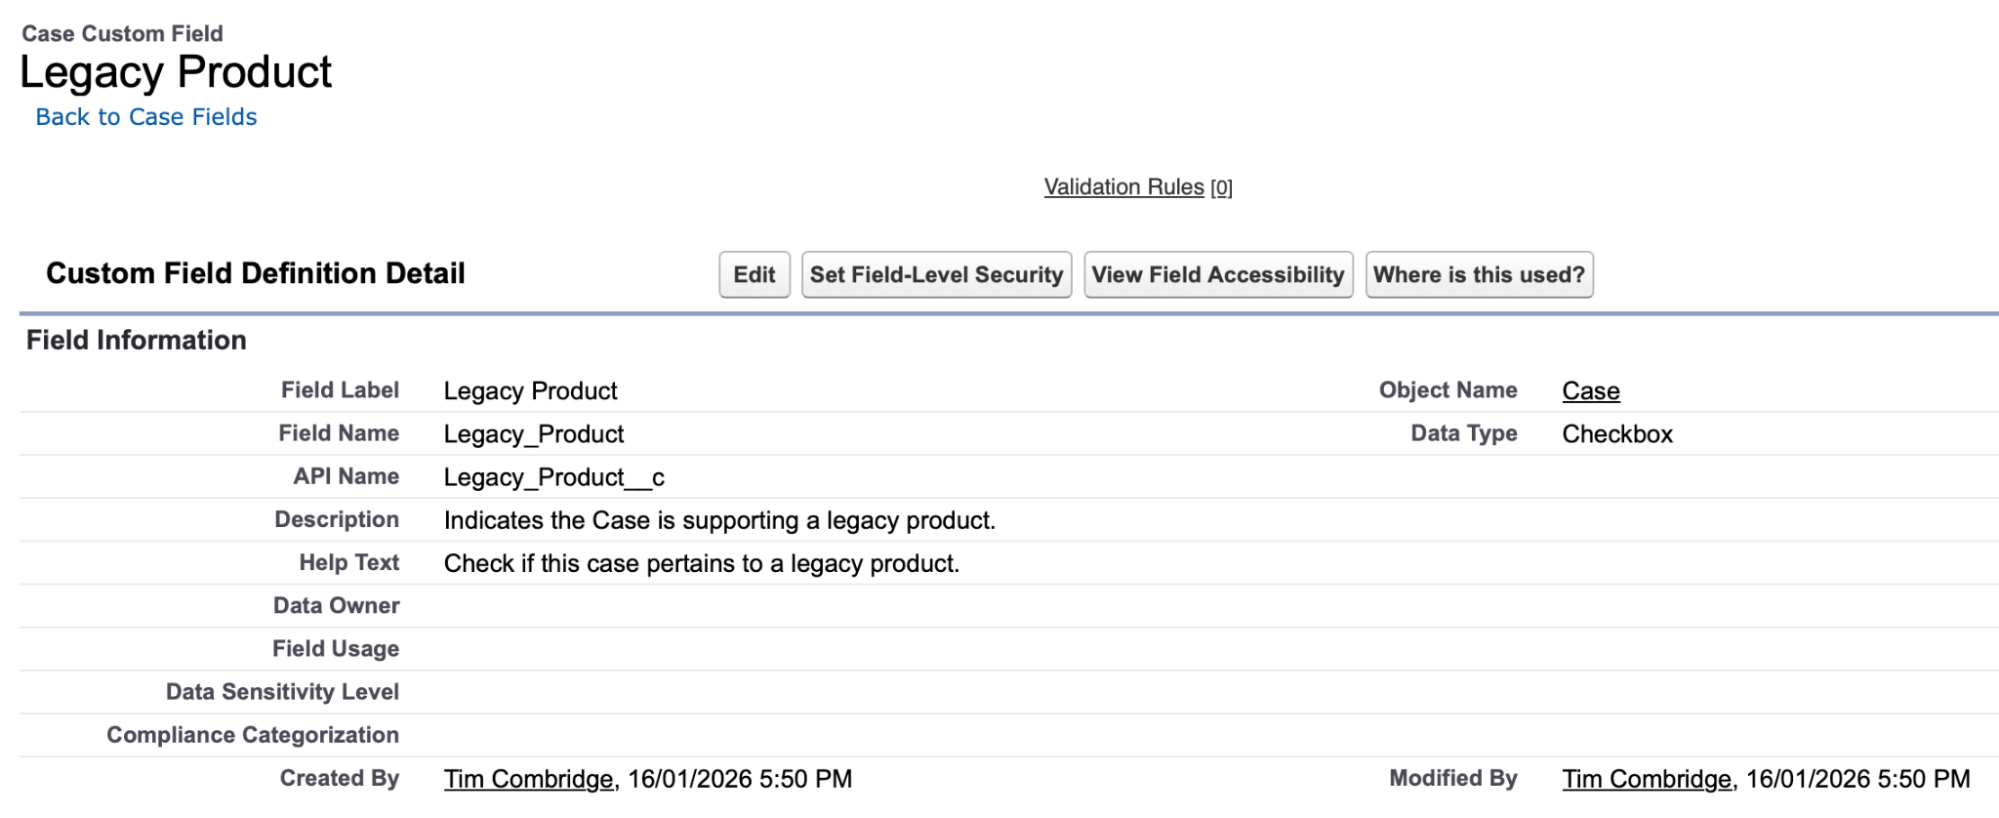
After a bit of back-and-forth relating to source tracking and selecting the right metadata, Agentforce Vibes successfully deployed the field to my dev org.
While the experience from one person to another isn’t guaranteed to be the same due to the probabilistic nature of Agentforce Vibes, you should have a fairly similar experience given the simplicity of the prompt.
Getting Started With Agentforce Vibes: Do’s and Don’ts
While you’re still ensuring that you and Agentforce Vibes are on the same page about a particular task, you should use the Plan Mode. This gives you an opportunity to correct any misunderstandings that Vibes has and make sure that you’ve made all the necessary considerations.
Be as clear as possible with your prompt. Remember, Agentforce Vibes starts by knowing about Salesforce in general. It gets a prompt from you that contains some context, then it retrieves metadata from your org to get more context, and only then is it informed on the basics.
In addition, be clear about your constraints. If you want a solution to be built a certain way or using a certain tool, include this in your prompt. Agentforce Vibes has been trained on a number of Salesforce tools and features, but you may only want to use Vibes to build in one certain tool (i.e., Apex over Flows). If this is the case, you need to explicitly state this.
Ask Agentforce Vibes to repeat back to you the requirements in its own words, state any assumptions that it has made, and confirm best practices that it believes it will need to follow when building. This once again ensures that you’re on the same page before it begins developing for you.
Whatever you do, do not trust the output blindly. Make sure to read through and check what Agentforce Vibes has built to verify that it makes sense. In fact, this is where the Planning Modes that Agentforce Vibes offers come in handy – it gives you a chance to ensure that it has understood your request fully before you proceed. I want to reiterate a rule that I always suggest people follow: don’t use Agentforce Vibes to build a technology that you don’t understand yourself.
Think of it like this: you wouldn’t put someone who has never driven a car before behind the wheel of a Tesla just because it has self-driving technology. If there’s an incident, it’s still the driver’s fault. The same logic applies when vibe coding – you’re using a tool, and you are responsible for the output.
Don’t neglect a proper discovery before using Agentforce Vibes. If you don’t understand the requirements fully, how is Vibes supposed to know what to do? You need to confirm your understanding of the requirements, including edge cases, so that you can clearly explain to Agentforce Vibes what needs to be done.
Final Thoughts
Agentforce Vibes can be your best friend or worst nightmare; it all depends on how you use it. If you’ve never used Agentforce Vibes before reading this article, I hope you’ve found value not only from learning how to set it up and get started, but also from learning just a handful of best practices when using it.
Please remember – Agentforce Vibes is a tool; it is not a replacement for developer knowledge and experience. If there are issues with the output, you need to be ready to fix them. Don’t use Agentforce Vibes to build things that you don’t understand!
Resources
- Salesforce CLI Project Commands
- Salesforce CLI Org Commands
- Salesforce GitHub Agentforce Vibes Prompt Library