


Windows 11 is a very versatile and capable operating system, and while it works pretty well out of the box, there are many settings you can change and tweaks you can make to improve your experience with Windows 11 that much more. These may be things you don't even know about, or they may be things you forget to enable for one reason or another.
So, if you're not sure where to start or you just want to learn something new, I've rounded up some of the best tweaks you can make to WIndows 11. Let's get started.
16 Turn off notifications and set up Do not disturb
Pop-ups are annoying
The first thing you might want to do upon setting up a Windows 11 PC is managing your incoming notifications. By default most apps are allowed to send you notificaitons, which appear in the bottom right corner of the screen. If you don't like that, you can disable notifications for specific apps in the Settings app. Simply open the Settings app and navigate to System > Notifications. You'll see a list of your apps and whether they can send notifications or not. You can also dive in deeper and turn off specific kinds of notification features, like sound, banners, and more.

Something else that can help with this is enabling Do not disturb. This feature allows you to block all incoming notifications, and you can set it up to be automatically enabled at certain times, or under certain conditions, such as while playing a fullscreen game or movie. You can find these settings on the same apge by expanding the Turn on do not disturb automatically field. Turn on these features to your liking to prevent unwanted distractions.
15 Remove Windows 11 bloatware
A lot of trash is included

Windows 11 gets a lot of flak for multiple reasons, and one of them is the abundance of preinstalled software and features that most users don't want. Thankfully, a lot of solutions have arisen to let you remove and disable all the things you don't care about, and Win11Debloat is a great way to do just that.
This is a PowerShell script that comes with a few preset options to disable all kinds of privacy-intrusive and useless Windows 11 features, as well as uninstall some preinstalled apps you probably don't need. You can run it in a custom mode to change the settings you want, but the default mode makes things really easy and it's a great way to clean up your PC before you even start using it.
14 Uninstall apps you don't need
It may seem obvious, but...

In addition to the tons of apps that come preinstalled with Windows, there's a good chance you've built a library of apps you might not need anymore, or in some cases, the manufacturer of your PC may include some apps that aren't targetted by something like Win11Debloat. Checking up on your installed apps and removing anything you don't need is a good practice to do every now and then.
You can do this manually, but there are also apps like O&O AppBuster that are designed to uninstall multiple apps in one go easily.
13 Disable privacy-invasive features
Windows is tracking what you do

Windows 11, like many other operating systems, relies on tracking the user's behavior for many things, including advertising and recommended content. A lot of these invasive features are enabled by default, and it's a good idea to look into it to see what you're not comfortable sharing. We've already talked about Win11Debloat above, but if you don't feel comfortable using a third-party app, you can just dive into the Settings app yourself to change these options.
Once you've set up your PC, open the Settings app and go to the Privacy & security section. There are a lot of options here to navigate through, so take your time to check them out and disable what you deem unnecessary.
12 Turn off startup tasks
Save system resources

Whenever you boot up your PC, it's not just Windows starting up, there are a lot of other programs that like to start with Windows, too. Some of these can be essential, but not all of them are, so we recommend turning off some startup tasks to save your system resources for more important things. You can do this right after setting up a PC, but it's a good diea to check back after installing more apps, because tmany of them will create new entries.
To disable startup tasks, simply right-click your taskbar and choose Task Manager. In Task Manager, select the Startup tab, and you'll see a list of your apps with registered startup tasks, and whether they're enabled or not. Simply click the app you want to disable, and then choose Disable.
11 Change the theme color
Make it your own

By default, Windows 11 comes with light mode enabled and uses a blue accent color for certain parts of the UI. But you can change this to your liking if you want a different look. Right-click the desktop and choose Personalize, and the Settings app will open. Here, click Colors and you'll have a slew of options to change.
First, the Choose your mode option lets you change between light and dark modes for Windows and your apps. Below that, you have the Accent color option, which changes the color shown to highlight certain elements, like links. If you want the accent color to be more prominent, you can also enable the options to Show accent color on Start and taskbar and Show accent color on title bars and window borders, which can be found towards the bottom of this page.
This is just the tip of the iceberg for Windows 11 customization, but it's a good place to start.
10 Set up a Dev Drive
This one's for the developers out there

Most of these tips are valid for almost any Windows 11 user, but this specific one is more specific to developers using Windows 11. If you want to get the best performance possible for your development projects, it's a good idea to create a Dev Drive, which is a new feature in Windows 11 version 23H2.
A Dev Drive is a specific partition on your PC that's used to store your project files, and it's marked as secure storage in the eyes of Windows Defender, which prevents Windows from running security checks on it. In turn, this increases performance, so your projects should load a lot faster. Beware, though — you shouldn't store any downloaded files in a Dev Drive.
9 Set up Restore Points
Just to be safe


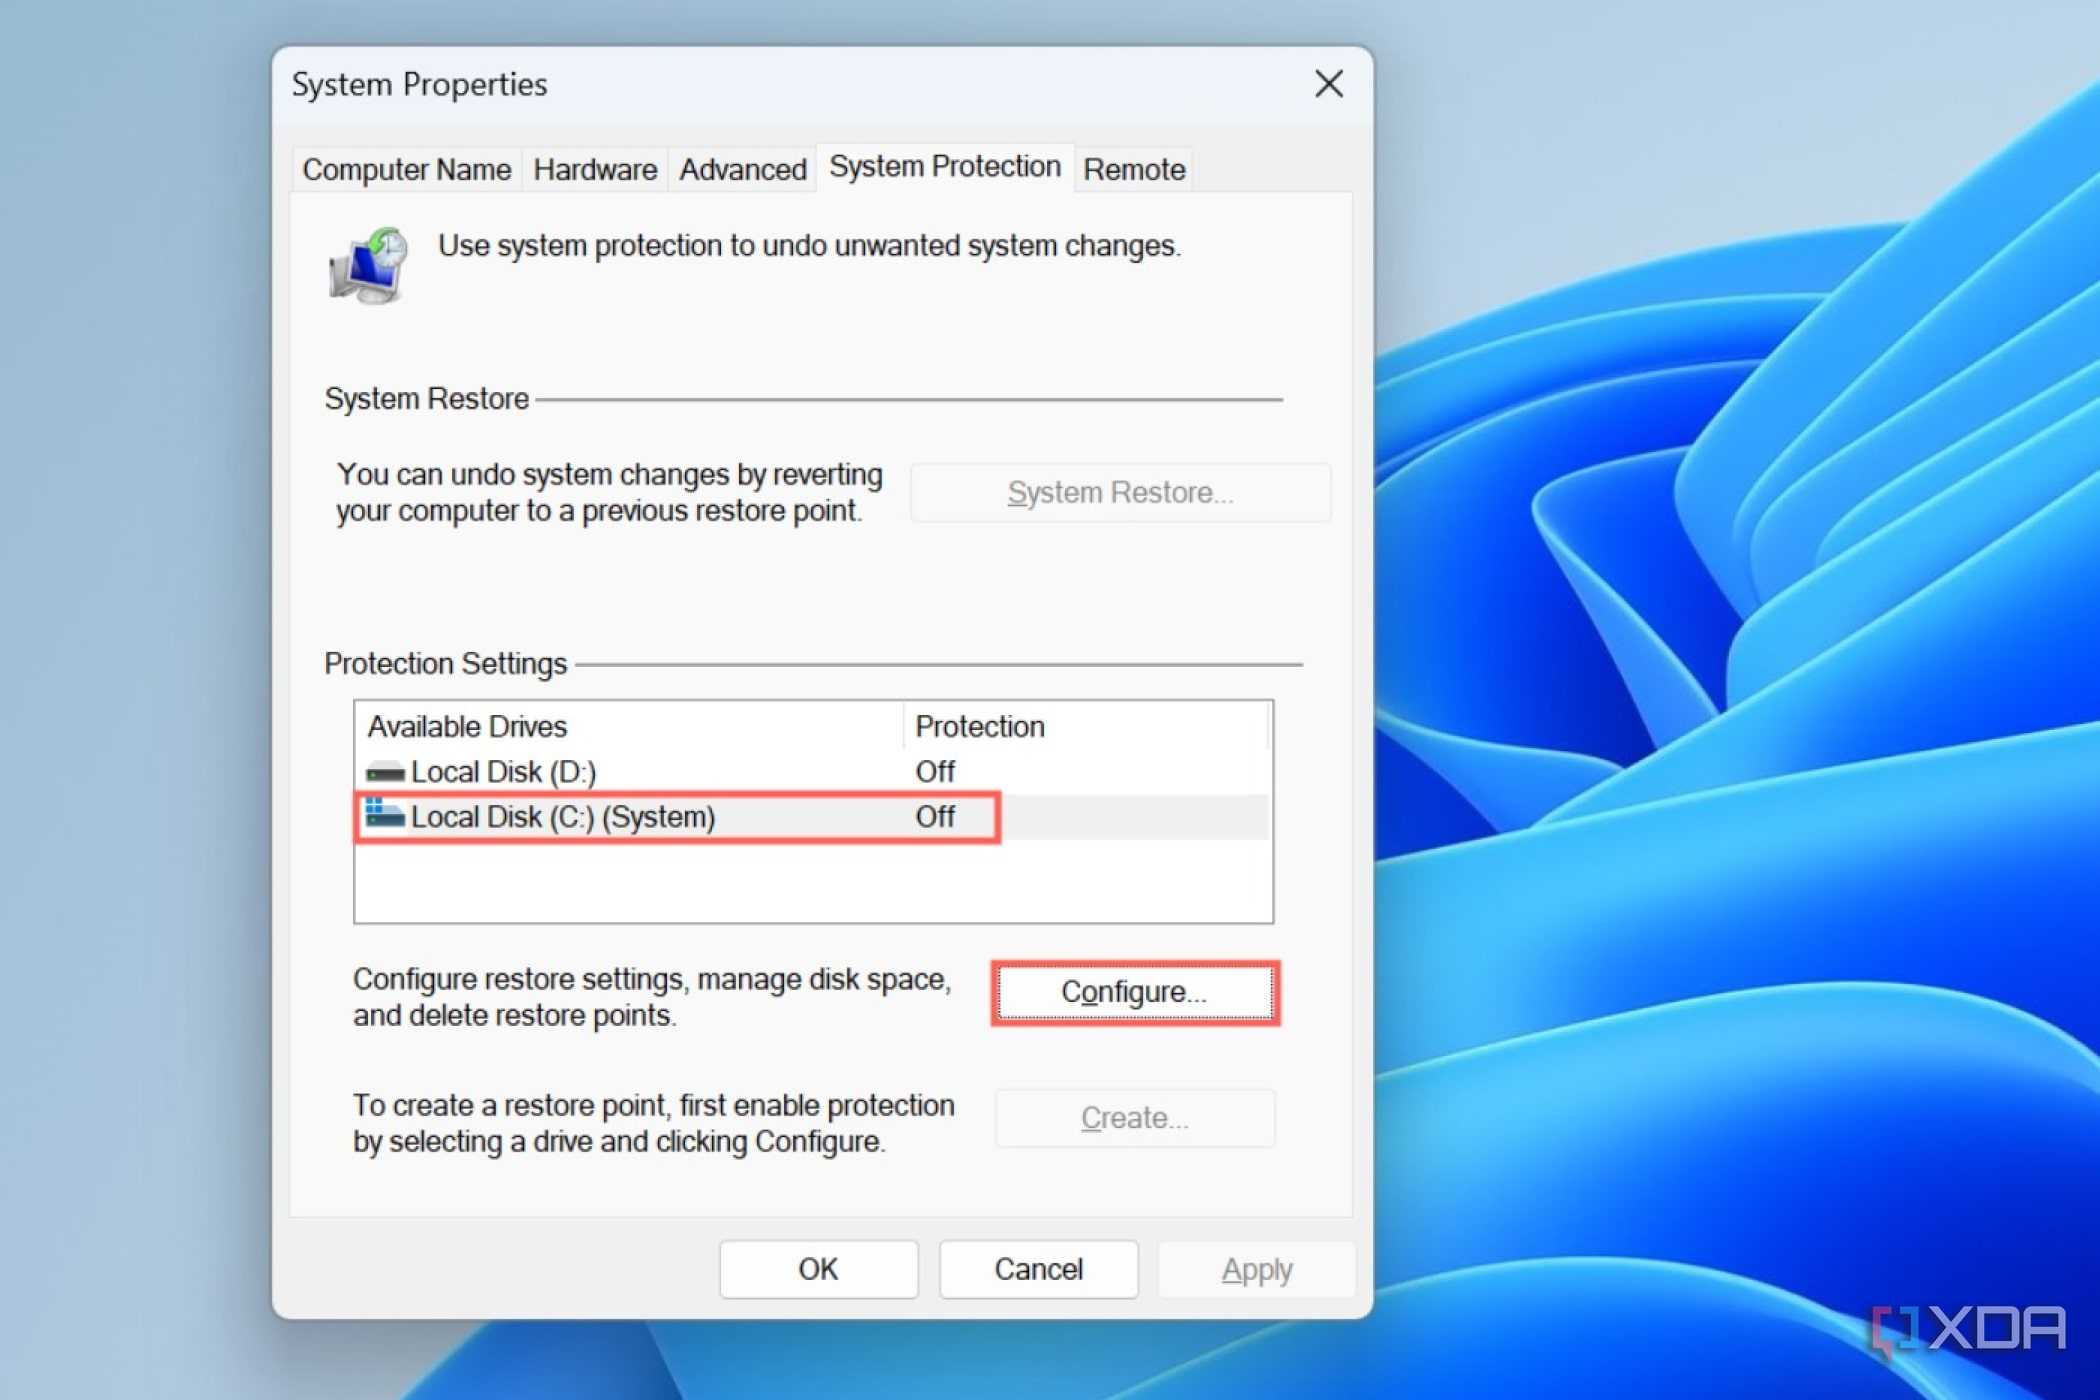
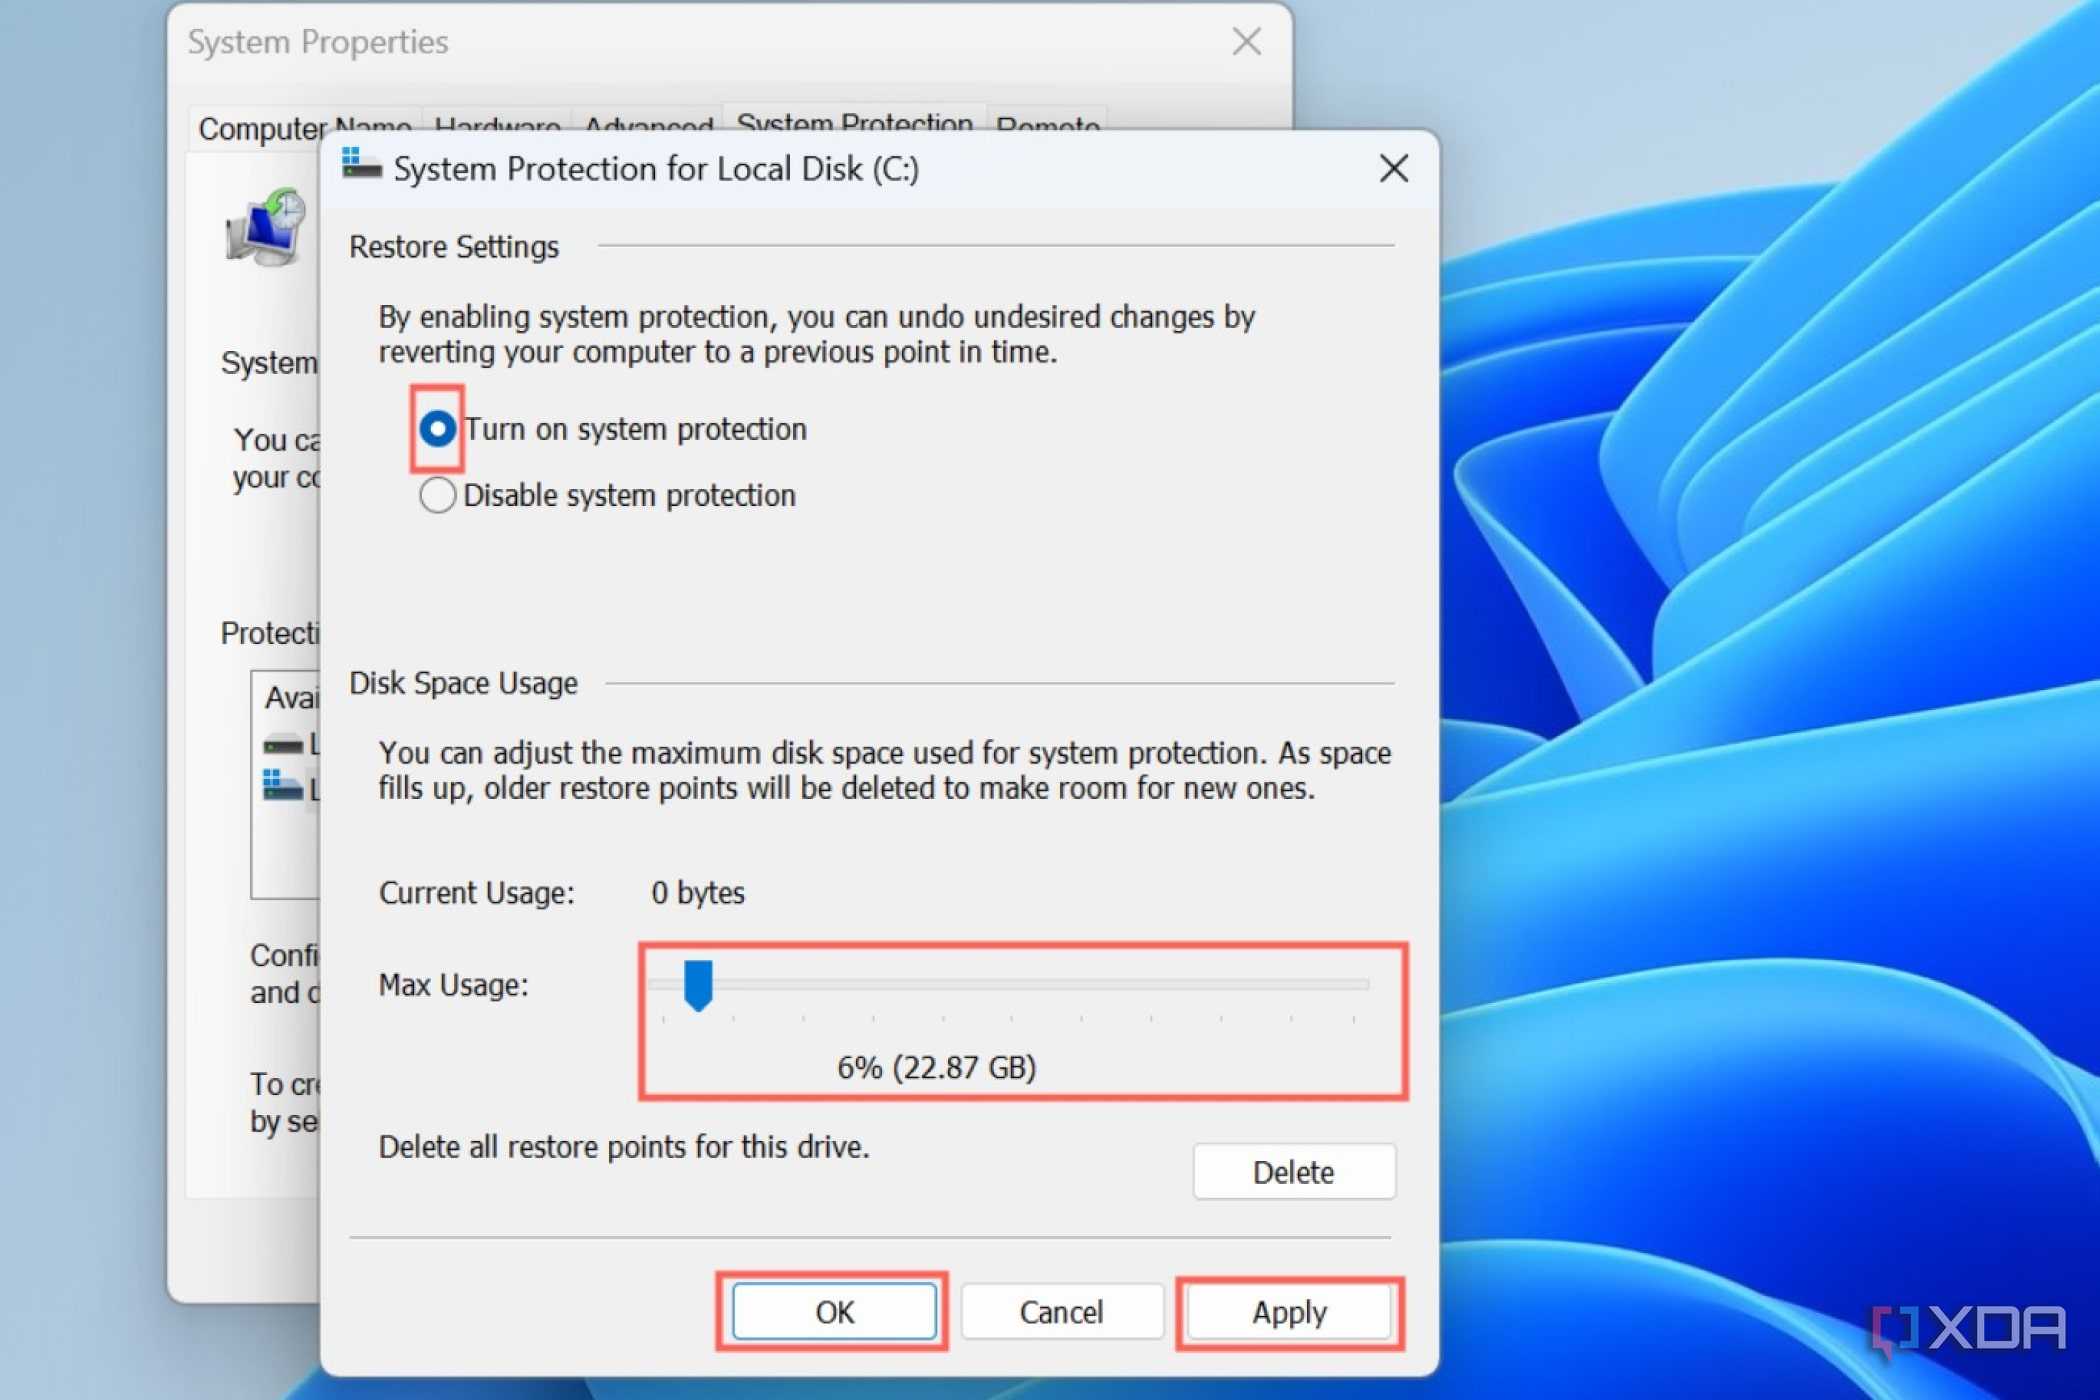
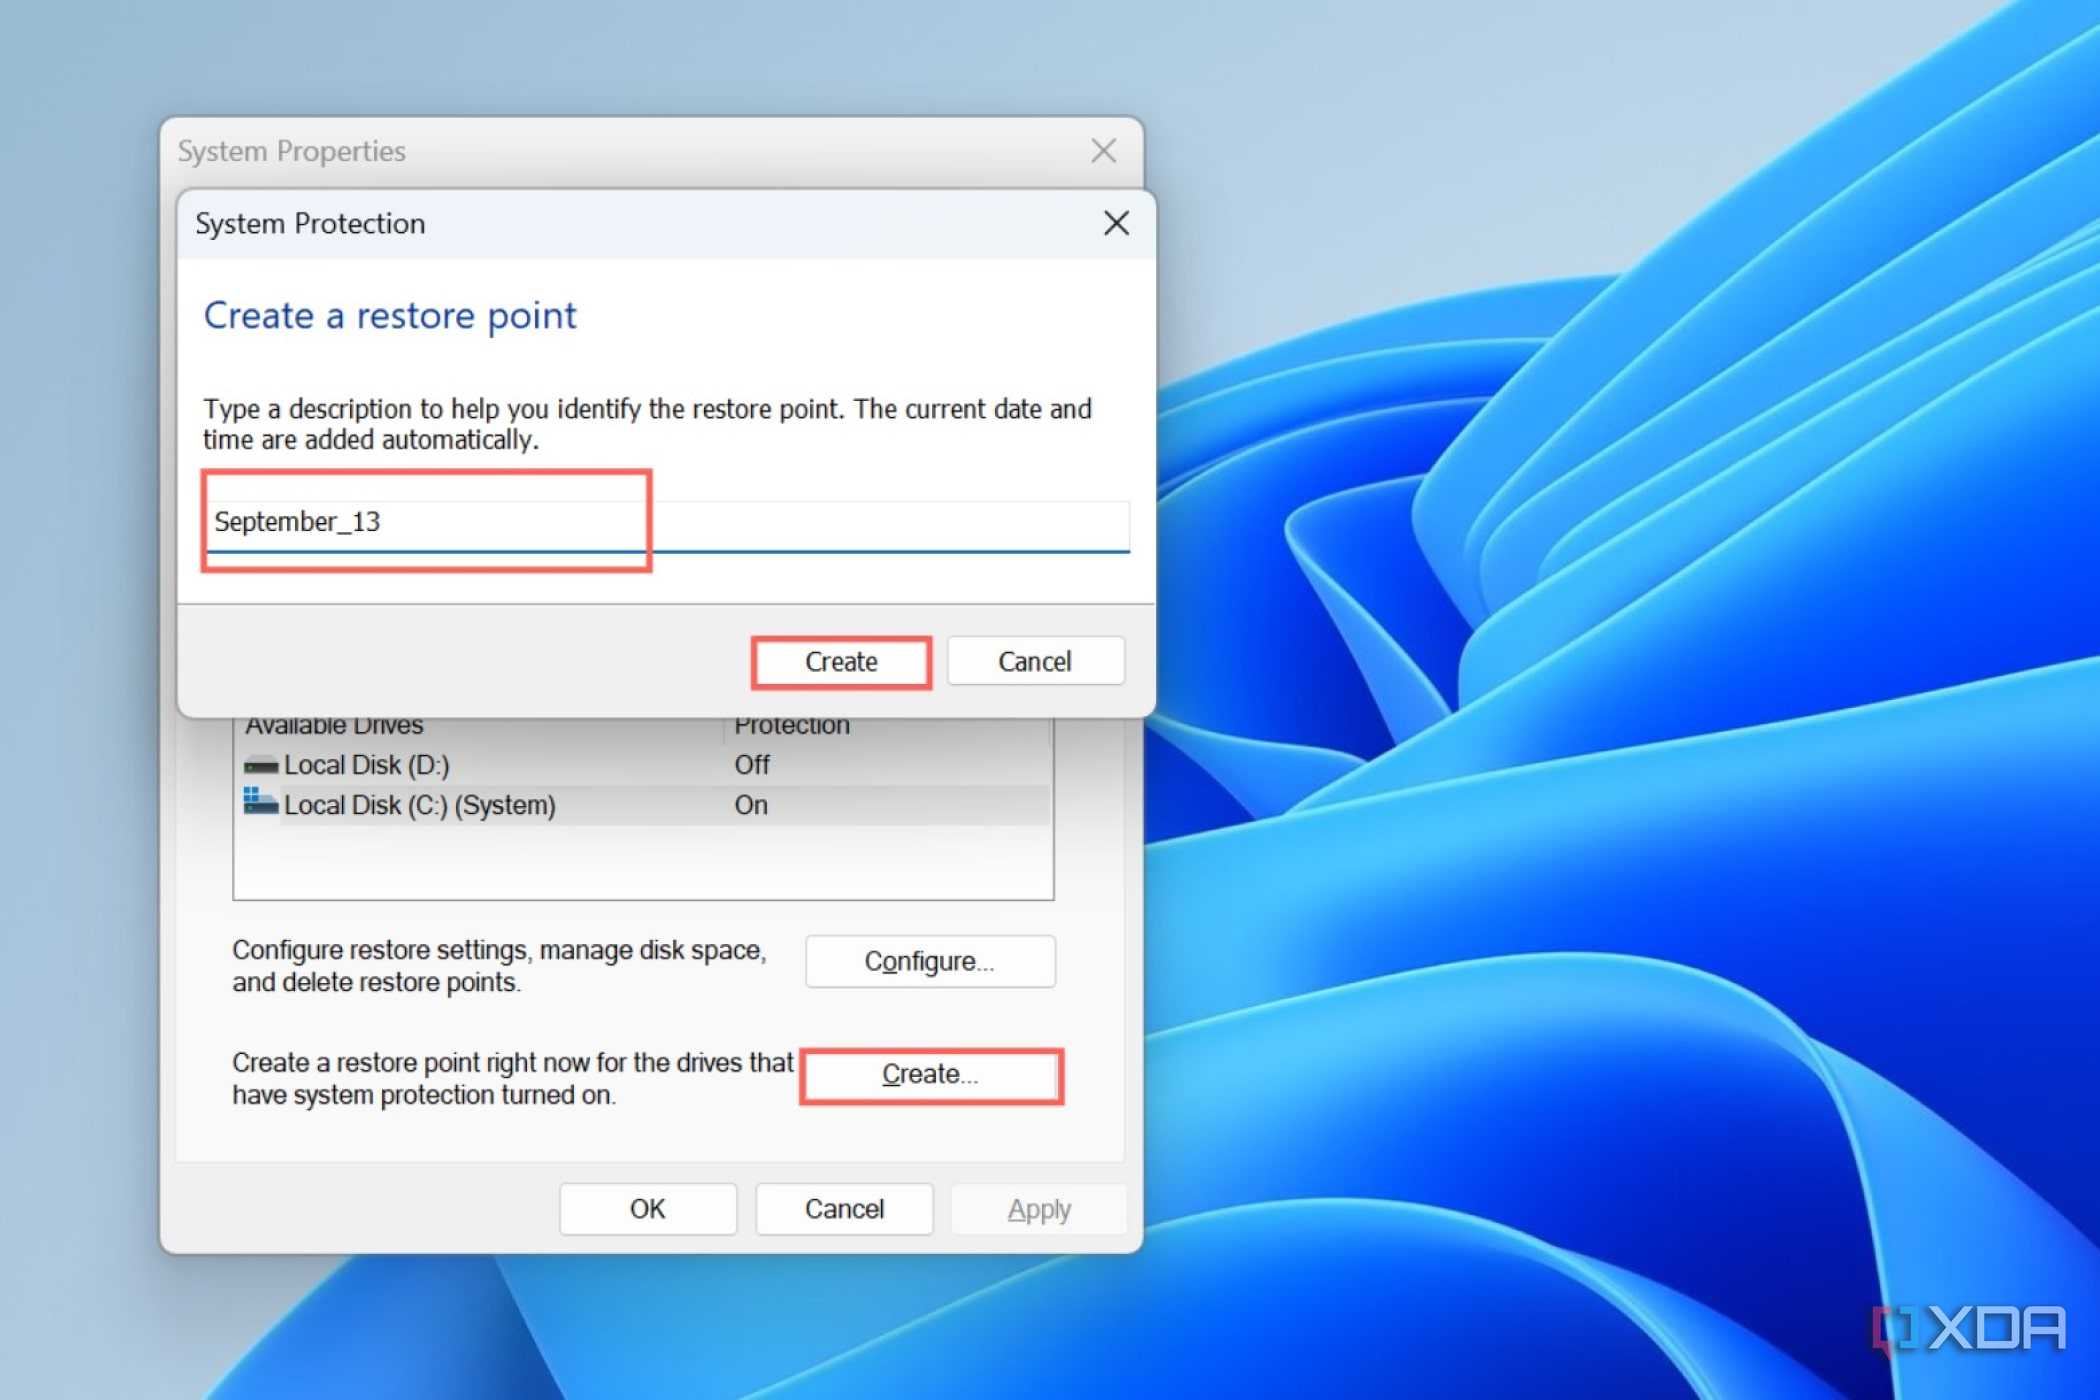
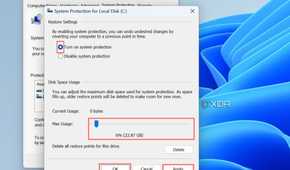
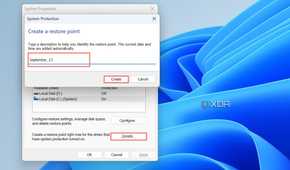
The system restore feature has long been one of the more useful tools in Windows, though it's been a bit downplayed in Windows 11. This capability lets you go back in time to a previous state your PC was in. This can be really useful if you ever run into an issue with your computer, as you can easily bring it back to a working state.
This capability is disabled by default in Windows 11, but if you open the Start menu and search for restore point, you can find it. Select your main drive and click Configure, then enable system protection and choose how much space to allocate to restore points. Windows 11 will start creating restore points automatically before major changes are made to the system. Alternatively, you can create a restore point yourself by coming back to this dialog whenever you need to. DOing this regularly helps ensure that even if you have to restore your PC, you won't lose a lot of files in the process.
8 Set up Storage Sense
Clean unnecessary files automatically

Windows can pile up temporary and unnecessary files over time, and every now and then, it's a good idea to delete them. However, doing this manually can be tedious, so it's a good idea to configure Storage Sense to do this automatically. In fact, this is already set up automatically, but maybe you want to change those settings.
Open the Settings app and go to System > Storage, and then choose Storage Sense. Here, check the Run Storage Sense option, which is set to run when disk space is low by default. You cans et it to run every month, every week, or every day. There's also the option to delete files in your Recycle Bin automatically if they've been there for some time. The default setting is 30 days, but if you want to save space faster, you can lower this to happen daily.
7 Replace the Start menu
The default one is very limited


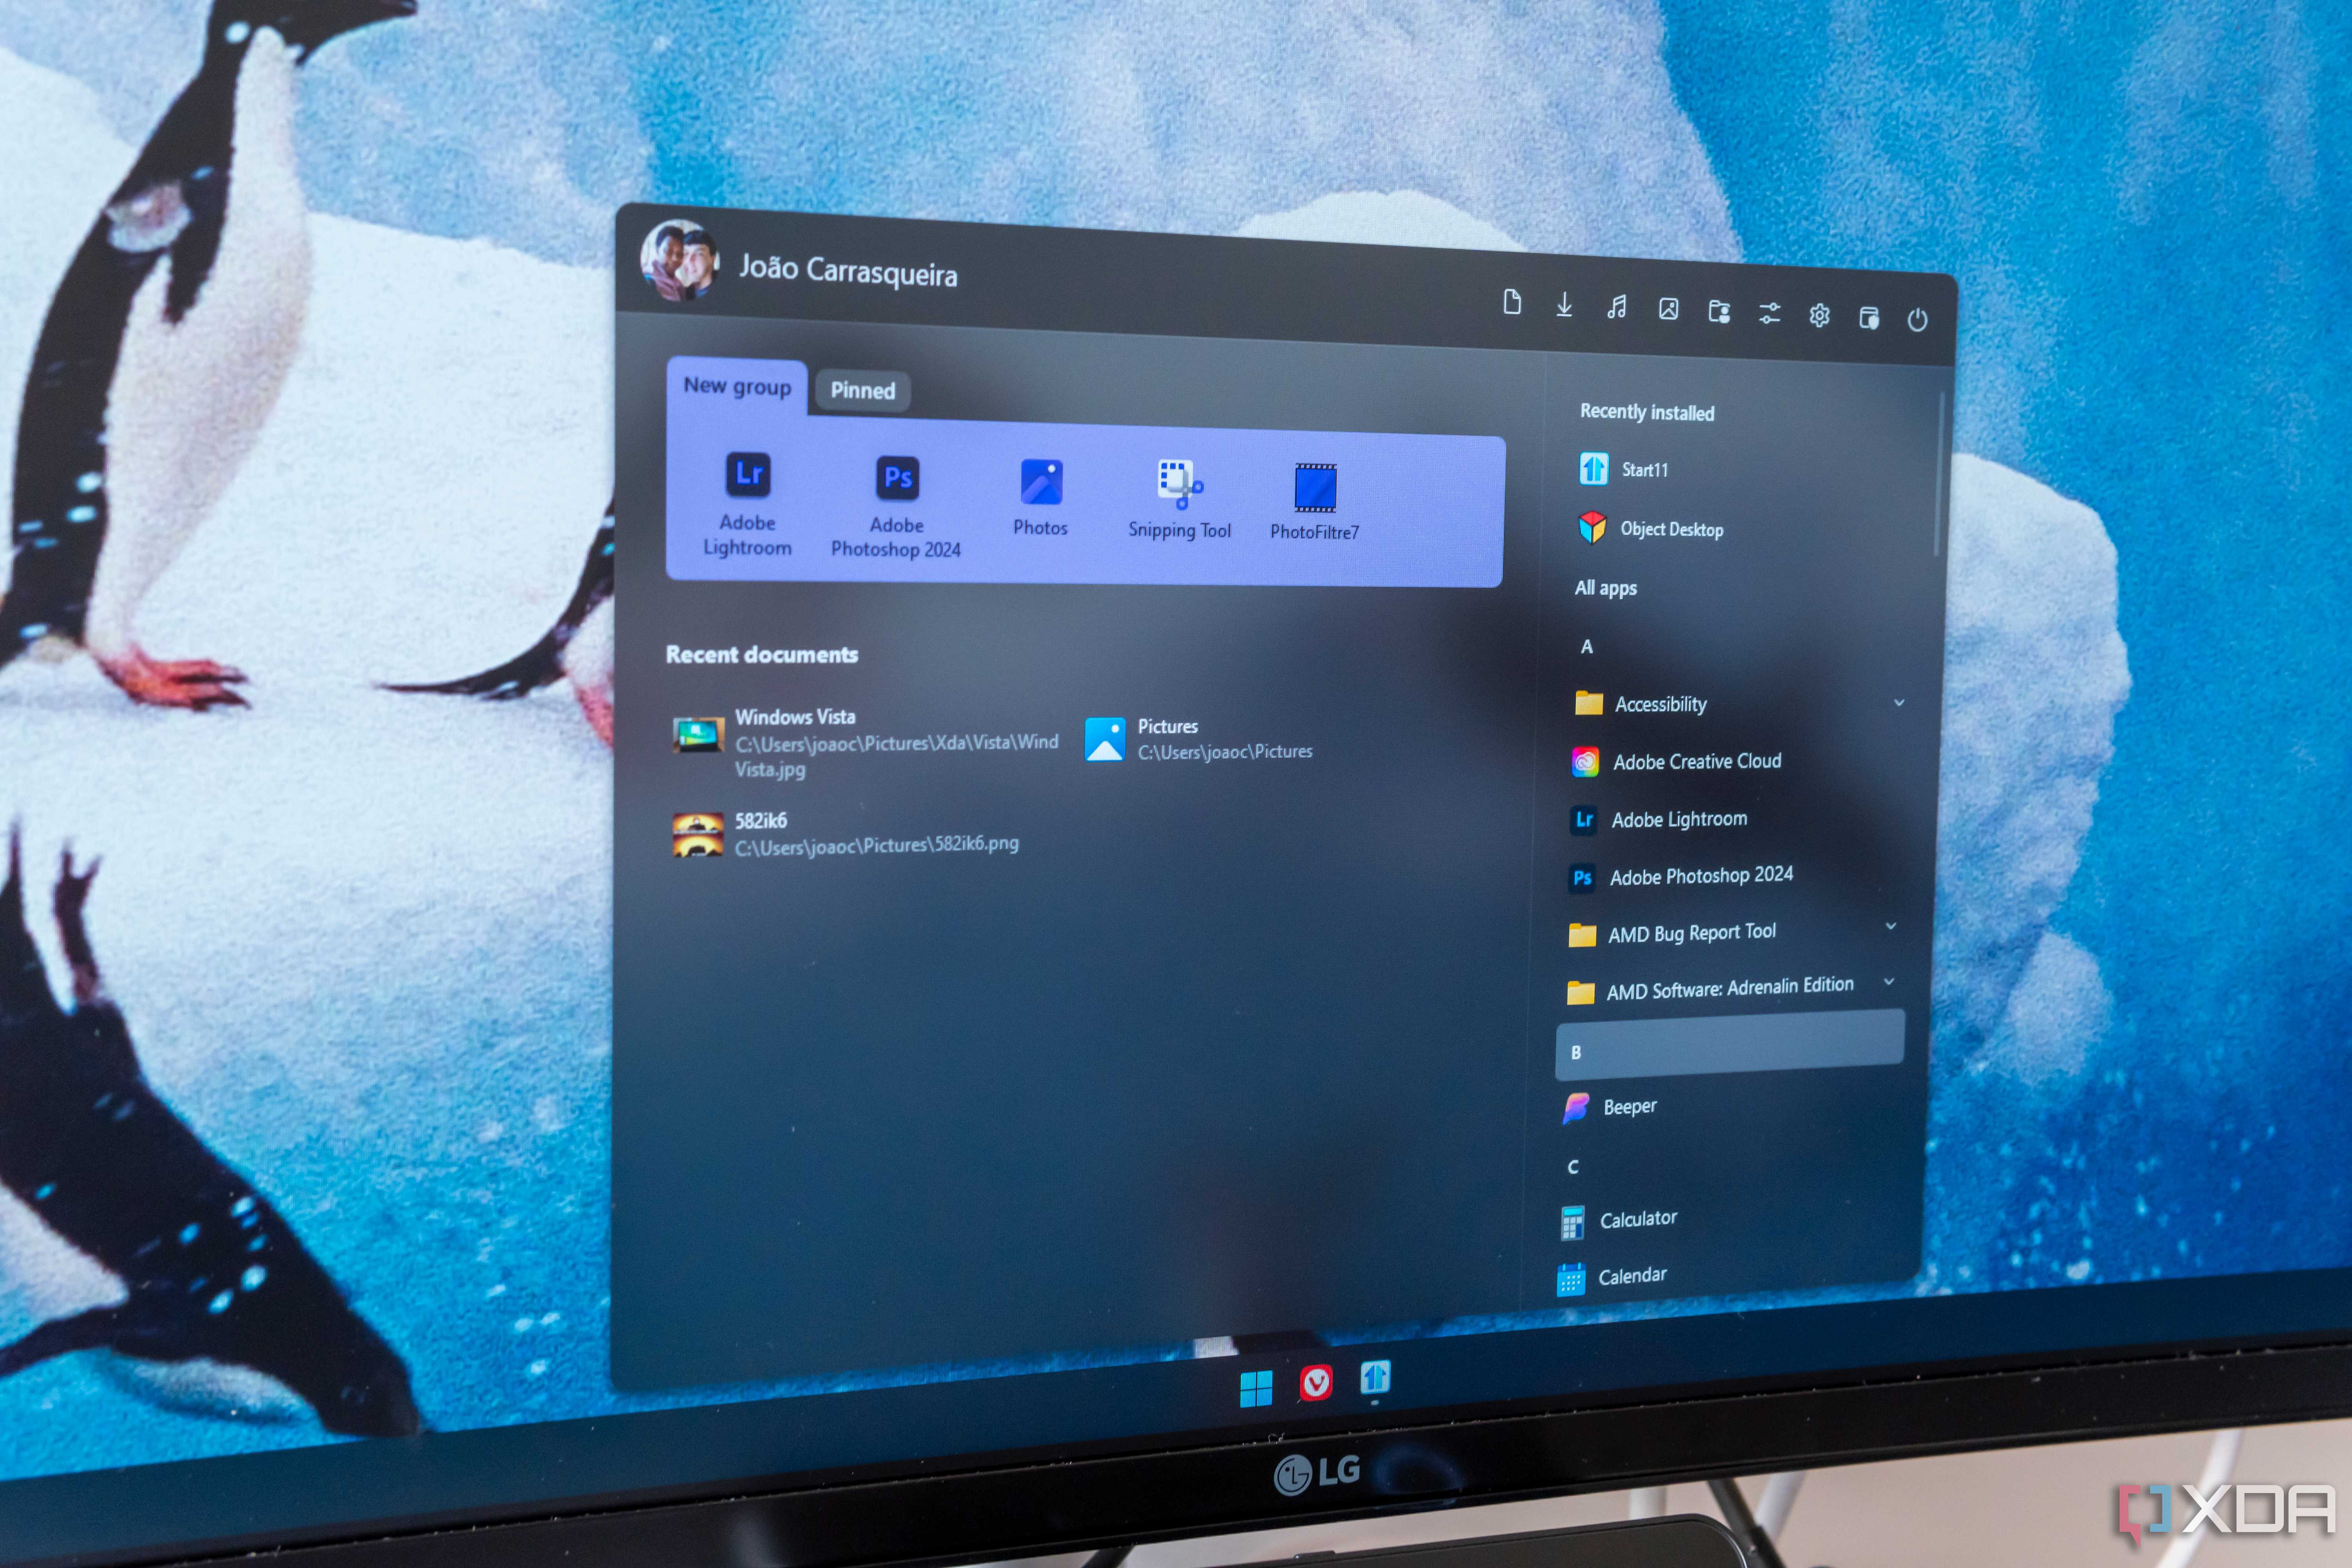
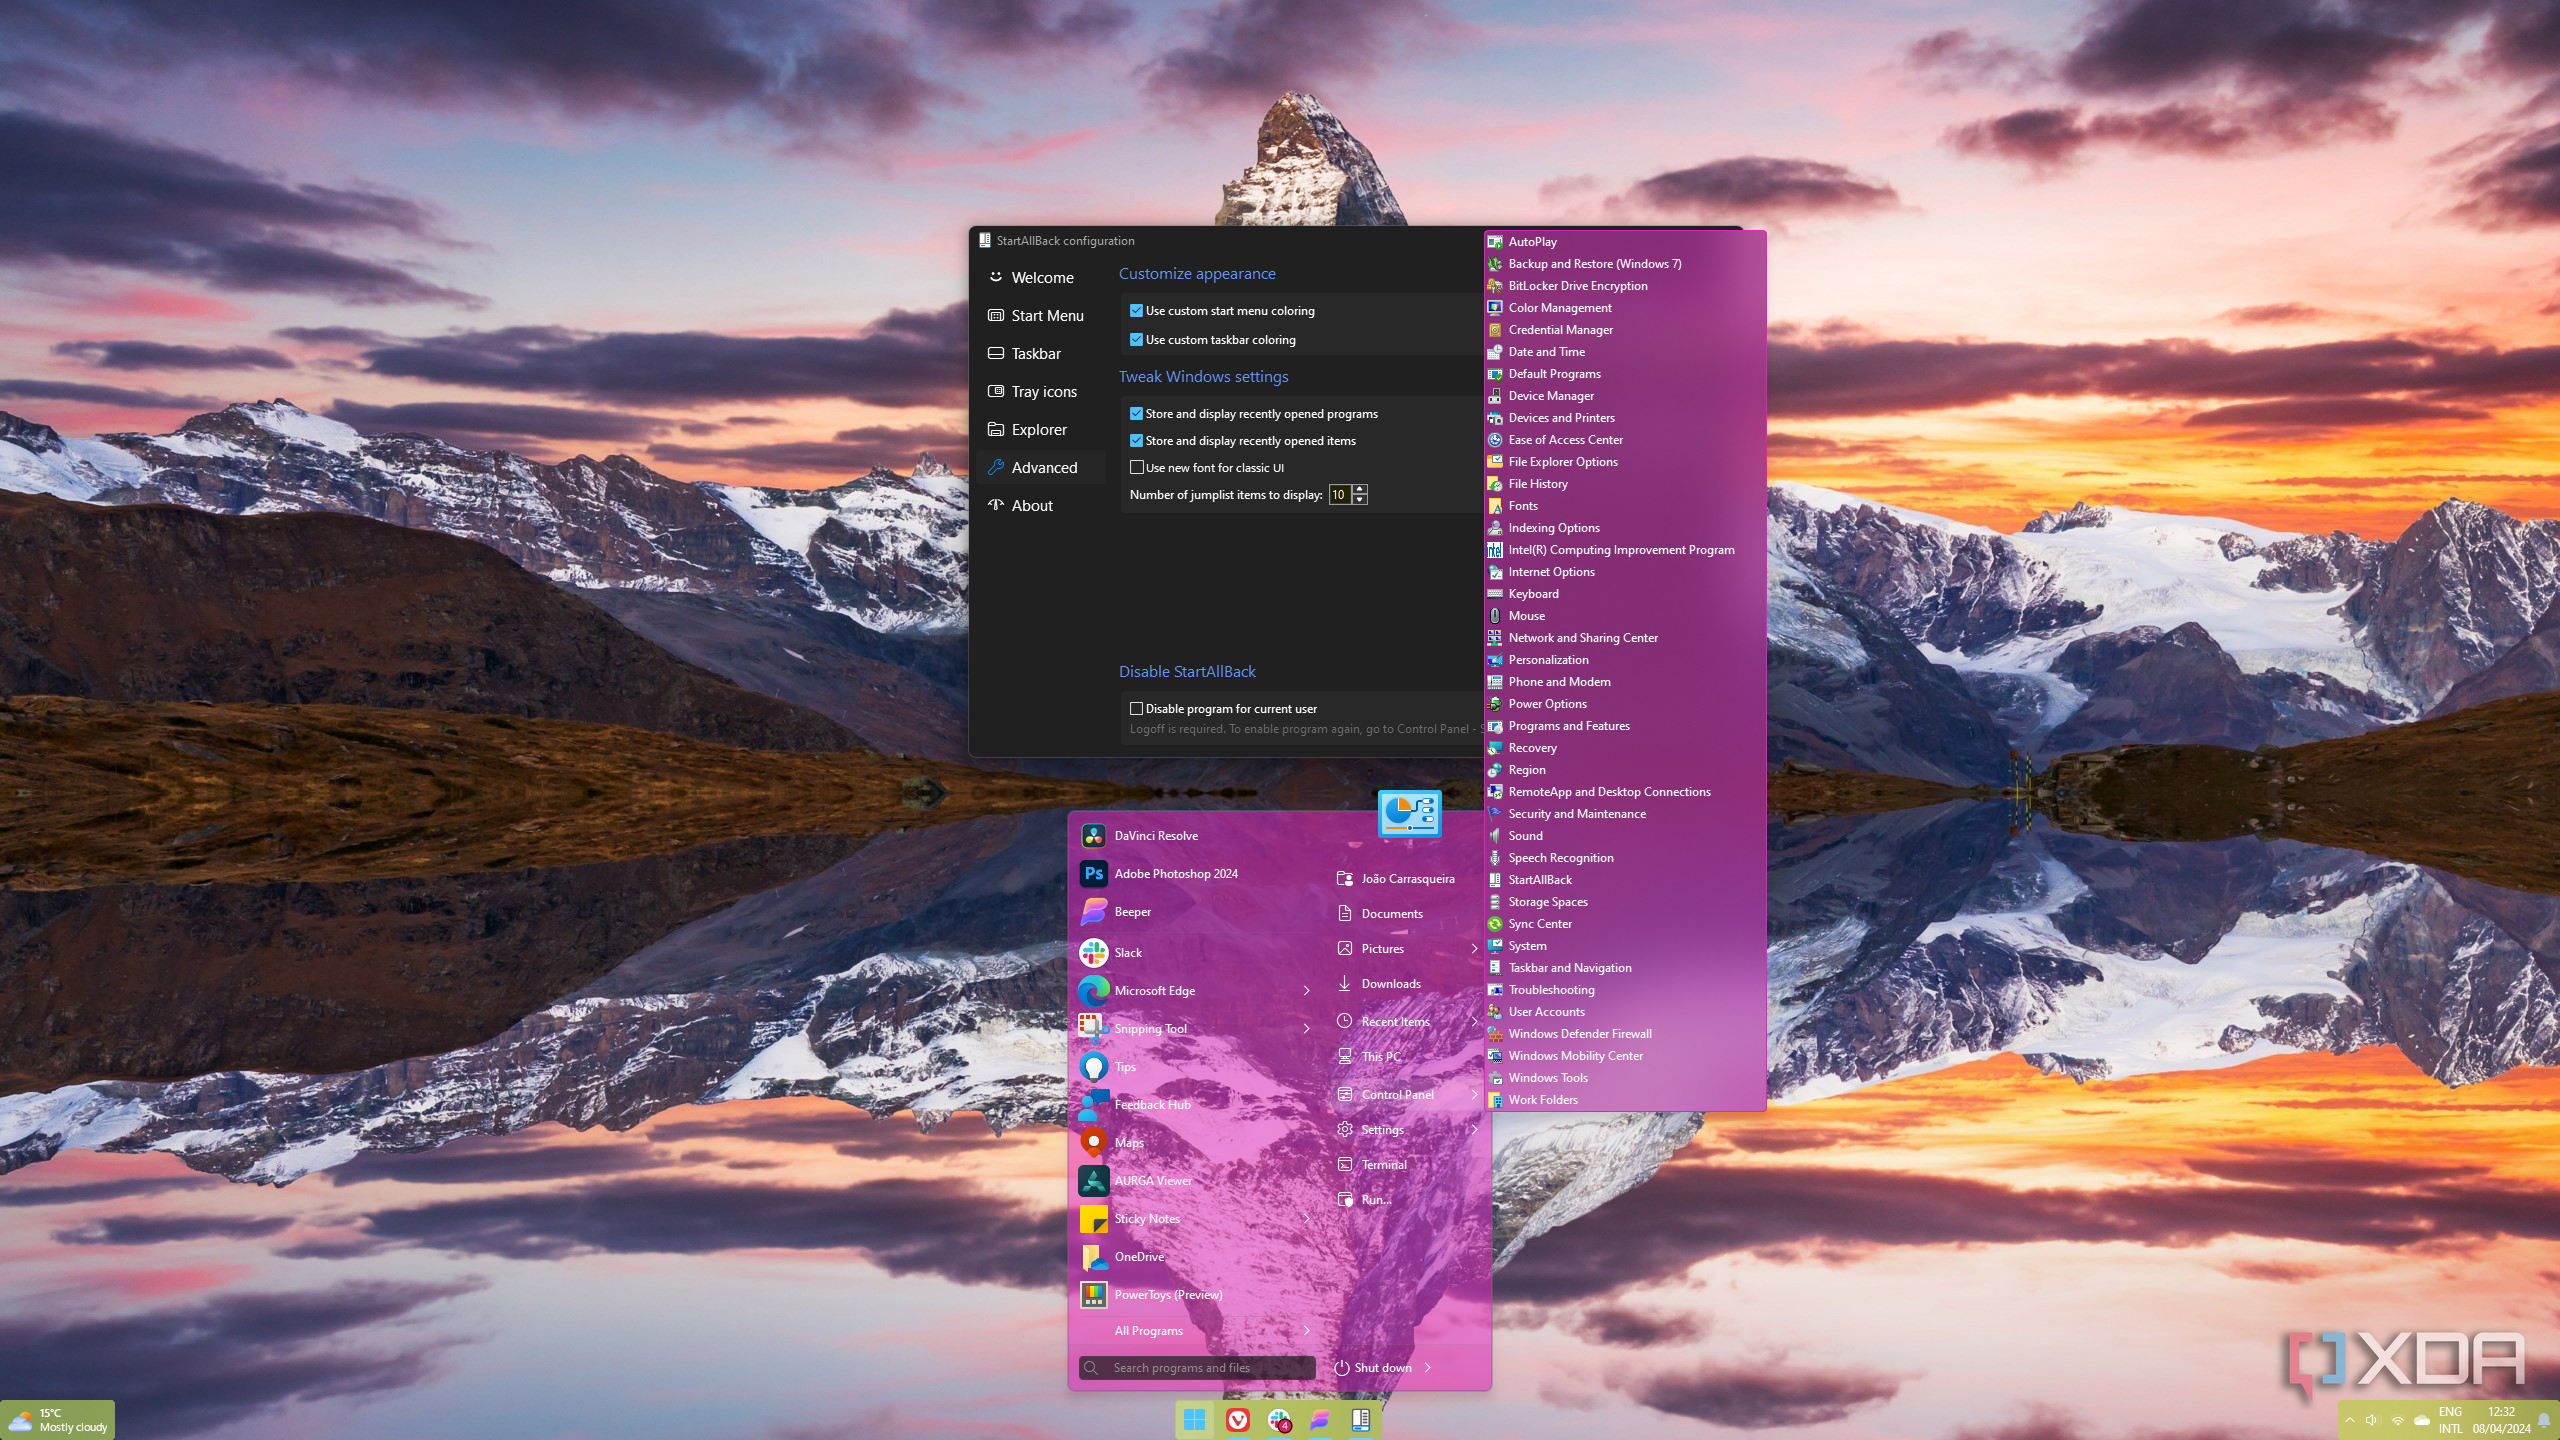
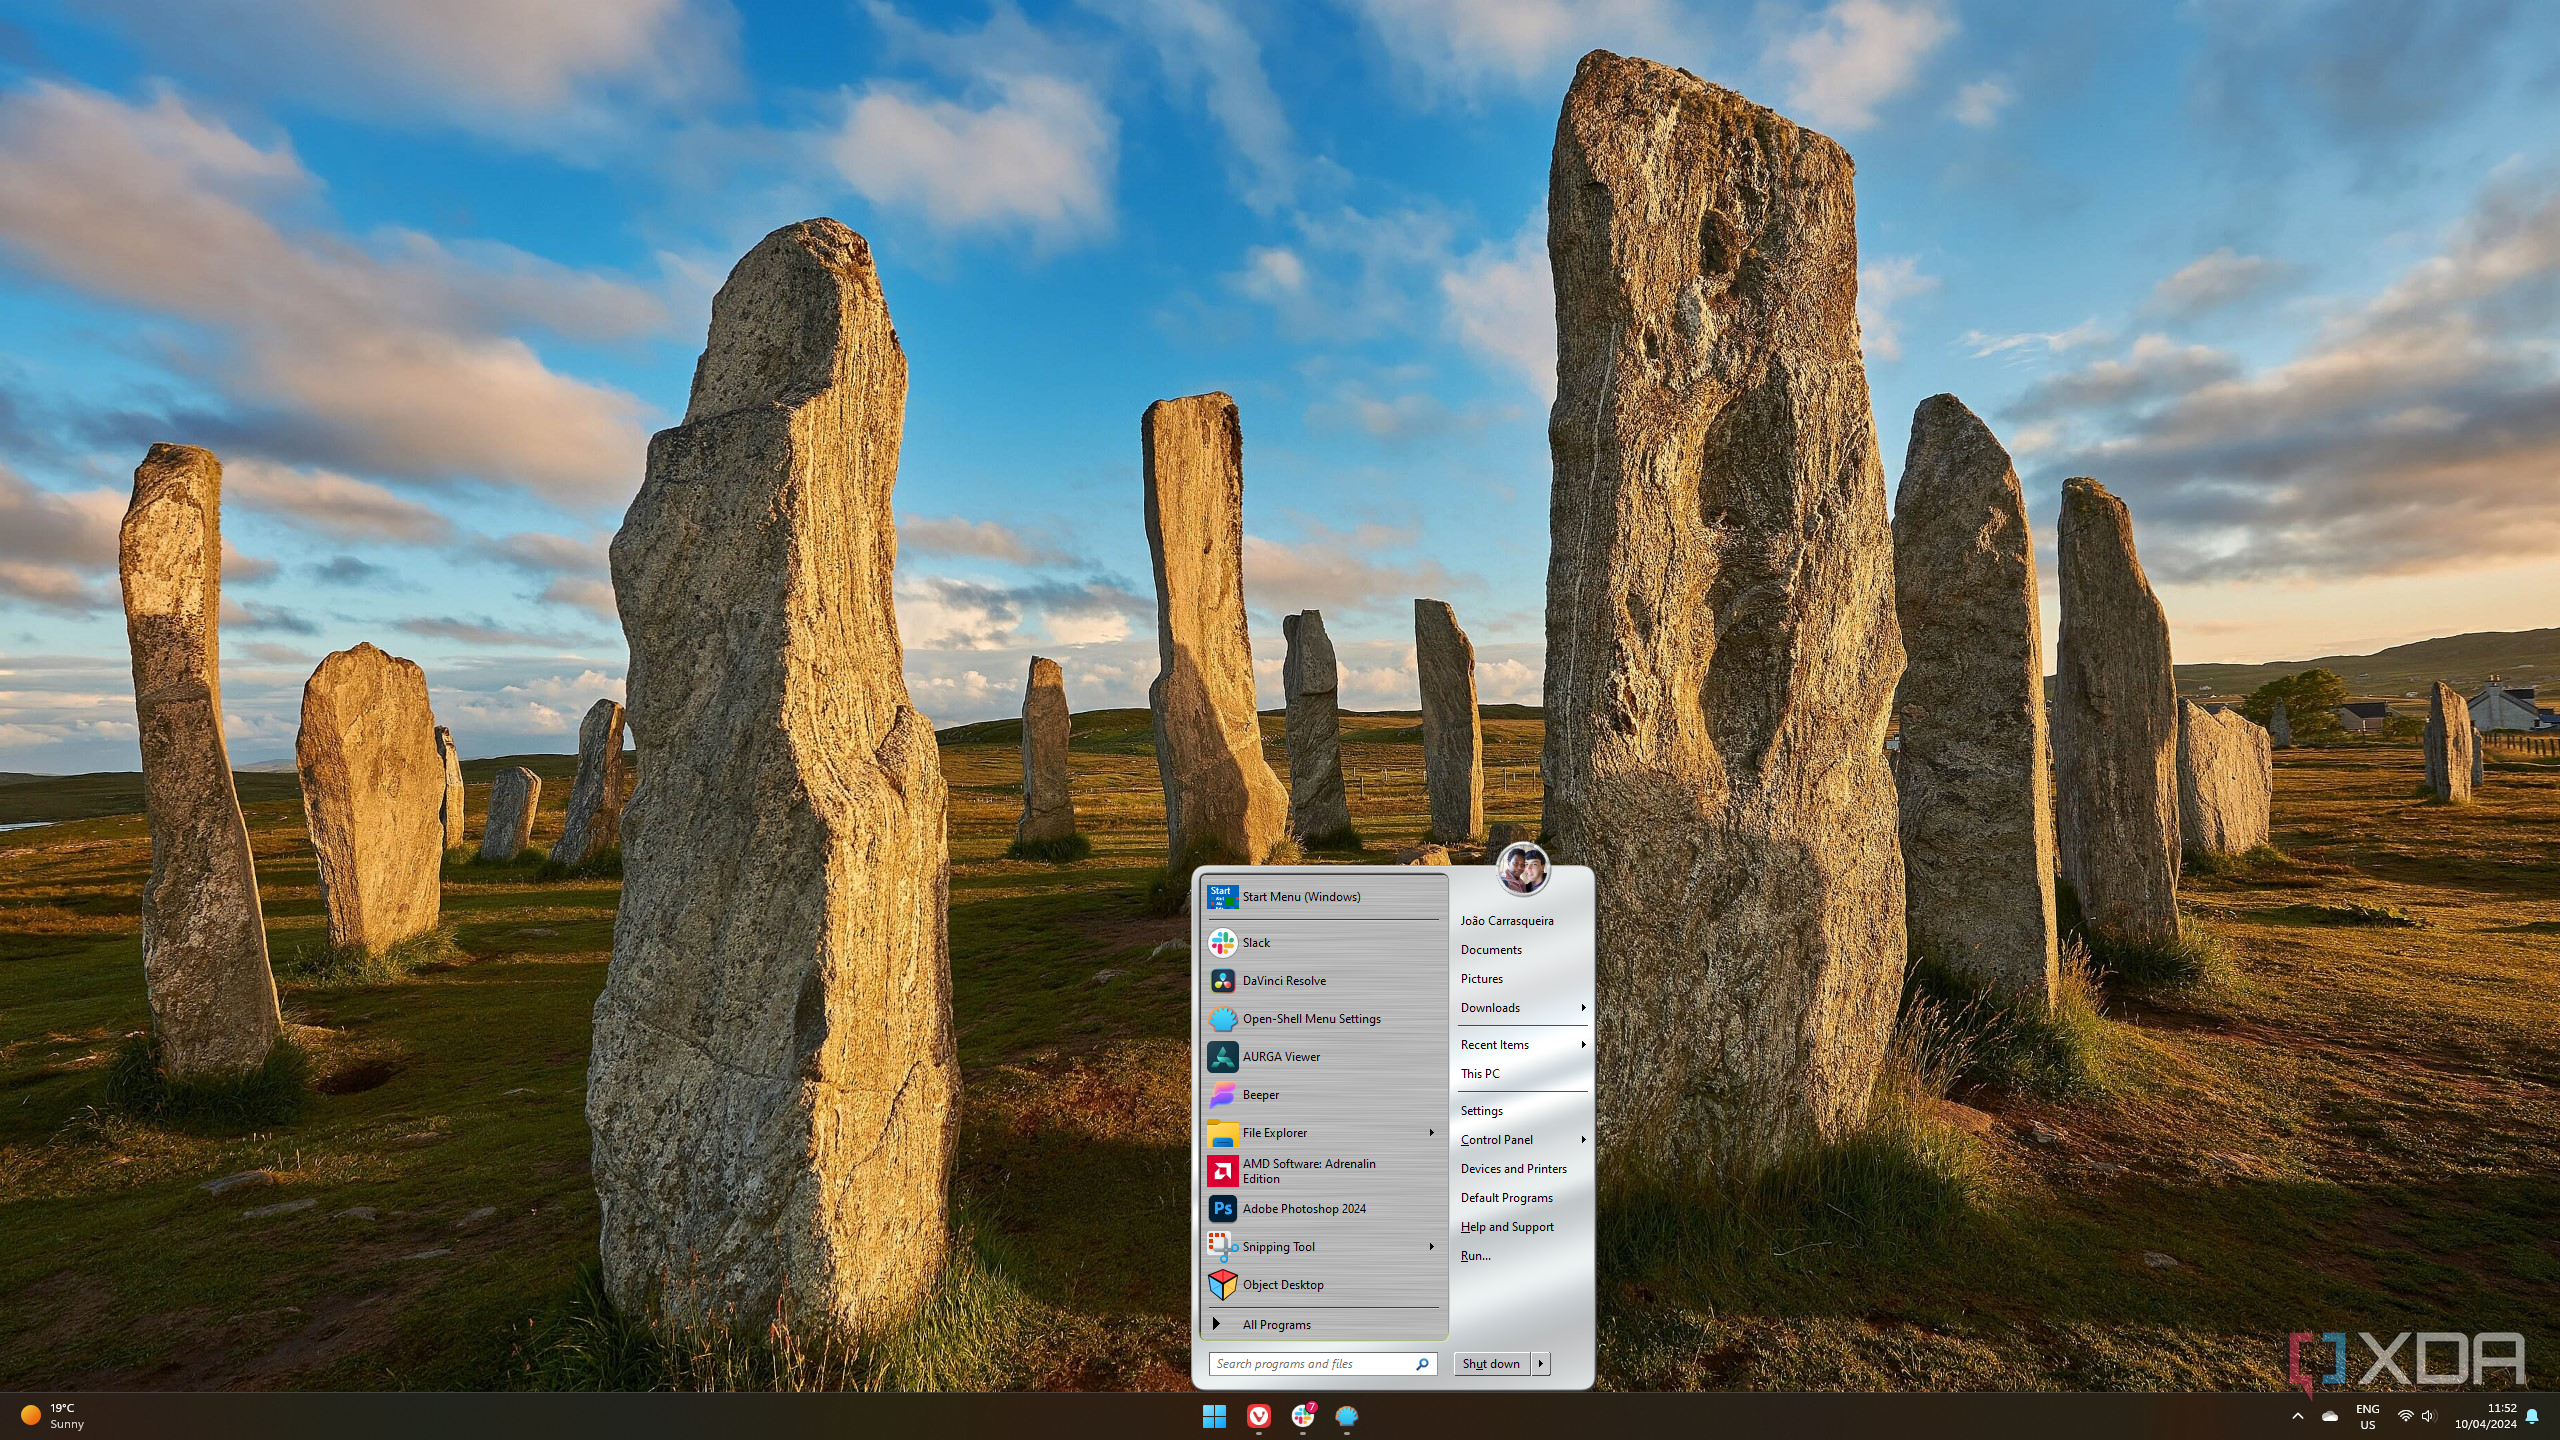
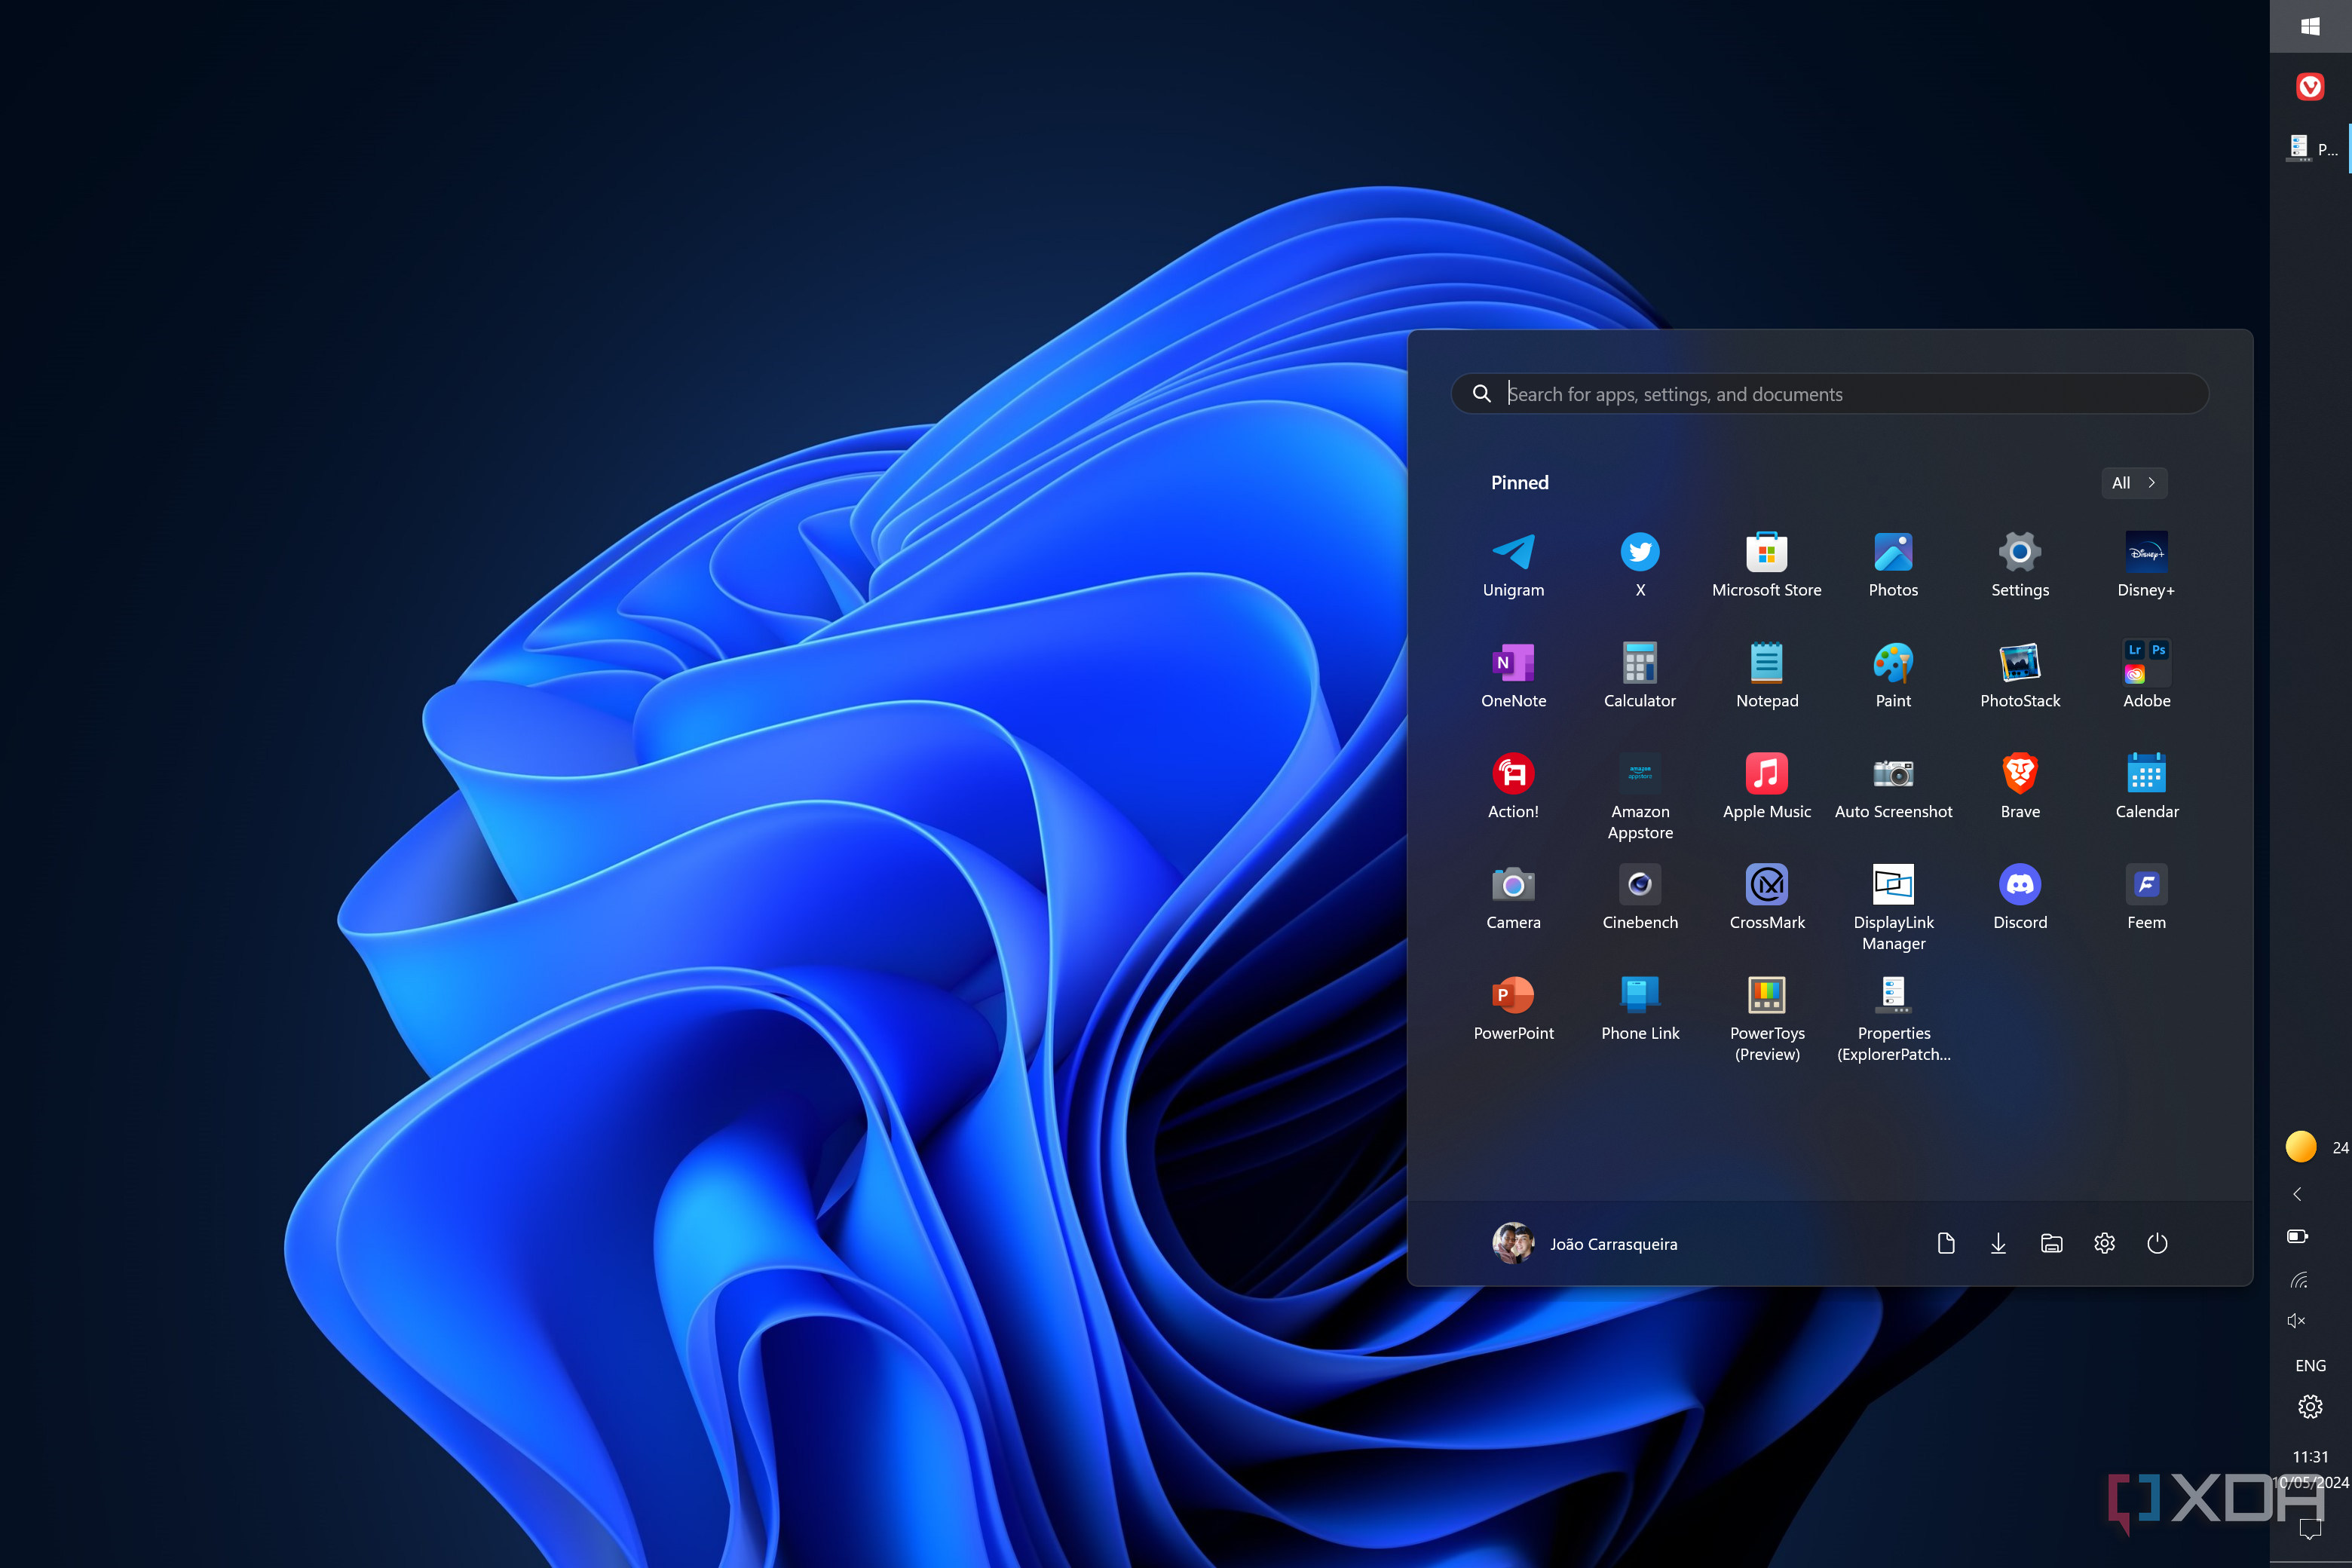
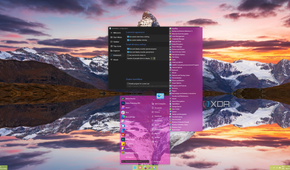
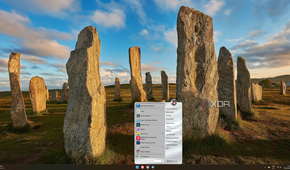
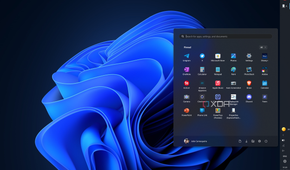
Another pain point many have with Windows 11 is the Start menu, which is a lot more limited than previous iterations. Thankfully, there are plenty of replacement options you can use to spice up your Start menu and make it that much more useful. A personal favorite of mine is Start11, but StartAllBack is also great. Both of those are paid options, but they're well worth the money for the flexibility you get.
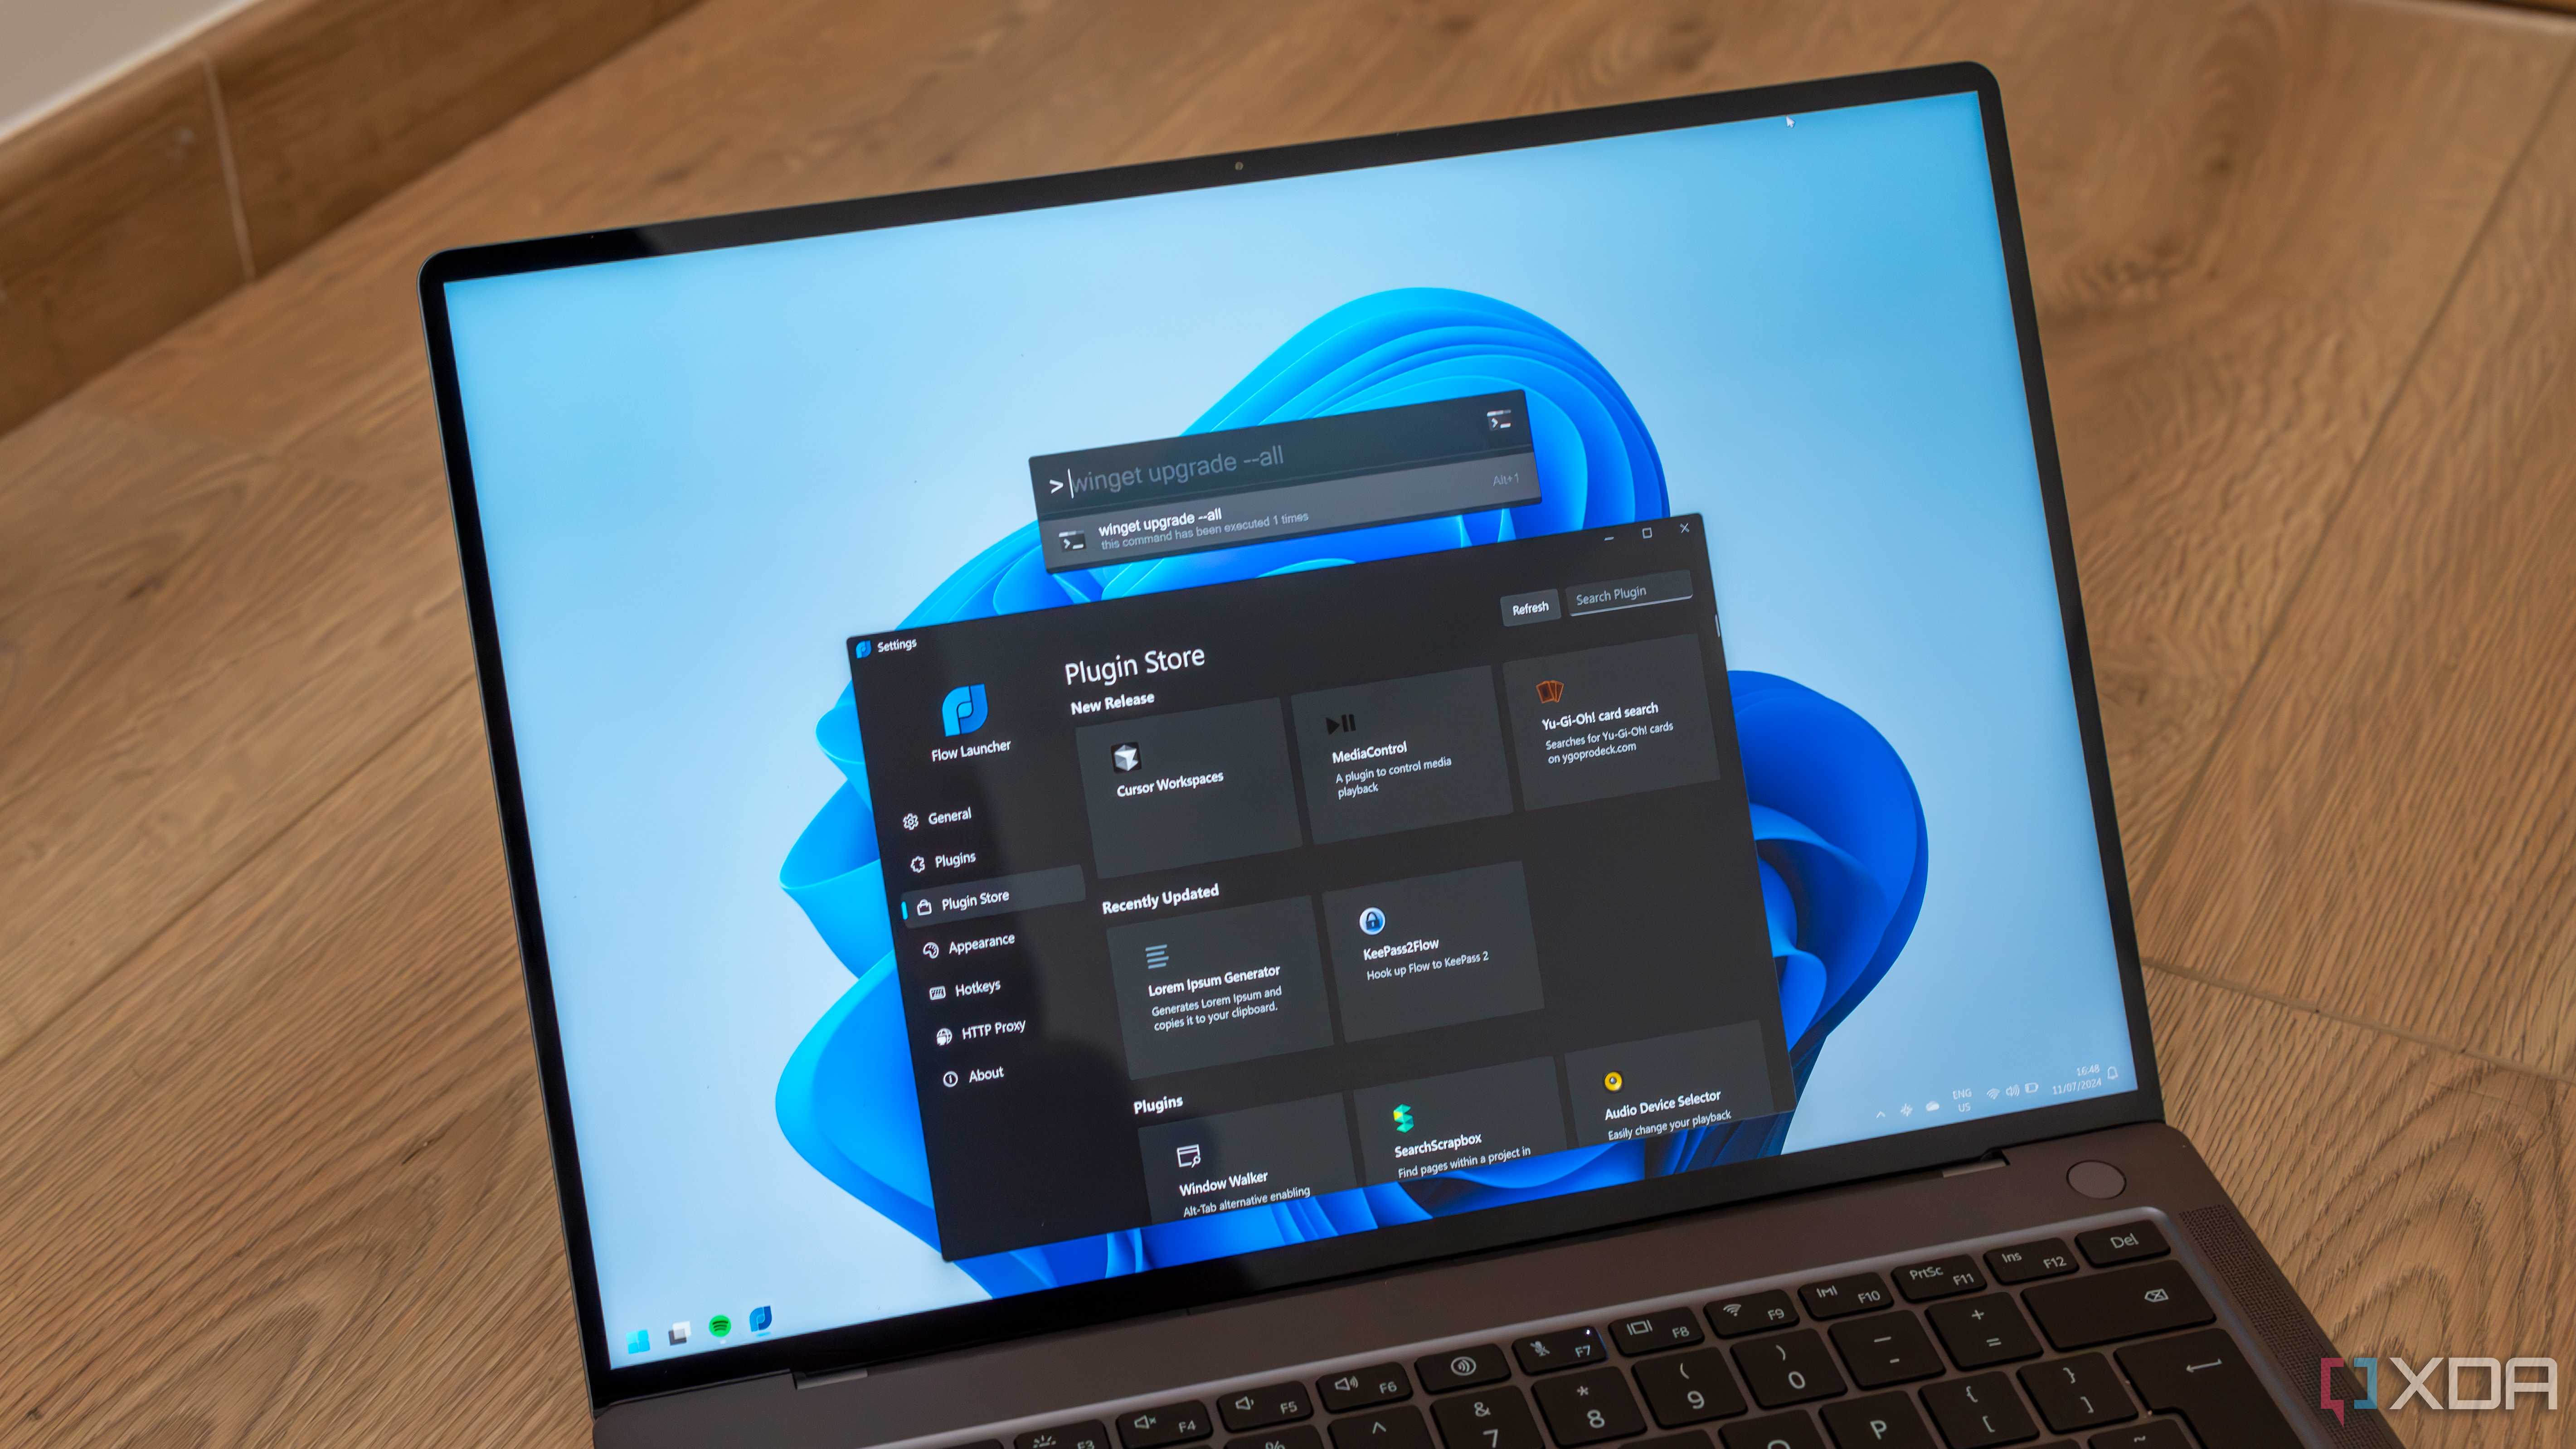
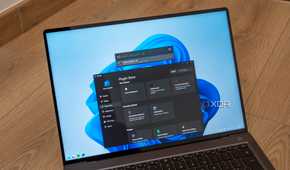
Or, if you don't care about the Start menu at all and you like using the keyboard, just use Flow Launcher. This is a search bar that can open all your apps, but it can do a whole lot more than that, too. It has a lot of plugins that allow you to search the web, YouTube, and much more.
