


When you’re out building a home lab, you’ll probably pick Proxmox, XCP-ng, or another Linux operating system. However, Windows machines can also double as solid workstations for your computing experiments, especially once you pair them with Hyper-V.
While the latest version of Hyper-V is restricted to the exorbitantly priced Windows Server package, you can run an older, free-to-use variant of the hypervisor on your Windows 11 rig and still expect reliable performance. So, we’ve compiled this detailed guide to walk you through the entire process of building a home lab using Hyper-V.
What you’ll need
Despite being extremely easy to configure, Hyper-V requires a slightly beefier PC than your average virtualization platform. Aside from a 64-bit processor armed (pun intended) with SLAT/nested paging provisions, you’ll need at least 4GB RAM on the host machine.
By default, Hyper-V Server 2019 is pre-installed on the Pro and Enterprise variants of Windows 11. Technically, you could install Hyper-V on Windows 11 Home, but you won’t be able to access the Windows Sandbox feature unless you’re using the Pro or Enterprise editions. Not to mention, you also have the added advantage of going beyond the 128GB memory limit on non-Home Windows 11 versions, which will come in handy when you’re attempting to set up a production environment using Hyper-V. So, we’ll center this guide around Windows 11 Pro, and you’ll need the OS pre-installed on your PC before you can proceed to the rest of the article.
Enabling CPU virtualization in the BIOS
Before you can start tinkering with Windows settings, you must modify the motherboard’s BIOS settings to turn on the CPU virtualization feature. The exact steps may differ depending on your mobo manufacturer, but here’s a general outline of the process:
- Reboot your PC and repeatedly tap the Delete key to enter the BIOS.
-
Head to the Advanced CPU options/Tweaker tab and set Virtualization/SVM Mode/Intel VT-x/AMD-V to Enabled.
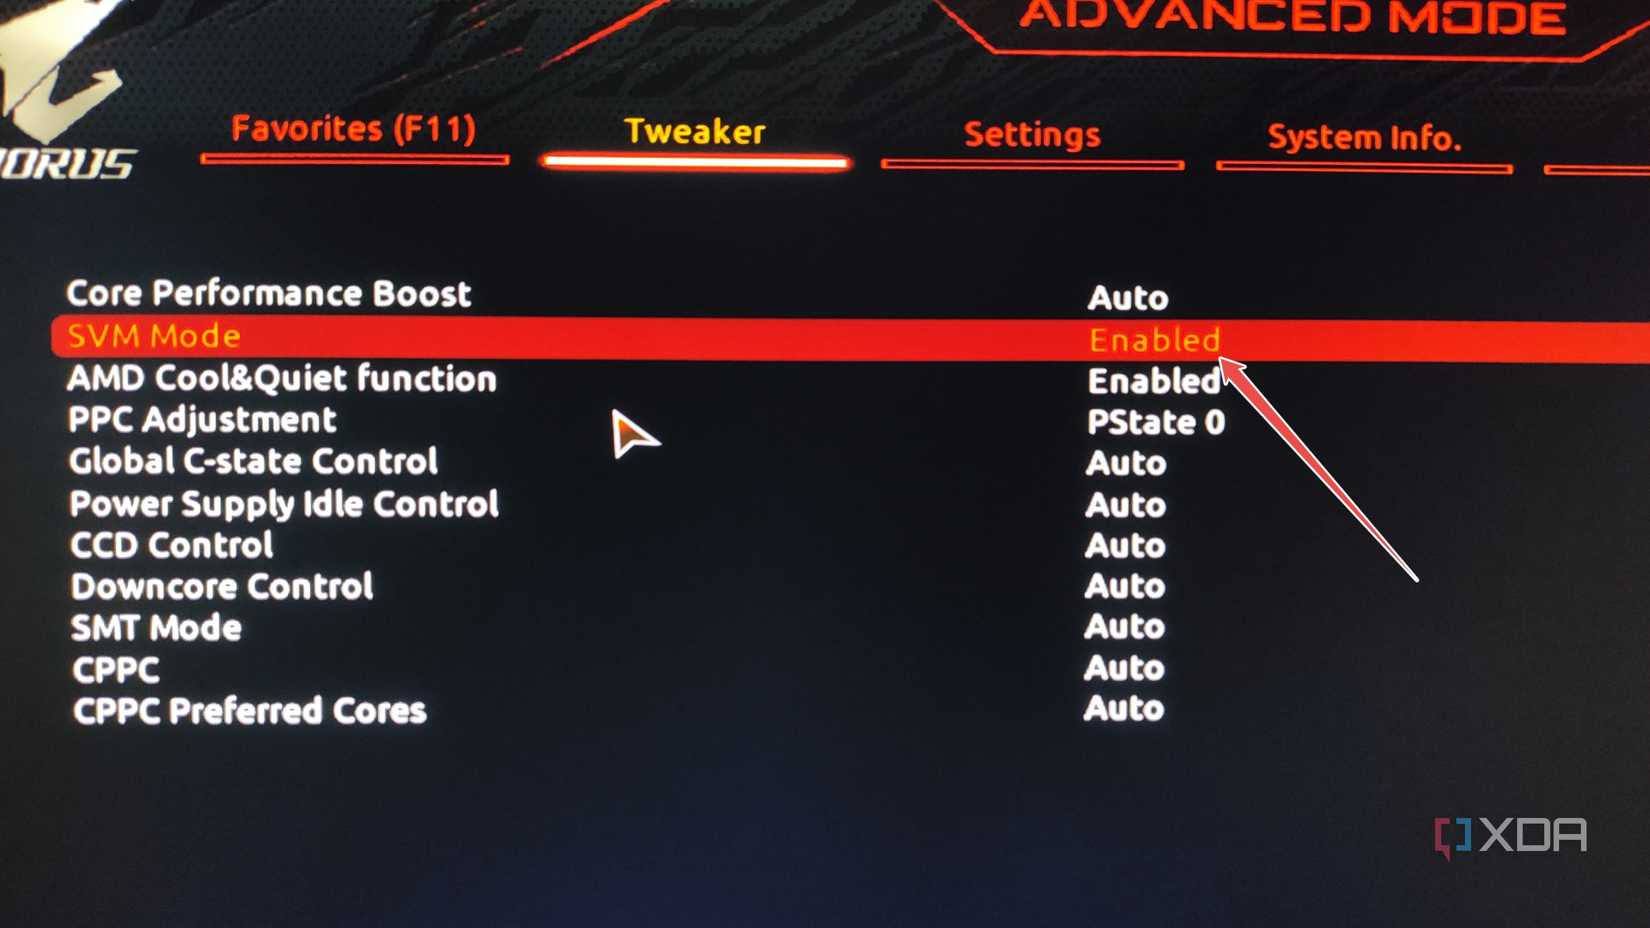
- Remember to save the changes before you exit the BIOS.

Enabling the Hyper-V services on Windows 11
With the virtualization setting toggled on, it’s time to set up Hyper-V on your PC. For those on Windows 11 Pro or Enterprise builds, you can get the hypervisor up and running once you enable two packages using the Control Panel:
-
Type Control Panel into the Search Bar and hit Enter when the utility shows up under the Best Match section.

-
Head to the Programs tab and click on Turn Windows settings on or off.

-
Enable the two Hyper-V services before tapping OK and hitting the Restart now button.


Deploying a virtual machine in Hyper-V
Once your PC restarts, you’ll be able to create and deploy virtual machines with the help of Hyper-V Manager.
-
Enter the words Hyper-V Manager into the Search Bar, and click on the app after it appears under Best match.

-
Select the host machine inside the Hyper-V Manager UI.

-
Tap the New button and select Virtual machine…

-
Press Next at the Before you begin tab.

-
Enter a Name for your new virtual machine.
Be sure to hit Next after each step.

-
Choose the Generation of your VM.

-
Allocate the Startup memory to the virtual machine.

-
If you want your VM to connect to the Internet, select the Default Switch inside the Connection tab.

-
Pick a Name for the virtual hard disk, choose a Location for it on your host machine, and grant some storage capacity to it.

-
Assuming you have some ISO images saved on your local machine, press the radio button next to the Install an operating system from a bootable CD/DVD-ROM and use the Browse option to select the ISO file of your favorite OS.

-
Tap the Finish button inside the Summary tab.

-
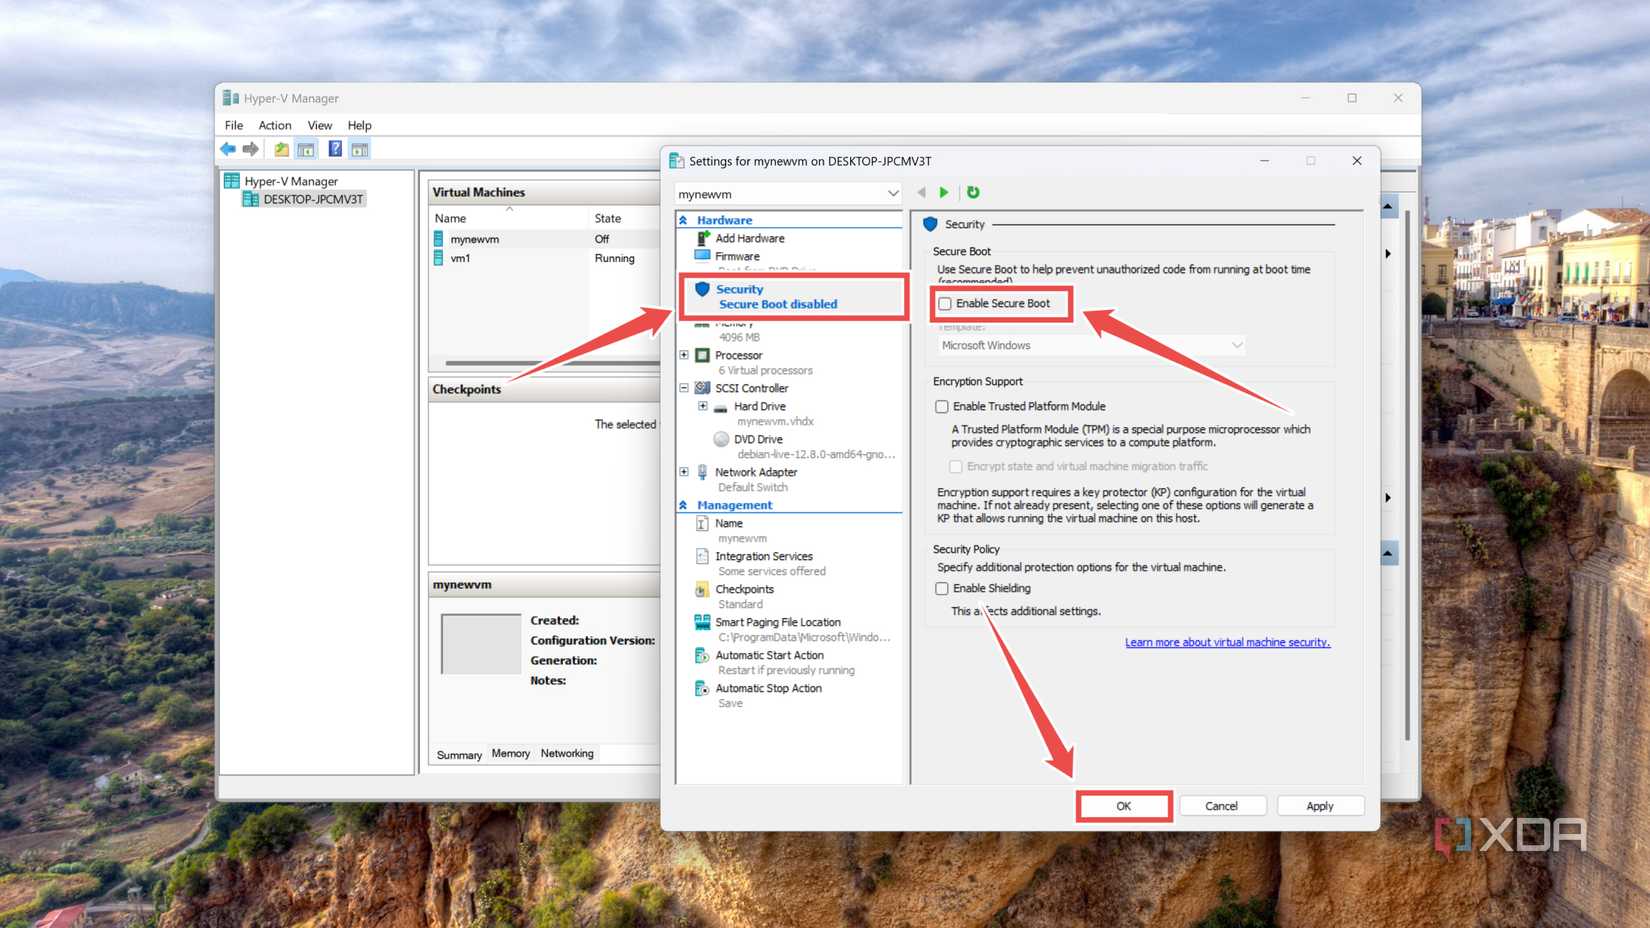
(Optional) If you’re attempting to run a Linux distro on the Hyper-V virtual machine, right-click on the VM, choose Settings, and uncheck the Enable Secure Boot option inside the Security tab.
-
To run the VM, double-click on it and hit the Start now button inside the pop-up window.


Turning your Windows 11 machine into an experimentation hub using Hyper-V

Assuming you’ve followed all the steps properly, the VM should boot into the operating system you chose earlier. With that, you’re free to bring your cool projects to life. But if Hyper-V seems too overwhelming, you can start your home lab journey using simple Type-2 hypervisors like VirtualBox and VMware Workstation Pro instead.
