


Building your own Network-Attached Storage can be a fun experience. Not only do you get to customize the hardware per your storage needs, but you also get the option to experiment with different NAS-centric operating systems. While TrueNAS Scale and Unraid are the most popular options in the hardcore NAS community, there are plenty of alternatives that are just as useful for beginners and veteran data hoarders.
OpenMediaVault is a lightweight OS that combines an easy UI with support for multiple file formats, making it perfect for anyone who wants to turn an outdated machine into a NAS.
What you’ll need
If you thought the system requirements for TrueNAS Scale, Unraid – or even your average GUI Linux distro – were low, you’re in for a treat with OpenMediaVault. For starters, you can install this ultra-light OS on a machine with just 1GB RAM. Heck, you don’t even need a 64-bit processor, as OMV also supports ARM CPUs.
While there’s a plugin that lets you utilize the same disk as the system and data drive, it’s a good idea to keep them separate. Technically, you can even configure a USB to serve as the system drive, and OMV recommends using one that supports the static wear leveling facility. Apart from that, you’ll need a USB drive with 2GB storage capacity to create the bootable drive.
-

PNY 128GB Elite-X Type-C USB 3.2 Gen 1 Flash Drive
- Capacity
- 128GB
- Connection
- USB 3.2 Gen 1
-
-


Setting up the bootable USB drive
Once you’ve gathered everything, it’s time to kick this project into high gear by writing the OMV ISO file onto a USB drive. We’ll go with Balena Etcher for this article, but you won’t run into any issues on Rufus or other image flashing tools.
- Head to OpenMediaVault’s official website and download the ISO file that’s compatible with the CPU architecture of your NAS.
- Download the setup.exe file for Balena Etcher and use it to install the tool on your system.
- Run Balena Etcher’s executable file with admin privileges.
-
Tap Flash from file and pick the OpenMediaVault ISO you downloaded earlier.

-
Click on Select target and choose the flash drive you wish to use as the bootable drive.

-
Hit the Flash button and wait for Balena Etcher to write the OS files onto the USB flash drive.


Switching the boot device in the BIOS
Before you can begin installing OMV, you’ll have to open the BIOS of your NAS’ motherboard and set the freshly-configured flash drive as the primary boot option.
- Plug the bootable drive into your NAS, power it on, and mash the Delete key as it starts up.
-
Open the Boot Settings and set the flash drive as Boot Option #1.
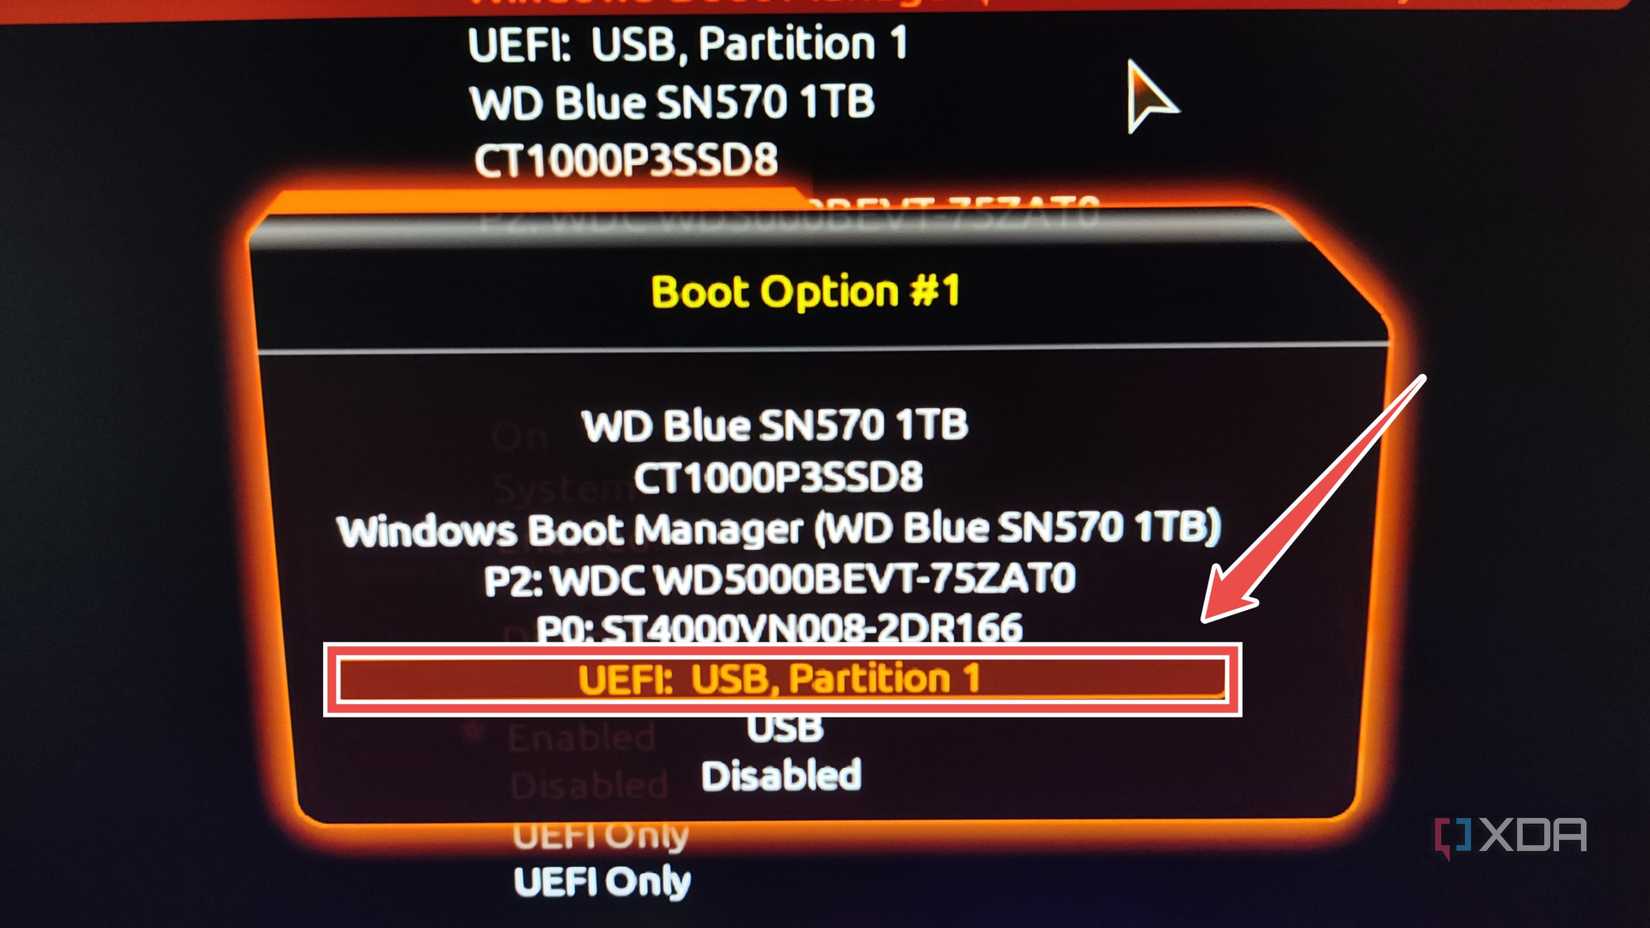
- Remember to save the changes before you exit the BIOS.

Installing OpenMediaVault
When the NAS restarts, you’ll be prompted to use the OMV installation wizard. This is where you’ll have to configure a bunch of settings, including the Keyboard layout, Timezone, and Storage drives.
-
Pick the Install option.

-
Choose your preferred Language for the OMV configuration.

-
Select the Location and Keymap settings.

-
Enter the Hostname, Domain Name, and Root Password for your OpenMediaVault NAS.

-
Pick the correct Timezone that corresponds to the Location you specified earlier.

-
Hit Continue when prompted to partition disks before selecting the Drive you wish to use as the boot disk.

Unlike your average OS, OMV doesn’t show a confirmation checkbox when you press enter over a drive. As such, you’ll want to be extra careful when partitioning the disks, as it’s easy to format the incorrect drive and lose essential data.
-
Select a Location for the Debian Package Manager Mirror and choose the URL for this Mirror archive.

- Press Continue to wrap up the installation and unplug the bootable drive as the system shuts down.


Configuring the OMV web UI
Following yet another reboot, the NAS will finally boot into the OpenMediaVault CLI. If it doesn’t, you’ll want to head to the BIOS and set the OMV boot drive as Boot Option #1. Either way, we’ll use the IP address of the NAS to access the OpenMediaVault web UI.
-
Paste the IP address of your DIY NAS into the Search bar of your favorite browser on another PC connected to the same network.

-
Log into the web UI by entering admin as the Username and openmediavault as the Password.

-
Navigate to the Disks submenu inside the Storage tab.

-
Select the Disk you wish to use as the storage drive, press the Wipe button, and tap Yes after enabling the Confirm checkbox.

-
Choose Quick as the Wipe method and wait for the console to show the End Of File message.
If the Quick option results in an error, you can attempt to wipe the disk again using the Secure method.

-
Switch to the File Systems section, click on the Add button, and choose your preferred File System from the list
.

-
Pick the Storage Profile, select the Disk you formatted earlier, and press Save.

-
Navigate to the Mount tab, enter the File System, and tap Save.

-
When OMV displays the Pending configuration changes bar, click on the Apply button and hit Yes.


Accessing the OMV NAS from your PC
With the storage drive mounted and ready for operation, you’ll want to tinker with the SMB share settings to use it with your Windows 11 machine.
-
Move to the Shared Folders button and press Create.

-
Enter a Name for this folder, choose the File System you set up earlier, and press Save.

-
Next, click on the Services tab, select SMB/CIFS, and toggle the Enabled checkbox inside the Settings sub-menu.

-
Head to the Create section, enable the Share (again), grant it a Name, and tap the Save button.
Be sure to Apply the changes in the Pending configuration changes bar, just like you did earlier.

-
Switch to the Users tab and press Create.

-
Set a Username and a Password for the User before clicking on the Save button.

-
Select this new User and use the Share button to grant it Read/Write access to the Shared Folder.

-
Launch the File Explorer and type the IP address of the OMV NAS inside the Address bar.

-
Enter the User Name and Password of your newly-configured NAS user.


Enhancing your OMV experience with useful plugins

Assuming you followed all the steps properly, you should be able to access your SMB share from your PC. If you're a fan of tinkering, you might want to check out all the cool plugins that can add even more features to your OpenMediaVault NAS. For instance, fans of the ZFS file system can import the openmediavault-zfs plugin, which in turn, is a part of another add-on called omv-extras. You also have the Docker, K8s, and Podman plugins, which are quite helpful when you want to turn your OMV storage server into a full-on self-hosting workstation. Assuming your hardware can handle VMs, you can even add the KVM hypervisor via openmediavault-kvm integration and run virtual machines on top of your newly-configured OpenMediaVault NAS.
