


From upgrading your router to modifying certain settings, there are tons of ways to increase your Wi-Fi speeds. But if you’re looking for some advanced tips to quicken the loading times of your favorite websites, you can try enabling DNS caching. For those unfamiliar with the term, Domain Name Service acts as a bridge between human-readable URLs and the numerical IPv4 and IPv6 addresses of websites. Anytime you search for a website, the DNS server resolves the request and loads the website whose IP address matches the URL you entered into the web browser.
Since the DNS resolution can take up to a few seconds, you can reduce the response time by caching the records in your local network. Better yet, you can turn any old Raspberry Pi in your house into an inexpensive DNS caching server!
What you’ll need
Building a DNS server doesn’t take too many resources, meaning you’re free to choose any Raspberry Pi for this project. However, I’d strongly recommend going with an RPi model that comes with a LAN port, as our primary objective is to reduce the latency as much as possible.
We’ve used the GUI variant of the trusty Raspberry Pi OS, but you’re free to follow along on any desktop-based Linux distro, including the Raspberry Pi Lite, DietPi, and other operating systems that rely on a command-line interface. If you’re having trouble installing the OS, feel free to consult our beginner’s guide to the Raspberry Pi for reference.
-
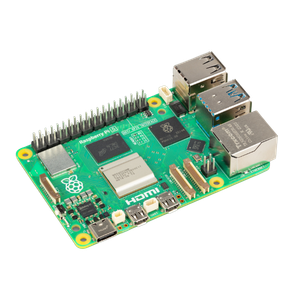
Raspberry Pi 5
- CPU
- Arm Cortex-A76 (quad-core, 2.4GHz)
- Memory
- Up to 8GB LPDDR4X SDRAM
- Operating System
- Raspberry Pi OS (official)
- Ports
- 2× USB 3.0, 2× USB 2.0, Ethernet, 2x micro HDMI, 2× 4-lane MIPI transceivers, PCIe Gen 2.0 interface, USB-C, 40-pin GPIO header
- GPU
- VideoCore VII
- Starting Price
- $60
-

Setting up a static IP address on your Raspberry Pi
Once you’ve installed the operating system on your Raspberry Pi, you’ll want to create a static IP address for your SBC. To do so,
-
Launch the terminal app if you’re on a GUI distro.

-
Check the IP address of your router by typing the following command:
ip r | grep default
The IPv4 address after default via is the address of your router.
-
Modify the dhclient.conf file with the nano editor:
sudo nano /etc/dhcp/dhclient.conf

-
Add the following lines at the end of the file:
-
interface wlan0/eth0
-
static ip_address=IP_address/24
-
static routers=Router_address
-
static domain_name_servers=DNS_address
For the static ip_address field, feel free to add any IPv4 address that your router hasn't assigned to other devices. Next, be sure to paste the value you received after running the ip r | grep default command into the static routers field. Finally, you can choose any 8.8.8.8, 1.1.1.1, or another DNS server for the static domain_name_servers field.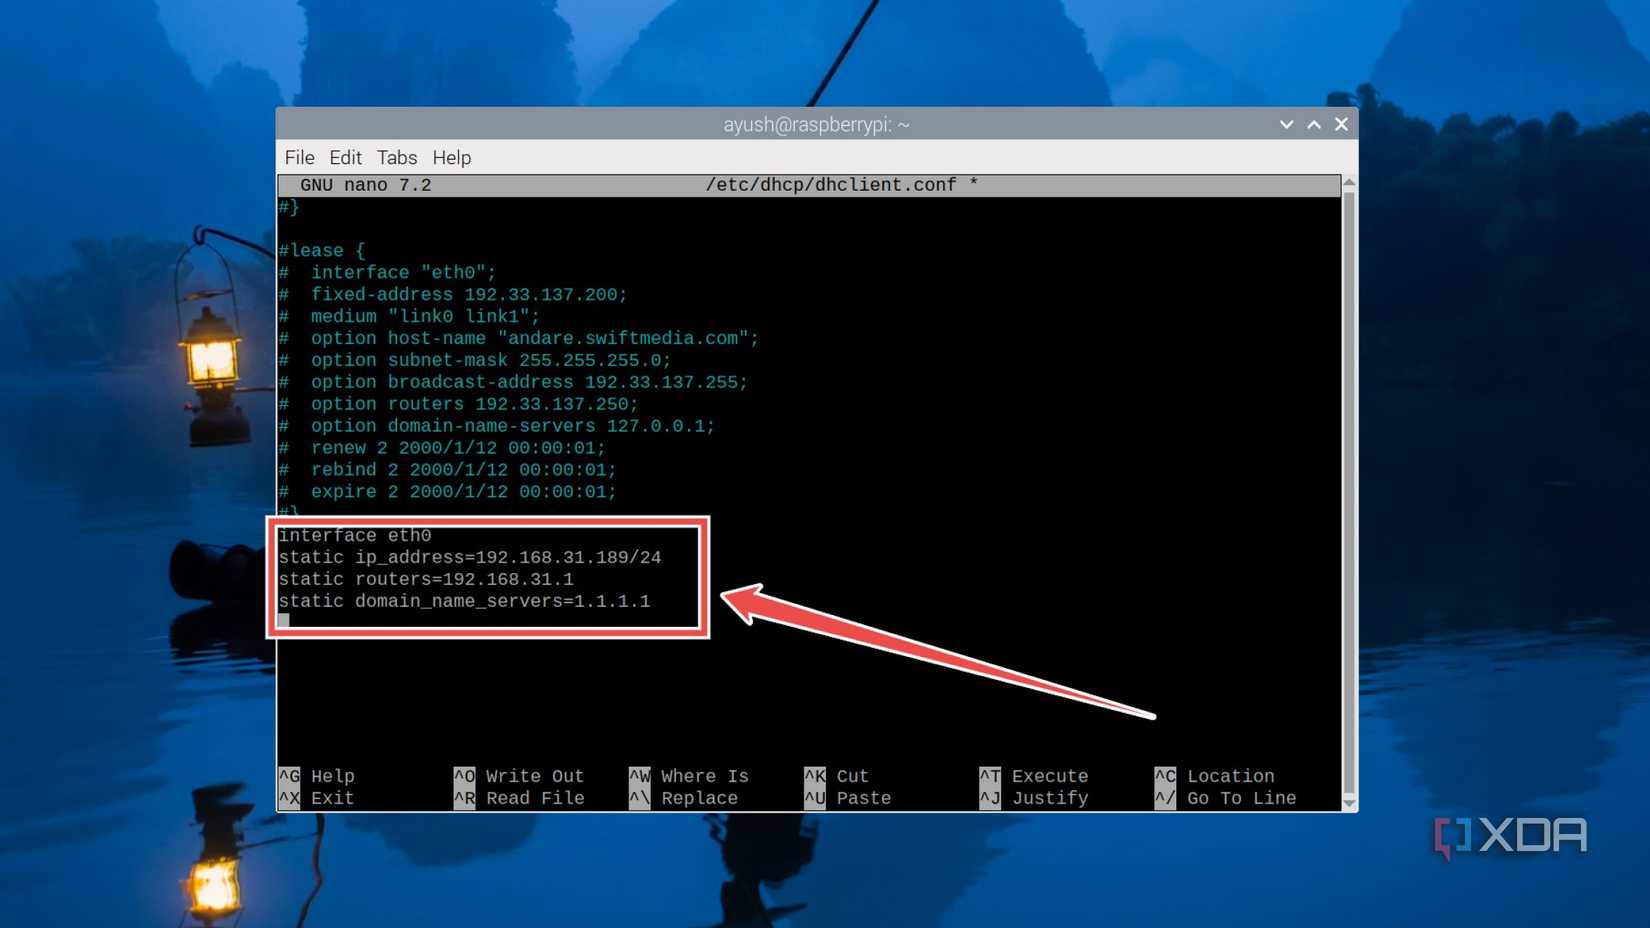
-
- Hit Ctrl+X, followed by Y and the Enter key to exit the dhclient.conf file.


Configuring Dnsmasq
With a static IP assigned to the Raspberry Pi, it’s time to initialize the Dnsmasq server.
-
Grab the Dnsmasq package by running the following command:
sudo apt install dnsmasq -y

-
Use the nano text editor to open the dnsmasq.conf file:
sudo nano /etc/dnsmasq.conf

-
Remove the # before the following terms:
-
domain-needed
-
bogus-priv
-
dnssec
-
no-resolv

-
-
Scroll down to the #server=/localnet/192.168.0.1 command and replace it with the upstream servers you wish to use.
server=1.1.1.1

-
Get rid of the # before the cache-size field and set its value to 2000 to increase the size of the DNS cache.

- Press Ctrl+X, Y, and Enter to save the changes and exit the configuration file.
-
Run the following commands to restart the Dnsmasq service and check its status:
-
sudo systemctl restart dnsmasq
-
sudo systemctl status dnsmasq

-


Connecting to the DNS caching server from another device
Although your Raspberry Pi-powered DNS server is up and running, you’ll want to connect your devices to it if you wish to utilize the DNS caching facility. We’ll highlight the steps to do so on a Windows 11 machine, but the overall process is the same for most operating systems:
-
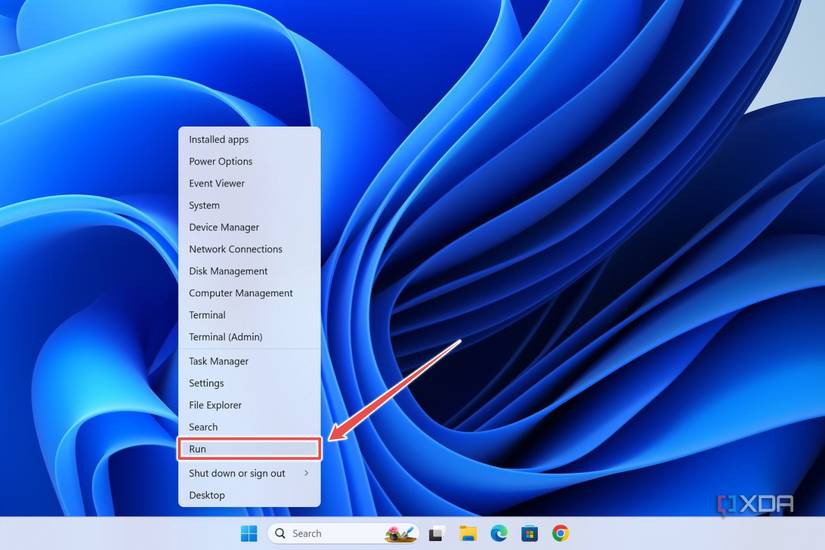
Right-click on the Start button and select Run.
-
Type ncpa.cpl into the Open: bar and tap OK.

-
Right-click on your Network interface and choose Properties.

-
Double-click on Internet Protocol Version 4 (TCP/IPv4).

-
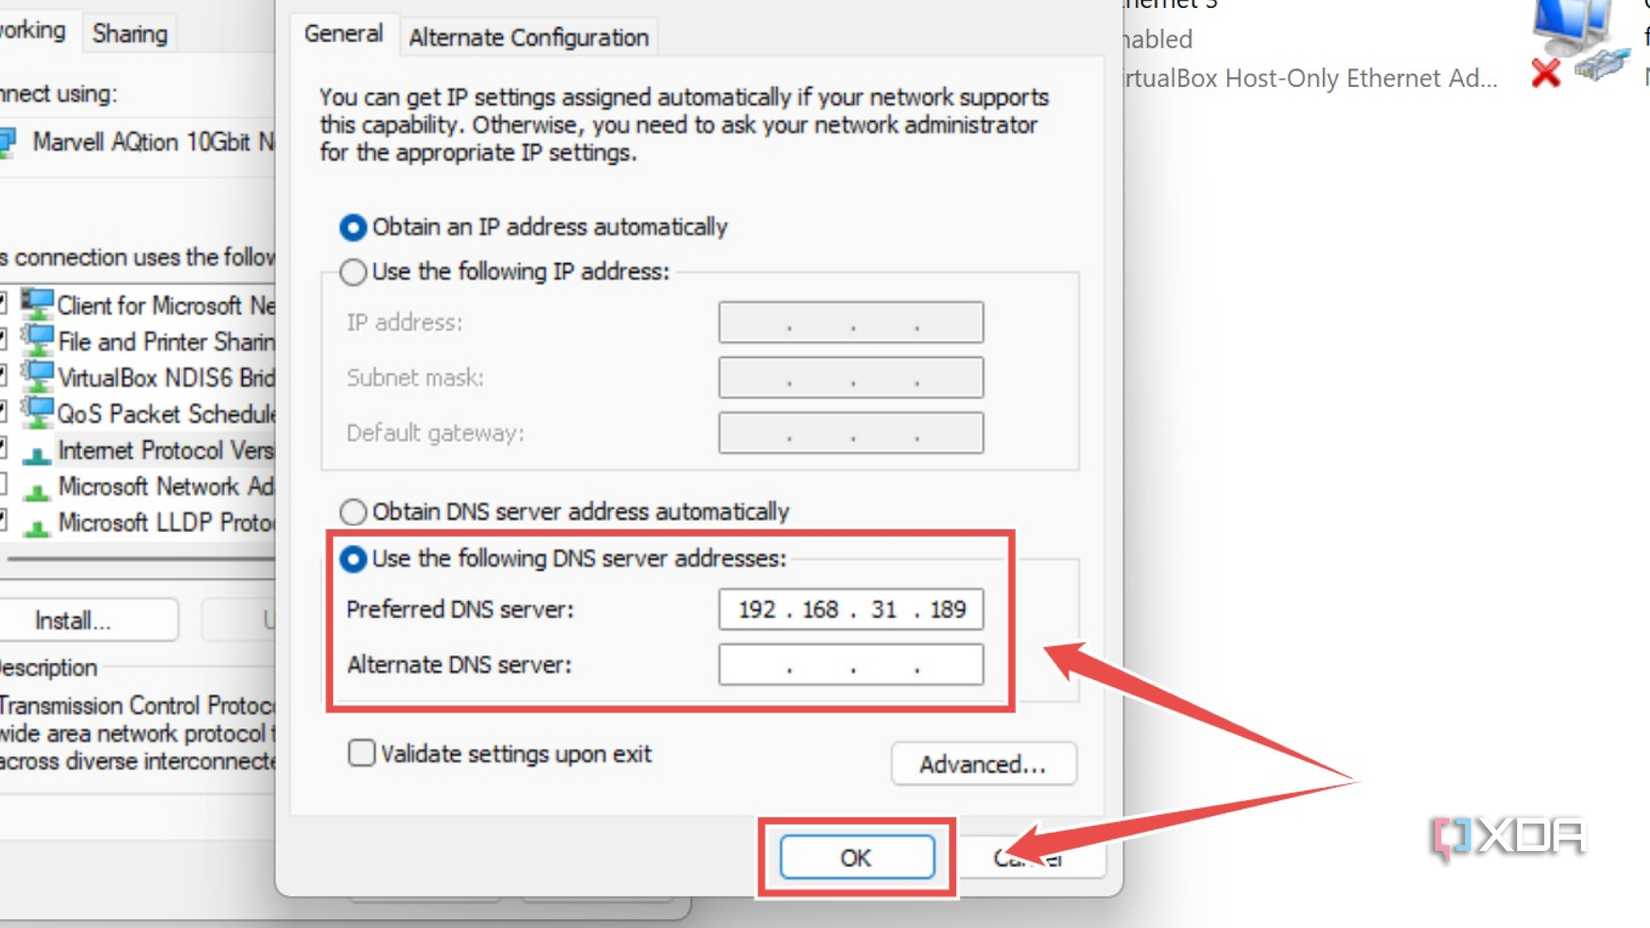
Toggle the radio button next to Use the following DNS server addresses option before entering the (static) IPv4 address of your Raspberry Pi and tapping OK.


Boosting your network’s DNS resolution speed with your spare Raspberry Pi

Once you’ve connected your PC to the Raspberry Pi-flavored DNS server, you can check whether everything works properly by launching your favorite website. Depending on your Internet speed, the caching process may take a second or two when you open a web page for the first time. But once the caching for URLs is complete, your browser will be slightly faster at serving your oft-visited web pages.
