


I love streaming Spotify music, but my phone's and laptop's built-in speakers aren't the best. Typically, I use HomePod to stream music from my iPhone and iPad despite knowing it lacks native Spotify integration and works only with AirPlay-supporting Apple devices. Also, the fact that HomePod is absent from the Spotify Connect-enabled products list hurts; it doesn't work directly with Android phones and Windows or Linux-based computers.
Because of that, I decided to turn the HomePod into a Spotify Connect device with a Raspberry Pi SBC. It is a makeshift solution involving packages that aren't actively maintained and work only on Raspberry Pi with Debian or Ubuntu. Since it's unlikely that Apple will work with Spotify to make it a Spotify Connect device anytime soon, I managed to convert the HomePod into a universal, unrestricted Spotify speaker using a Raspberry Pi 4B. Here's how to do it.
Streaming Spotify music to HomePod over AirPlay Isn't Straightforward
The official ways are more like a workaround

When using Spotify on my iPhone, iPad, or Mac, I need to open the Control Center to choose AirPlay and switch the Sound Output source to HomePod. Well, that's not exactly an ideal integration. Alternatively, I can ask Siri to play a song using the Spotify app on my iPhone (iOS 17.4 or higher), iPad (iPadOS 17.4 or higher), and Mac (macOS 10.14 Sonoma or higher). However, getting Siri to use Spotify to play music over HomePod is a struggle, mostly because Apple allows limited integration of third-party apps with Siri.
Besides that, I am at the mercy of third-party apps such as AirMusic and AirStreamer on Android phones and Windows 11 computers to use Spotify with HomePod over AirPlay. That means I need to always update those AirPlay mirroring apps for Android and Windows devices.
These workarounds didn't offer one thing — the capability to use the HomePod as a wireless speaker for seamless playback from any device or platform. I wanted the HomePod to work with all of them without using third-party apps on a mobile or computer.
-

Raspberry Pi 4
- Storage
- MicroSD card slot
- CPU
- Arm Cortex-a72 (quad-core, 1.8GHz)
- Memory
- 1GB, 2GB, 4GB, or 8GB of LPDDR4
- Operating System
- Raspberry Pi (Official)
- Ports
- 2x USB-A 3.0, 2x USB-A 2.0, 40-pin GPIO, 2x micro-HDMI, 2-lane MIPI DSI display port, 2-lane MIPI CSI camera port, 4-pole stereo audio and composite port, microSD card slot, USB-C (for 5V power), Gigabit Ethernet
- GPU
- VideoCore VI
-
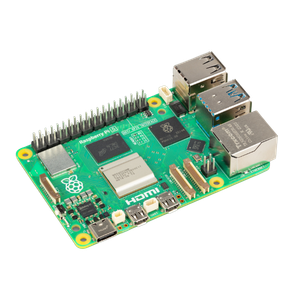
Raspberry Pi 5
- CPU
- Arm Cortex-A76 (quad-core, 2.4GHz)
- Memory
- Up to 8GB LPDDR4X SDRAM
- Operating System
- Raspberry Pi OS (official)
- Ports
- 2× USB 3.0, 2× USB 2.0, Ethernet, 2x micro HDMI, 2× 4-lane MIPI transceivers, PCIe Gen 2.0 interface, USB-C, 40-pin GPIO header
- GPU
- VideoCore VII
- Starting Price
- $60
Finding suitable software to turn a HomePod into a Spotify Connect device
Getting the right tools, even if they're a bit rusty
To make HomePod available to all devices, I needed to make it discoverable on the local network. For that, I chose OwnTone (Linux, FreeBSD, macOS) as an audio media server for streaming music to AirPlay devices (multiroom), Chromecast, Roku, and iTunes over a local network. It supports local music libraries, podcasts, audiobook files, internet radios, and Spotify (requires Spotify Premium).
Next, I picked SpoCon (a Debian and Ubuntu package), which turns a HomePod into a Spotify Connect device when an SBC like a Raspberry Pi sits between them. SpoCon and OwnTone work on any SBC with at least Debian 12, Ubuntu, or Raspbian. I have a Raspberry Pi 4B running a handful of projects and use it to install the SpoCon and OwnTone servers.
So here's what you'll need to turn your HomePod into a local Spotify Connect device.
- HomePod or HomePod mini
- Spotify Premium account to use with OwnTone server
- Raspberry Pi or other SBC with Debian 12 (at least) or Ubuntu
Installing and configuring SpoCon software to make HomePod discoverable
Necessary to make HomePod visible to all devices on the local network
The first step involves installing the SpoCon package on your Raspberry Pi with Bookworm to ensure that HomePod is visible over the network. I used a headless (no GUI) Raspbian version on my Raspberry Pi and invoked Terminal over SSH to install the packages.
Using a root account makes downloading and installing packages easier.
Here's how to add SpoCon on a Raspberry Pi.
-
Paste the following command in the Terminal to easily install software resources from independent software vendors and manage the distribution.

sudo apt-get install software-properties-common
-
Next, paste the command below to set up the PPA keys for the SpoCon package.

curl -sL https://spocon.github.io/spocon/install.sh | sh
-
Since Bookworm removes support for openjdk-11-jre and openjdk-8-jre dependencies, the SpoCon package won't install automatically. You need to unpack, edit the dependencies, and repack the SpoCon package. Paste the following command to download SpoCon's .deb package into the /home/pi directory.
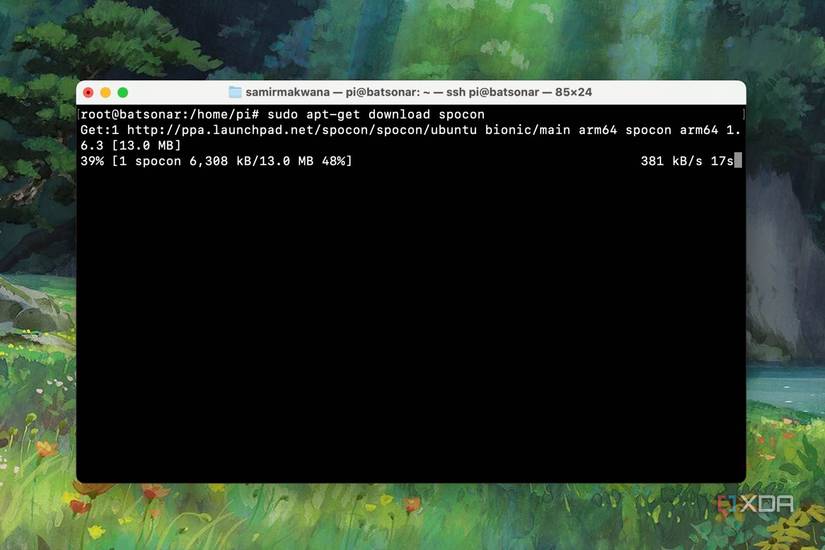
sudo apt-get download spocon
-
Create a temporary folder to unpack the downloaded SpoCon .deb package.

sudo mkdir temp
-
Unpack the SpoCon .deb package in the temp folder.

sudo dpkg-deb -R spocon_1.6.3_arm64.deb temp
-
Next, you'll need to edit and change the dependency value from the control in the unpacked .deb file. To do that, copy and paste the command below.

sudo nano ./temp/DEBIAN/control
-
Append "| openjdk-17-jre" at the end of the dependency value line.

Depends: libasound2, adduser, openjdk-11-jre | openjdk-8-jre | openjdk-17-jre
- Press the Control + O shortcut to add the changes to the control file and hit Control + X to close it.
-
Repackage the updated .deb package using the command below.

sudo dpkg-deb -b ./temp spocon_new.deb
-
Finally, run this command to install the SpoCon New.deb file. It will automatically fetch the other dependencies required by the package.

sudo apt-get install -y ./spocon_new.deb


After that, you must create folders so SpoCon can communicate with the OwnTone server to send the details of the music or audio file to the stream.
-
In Terminal, paste the following command to create a new directory.

sudo mkdir /srv/music
-
Create pipe folders for SpoCon and OwnTone to communicate and serve Spotify's music metadata.

sudo mkfifo /srv/music/spotify; mkfifo /srv/music/spotify.metadata
-
Give SpoCon user access to these pipe folders using the command below.
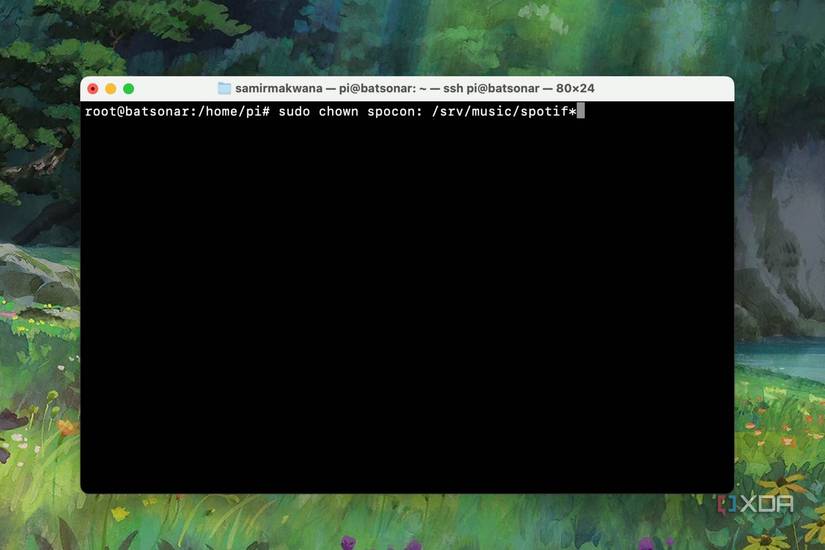
sudo chown spocon: /srv/music/spotif*


Next, you must add the pipe folder paths to SpoCon's configuration file so that it can correctly share Spotify configuration details with the OwnTone server and show HomePod as a Spotify Connect device on a local network with an assigned name.
-
In Terminal, open the SpoCon configuration .toml file to edit.

sudo nano /opt/spocon/config.toml
-
Edit the configuration file to change the following values inside the double quotes.

deviceType = “SPEAKER”
deviceName = “HomePod”
[player]
initialVolume = 21845
metadataPipe = “/srv/music/spotify.metadata”
output = “PIPE”
preferredAudioQuality = "VERY_HIGH"
pipe = “/srv/music/spotify”
logAvailableMixers = true
volumeSteps = 64 - Press Control + O to write the changes to the configuration .toml file and press Control + X to close it.


Installing and configuring the OwnTone server to grab and stream music metadata
Making an audio media server handle the streaming duties for HomePod
Here's how to install the OwnTone server to manage the audio streaming tasks.
-
Paste the following command to add the OwnTone repository key to your Raspberry Pi.

wget -q -O - http://www.gyfgafguf.dk/raspbian/owntone.gpg | sudo gpg --dearmor --output /usr/share/keyrings/owntone-archive-keyring.gpg
-
Fetch OwnTone's sources list that is Bookworm compatible and add it to your Raspberry Pi's default sources list.

sudo wget -q -O /etc/apt/sources.list.d/owntone.list http://www.gyfgafguf.dk/raspbian/owntone-bookworm.list
-
Run a command to update all packages and install the OwnTone server along with other dependencies.

sudo apt-get update && sudo apt-get install owntone
-
Restart the OwnTone service and SpoCon service together.

sudo service owntone restart && sudo service spocon restart


Finally, ensure that the OwnTone server recognizes your HomePod. Here's how you can check.
-
Open the OwnTown server URL below in a browser on a mobile device or computer on your local network.

http://owntone.local:3689/#/
-
Click the Upward-Arrow in the bottom-left corner of the window to check if your HomePod's name appears on the list of devices.
If it appears with a black font and slider, you're ready to use it.


Otherwise, you must enable it from the Hamburger menu in the top-left corner -> Settings -> Remotes and Outputs -> Speaker pairing and device information. Look for your HomePod's name and enable the toggle next to it.
Use HomePod to stream Spotify from any device on a local network
Using the Spotify app on a Mac, Windows, or Android makes it convenient to use HomePod as a Spotify Connect speaker. The only tip I can offer is to try not to use Spotify on an iPhone or iPad while playing songs on HomePod from other devices. On the iPhone or iPad, Spotify sometimes switches to AirPlay overzealously. A 2-3-second delay/lag occurs using Spotify with HomePod in this setup, but it won't bother you after a few weeks.
There's a downside to this setup. HomePod appears as a Spotify Connect device to any Spotify Premium user on the same local network. That means people on your guest network can hijack your playlist queue and mess around. Of course, you can edit the SpoCon configuration file to add your Spotify username, password, and authentication blob in the configuration file so that only you can get to use the HomePod as a Spotify Connect device.
This is only a one-time setup that takes a few minutes. If you really enjoy music as much as I do, check out how to make a custom Spotify recommender using Python to find new music or build a digital jukebox on a Raspberry Pi.
-

Apple HomePod mini
- Display
- No
- Dimensions
- 3.3 x 3.9 inches
- Weight
- 345g
- Clock
- No
- Integrations
- iHeart Radio, Radio.com, Deezer, TuneIn, Pandora and Amazon Music
- Woofer Size
- 4-inch (10 cm) woofer
The Apple HomePod Mini is an affordable, Siri-enabled speaker that offers plenty of neat smart features, including temperature and humidity monitoring. However, you should only get one if you're in the Apple ecosystem.
-

Apple HomePod 2
The HomePod 2 comes with a large build, loud sound, wide touchscreen, and more. It seamlessly connects to other Apple devices and offers room temperature and humidity sensors.


