


For the uninitiated, Secure Shell, or SSH, is a protocol that allows you to establish an easy-to-use yet robust connection between two devices. Typically used for sharing files or executing remote commands over a network, SSH is the perfect way to access any of your devices from your PC.
With Raspberry Pi being one of the most-used SBCs for hobbyist projects, you’re bound to require SSH functionality in the palm-sized system sooner or later. So, we’ve compiled a detailed guide to help you SSH into your Raspberry Pi and access it from any Windows machine.
How to enable SSH before installing an OS on the Raspberry Pi
Using Raspberry Pi Imager
First, you’ll need to enable the SSH functionality on your Raspberry Pi. If you haven’t already flashed an operating system onto your microSD card, you can use the OS customization settings available in the Raspberry Pi Imager app to enable SSH.
-
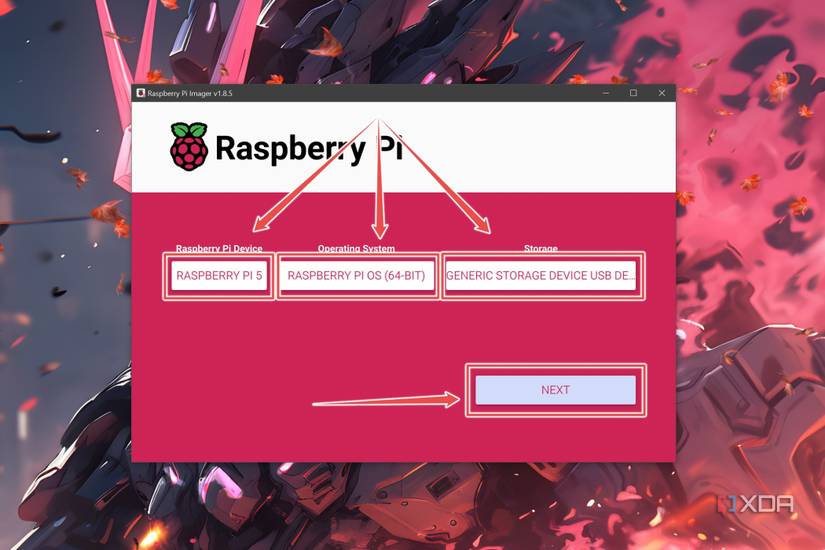
Hit Next once you've set the Device, Operating System, and Storage options within the Raspberry Pi Imager.
-
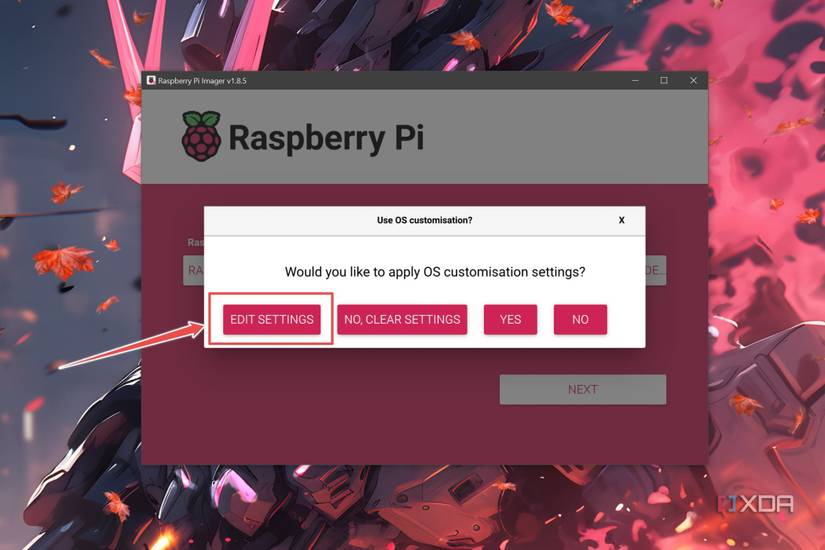
Select Edit Settings when prompted by the app to apply OS customization settings.
-
Head to the Services tab and make sure the Enable SSH checkbox and the Use password authentication option are enabled.
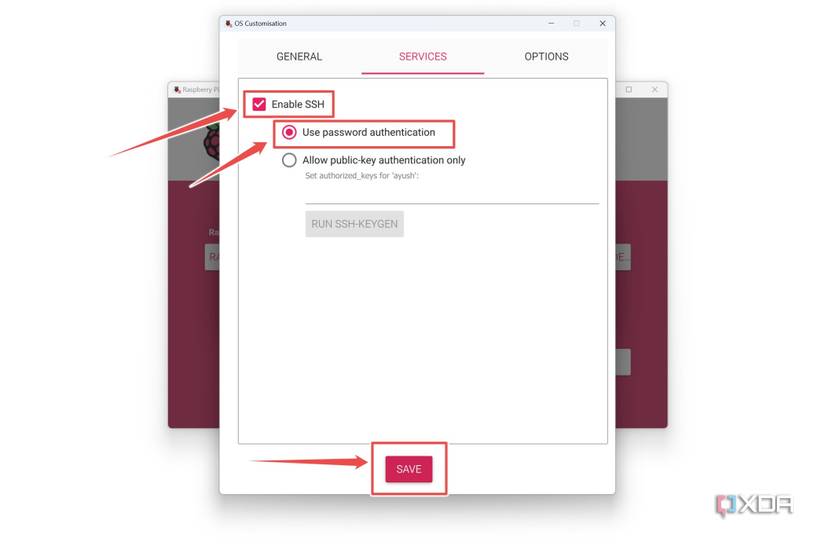
- Click the Save button and proceed with the usual procedure to flash the microSD card.


Using the ssh file
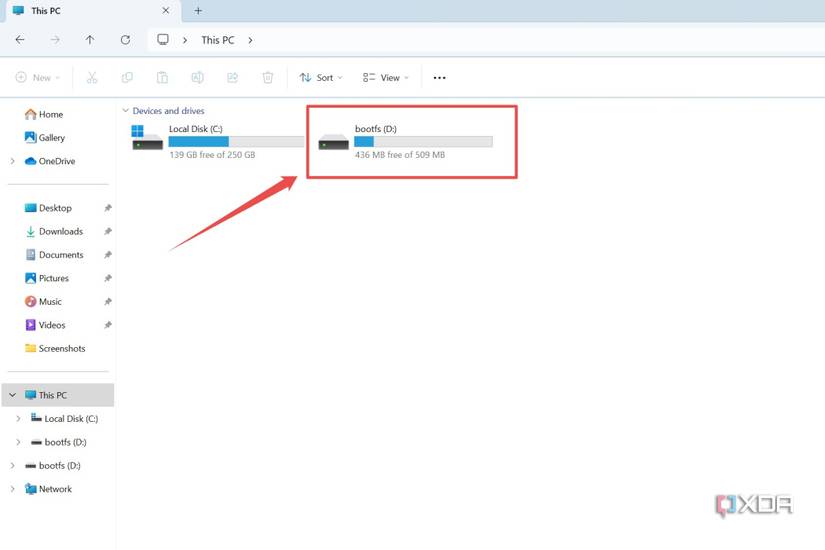
If you're accustomed to using Balena Etcher, Rufus, or other flashing tools, you can create an empty ssh text file before inserting the microSD card into your Raspberry Pi.
-
Head to the microSD card's directory using the File Explorer.
-
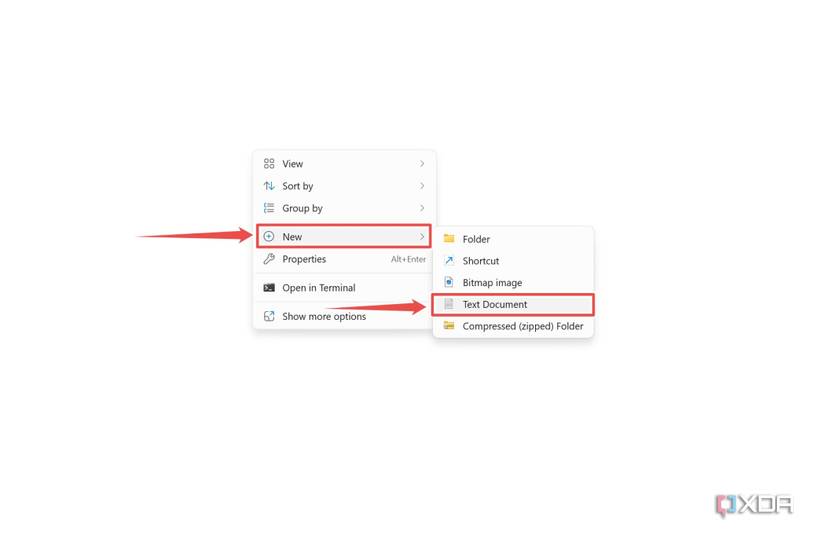
Right-click anywhere on the screen, hover your cursor over New, and select Text Document.
-
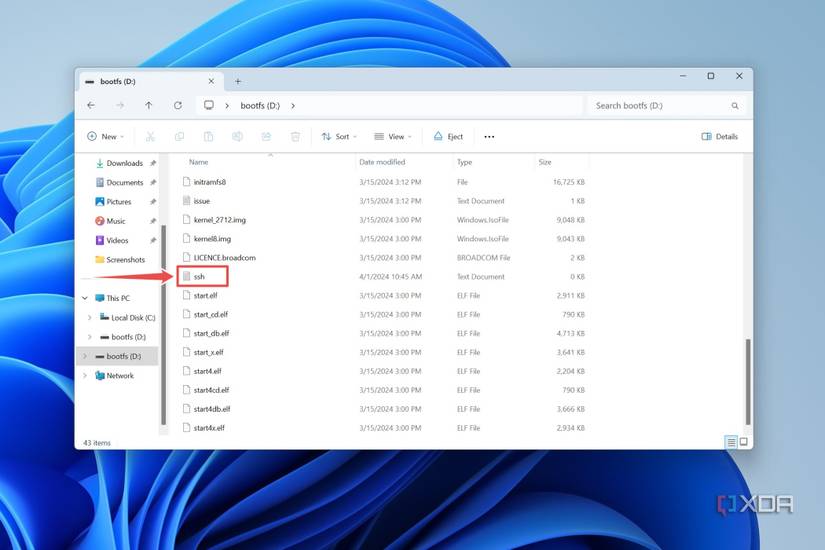
Rename this file to ssh.


How to enable SSH after installing an OS on the Raspberry Pi
Using the Configuration settings
Assuming you’re using the Raspberry Pi OS, there are several ways to turn on SSH functionality on your RPi. The simplest method involves modifying certain Configuration settings:
-
Click the Raspberry button before hovering your cursor over Preferences and selecting Raspberry Pi Configuration.

- Head to the Interfaces tab.
-
Set the SSH toggle to Enabled and press the OK button.


Using the raspi-config tool
If you prefer a more BIOS-like interface, you can utilize the Raspberry Pi Software Configuration tool, which is accessible via the Terminal.
-
Click on the terminal app.

-
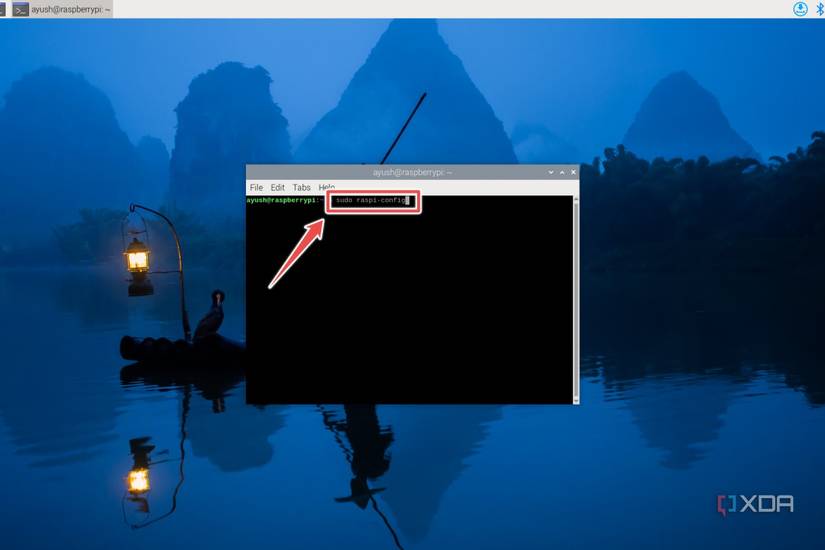
Type the following command within the terminal window:
sudo raspi-config
-
Navigate to Interface options.

-
Select SSH and tap Yes when asked for confirmation.

-
Click on Finish to exit raspi-config.


Using the terminal
Finally, if you prefer terminal commands to GUI settings, you can use the systemctl command to enable SSH on the SBC. This method is also compatible with other Debian-based Linux distros, including Ubuntu.
- Open the terminal app.
-
Paste the following commands into the Terminal window and press Enter to execute them:
-
sudo systemctl enable ssh
-
sudo systemctl start ssh

-

How to find the IP address of your Raspberry Pi
Before you can access your Raspberry Pi from your PC, you’ll need to find its IP address. There are many ways to do this, but we’ll use the simplest method for now.
- Click on the Wi-Fi/Ethernet icon.
-
Hover over the Advanced Options and choose Connection Information.

-
Make a note of the IP Address under the IPv4 header.


How to SSH into the Raspberry Pi on your PC
Now that you know your Raspberry Pi’s IP address and have enabled SSH, it’s time to switch to your PC. While you can use the built-in terminal emulator on Windows 11, I’ve switched to PuTTY as it’s much easier to use.
- Make sure your Raspberry Pi is powered on and connected to Ethernet/Wi-Fi.
- Download PuTTY from this link and run its executable file as an administrator.
-
Enter the IP address of your Raspberry Pi as the hostname and select SSH as the connection type before hitting the Open button.

-
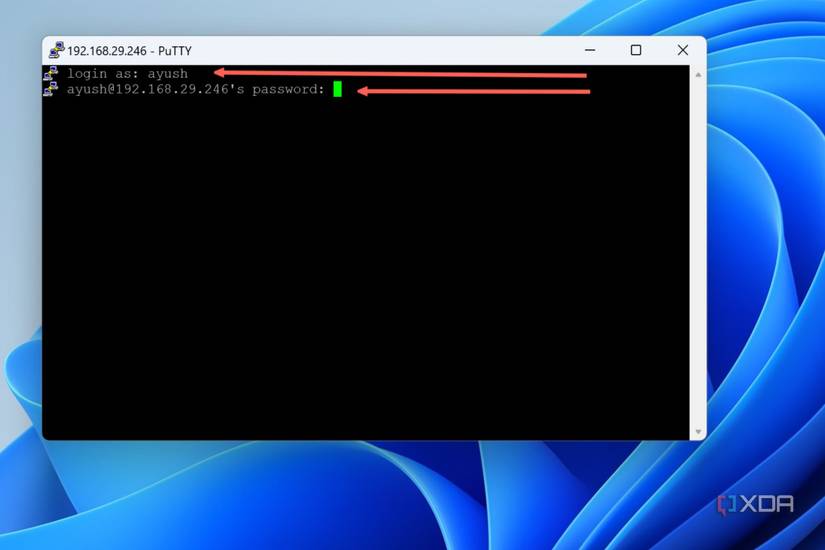
Enter the username and password of your Raspberry Pi to gain access to it over SSH.


Accessing your Raspberry Pi via SSH

Assuming you followed all the steps correctly, PuTTY will show user@raspberrypi as the device name, and you’re free to run as many commands as you wish from your PC. If you’re wondering what you can do with SSH, this feature will be useful when you make a NAS with your Raspberry Pi. Besides letting you use port forwarding on the SBC, SSH also allows you to remotely install any app on the Raspberry Pi.
