


When you’ve built a powerful Proxmox rig outfitted with your favorite virtual machines and containers, the last thing you’d want is a botched experiment to render everything unusable. While there are plenty of ways to safeguard your tinkering workstation, deploying a Proxmox Backup Server is by far the most efficient method of saving all your virtual guests. So, I’ve created this guide to help you integrate Proxmox Backup Server with your home lab.
Why should you use Proxmox Backup Server?
One word: deduplication


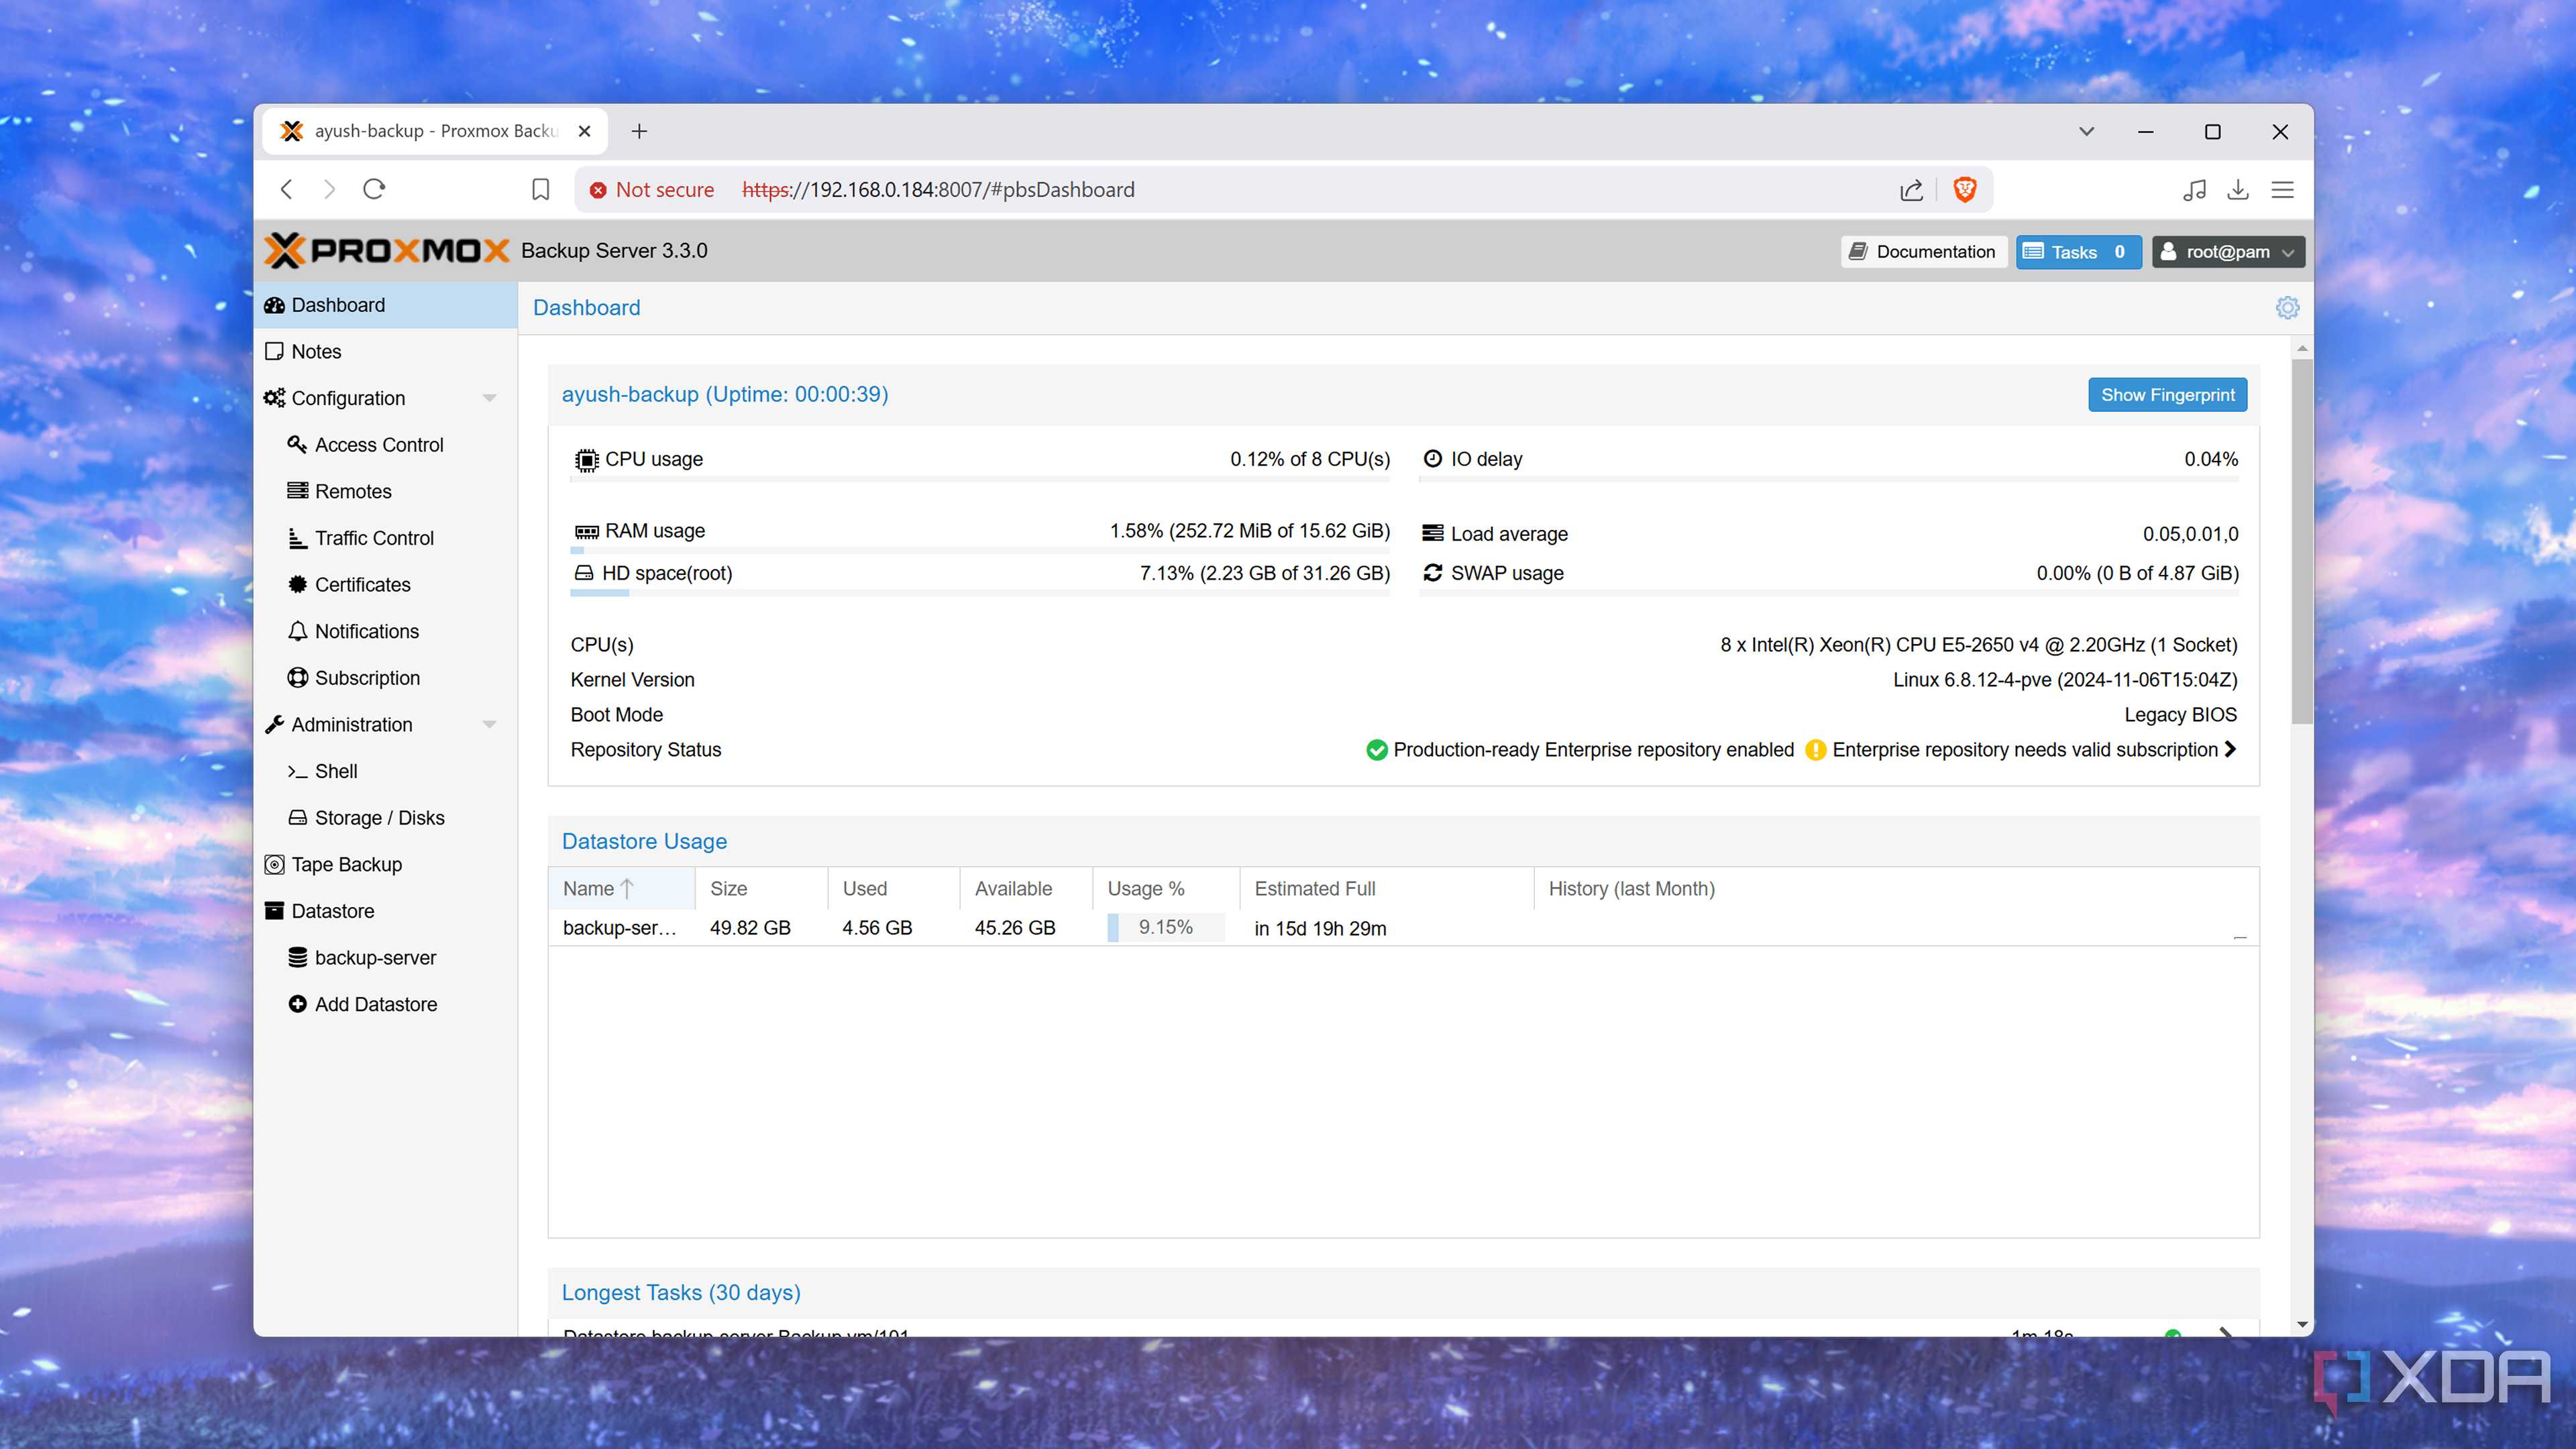
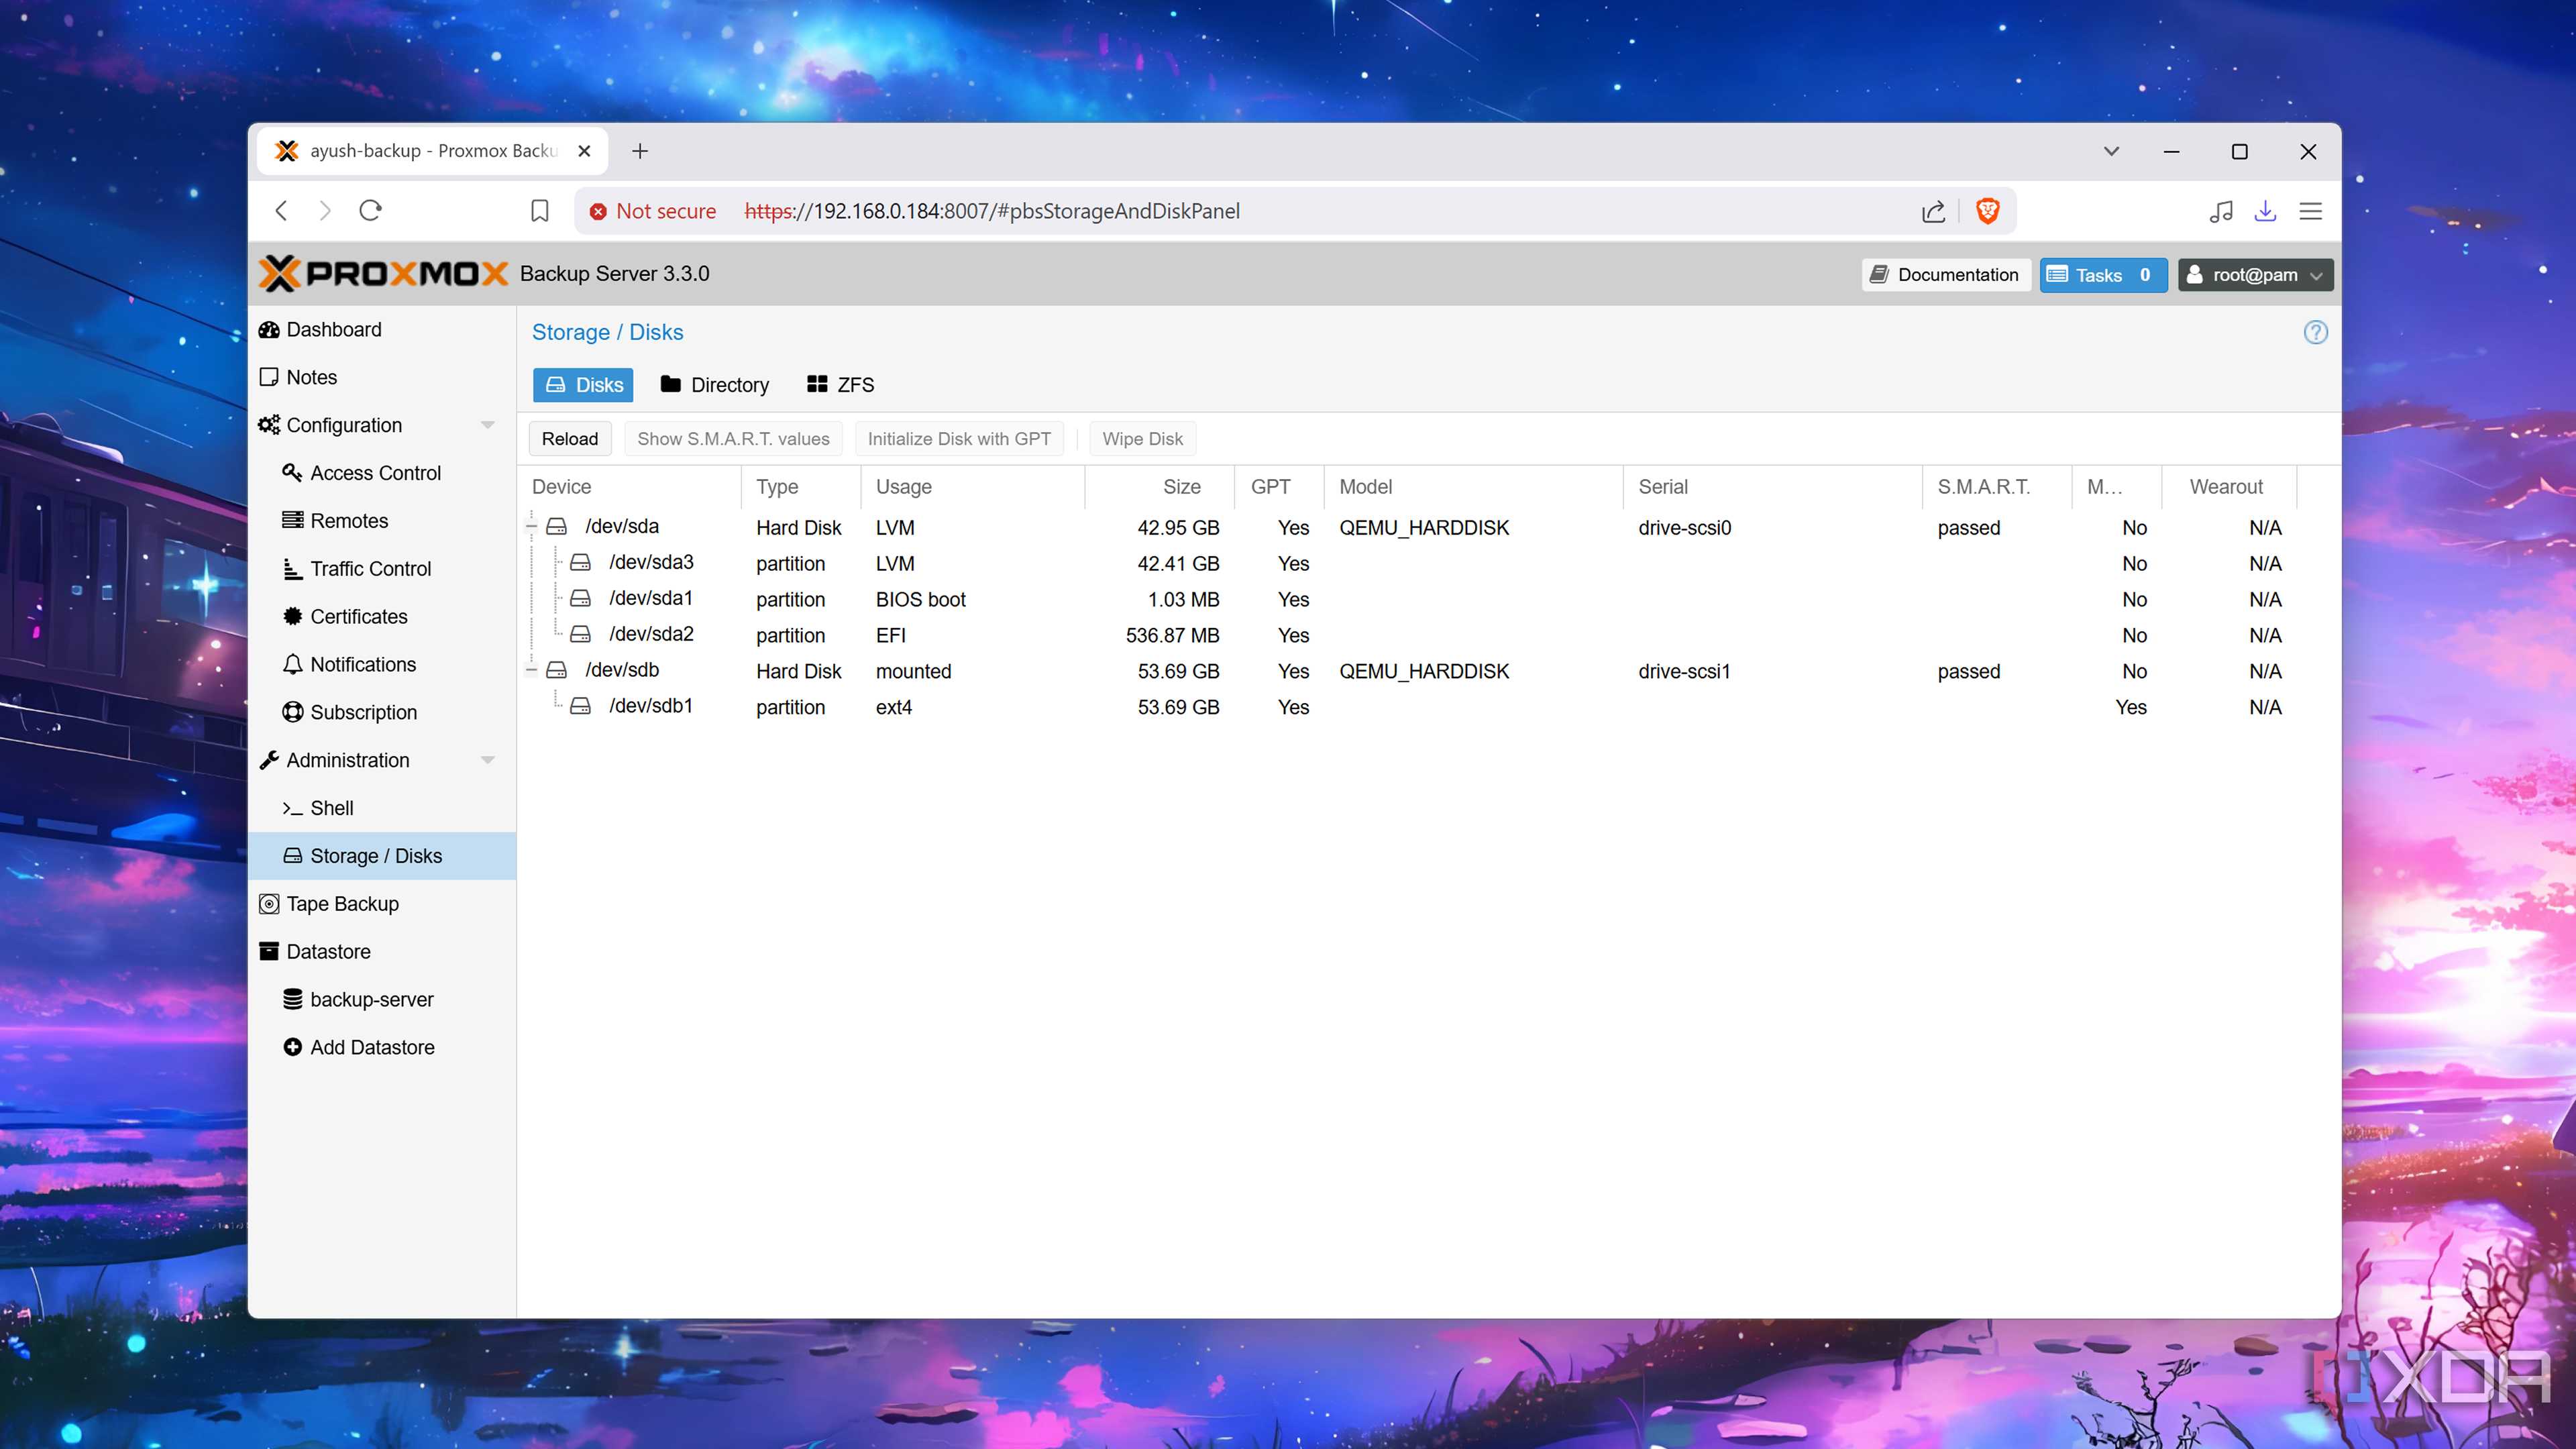
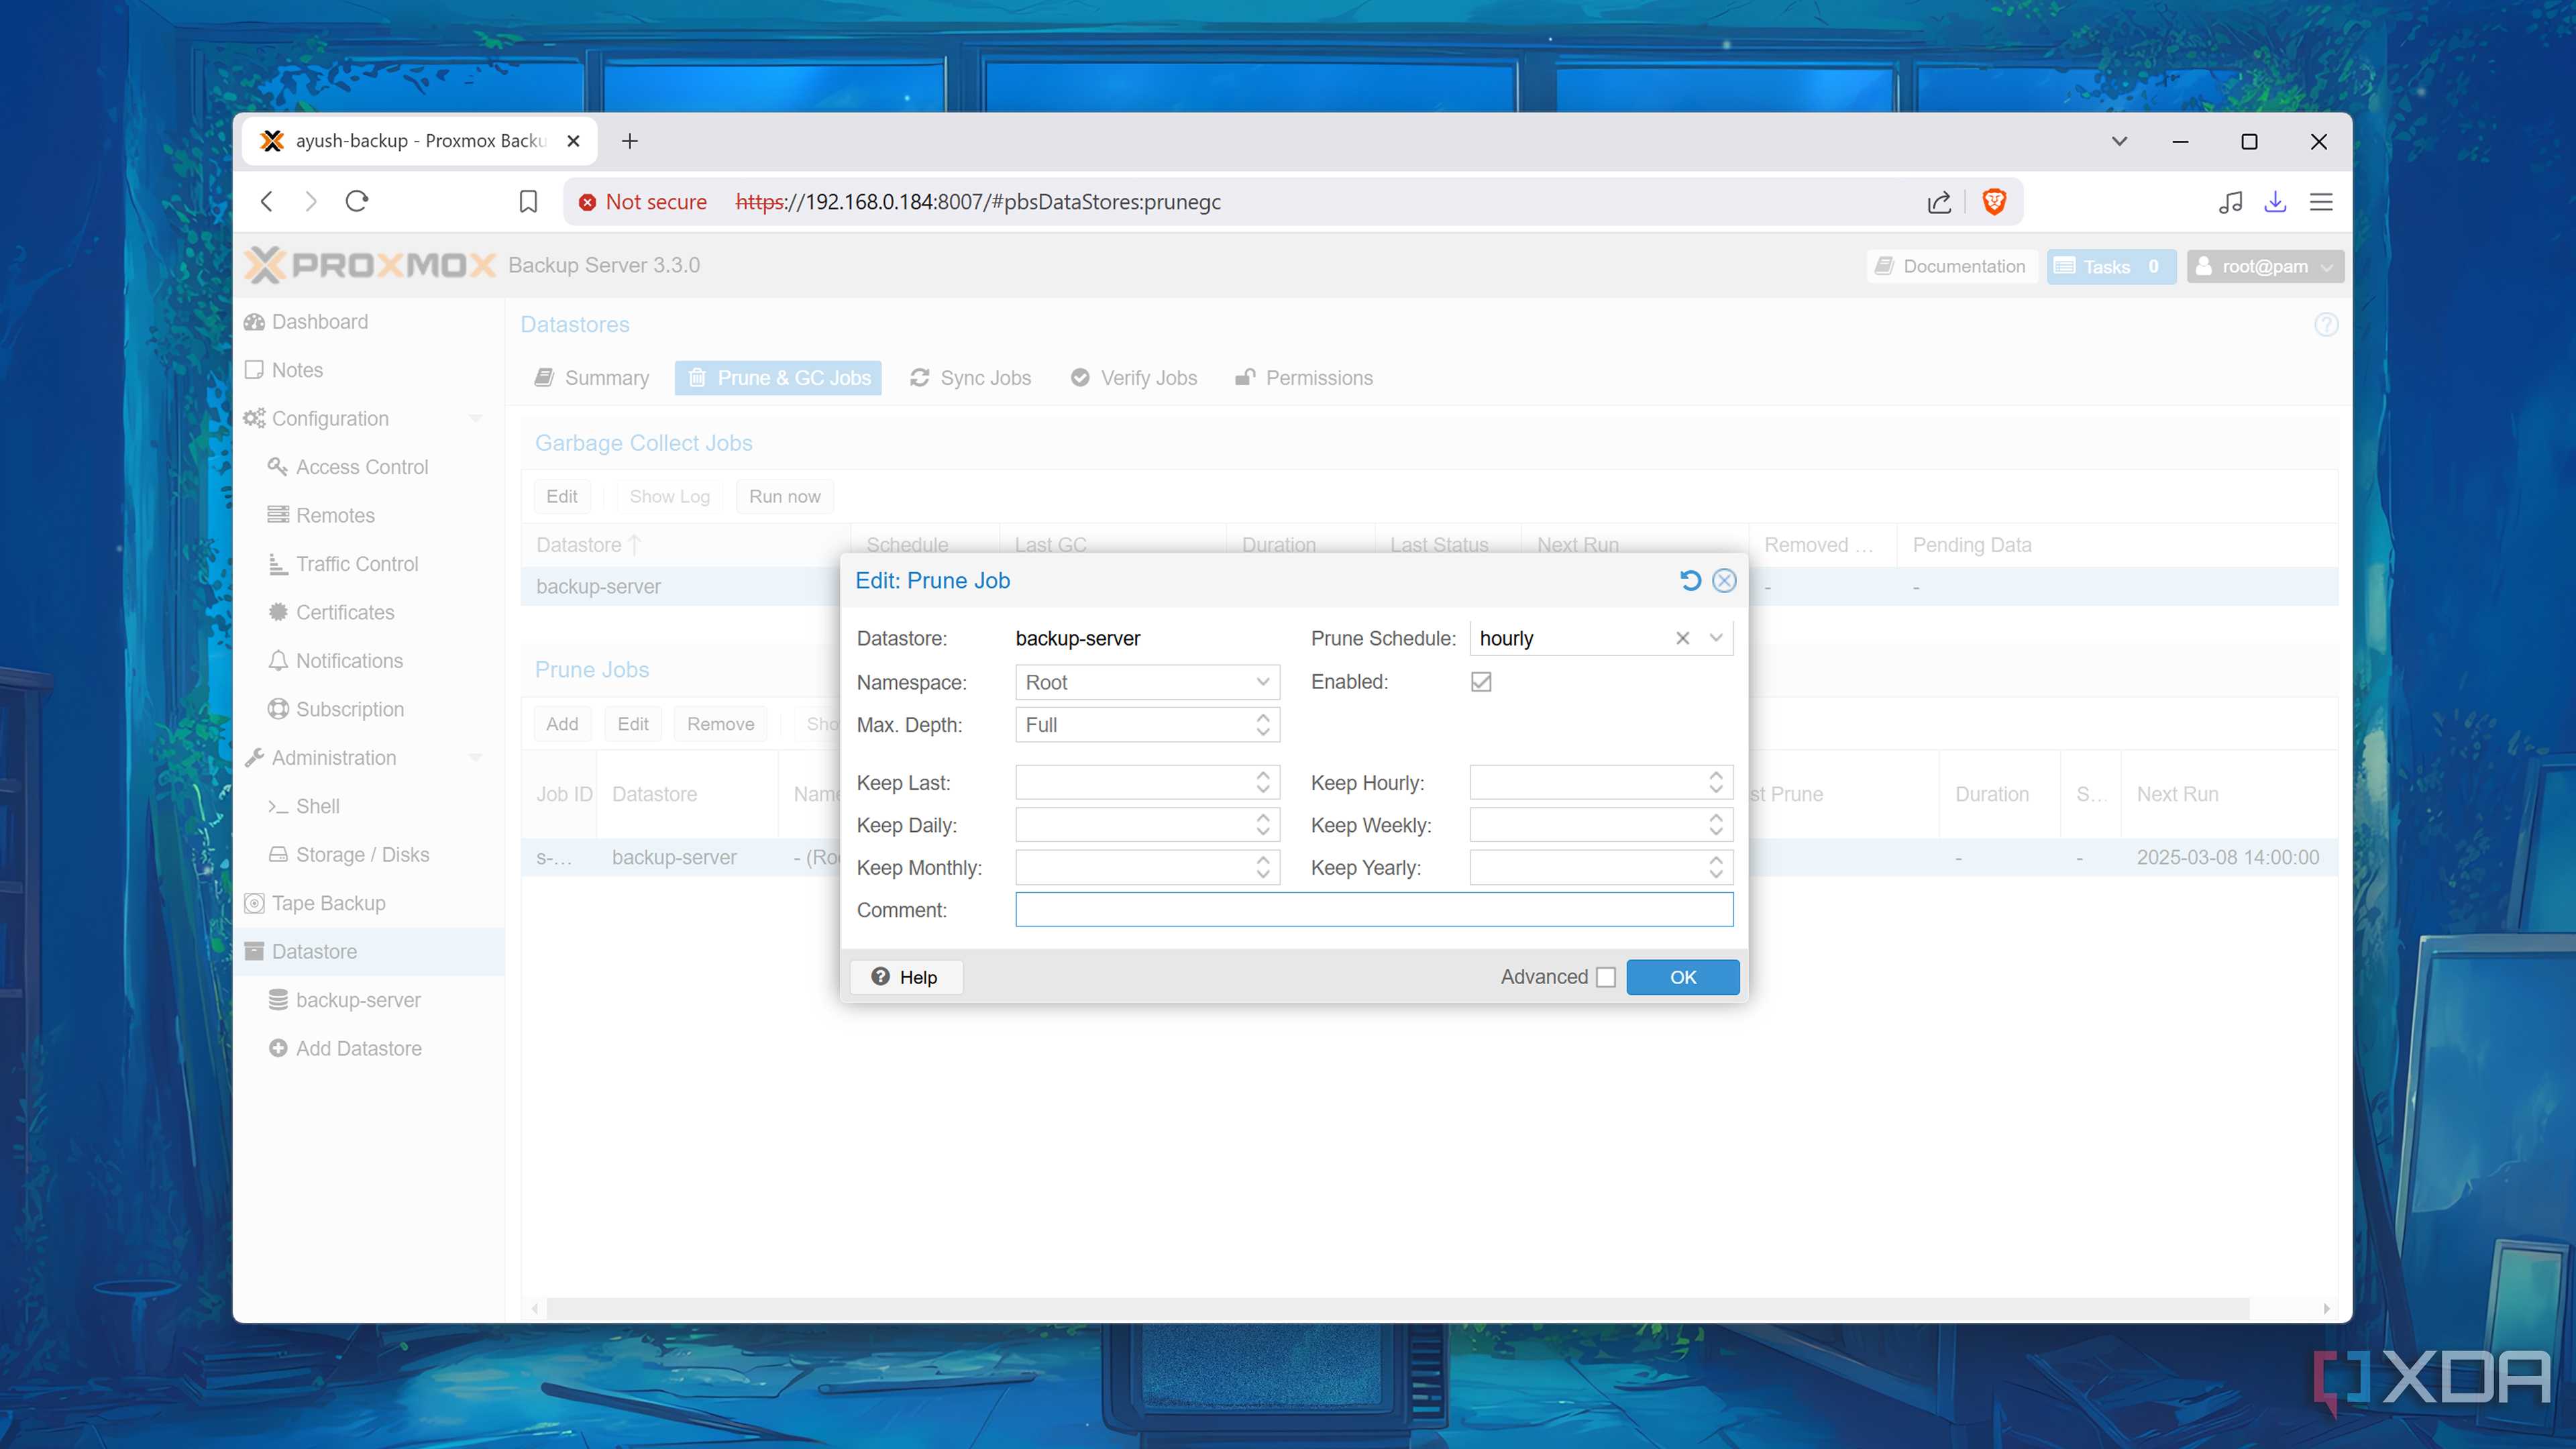
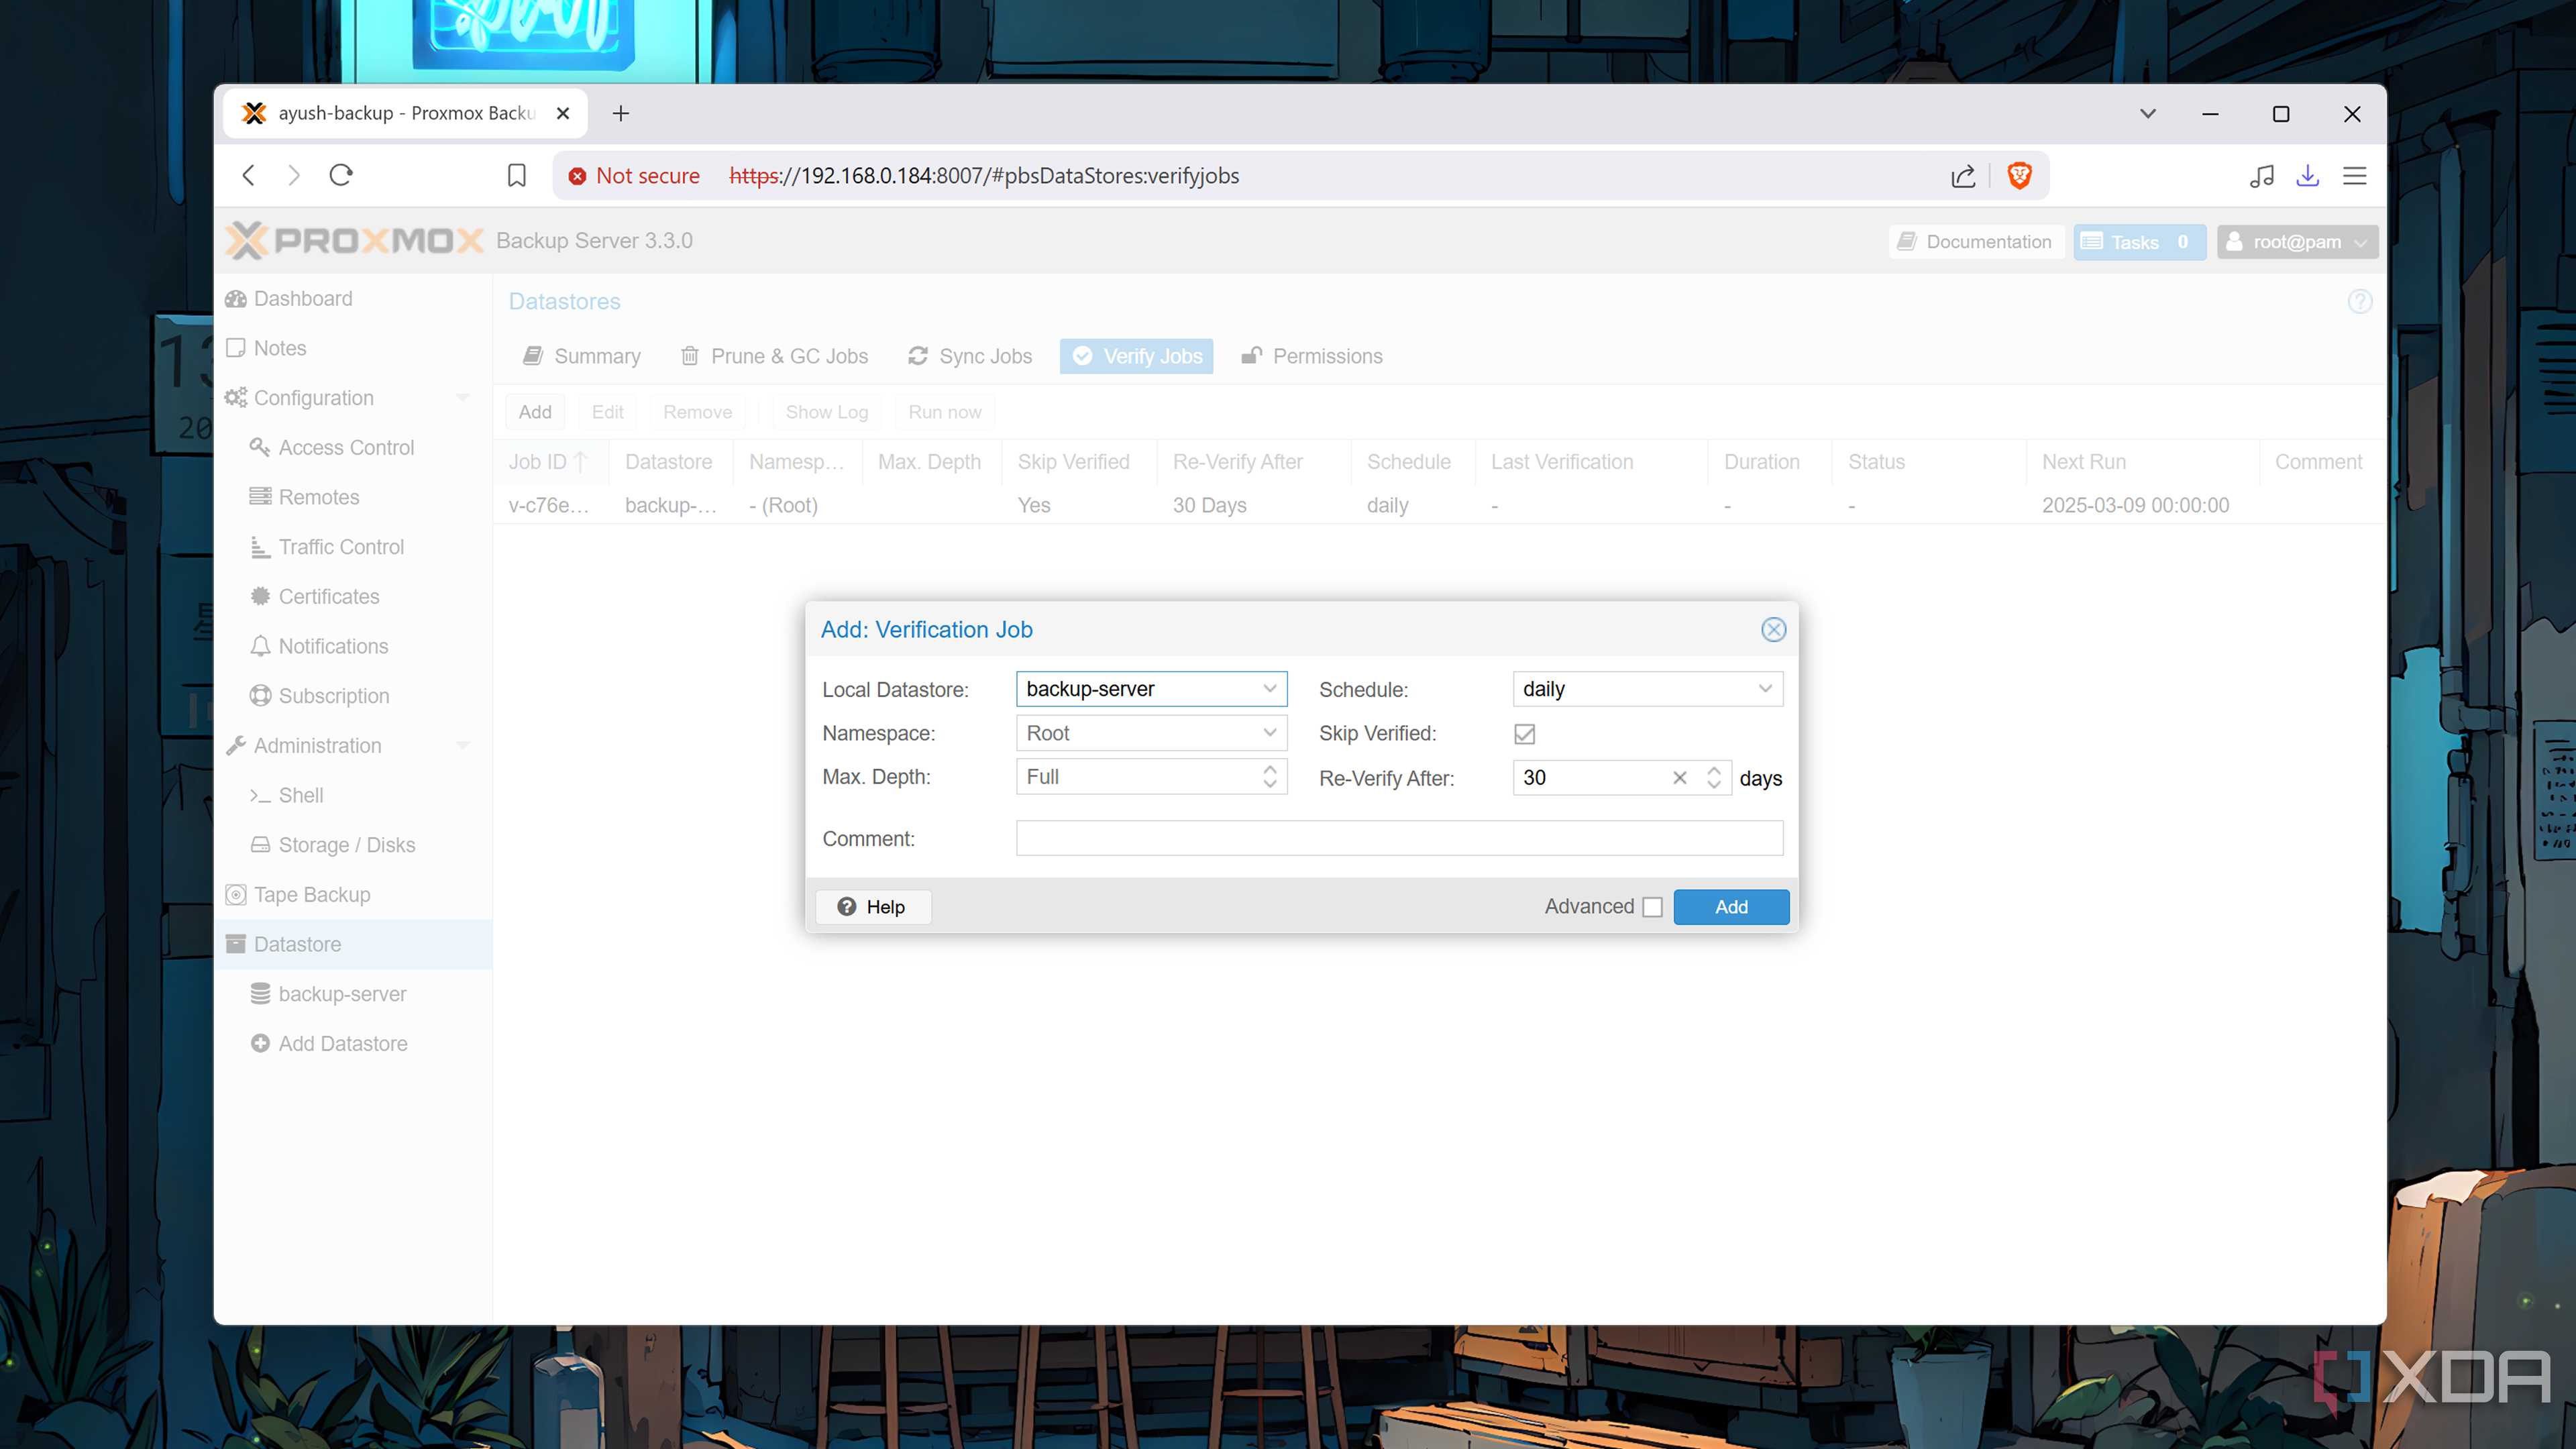
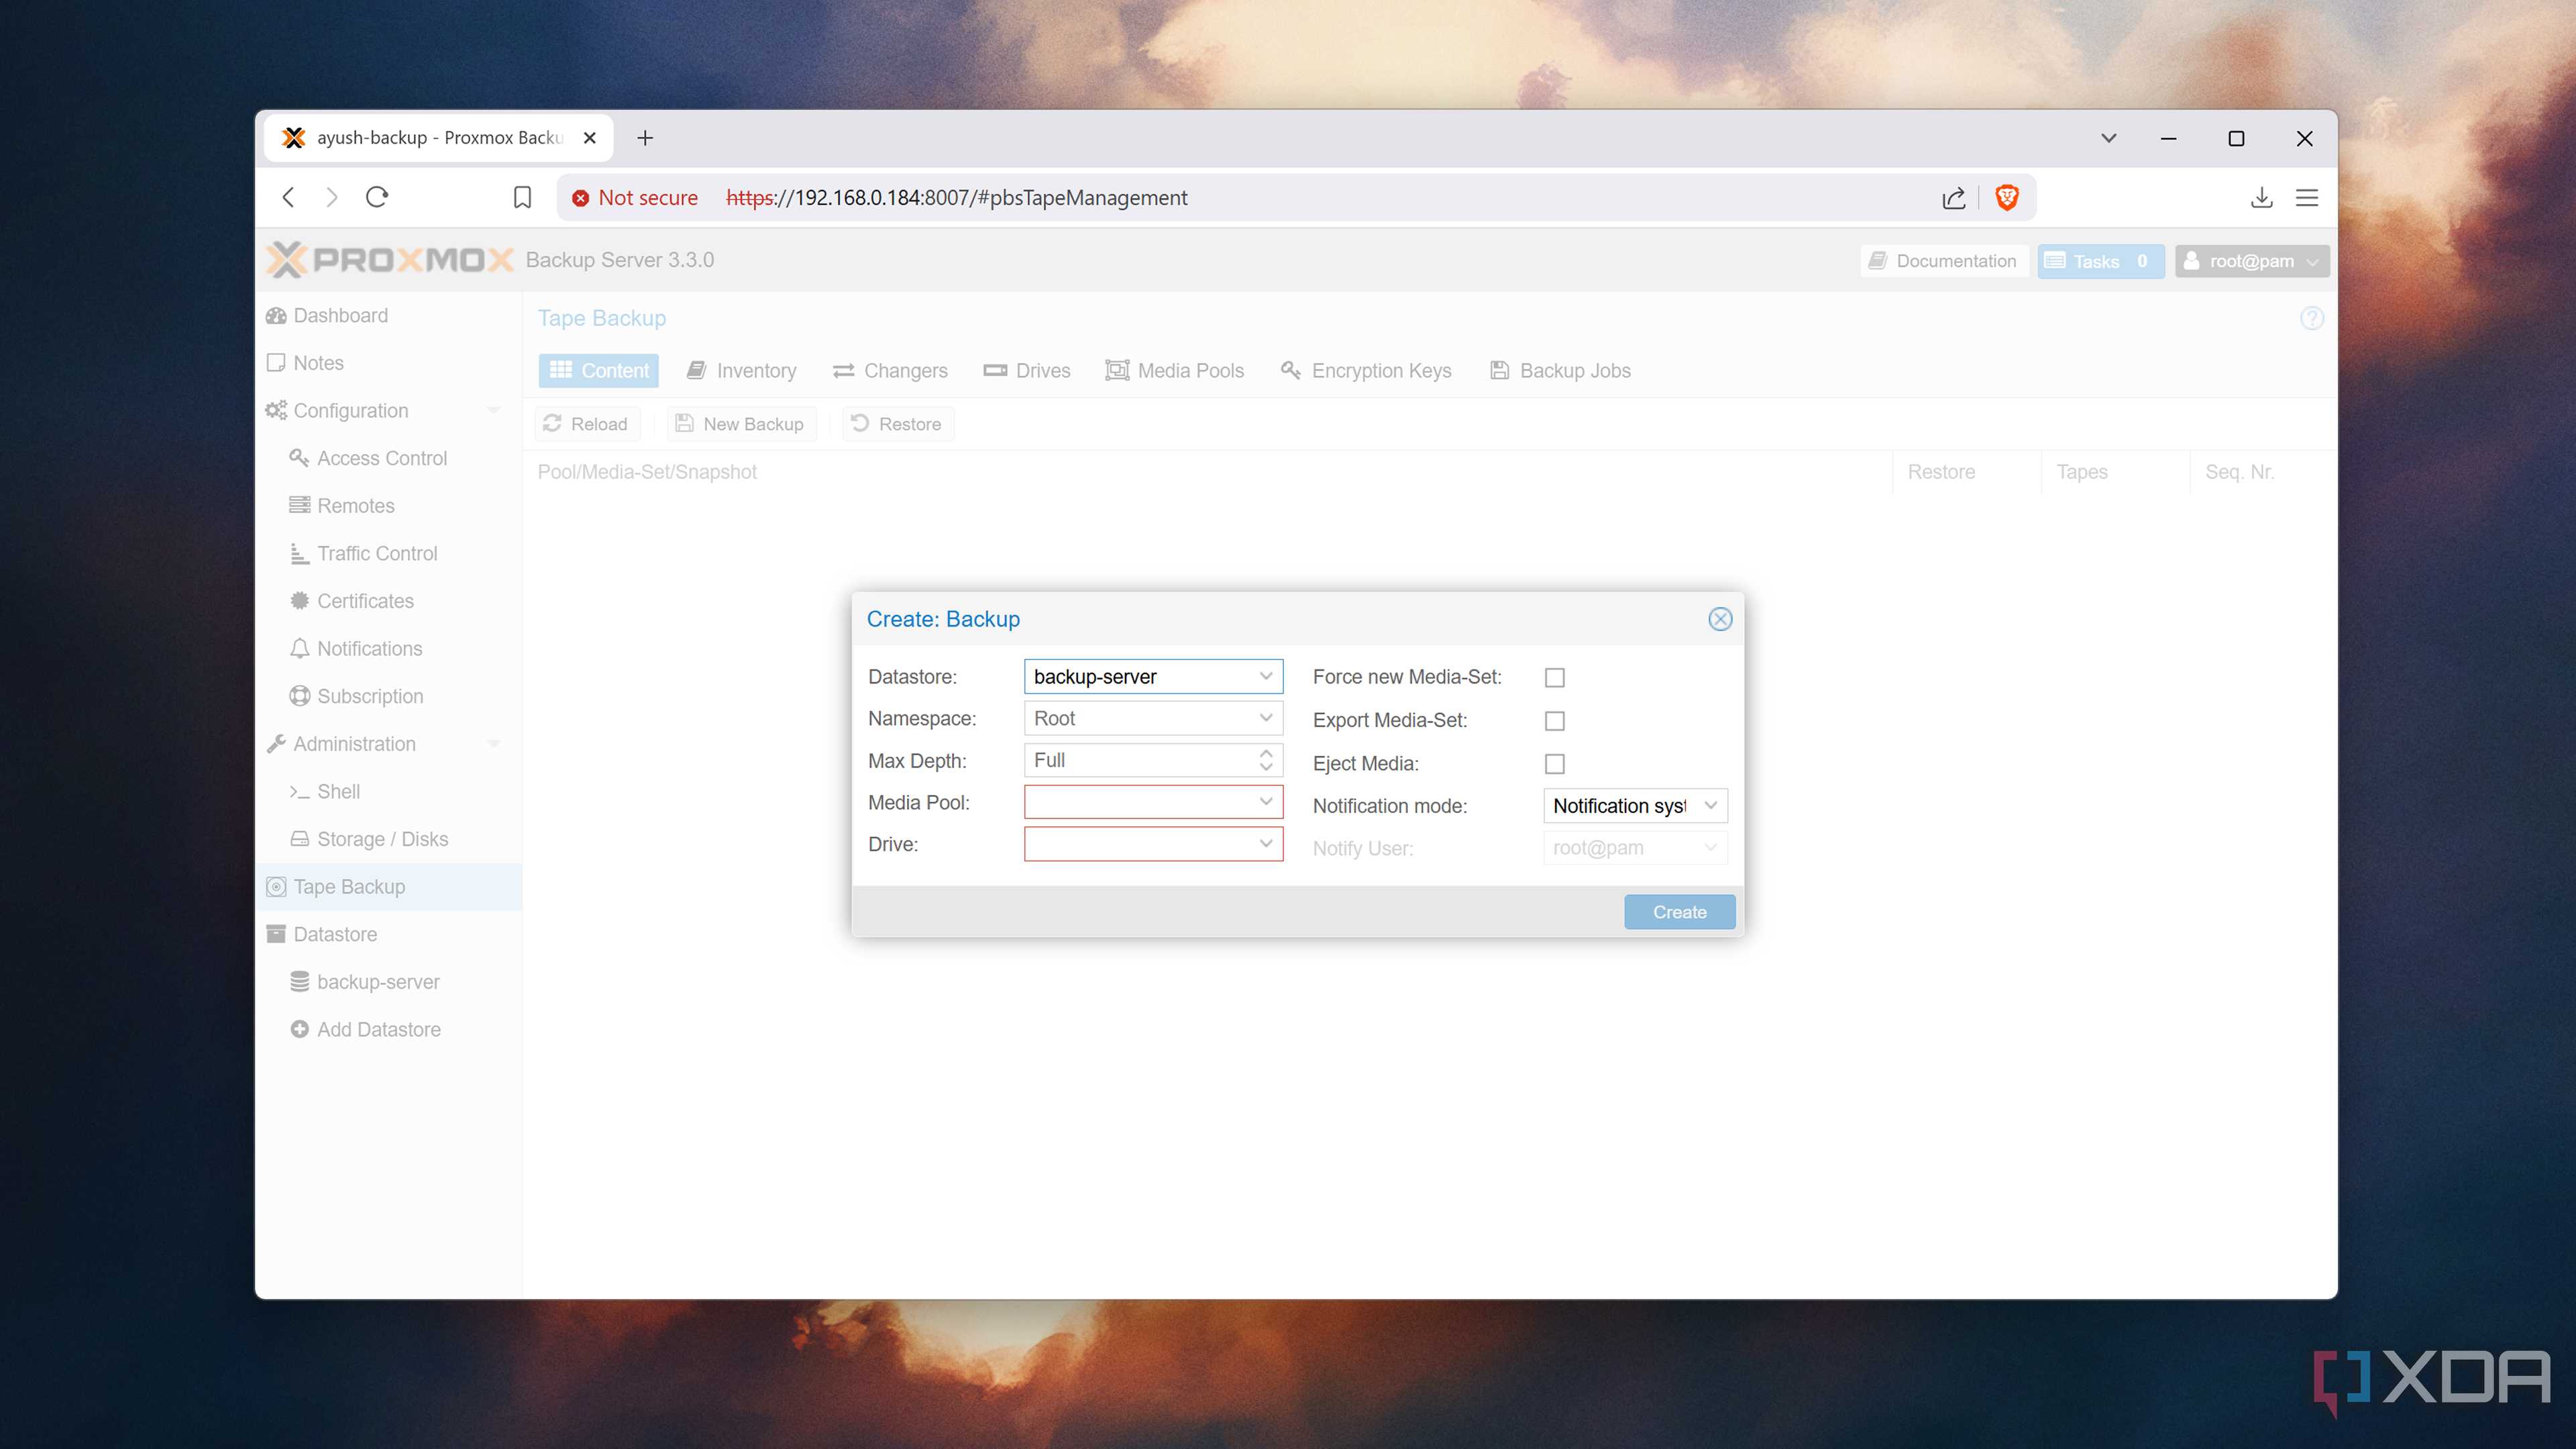
Considering that Proxmox already offers snapshot and backup utilities, a dedicated PBS environment may seem unnecessary. Unlike the tools included in the PVE web UI, the Proxmox Backup Server supports deduplication. Rather than occupying huge chunks of storage space for each backup, PBS only creates one backup file and saves the subsequent changes as incremental updates. This way, you can save terabytes of storage space on your backups.
As if that’s not enough, Proxmox Backup Server also lets you set up granular restore, so you can choose the exact files you want to recover from a backup. And that’s before you include the live restore, monitoring, and tape backup provisions supported by PBS.
What you’ll need for a Proxmox Backup Server

Technically, you can deploy PBS as a virtual machine on top of your Proxmox server. But I recommend against doing so, as you won’t be able to access the Proxmox Backup Server if the host machine goes offline due to your experiments.
Thankfully, PBS doesn’t require an enterprise-grade system, as you can get a backup node up and running on a system with a 4-core, x86 processor and at least 4GB of memory. However, I recommend slotting at least two drives into the machine: one as the PBS installation disk and the other as the storage volume for your backups.
Creating an ISO file for PBS
Like most operating systems, you’ll need to create a bootable PBS disk using a flash drive. I recommend using Balena Etcher, but you’re free to go with other image-flashing utilities as well.
- Download the setup file for Balena Etcher and use it to install the tool on your PC.
- Grab the latest version of the Proxmox Backup server from the official website.
- Run Balena Etcher.exe as an administrator.
-
Click on Flash from file and choose the Proxmox Backup Server .ISO file you downloaded earlier.

-
Tap the Select Target button and pick the USB drive you plan to turn into the bootable drive.

-
Hit Flash and wait for Balena Etcher to work its magic.


If you've already set up a PXE server, you can use it as a replacement for the USB boot drive.
Modifying the boot order in the BIOS
Before you can access the PBS installation wizard, you’ll need to modify the boot order in the BIOS of your would-be backup PC. To do so,
- Plug the newly-flashed USB drive into the system and power it on.
- Mash the Delete key as the system boots up to enter the BIOS.
-
Head to the Boot tab of the Advanced CPU options and ensure that the USB drive appears as Boot option #1.
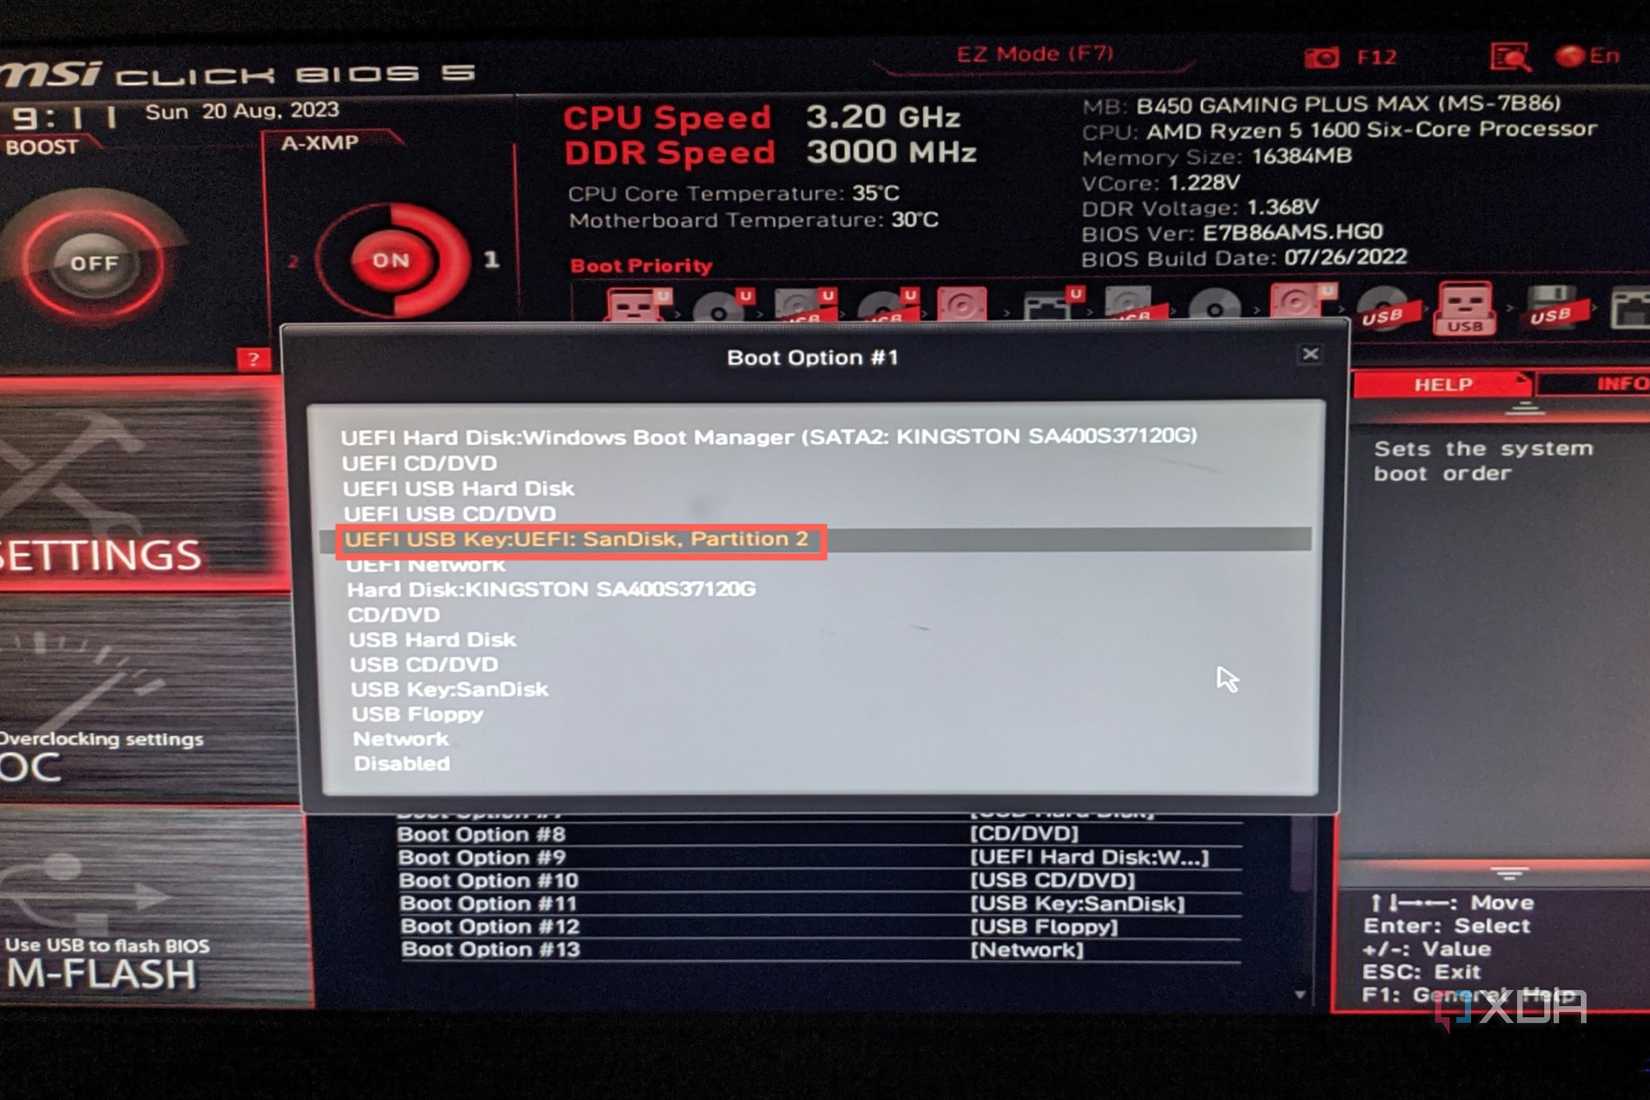
-
If you’re using a PXE server, you’ll want to set Boot option #1 to UEFI network instead.
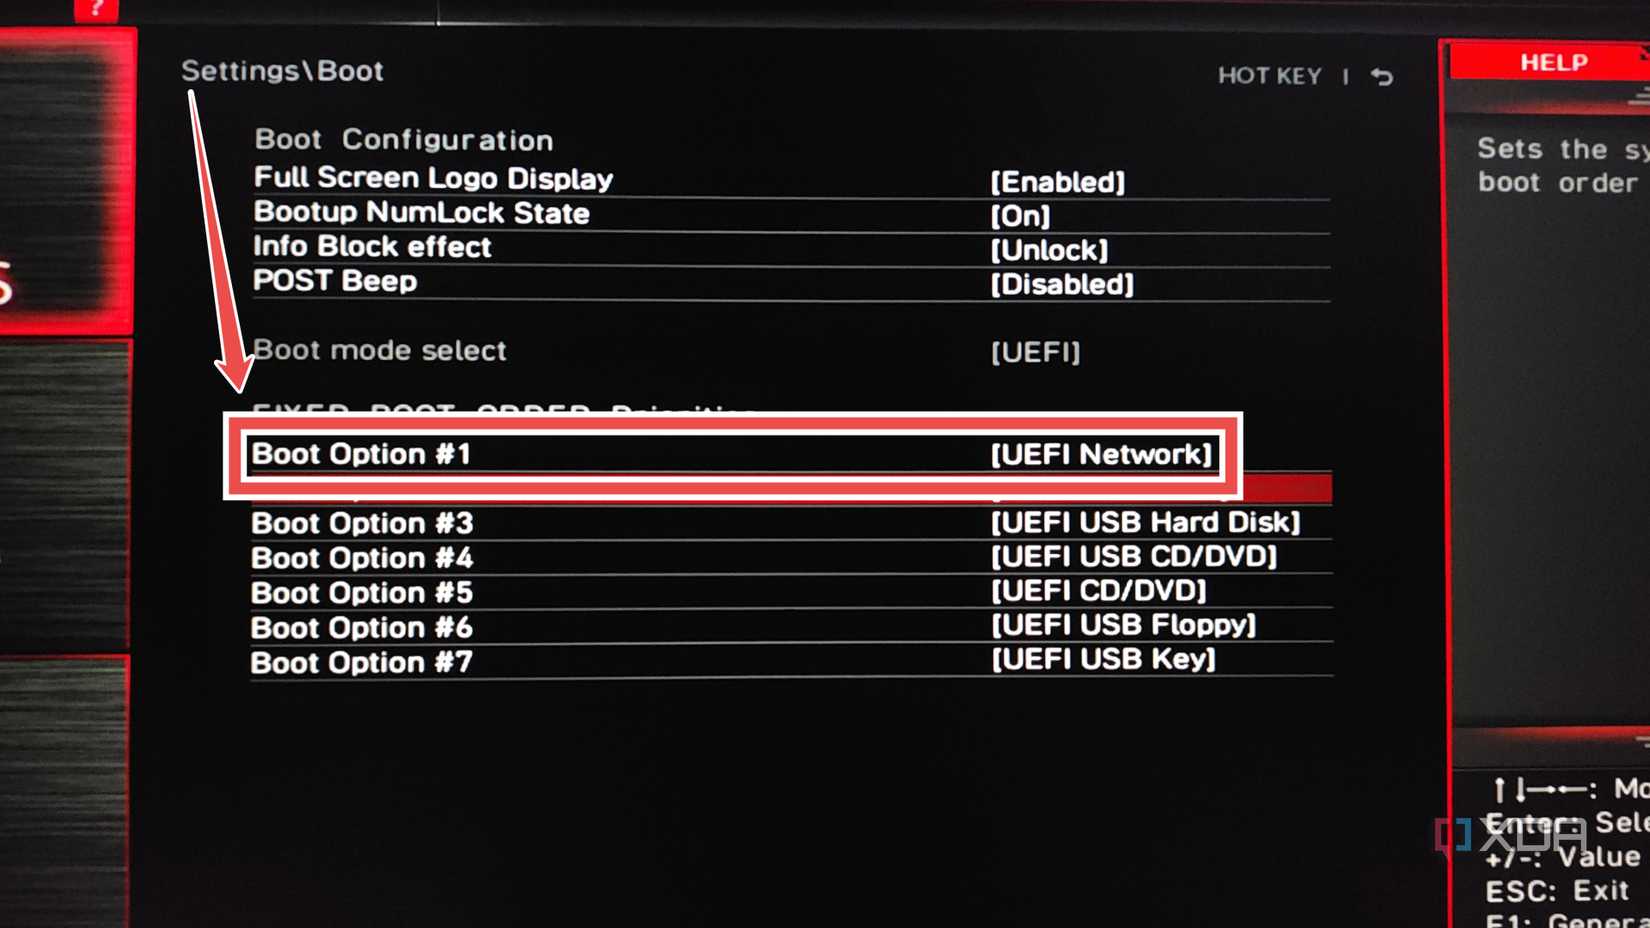
- Save the changes and exit the BIOS.


Installing Proxmox Backup Server
Once your system reboots, you’ll be greeted with the Proxmox Backup Server installation wizard. If you’ve set up Proxmox beforehand, you’ll notice it’s entirely the same for the backup platform. Nevertheless, you’ll have to configure a couple of settings before you can deploy the PBS workstation.
-
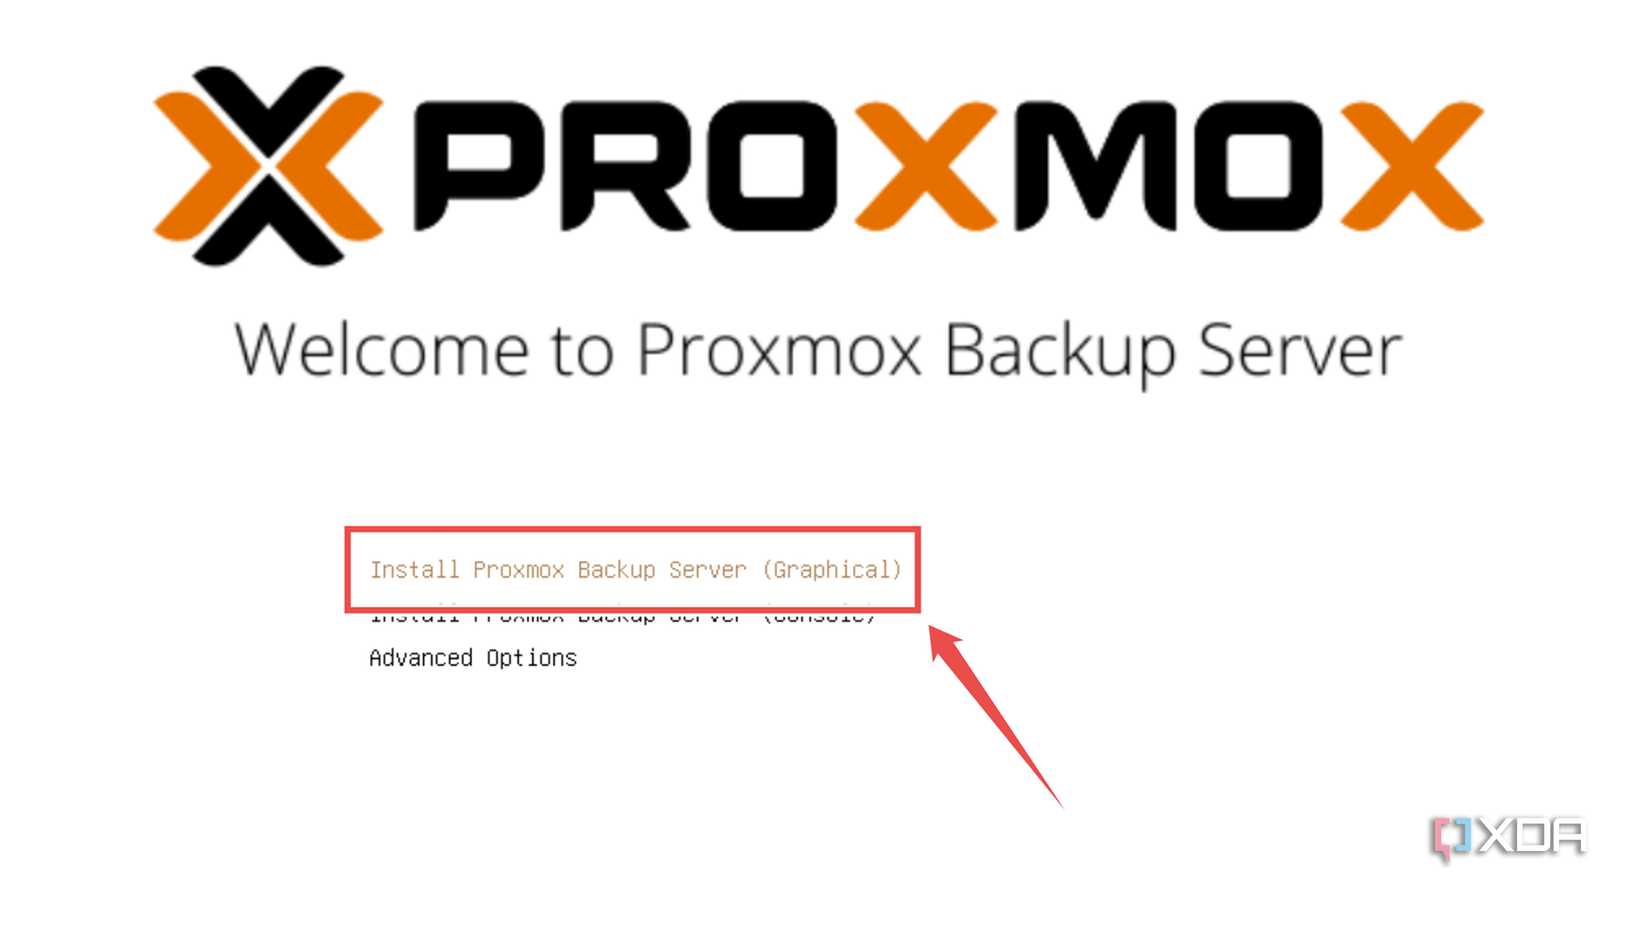
Start by choosing Install Proxmox Backup Server (Graphical).
-
Tap I agree when the wizard displays the End User License Agreement.

-
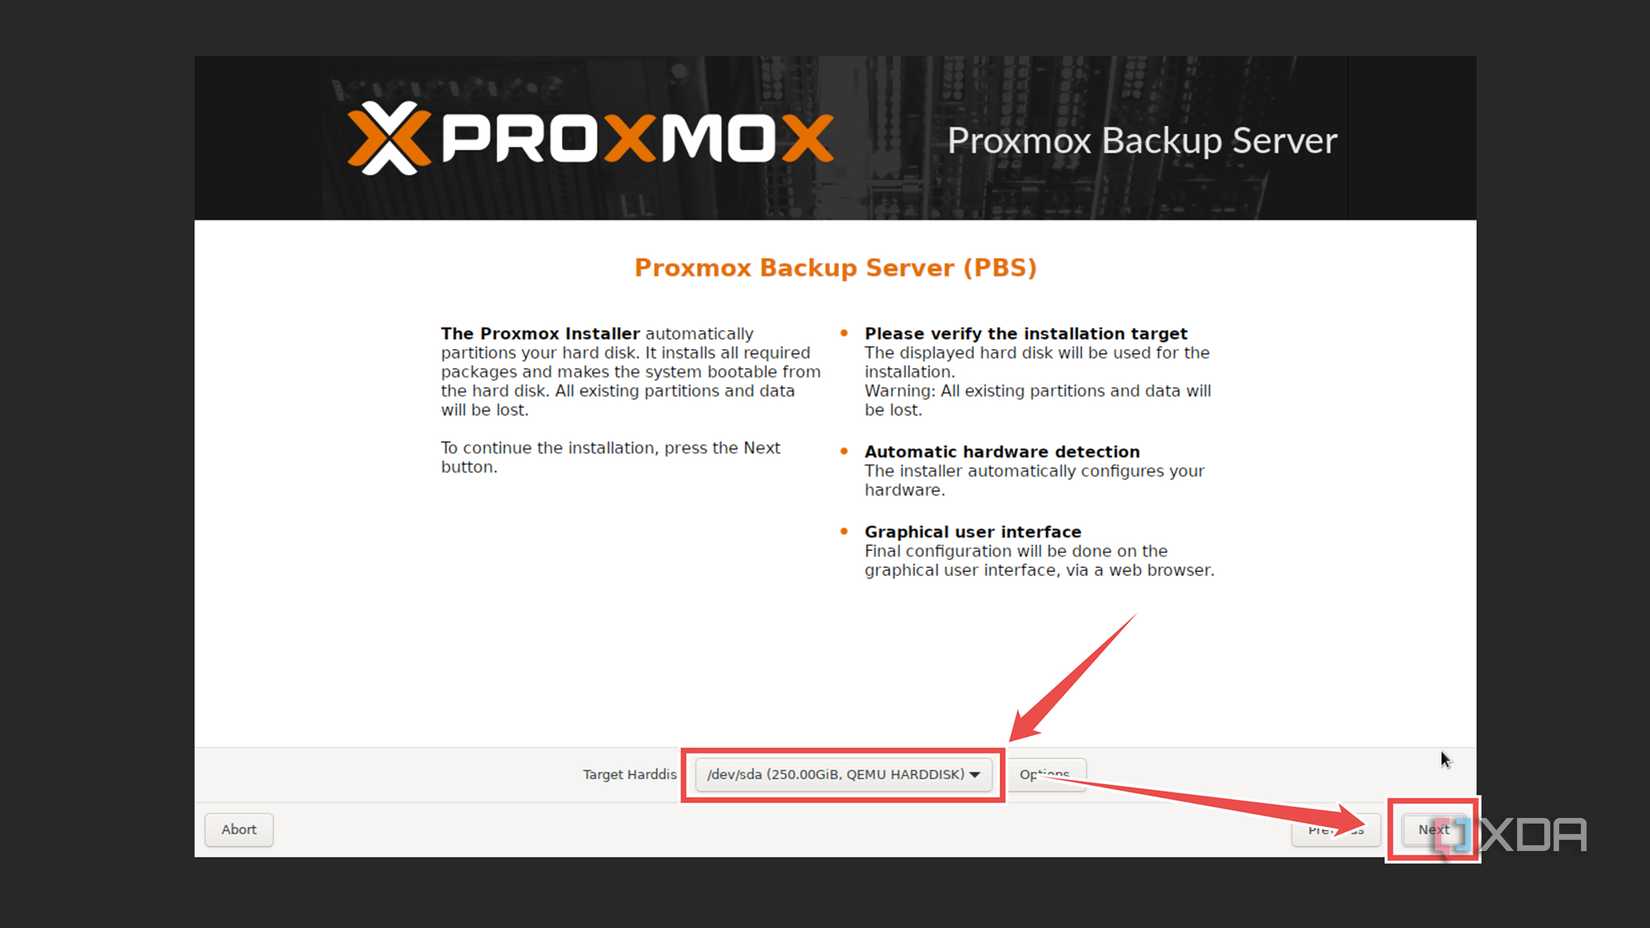
Choose the drive where you wish to install the Proxmox Backup Server and tap Next.
Remember to hit Next after each step.
-
Choose the Country, Timezone, and Keyboard Layout settings.

-
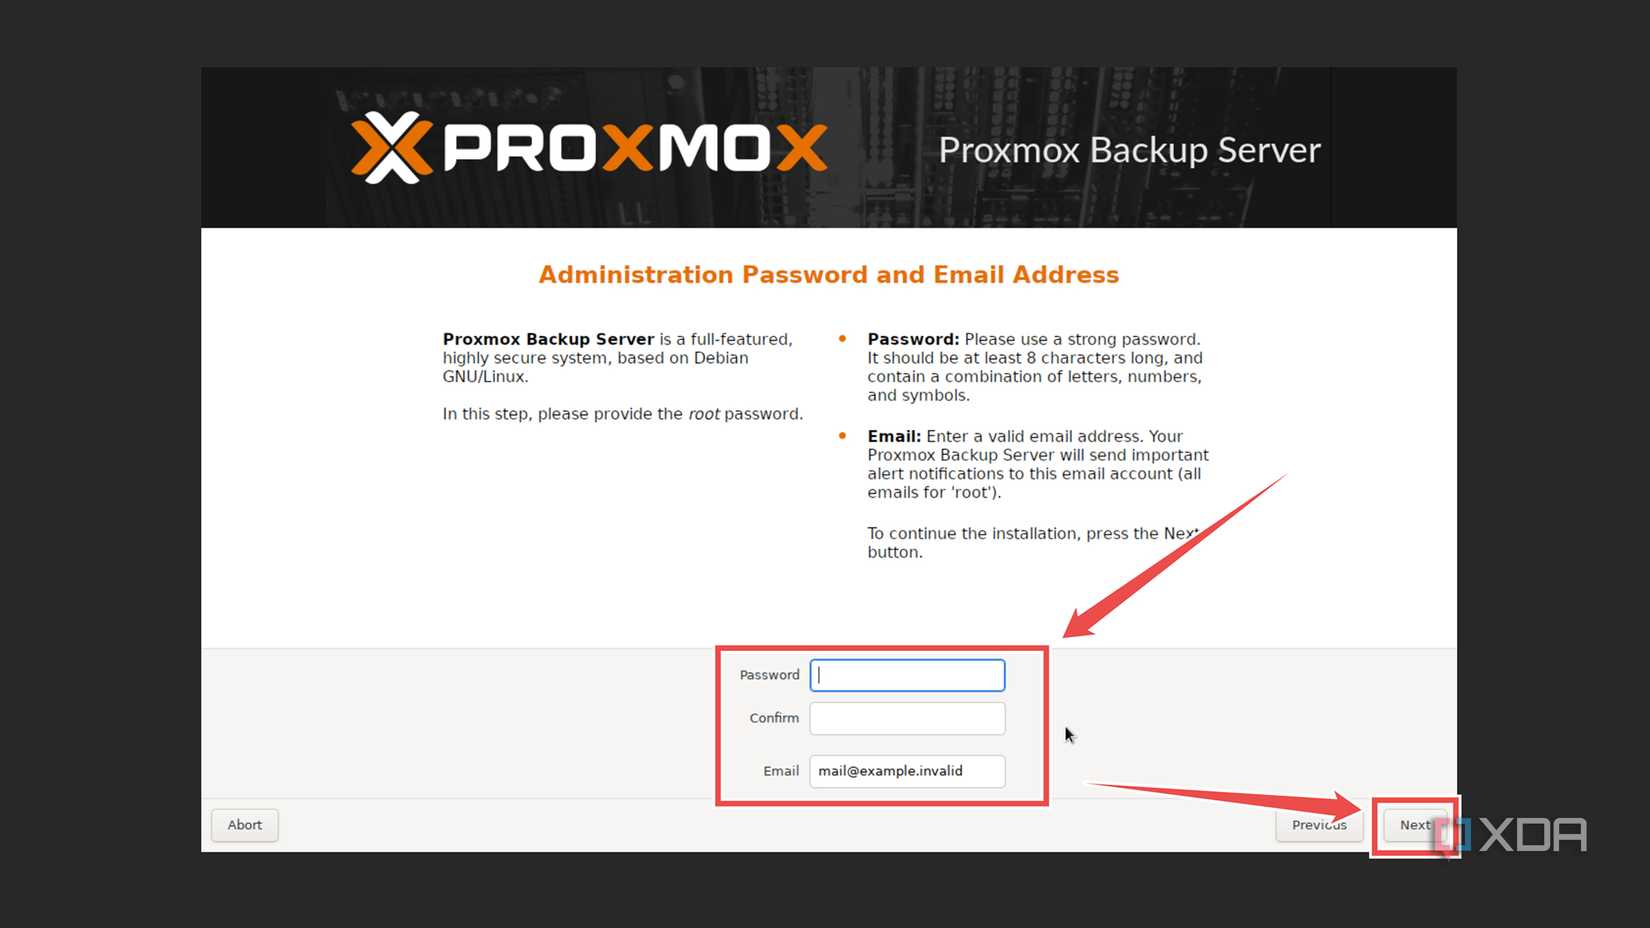
Set a Password and Email address for your PBS system.
-
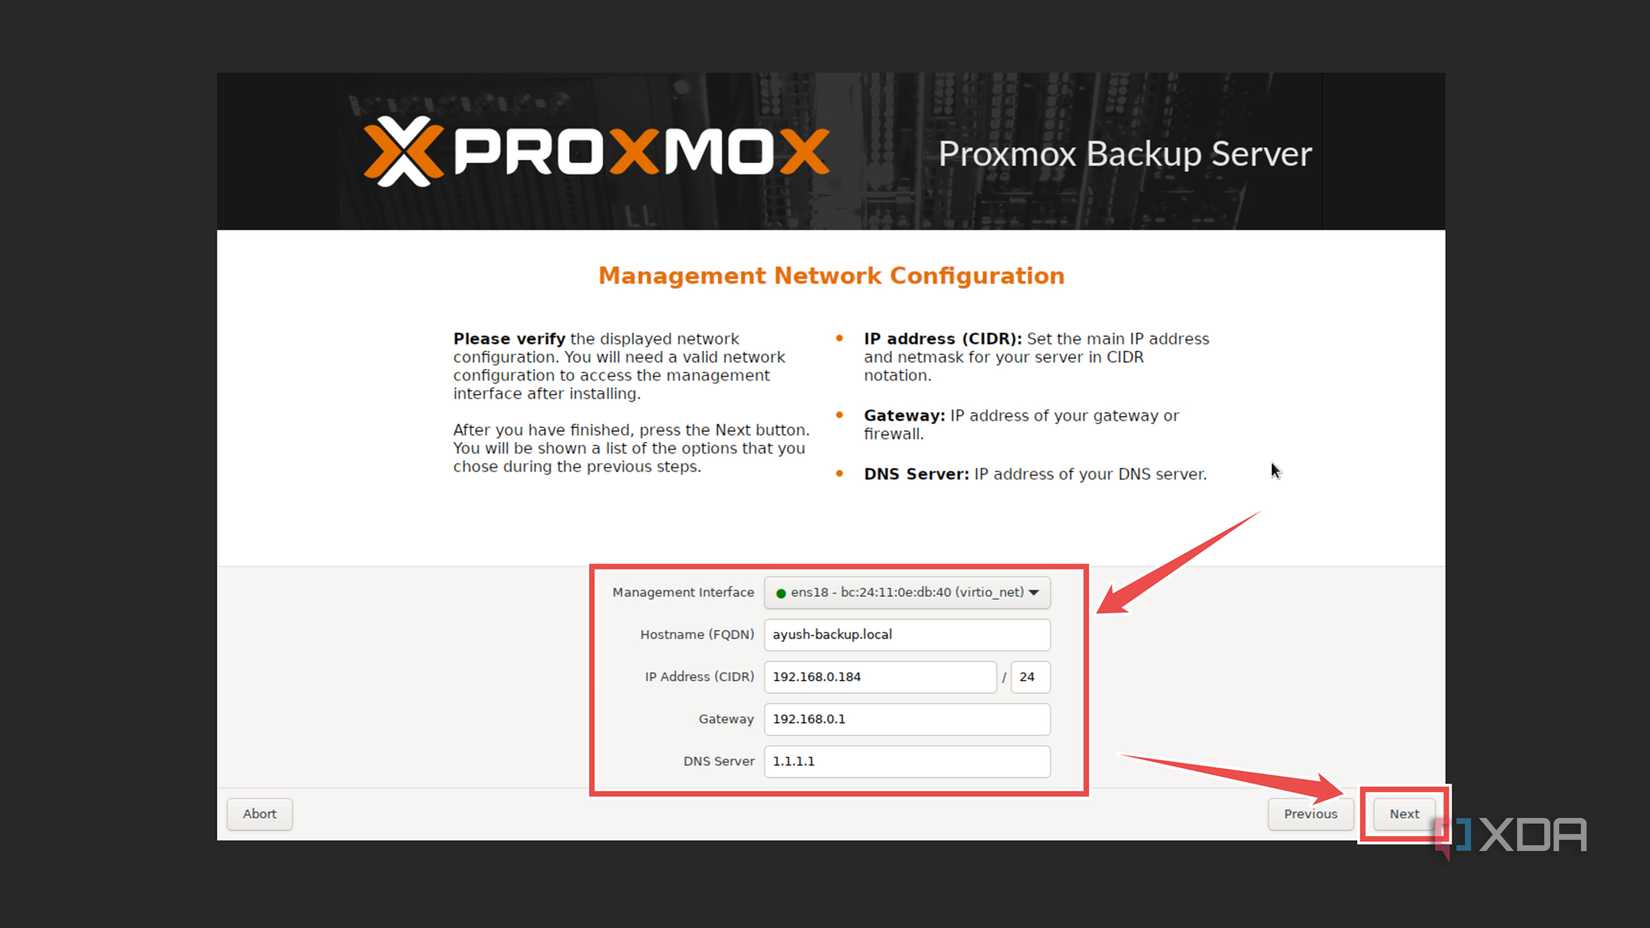
Ensure that the correct Network Device is chosen as the Management Interface before entering the Hostname (FQDN), IP Address (CIDR), Gateway, and DNS Server.
-
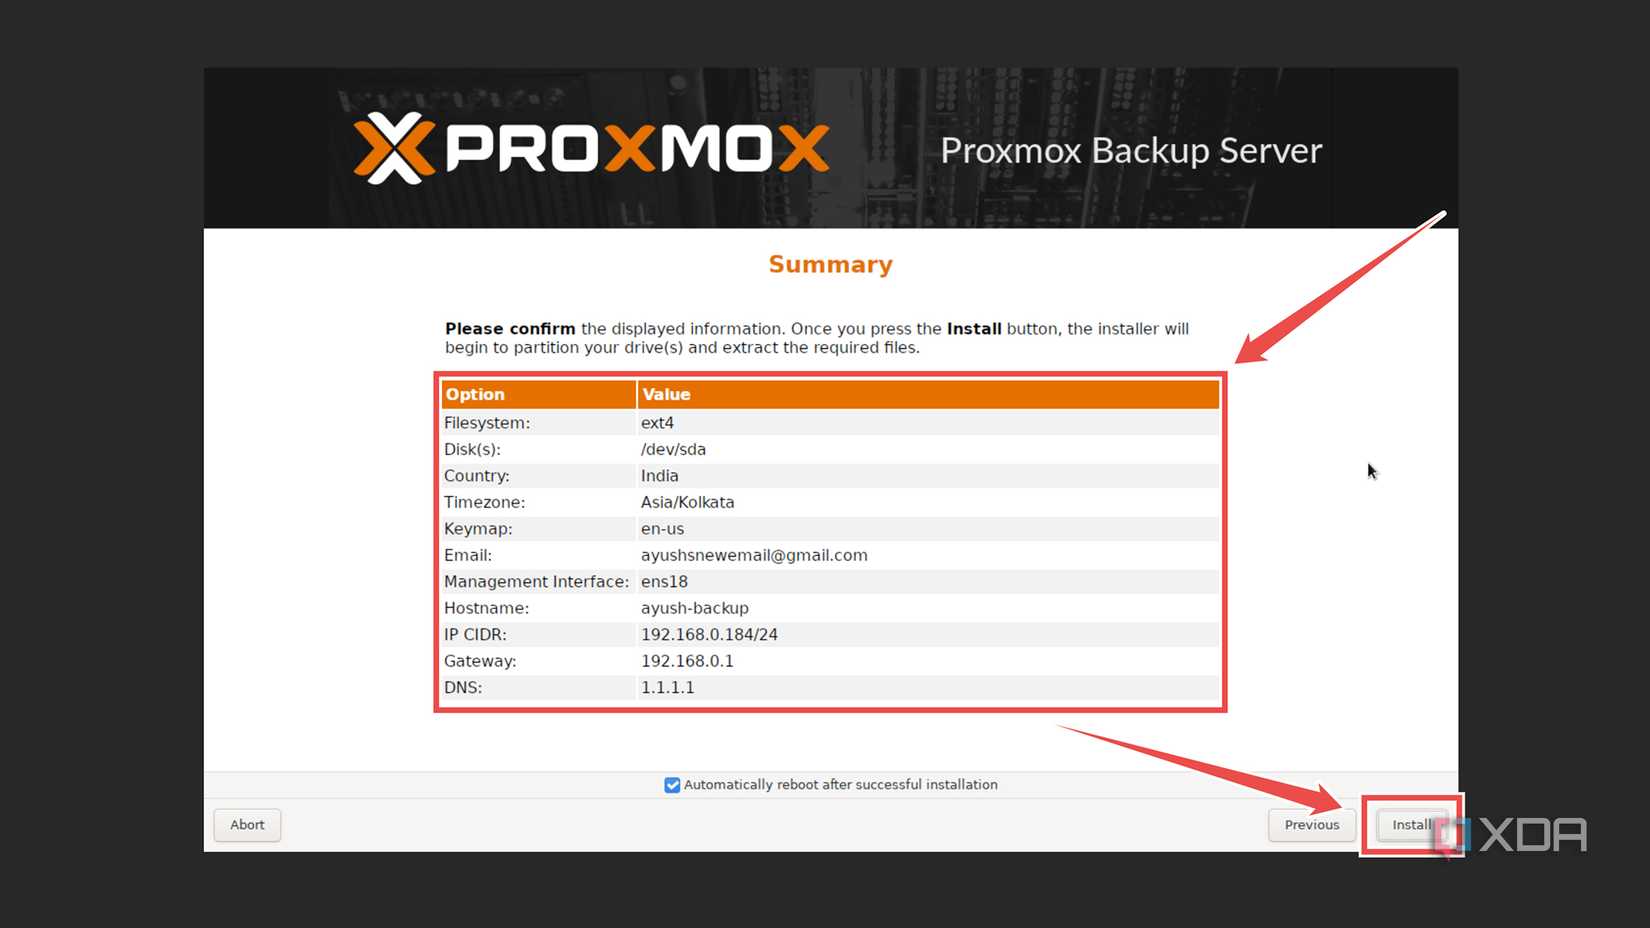
Double-check your settings, tap Install, and wait for the PBS wizard to finish installing the OS on your PC.


Creating a Datastore for the Proxmox Backup Server
With the installation complete, your PC will automatically boot into the Proxmox Backup Server CLI, though you don't need to learn complex terminal commands to operate this neat utility. Instead, you can use the PBS web UI to manage your backups.
-
Enter the IP Address from the Proxmox Backup Server CLI into the web browser on another PC connected to the same network as the PBS system.

-
If your browser displays a security warning, you can use the Proceed to IP Address (unsafe) option to head to the PBS web UI.

-
On the login screen, type root as the User name before entering the Password you’d set earlier.

-
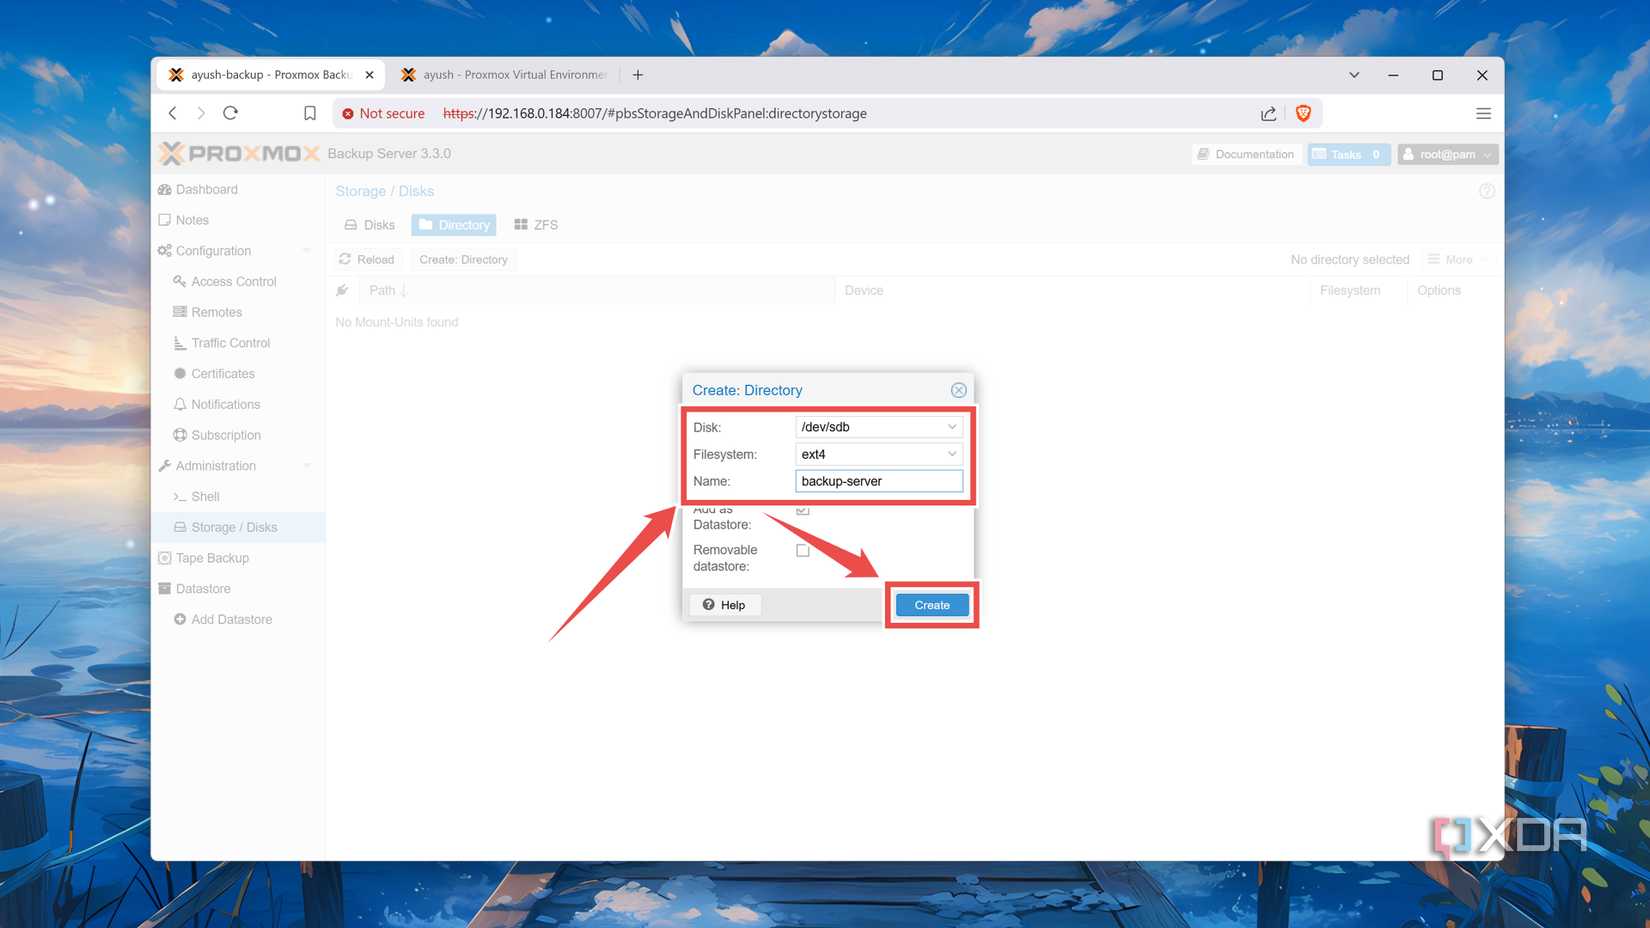
Switch to the Directory window within the Storage/Disks tab and hit Create: Directory.

-
Choose the Disk, Filesystem, and Name for your directory before tapping Create.
Alternatively, you can use the ZFS window to leverage RAID setups into your Datastore.


Connecting the PBS system to a Proxmox server
With the Proxmox Backup Server mostly configured, it’s time to switch to your Proxmox web UI and pair it with the PBS node.
-
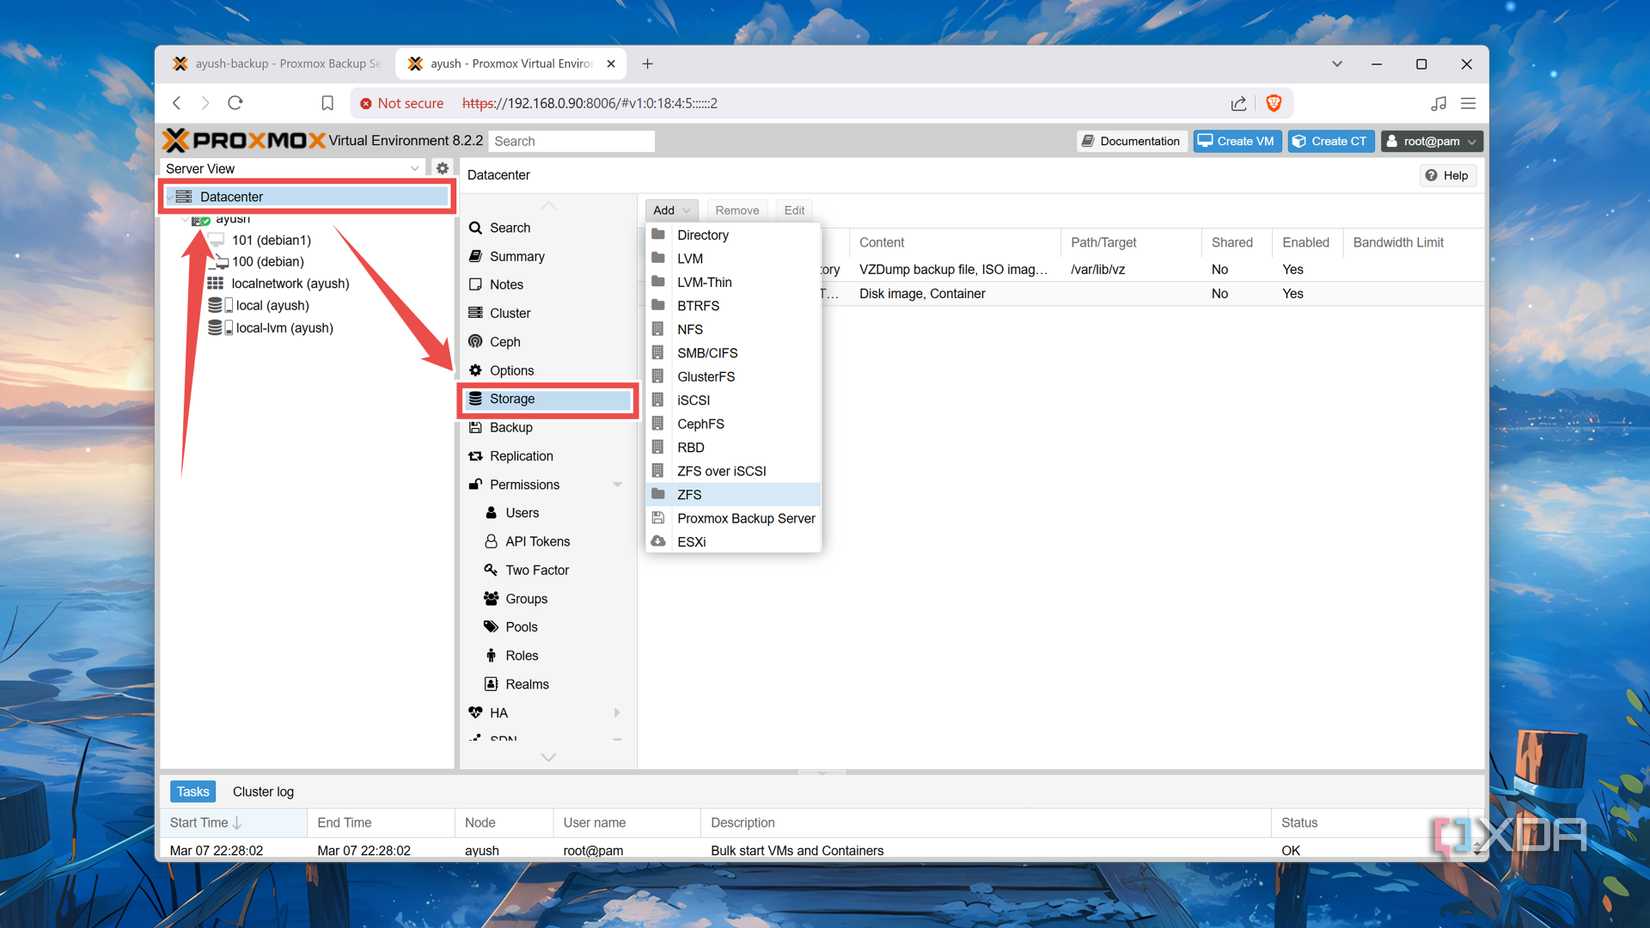
Navigate to the Storage section within the Datacenter tab of your Proxmox machine.
-
Press Add and select Proxmox Backup Server from the drop-down list.

-
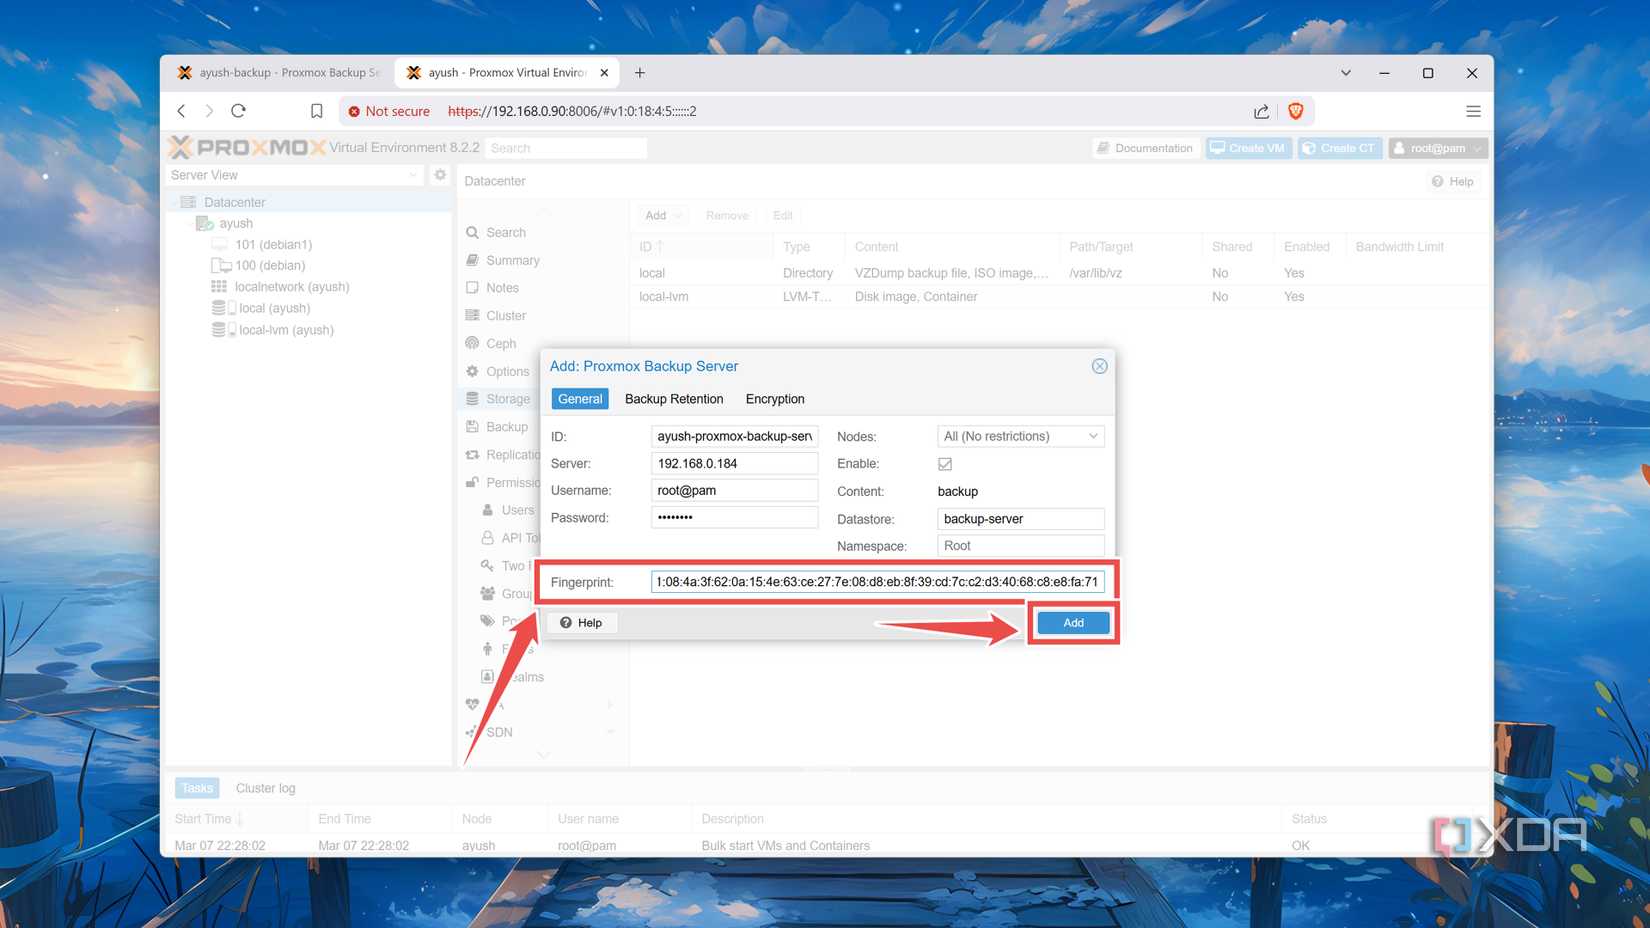
Enter an ID (any random identifier), Server (IP Address of the PBS workstation), Username (root@pam, if you want to use the root user), Password (the one you’d set when installing PBS), and Datastore (where you want to save your Proxmox backups).

-
Switch to the Proxmox Backup Server web UI, click on the Show Fingerprint option within the Dashboard, and copy the long string displayed on the screen.

-
Head back to the Proxmox web UI, paste the Fingerprint into the tab with the same name, and tap the Add button.


Backing up your virtual machines with PBS
If you’ve followed the steps properly, the Proxmox Backup Server should be added to your PVE system. If you want to create a backup on the PBS node,
-
Inside the Proxmox web UI, head to the Backup tab of your favorite virtual machine, and tap Create Backup.

-
Choose the PBS node as Storage, select your preferred Mode, and hit Backup.

- Wait for the Proxmox Task manager to give the Task OK message.


Manage your backups like a pro with a PBS workstation

With that, you’ve got everything you need to safeguard your VMs, containers, and even the Proxmox host itself! Since PBS lets you sync your saved data with remote machines, you can even follow the 3-2-1 backup rule to add an extra layer of redundancy to your Proxmox home lab.
If you want better control over your backups, I recommend looking into the Prune, Sync, Verify, and GC tabs of your Datastore. For folks with limited network bandwidth, you can tweak the data transfer settings within the Traffic Control tab to get rid of network congestion when syncing backups for your Proxmox cluster.
