


Self-hosted game servers are perfect when you want a private gaming space with custom plugins and mods for local (or even remote) co-op with your friends. While you can set up individual servers for a couple of your favorite games, you might need to run through hoops of different software and apps to manage all the servers.
That’s where Pterodactyl shines with its robust game server management tools. The only caveat with the app is that installing is a job and a half, and it’s easy to get overwhelmed with setting up Pterodactyl if you don’t have a lot of experience with self-hosting servers. So, we’ve created a detailed step-by-step guide to help you convert any PC into a Pterodactyl-powered all-in-one game server management hub.
What you’ll need
Unlike modern 3D games that require cutting-edge processors and powerful GPUs, Pterodactyl game servers can work on most systems, including old PCs. Just make sure your PC has enough RAM if you’re planning to run multiple servers for each game simultaneously. Likewise, a solid network card and Internet connection are a must when connecting several clients to your self-hosted game servers.
On the software side, you’ll need to have an operating system pre-installed, and there are a couple of caveats to consider here. Windows 11 doesn’t support the latest version of Pterodactyl’s Wings utility. Although it's supposed to work on Ubuntu, version 24.04 completely breaks the app in half, and I spent an entire day fruitlessly trying all possible ways to get the Pterodactyl to work on my Ubuntu machine. Yes, including Ubuntu server and older versions of the OS. Thankfully, Debian 12 works perfectly with the tool, meaning you’ll have to install it on your PC before proceeding onward. The overall procedure to set up Debian is that same as that for Ubuntu, except, you'll need to use the ISO file for Debian instead.
Installing Pterodactyl using the official scripts
There are quite a few ways you can set up Pterodactyl on your PC. However, the official method is so long and complicated that this article would never end if I were to explain the entire process. That’s where the unofficial script-based installation procedure comes in real handy.
-
Launch the terminal and run the following command to grant admin access to your current user:
su root

-
With the help of the apt package manager, install the curl package:
sudo apt install curl -y

-
Execute this script to initiate the Pterodactyl setup process:
bash

-
Tap 2 when the installer prompts you to pick the version of Pterodactyl you wish to set up.

-
Type the Database Name, Username, and Password.
Alternatively, you can leave them blank if you don't mind going with the default options. Either way, be sure to hit Enter after each step.

-
Open this link to check your timezone before entering it in the Continent/City format.

-
Enter the Email Address for the admin account as well as for the Let’s Encrypt and Pterodactyl setup.
You can use the same email ID for all three.

-
Type the First Name, Last Name, Username, and Password for the admin account.

-
Enter the FQDN for the server. I’ve used the IP address of my PC since I’ll be hosting all servers locally.
But for those who want players from other networks to connect to the server, you’ll need to set up a Domain Name for Pterodactyl and enter it here. Alternatively, if you don't know your PC's IP address, you can use a network scanner like Fing to find it out.

-
Tap y to have the installer automatically calibrate the UFW firewall settings.

-
Double-check all the settings and press y to install Pterodactyl.

-
Enter no when the installer prompts you to enable telemetry.


Setting up Wings
Wings is an add-on for Pterodactyl that lets you connect to game server instances mid-operation and perform even more calibrations to enhance your experience.
-
Once the Pterodactyl script finishes installing the tool, press y to initiate the Wings setup procedure.

-
Tap y thrice if you want the installer to automatically configure UFW, a user for database hosts, and enable external access to MySQL.

- Leave the Panel address section as is.
- Since we’re using the local IP address, tap n to stop the script from auto-configuring HTTPS using Let’s Encrypt.
-
(Optional) After Wings has finished installing, run the following command to automatically start Wings when the PC boots up:
systemctl start wings


Configuring the Pterodactyl web UI
Adding nodes to Pterodactyl
With that, you’ve finished installing Pterodactyl and Wings. But that’s only half the work done because now you’ll have to create nodes and servers using the web UI.
- Launch your favorite web browser and use the FQDN to access the Pterodactyl web UI.
-
Enter the Username and Password you set earlier and tap Login.

-
Head to the Locations tab and hit the Create New button.

-
Give a Short code to the Location and press Confirm.

-
Navigate to the Nodes section and click on Create New.

-
Enter the Name, select the Location, and type the IP address/Domain Name under the FDQN option.
Be sure to toggle the Use HTTP Connection option if you’re using an IP address.

-
Enter the Total Memory and Total Disk Space before typing the Memory and Disk Over-Allocation values and pressing Create Node.

-
Click on the Allocation sub-menu, enter the IP address and Ports, and tap the Submit button.

-
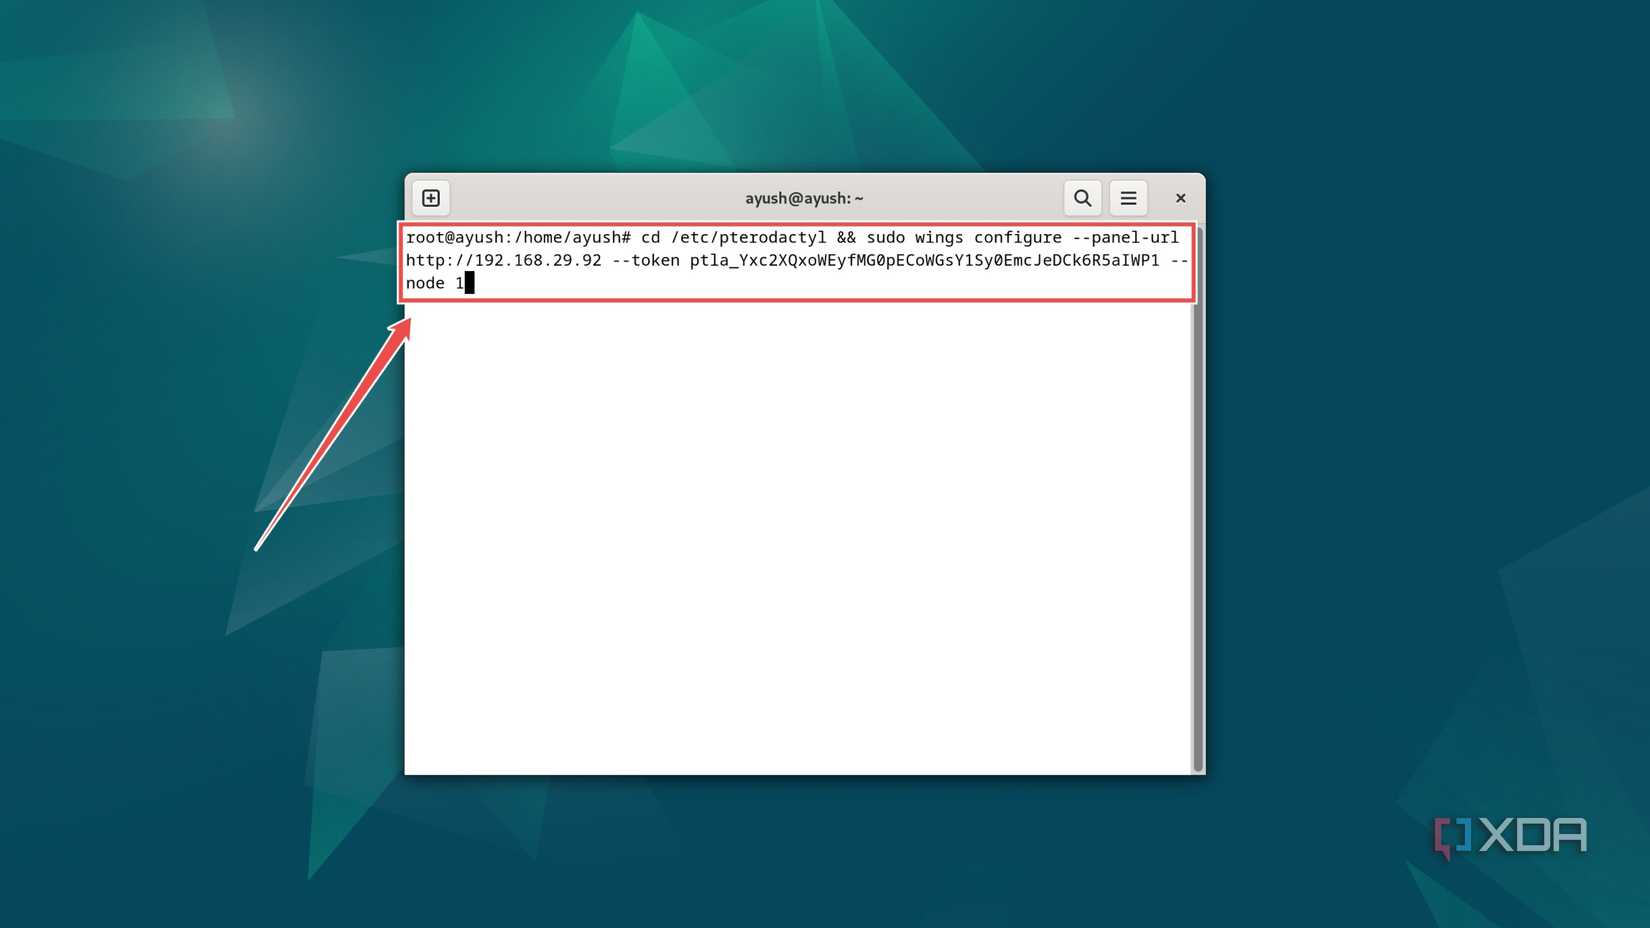
Next, switch to the Configuration tab and hit the Generate Token button under Auto-Deploy.

-
Switch to the PC running the Pterodactyl server and enter this token into the terminal.


Creating a server in the Pterodactyl web UI
Once you’ve created and deployed a node, it’s time to initialize a server for your favorite game. We’ll go with everybody’s favorite game, Minecraft, but the overall procedure is the same for the other titles.
-
Head to the Servers tab, and just like the Location and Node, select the Create New button.

-
Give a Name to the server and set the admin account you created during Pterodactyl’s installation as the Server Owner.

-
Pick the Node you set up earlier and choose your preferred IP address and Port combination under the Default Allocation option.

-
Set the CPU Limit, Memory, and Disk Space you wish to allocate to the server under the Resource Management section.

-
Choose the Nest (collection of presets for games) and pick the Egg (the game version) before deciding on the Docker Image.

- Select Create Server once you’re calibrating all the settings.
-
Launch the server by pressing Start once it has finished installing.


Hosting your own game servers on Pterodactyl

If all goes well, the server should appear with a UUID and an Active status. After that, you’ll have to connect to the server from the in-game settings. I tested Pterodactyl with the latest version Minecraft: Java Edition, and I had no trouble adding another player to the server.
On its own, Pterodactyl supports a few other titles, including Team Fortress 2 and Counter-Strike: Global Offensive. If you wish to try hosting servers for other titles, you can try importing their nests, eggs, and Docker images from trusted sources.
