


Remote streaming is a neat way to access your PC from other devices. Thanks to the advancements in hardware capabilities and network bandwidth, you even enjoy high graphical fidelity and solid frame rates while streaming full-fledged games to your PC.
In fact, there are a handful of applications that allow you to set up remote streaming on all your favorite computing devices. If you're looking for a free-yet-robust way to stream games, the combination of a Sunshine server and a Moonlight client is easily the best option. But since configuring both apps can get rather cumbersome, we’ve created a step-by-step guide to help you level up your remote streaming game!
Setting up Sunshine
Serving as one-half of the remote streaming setup, Sunshine is an application that lets you convert a powerful PC into a server capable of rendering games and sending the stream to any client device. It’s also quite easy to configure as all you have to do is:
- Head to Sunshine's official GitHub link and download the portable version of the app.
- Extract the folder and run sunshine.exe as an administrator.
-
Copy the Configuration UI link from the Sunshine terminal onto your web browser.

-
Pick a username and password and click on Log in before signing in with the newly-set account credentials.
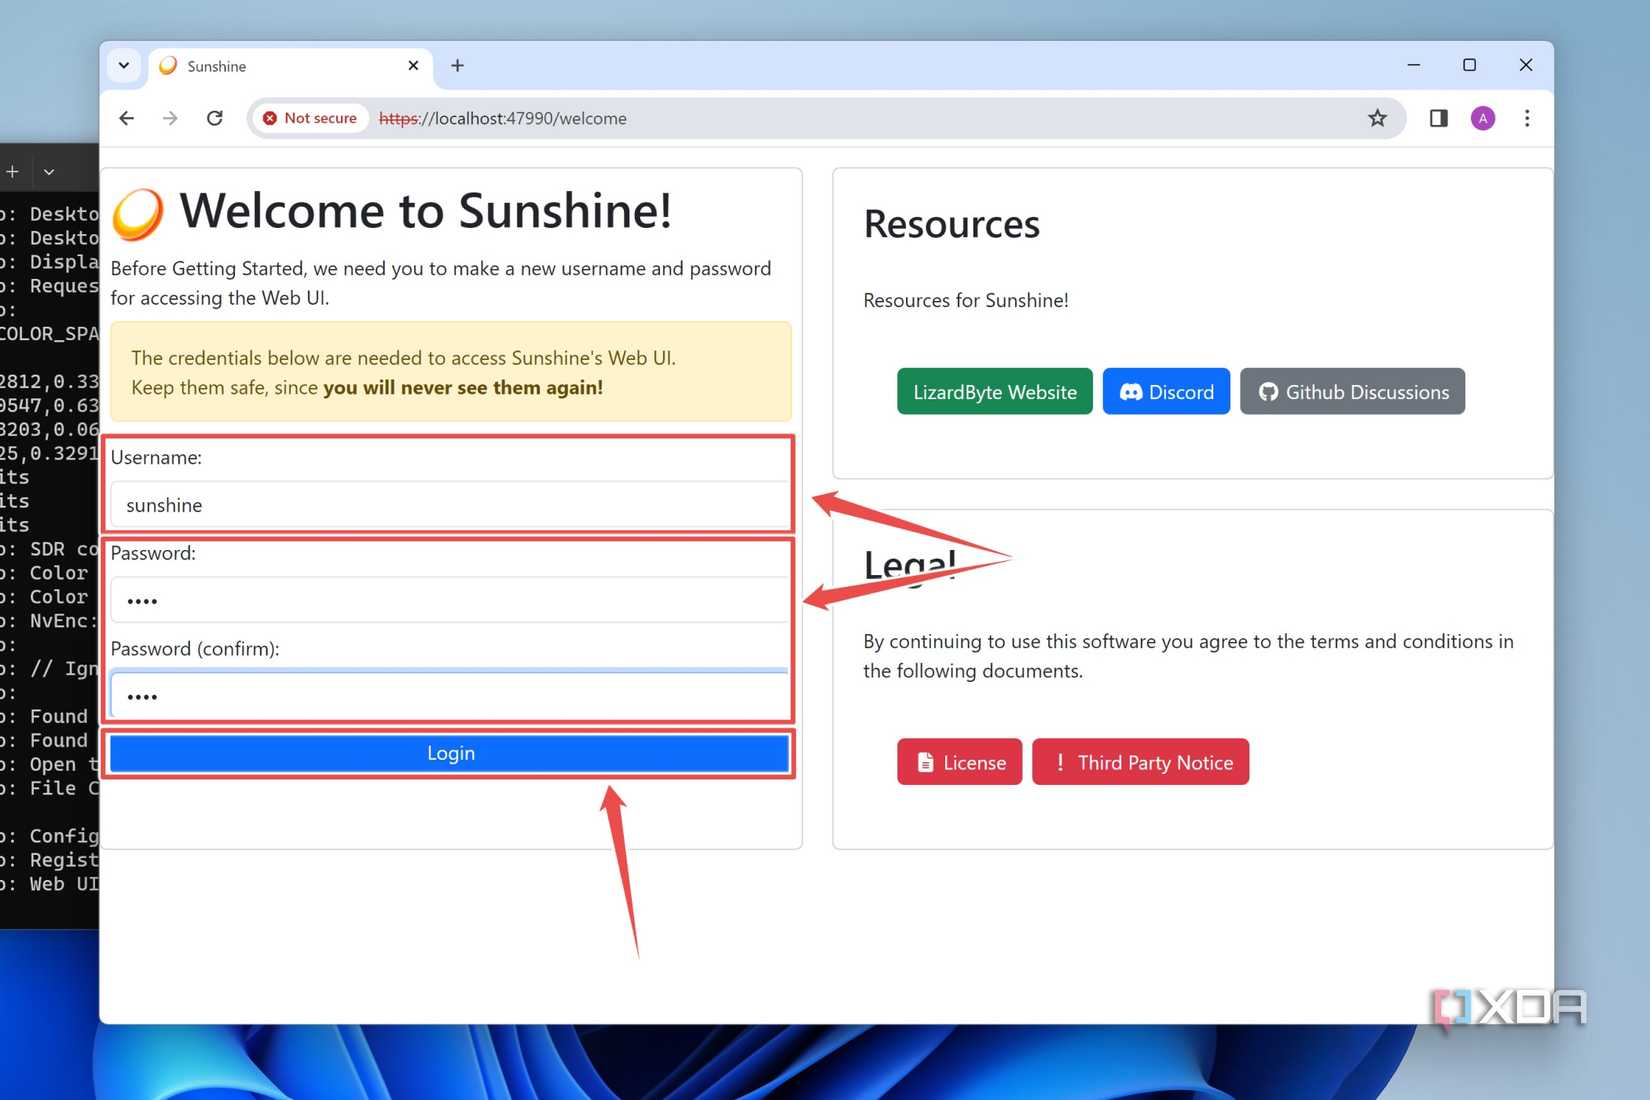
- (Optional) If you prefer playing with controllers, you’ll need to download and install the ViGEmBus drivers.


Setting up Moonlight
With the host machine configured, you’ll need to download Moonlight, an application that allows you to connect a client device to the Sunshine server.
- Download the latest version of Moonlight from the GitHub link.
- If you’re using the portable version, simply extract the folder you just downloaded and run Moonlight.exe with admin privileges.
-
If your firewall tries to block Moonlight, click on the Allow access button.

- Assuming your Sunshine host and Moonlight client are on the same network, the server will appear inside the Moonlight client.

Pairing the Sunshine server with a Moonlight host
Now that you've installed Sunshine and Moonlight on your PCs, it’s time to pair them over the LAN/Wi-Fi.
-
Inside the Moonlight app, click on the Sunshine server.

-
Note the PIN displayed by Moonlight and switch to the other PC.

-
Click on the PIN tab of the Sunshine UI and enter the four-digit code before clicking on the Send button.

-
The lock icon on the host/server PC will disappear from Moonlight, and you're free to use it from the client system.


(Optional) Optimizing the video settings on Moonlight
Once you’ve set up both Sunshine and Moonlight, you can click on the server name in Moonlight and begin broadcasting your games and even the desktop screen to the client system. However, you’ll notice that the image quality on Moonlight can be somewhat lacking. To fix this, simply adjust the video settings on Moonlight by following these steps:
- Click on the Settings icon in Moonlight.
-
Increase the resolution and FPS by clicking on the arrows and choosing the ideal values in accordance with your network bandwidth and speed.

-
You can also modify the image quality with the help of the Video bitrate slider.


(Optional) Setting up ZeroTier to stream games over the Internet
So far, you're limited to streaming games across devices connected to the same network. But for those who want to stream games over the Internet, the ZeroTier application serves as a nice solution.
- Download the ZeroTier app on both the server and the client system from the official link.
- Run zerotier_desktop_ui.exe on both devices.
-
Right-click on the ZeroTier app icon in the Taskbar and pick the Join new network… option to open a new dialog box.

- Switch to your web browser, and sign up on ZeroTier to gain access to the Network settings page.
-
Click on the default Network created by ZeroTier.

-
Choose 10.147.17.* as the IPv4 Auto-Assign range.
Also, ensure that all the IPv6 Auto-Assign settings are disabled.

-
Copy the Network ID into the Join ZeroTier Network dialog box and hit Join.
Repeat this step for the client device.

-
Head back to ZeroTier's Network page on your web browser, and enable the checkbox under the Auth? column for the server and client systems.

-
Switch to the client system that’s running Moonlight and click on the Add PC manually button.

-
Copy and paste the Managed IP of the server into the blank and hit OK.


Once the server shows up in the Moonlight app, you can access it from any network, not just your home Wi-Fi/LAN.
Wrapping up the procedure to set up Sunshine and Moonlight
Remote gaming is quite a neat facility, especially if you wish to play your PC games on other devices like a portable laptop, gaming handheld, or smartphone. It’s also a better alternative to cloud gaming as you retain full control over the actual hardware and games. That said, if you're more into the productive aspect of remote streaming, you might want to check out the easy-to-setup Parsec application instead.
On the flip side, if you encounter random slowdowns during your remote gaming sessions, chances are your Wi-Fi router isn’t powerful enough to stream your games. Turning down the resolution and increasing the Rx and Tx buffer sizes can help out a lot, though you'll need ample RAM on your system for the latter tweak. If you've got a slow home network, upgrading to a high-speed router, better cables, and faster NICs and switches can improve your remote streaming experience. Your server can also be the culprit that's causing low FPS, meaning it's time to upgrade to better components.
