


If you have multiple PCs in your computing space, you might be familiar with the annoyance of unplugging and reinserting a USB accessory when you need to switch between two systems. USB-over-LAN services provide an easy solution to this issue, though the high monthly subscription fees charged by these apps make them impractical for personal use.
Luckily, you can use some free apps and packages to share the USB accessories connected to your Raspberry Pi with other PCs over local networks. But since the procedure can get rather daunting if you’re on Windows, we’ve created a detailed guide to help you turn your Raspberry Pi into a powerful USB-sharing hub.
What you’ll need
For obvious reasons, a Raspberry Pi SBC will serve as the heart of this project. Since most Raspberry Pi SBCs besides the Zero family include four USB ports, it’s a good idea to stick with a mainline model. The software we’ll use for this project is very small, so you just need a microSD card with enough capacity to store the OS.
While we’re on the subject of the operating system, we’ll assume that you’ve already flashed the microSD card with a proper desktop OS. We’ve gone with the Raspberry Pi OS to keep things simple, but you can cut down on resource consumption by switching to a CLI-based operating system like DietPi.
-
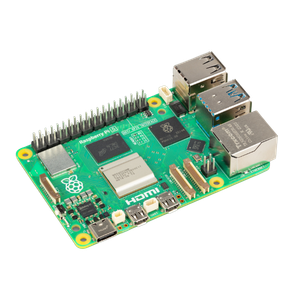
Raspberry Pi 5
- CPU
- Arm Cortex-A76 (quad-core, 2.4GHz)
- Memory
- Up to 8GB LPDDR4X SDRAM
- Operating System
- Raspberry Pi OS (official)
- Ports
- 2× USB 3.0, 2× USB 2.0, Ethernet, 2x micro HDMI, 2× 4-lane MIPI transceivers, PCIe Gen 2.0 interface, USB-C, 40-pin GPIO header
- GPU
- VideoCore VII
- Starting Price
- $60
-

Setting up VirtualHost
VirtualHost is the first method for the Raspberry Pi-flavored USB hub. Setting it up is fairly easy, as all you have to do is:
-
Launch the terminal app on your Raspberry Pi and use the wget command to download the vhusbdarm package.
wget https://www.virtualhere.com/sites/default/files/usbserver/vhusbdarm

-
Modify the permissions of the vhusbdarm file with the chmod command.
chmod +x vhusbdarm

-
Initialize the server by executing the vhusbdarm script:
sudo ./vhusbdarm


With that, your Raspberry Pi USB hub is up and running. Next, you need to configure your Windows 11 machine as the client.
- Download the VirtualHere Client app from the official link and run it as an admin.
-
The Raspberry Pi USB server will appear alongside the USB devices plugged into the SBC.
You can start using the peripheral by double-clicking on it inside the app.


Although VirtualHere provides a painless way to create this project, it has a couple of limitations. The app only supports one USB device at a time, and you’ll have to shell out $49 for a license that’s tied to the hardware. It’s also a bit on the slower side, so you might want to check out the second method instead.
Setting up USB/IP
Configuring the Raspberry Pi as a USB/IP server
If you have a Linux PC or have WSL installed on your PC, the USB/IP method is a cakewalk. However, the difficulty rises exponentially if you’re on a Windows device. But more on that in a bit. First, it’s time to install the USB/IP server package on your Raspberry Pi:
-
Inside the terminal app, install the usbip package using the apt package manager.
sudo apt install usbip

-
Load the USB IP host module to the kernel using the modprobe command:
-
sudo modprobe usbip_core
-
sudo modprobe usbip_host

-
-
Run the usbip command with the list parameter to check the USB devices attached to your Raspberry Pi.
usbip list -l

-
Enter the bind command followed by the bus ID of the USB device you wish to share over the LAN.
sudo usbip bind -b usb_id

-
Start the USB/IP server using this command:
sudo usbipd


Importing the USB/IP certificate to Windows 11
Once the USB/IP server starts up, you can leave the Raspberry Pi be and switch to your PC. On Windows 11, you’ll have to undergo a long-drawn-out procedure to use the USB/IP client. As such, Linux/WSL users might want to skip to the last section about pairing their system with the Raspberry Pi server. With that out of the way, the first step is to import the USB/IP certificate into your local machine.
- Head to developer cezanne’s GitHub repository and download the latest version of the USB/IP source code and dev.zip packages.
-
Uncompress both files and open the usbip_test file inside the driver folder.

-
Pick the Local Machine option and hit Next twice.

-
Enter usbip as the password and press the Next button two times.

-
Tap Finish to exit the Certificate Import Wizard.


Installing the USB/IP drivers on Windows 11
Once the certificate has been added to the local machine, you’ll need to install the USB/IP drivers. Unfortunately, the unsigned drivers can only be installed in Test Mode, so you should proceed carefully with the setup and turn off this mode the moment you’re done installing them.
-
Right-click on the Start menu and choose Terminal (Admin).
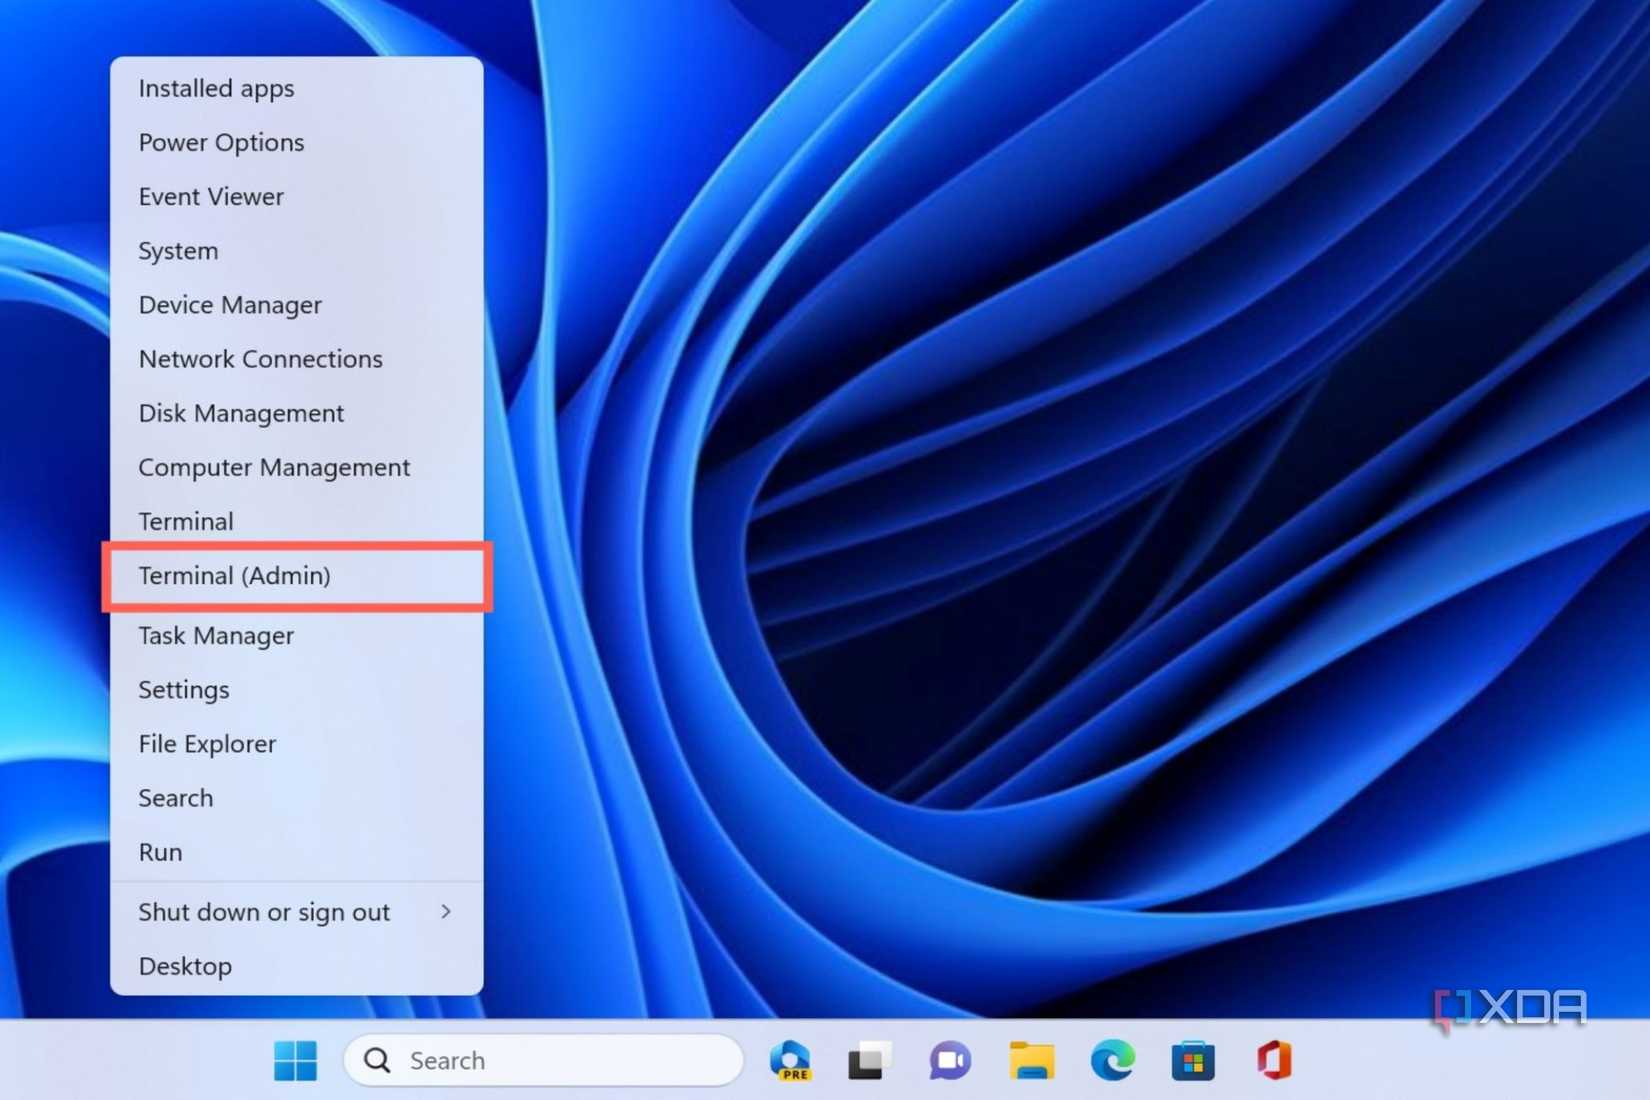
- Grant admin privileges to the Terminal when prompted by the UAC service.
-
Paste the following command in the Terminal app to enable Test Mode on the next startup:
bcdedit.exe /set TESTSIGNING ON

- Reboot your system
-
Once the PC powers on, you'll notice the Test Mode watermark in the bottom-right corner of the screen.

-
Reopen the Terminal and use the cd command to navigate to the directory containing the usbip.exe file you downloaded in the previous section.

-
Install usbip.exe with the help of this command:
.\usbip.exe install

-
Exit the Test Mode by running the following command before rebooting your system once again:
bcdedit.exe /set TESTSIGNING OFF


Connecting the PC with the Raspberry Pi USB/IP server
When the PC finishes restarting, you’re free to pair it with the RPi server and start using your USB accessory over the LAN.
-
Open the Terminal app, switch to the USB/IP directory once again, and run usbip.exe with the list parameter.
.\usbip.exe list -r raspberry_pi_ip_address
You can use a network scanning app like Nmap to check the IP address of your Raspberry Pi. Furthermore, Linux/WSL users can follow along by removing .\ and .exe from the usbip command in each step.
-
Locate the device you want to use on the PC and run the attach command to pair it with your PC.
usbip.exe attach -r raspberry_pi_ip_address -b usb_id


Assuming you followed the procedure correctly, the Terminal will confirm that the USB device has been connected to your PC. With that, you’ll be able to use the accessory connected to the Raspberry Pi on your PC.
Using the Raspberry Pi to access all your peripherals over the network

For complete beginners, I recommend sticking to the first option as it’s insanely easy to set up and is fairly useful as long as you only need to use one device at a time.
Meanwhile, the second method is easily the better alternative for Linux users. Heck, you can even use it on Windows if you’re up to the challenge. Just make sure you disable the Test Mode the moment you’re done installing the usbip.exe file, as it’s really unsafe for general use.
