


Virtualization opens the doors to many interesting projects, be it running the newer versions of macOS on your home server or hosting a plethora of services inside virtual machines. But what if you could create a virtualized instance of your daily driver and run it inside a VM? Turns out, you can actually pull off this insane project with the help of Disk2vhd and VirtualBox.
Creating a VHD file using Disk2vhd
As its name suggests, Disk2vhd is a free tool that lets you save the contents of your storage drives in the form of .vhd files. Besides providing a means to create makeshift backups of your PC, the .vhd files generated by Disk2vhd can also be used to virtualize an existing Windows 11 environment into a VM using a process called Physical to Virtual migration. To create this file,
- Head to the official Disk2vhd web page and download the latest version of the tool.
- Extract the folder you just downloaded and run disk2vhd.exe as an administrator.
-
Select the drives you wish to convert into a .vhd file, pick the directory where you wish to save this file, and hit Create.
Since we’re using VirtualBox for this project instead of Hyper-V, feel free to leave the Use vhdx checkbox disabled. Likewise, you can leave the Prepare for use in virtual PC disabled, though you might want to enable Use Volume Shadow Copy option if you’re planning to generate a .vhd file for an external storage drive.


Deploying a virtual machine inside VirtualBox
With the .vhd file ready, it’s time to create a virtual machine that can utilize it as the disk drive. Since we’ll use VirtualBox to deploy the VM, you’ll need CPU virtualization enabled in your PC’s BIOS.
- If you haven’t already set up VirtualBox on your system, download its setup.exe file and use it to install the hypervisor on your system.
- Launch VirtualBox.exe with admin privileges.
-
Hit the New button.

-
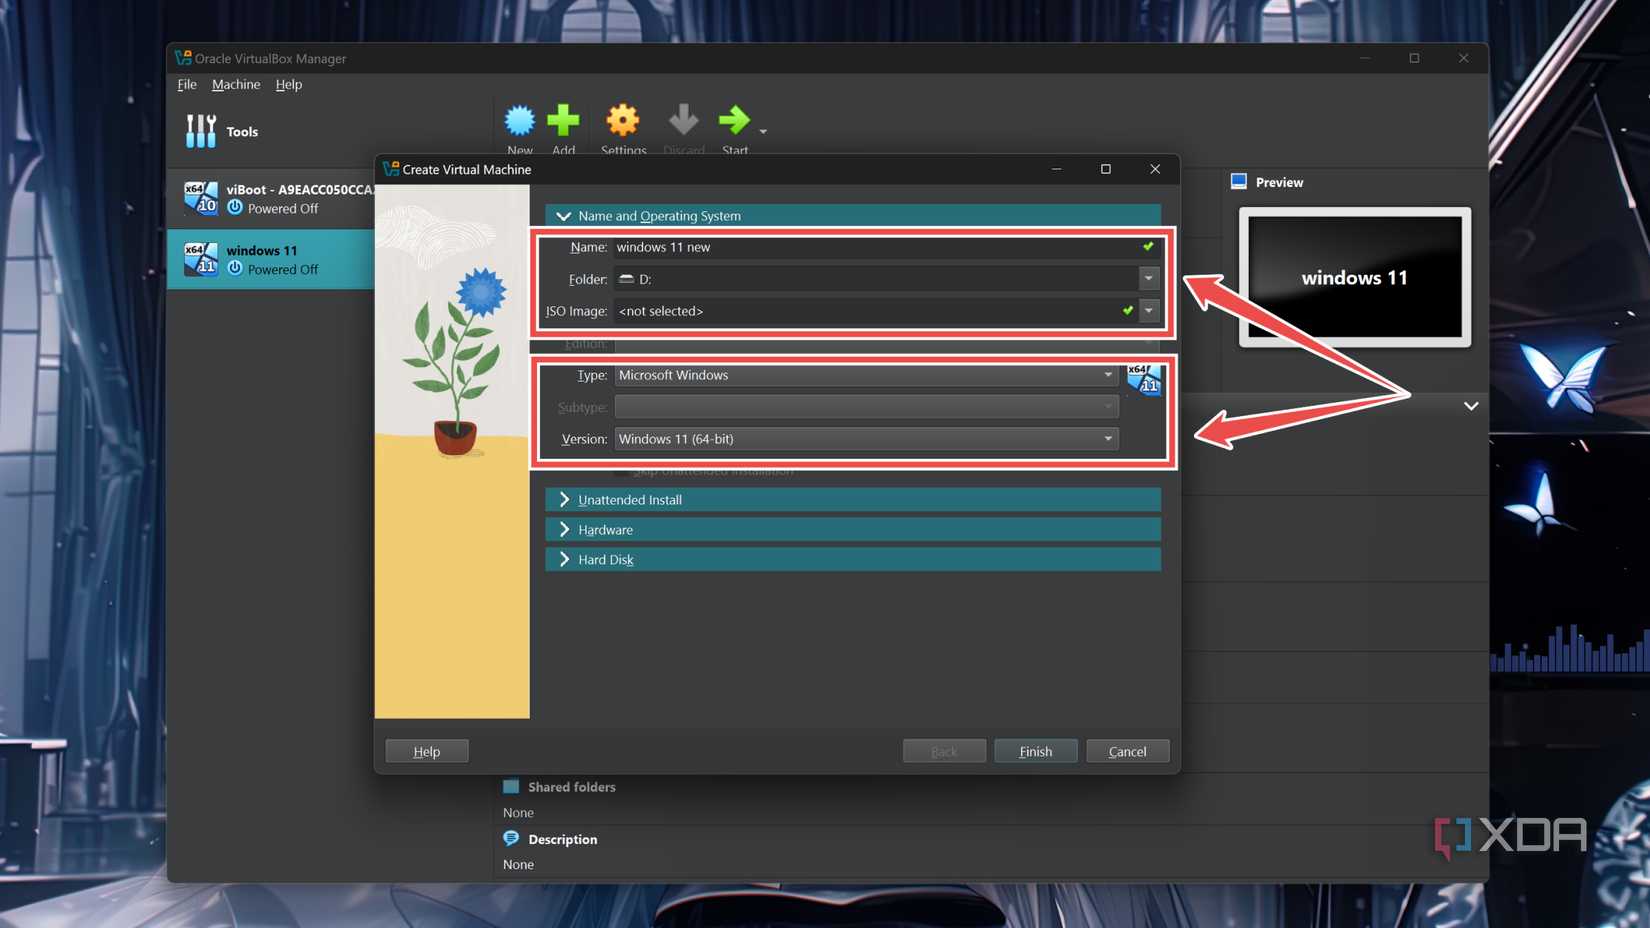
Inside the pop-up window, enter the Name of your VM, select its Folder (directory), and make sure the Type setting shows Microsoft Windows, with the Version option set to Windows 11 (64-bit).
Be sure to leave the ISO image field at
. -
Switch to the Hardware tab and assign more Base Memory and Processors to the VM.

-
Head to the Hard Disk tab, toggle the radio button adjacent to Use an Existing Virtual Hard Disk file, and click on the Folder icon underneath this field.

-
Tap the Add button inside the pop-up window, select the .vhd file you created earlier, and press the Choose button.

-
Click on Finish and wait for VirtualBox to create the virtual machine.

-
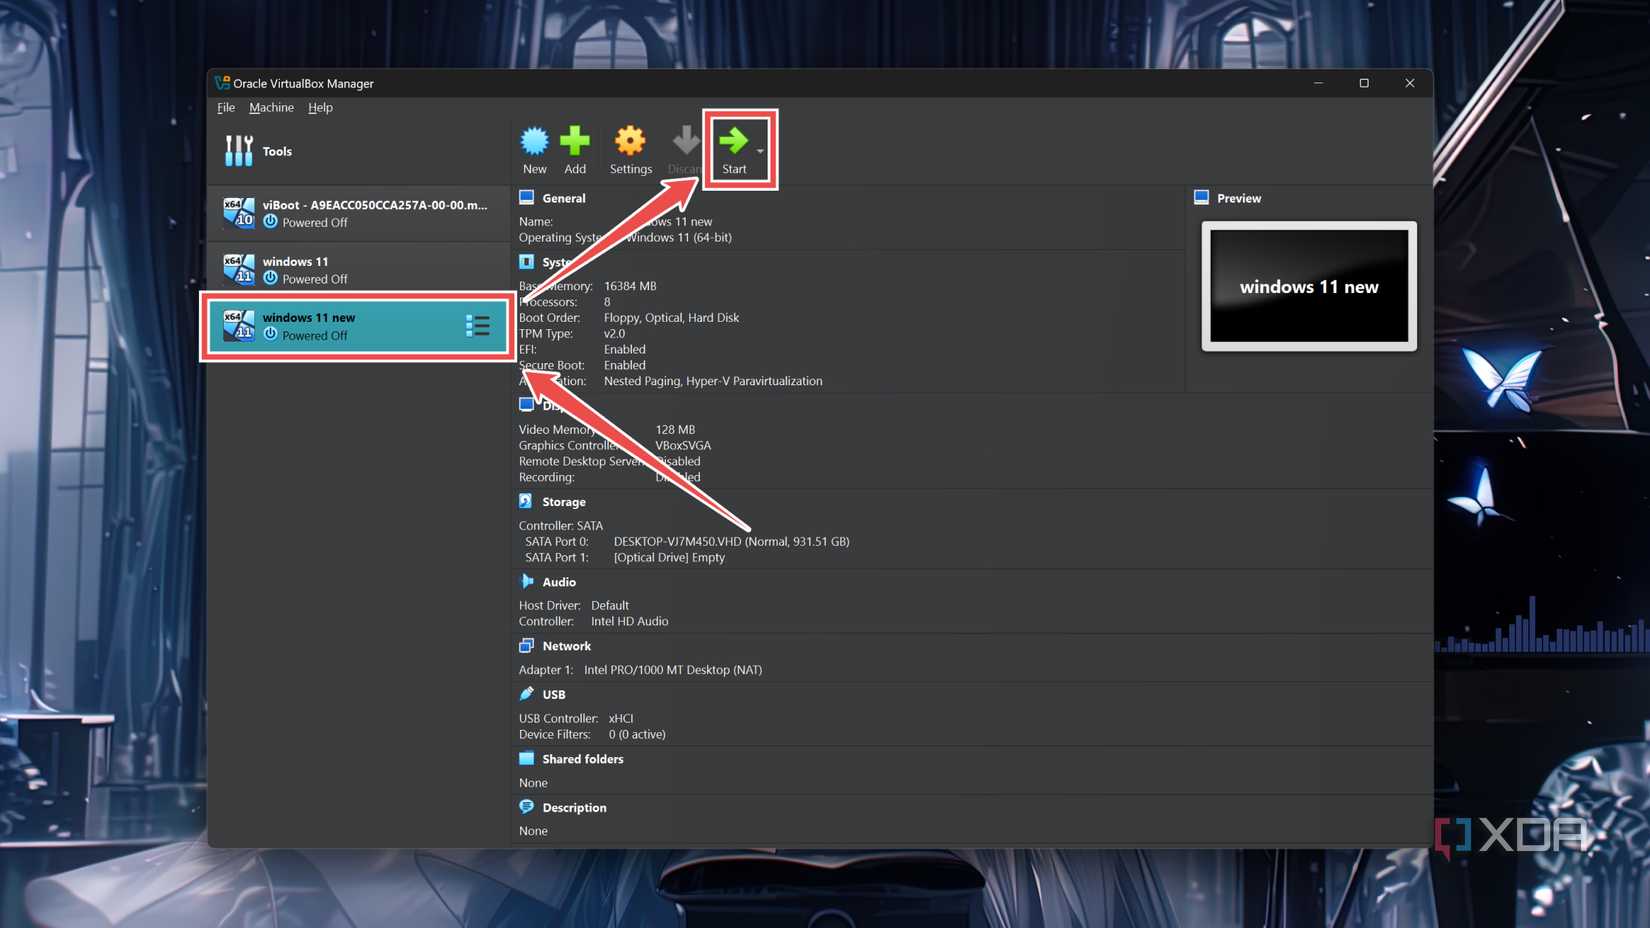
Select the VM you just created and tap the Start button.


Running a virtual machine replica of your everyday PC

Once you’ve deployed the virtual machine, it should boot into the familiar Windows 11 environment of your daily driver. If it loads the recovery environment instead, you can just follow the prompts to repair your system and launch Windows 11 with all the settings, data, and apps intact.
That said, the resource-hogging nature of Windows 11 will result in degraded performance and responsiveness. Unless you’re using a high-end processor and have allocated enough RAM and (logical) CPU cores to the VM, it’ll be a hassle to carry out even the least resource-taxing tasks on your virtualized machine. Nevertheless, it’s still a fun project if you want to conduct experiments on your daily driver without the fear of breaking it.
