


1. 服务器端配置(Ubuntu)
(1) 安装 Jupyter Notebook
如果尚未安装,在服务器上运行:
pip install jupyter notebook
# 或使用 conda(如果已安装 Anaconda),非常建议Conda
conda install jupyter notebook
# 检查是否安装好
jupyter notebook --version #安装好了会输出版本号

(2) 生成 Jupyter 配置文件
jupyter notebook --generate-config

# (base) root@ecs-4461:~# jupyter notebook --generate-config
# Writing default config to: /root/.jupyter/jupyter_notebook_config.py
这会生成配置文件 ~/.jupyter/jupyter_notebook_config.py。
(3) 设置 Jupyter 密码
jupyter notebook password
# [JupyterPasswordApp] Wrote hashed password to /root/.jupyter/jupyter_server_config.json
输入密码(后续远程连接需要)。
(4) 修改 Jupyter 配置文件
vim ~/.jupyter/jupyter_notebook_config.py
输入 i,开启编辑模式。
修改以下配置:
c.NotebookApp.ip = '0.0.0.0'  # 允许所有IP访问
c.NotebookApp.port = 8888      # 指定端口(可改)
c.NotebookApp.open_browser = False  # 不自动打开浏览器
c.NotebookApp.allow_remote_access = True  # 允许远程访问
或
## The IP address the Jupyter server will listen on.
#  Default: 'localhost'
c.ServerApp.ip = '0.0.0.0'  # 允许所有IP访问

## The port the server will listen on (env: JUPYTER_PORT).
#  Default: 0
c.ServerApp.port = 8888      # 指定端口(可改)

## Whether to open in a browser after starting.
#                          The specific browser used is platform dependent and
#                          determined by the python standard library `webbrowser`
#                          module, unless it is overridden using the --browser
#                          (ServerApp.browser) configuration option.
#  Default: False
c.ServerApp.open_browser = False  # 不自动打开浏览器

## Whether to open in a browser after starting.
#  See also: ExtensionApp.open_browser
c.LabServerApp.open_browser = False

## Allow requests where the Host header doesn't point to a local server
#
#         By default, requests get a 403 forbidden response if the 'Host' header
#         shows that the browser thinks it's on a non-local domain.
#         Setting this option to True disables this check.
#
#         This protects against 'DNS rebinding' attacks, where a remote web server
#         serves you a page and then changes its DNS to send later requests to a
#         local IP, bypassing same-origin checks.
#
#         Local IP addresses (such as 127.0.0.1 and ::1) are allowed as local,
#         along with hostnames configured in local_hostnames.
#  Default: False
c.ServerApp.allow_remote_access = True  # 允许远程访问
保存 (Shift+: → wq → Enter)。
补充vim基础的查找方式
-
正向查找(向下搜索)
-
按
/,输入要查找的关键字,按Enter。 -
示例:查找
ip/ip -
跳转到下一个匹配项:按
n -
跳转到上一个匹配项:按
N(Shift + n)
-
-
反向查找(向上搜索)
-
按
?,输入关键字,按Enter。 -
示例:
?ip -
n和N的跳转方向与/相反。
-
(5) 启动 Jupyter Notebook
jupyter notebook --no-browser --port=8888
# 或 我使用如下,因为我使用的是 root
jupyter notebook --no-browser --port=8888 --allow-root
或使用 screen 或 tmux 保持后台运行:
screen -S jupyter
jupyter notebook --no-browser --port=8888
# 按 Ctrl+A, 再按 D 退出 screen(进程保持运行)
2. 为Ubuntu系统创建普通用户
1. 创建新用户
sudo adduser username # 将 "username" 替换为你想要的用户名 我设置为ubuntu
执行后会交互式提示:
- 设置密码(输入时不可见)
- 填写用户信息(可直接回车跳过)
2. 赋予 sudo 权限(可选)
如果希望该用户能执行管理员操作:
sudo usermod -aG sudo ubuntu # 加入 sudo 组
验证是否生效:
bash
su - ubuntu  # 切换到新用户
sudo whoami    # 应返回 "root"

3. 配置 SSH 密钥登录(推荐,可跳过)
(1) 本地生成密钥对(在你的电脑上操作)
ssh-keygen -t ed25519 # 默认保存到 ~/.ssh/id_ed25519
(2) 将公钥上传到服务器
ssh-copy-id ubuntu@server_ip # 需要输入用户密码
或手动复制:
cat ~/.ssh/id_ed25519.pub | ssh username@server_ip "mkdir -p ~/.ssh && chmod 700 ~/.ssh && cat >> ~/.ssh/authorized_keys && chmod 600 ~/.ssh/authorized_keys"
4. 禁止 root 登录(安全强化,可跳过)
编辑 SSH 配置:
bash
sudo nano /etc/ssh/sshd_config
修改以下参数:
ini
PermitRootLogin no          # 禁止root登录
PasswordAuthentication no  # 禁用密码登录(仅密钥)
重启 SSH 服务:
bash
sudo systemctl restart sshd
5. 用户管理常用命令
| 操作 | 命令 | 说明 |
|---|---|---|
| 切换用户 | su - username | 需要输入密码 |
| 删除用户 | sudo deluser --remove-home username | 同时删除家目录 |
| 修改密码 | passwd username | root用户可修改他人密码 |
| 查看用户组 | groups username | 显示所属组 |
| 锁定用户 | sudo usermod -L username | 禁止登录 |
| 解锁用户 | sudo usermod -U username | 恢复登录 |
6. 重要目录说明
- 用户家目录:
/home/ubuntu/ - SSH配置:
~/.ssh/authorized_keys - sudo日志:
/var/log/auth.log
7. 验证用户创建成功
bash
id ubuntu # 应显示用户UID、GID和所属组
输出示例:

uid=1000(ubuntu) gid=1000(ubuntu) groups=1000(ubuntu),27(sudo)
8. 将root的文件的所有权限都给ubuntu
sudo chmod 755 /root/ # 开放读取权限
3. 本地连接 Jupyter Notebook
方法 1:SSH 端口转发(推荐)
在本地终端运行:
ssh -N -L localhost:8888:localhost:8888 ubuntu@服务器IP
-N:不执行远程命令-L:本地端口转发
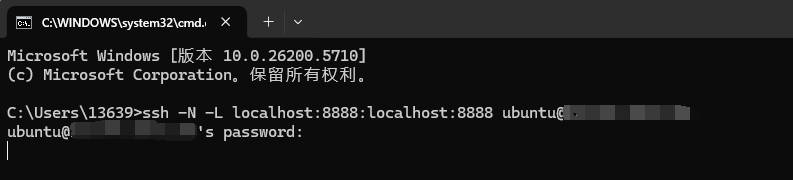
然后浏览器访问:
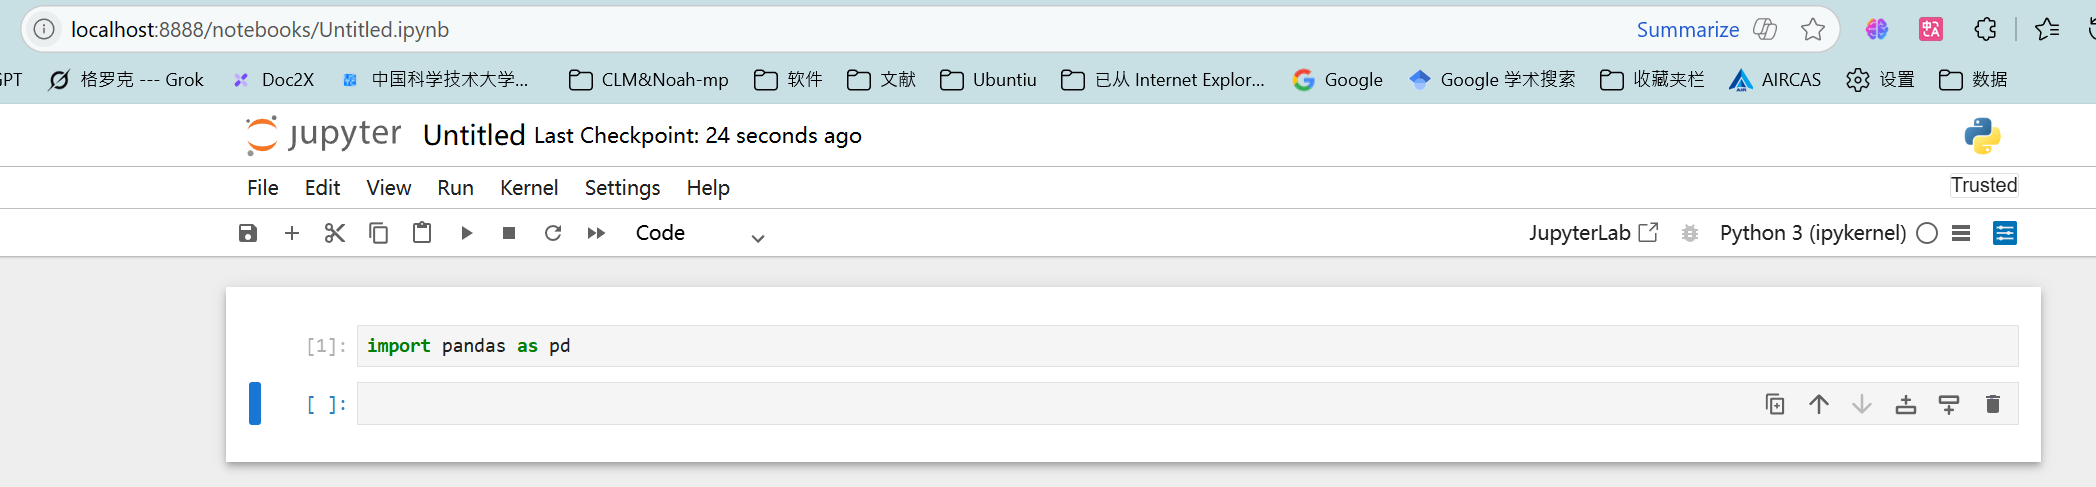
http://localhost:8888
输入之前设置的密码即可。
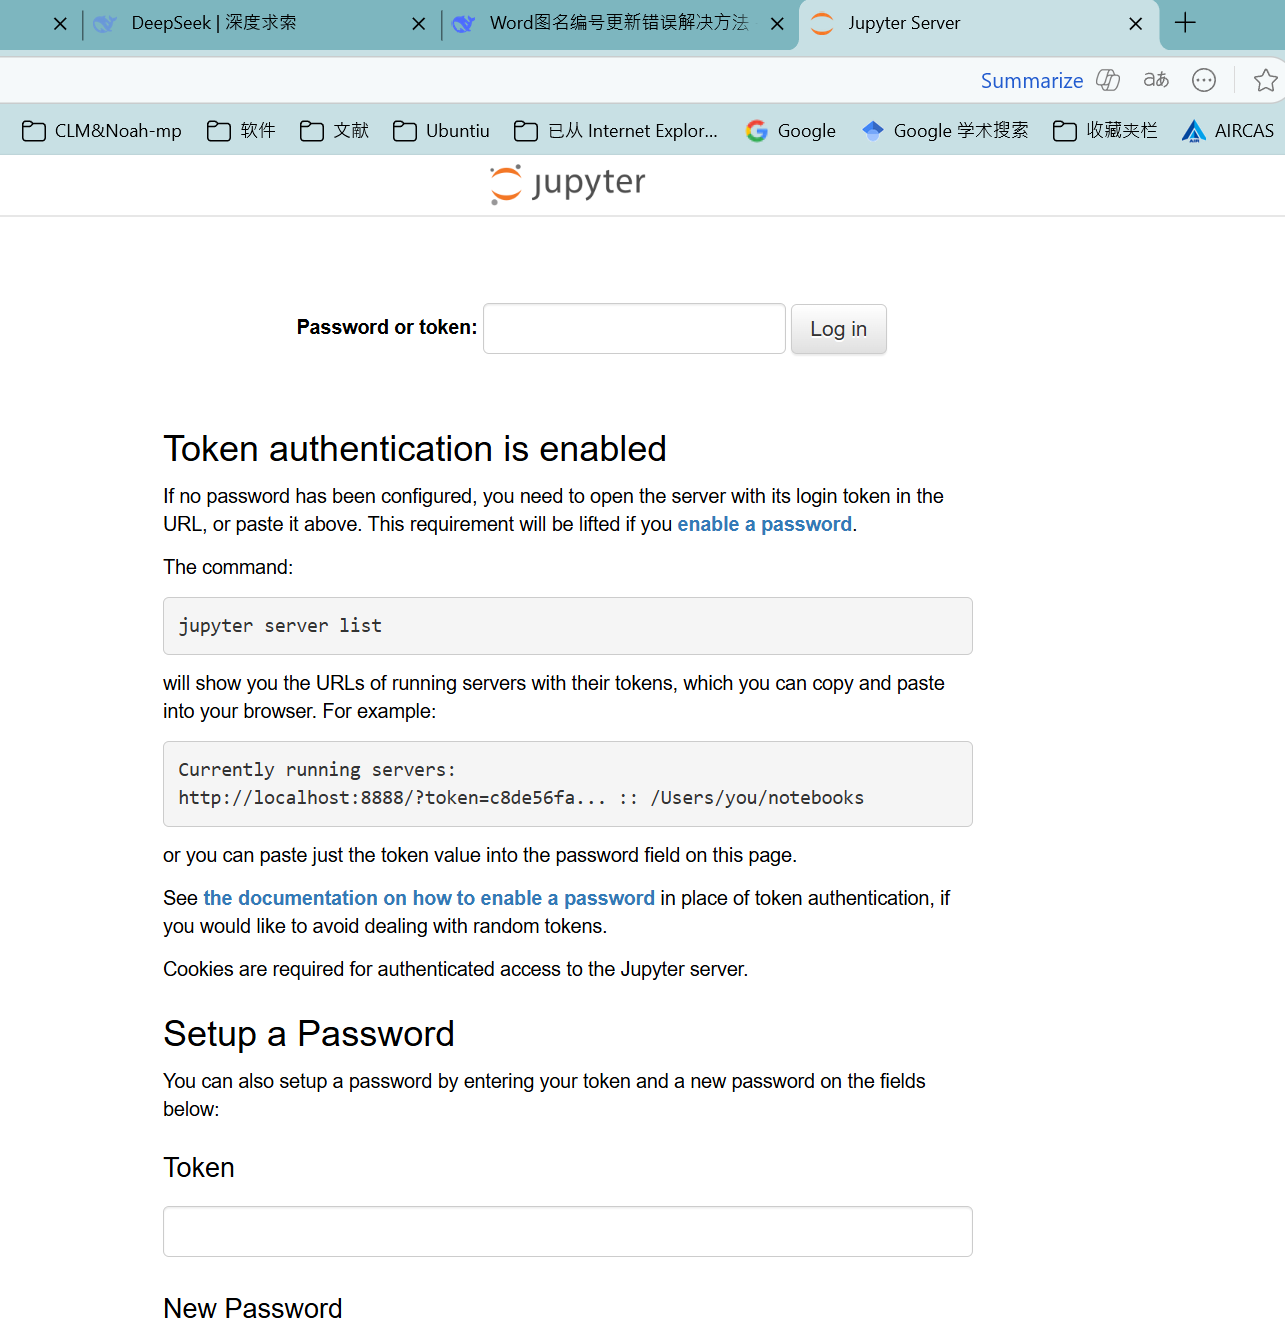
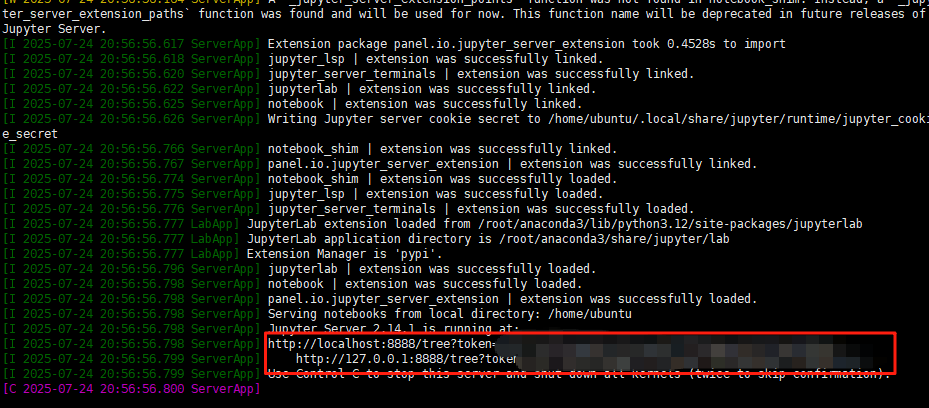
可以将以下 token=后的代码,放置在以上位置,然后设置新密码。(重要)
方法 2:VS Code 远程连接
-
安装 Remote - SSH 扩展
- 在 VS Code 扩展商店搜索并安装 Remote - SSH。
-
连接服务器
- 按
F1→ 输入 “Remote-SSH: Connect to Host” → 选择服务器。

- 按
-
访问 Jupyter Notebook
-
在 VS Code 中打开终端,运行:
jupyter notebook --no-browser --port=8888 -
VS Code 会自动检测并弹出浏览器窗口。
-
方法 3:PyCharm 远程连接
- 配置远程解释器
File→Settings→Python Interpreter→ 点击齿轮 →Add→SSH Interpreter。- 输入服务器信息,选择服务器上的 Python(如
/root/anaconda3/bin/python)。
- 配置 Jupyter Notebook
- 在 PyCharm 中新建 Jupyter Notebook 文件。
- 在
Run→Edit Configurations,设置:- Jupyter Server:
Existing→ 输入http://服务器IP:8888和密码。
- Jupyter Server:
方法 4:本地 Jupyter Lab 连接远程内核
-
在服务器上安装
jupyterlabpip install jupyterlab -
本地安装 Jupyter Lab
pip install jupyterlab -
配置远程内核
-
在本地运行:
ssh 用户名@服务器IP jupyter lab --no-browser --port=8888 -
浏览器访问
http://localhost:8888。
-
3. 常见问题
Q1: 连接时报错 Connection Refused
-
检查服务器防火墙是否开放端口:
sudo ufw allow 8888 -
确保 Jupyter 正在运行:
ps aux | grep jupyter
Q2: 如何让 Jupyter 后台运行?
使用 nohup 或 screen:
nohup jupyter notebook --no-browser --port=8888 > jupyter.log 2>&1 &
查看日志:
tail -f jupyter.log
Q3: 如何更改默认工作目录?
修改 jupyter_notebook_config.py:
c.NotebookApp.notebook_dir = '/path/to/your/project'
总结
| 方法 | 适用场景 | 优点 |
|---|---|---|
| SSH 端口转发 | 浏览器直接访问 | 简单稳定 |
| VS Code Remote | 代码编辑+运行一体化 | 适合开发 |
| PyCharm 远程 | 专业 Python 开发 | 调试方便 |
| Jupyter Lab | 交互式数据分析 | 界面友好 |
https://pan.baidu.com/s/17diTrVYNYKIKKlsM5y8R8A?pwd=8888 提取码: 8888


 2069
2069

 被折叠的 条评论
为什么被折叠?
被折叠的 条评论
为什么被折叠?
 到【灌水乐园】发言


