


SMB客户端无法更改的默认端口
在Windows上,我们可以快捷地在文件管理器(File Explorer)中输入一个远程SMB共享的UNC路径来进行连接。
这时,Windows会尝试连接到该IP地址或计算机名的445端口。
然而,如果你尝试输入一个形如\\IP地址:端口\路径的UNC地址,Windows就会立刻弹出一个错误,因为截至目前,文件资源管理器并不支持连接到一个非默认端口的SMB共享。
多么愚蠢,不是吗。微软在这些年来竟从未考虑过这个基本问题。
快速的解决方案
好在,从Windows 11 24H2起,我们能够使用Powershell连接到一个非默认端口的SMB共享,通过更改-TcpPort参数。但该命令不适用于以前所有的Windows版本。
New-SmbMapping
    [[-LocalPath] <String>]
    [[-RemotePath] <String>]
    [-AsJob]
    [-BlockNTLM <Boolean>]
    [-CimSession <CimSession[]>]
    [-CompressNetworkTraffic <Boolean>]
    [-Confirm]
    [-Credential <PSCredential>]
    [-GlobalMapping]
    [-HomeFolder]
    [-Password <String>]
    [-Persistent <Boolean>]
    [-QuicPort <UInt16>]
    [-RdmaPort <UInt16>]
    [-RequireIntegrity <Boolean>]
    [-RequirePrivacy <Boolean>]
    [-SaveCredentials]
    [-SkipCertificateCheck]
    [-TcpPort <UInt16>]
    [-ThrottleLimit <Int32>]
    [-TransportType <TransportType>]
    [-UserName <String>]
    [-UseWriteThrough <Boolean>]
    [-WhatIf]
    [<CommonParameters>]
对于一切老版本,我们只能进行变通。
端口转发和虚拟网卡(不可用)
为了解决这个问题,曾有人尝试在本地建立一个拥有独立IP地址的虚拟网卡,接着使用Windows自带的portproxy将非默认端口的共享地址转发到该网卡IP地址的445端口上。
首先,他们安装一个额外的Powershell模块,来能够让Powershell建立回环网卡。
Install-Module -Name LoopbackAdapter -MinimumVersion 1.2.0.0
紧接着,他们定义一个函数,负责创建一个端口代理,转发SMB映射。
Function Create-Host { Param(
	[Parameter(Mandatory=$true)]$Name,
	[Parameter(Mandatory=$true)]$Ip,
	[Parameter(Mandatory=$true)]$Dest,
	[Parameter(Mandatory=$true)]$Port,
	[switch]$Force
)
	if (
		(Get-NetIPAddress -IPAddress $Ip -ErrorAction SilentlyContinue) -or
		(Test-Connection $Ip -Quiet)
	) {
		throw "$Ip exists"
	}
	netsh `
		interface portproxy `
		add       v4tov4 `
		listenaddress=$Ip `
		listenport=445 `
		connectaddress=$Dest `
		connectport=$Port
	if (!$?) {
		return
	}
	Add-Host `
		-Name $Name `
		-Ip $Ip `
		-Comment 'Loopback machine for custom SMB' `
		-Force:$Force

	#the -PassThru of the cmdlets following this one return absolute junk so we cannot do it in one chain
	$adapter = New-LoopbackAdapter -Name $Name -Force:$Force

	$adapter `
	| Disable-NetAdapterBinding `
		-ComponentID ms_msclient,ms_pacer,ms_server,ms_lltdio,ms_rspndr

	$adapter `
	| Set-DnsClient `
		-RegisterThisConnectionsAddress $False `
		-PassThru `
	| Set-NetIPInterface `
		-InterfaceMetric '254' `
		-WeakHostSend    Enabled `
		-WeakHostReceive Enabled `
		-Dhcp Disabled
#this breaks hostname resolution, it also doesnt seem necessary as everything works
#(just keeping it here as it was present in a different tutorial I saw)
#		-SkipAsSource $True

	$adapter `
	| New-NetIPAddress `
		-IPAddress     $Ip `
		-PrefixLength  32 `
		-AddressFamily IPv4 `
	| Out-Null

	'Reboot your machine'
}
最后,调用该函数并传参,创建一个映射。
Create-Host -Name bob -Ip 10.254.0.1 -Dest ipOfHostname -Port port
接下来手动连接被代理转发的SMB共享。这些内容的源代码可在Github上被找到。
然而,事实证明这个方法亦不可行。实际的结果是,在第一次重启后,映射被创建。但在第二次及之后重启过后,映射莫名消失,尽管端口代理仍显示存在。
有人提议应该将Lanman Server和Workstation——Windows上掌管SMB服务和客户端的服务——改为依赖其它服务启动,防止它们抢夺445端口。
#This might be needed if the above shows forwardings are present, server is accessible, yet the port isn't listening.
#I'm only including it because it was mentioned in a tutorial I came across;
#like the SMB1.0 note above, I did not need to do it at all for my script to work
#and it runs fine (on my Win10 19044) with a stock/opposing setup.
#
#lanmanserver (local SMB) may be stealing ports (all interfaces) before iphlpsvc (netsh portproxy) can
#So add iphlpsvc as a dependant, takes effect upon reboot
sc.exe `
	config `
	lanmanserver `
	depend= `
	((&{ Get-Service -Name lanmanserver -RequiredServices | %{ $_.Name }; 'iphlpsvc'}) -join '/')
	#similarly apparently workstation might be problematic
sc.exe `
	config `
	lanmanworkstation `
	depend= `
	((&{ Get-Service -Name lanmanworkstation -RequiredServices | %{ $_.Name }; 'iphlpsvc'}) -join '/')
但事实证明这也毫无作用。行为毫无改变。
可用的方法
首先,摒弃创建一个回环网卡的思路。我们完全可以将端口代理转发到127.0.0.1:445上。不过,这就意味着你的计算机不能再从自身发出共享。
我们也不再使用Windows自带的端口代理,而是改用一个能实时显示状态的第三方工具。这样,即使出现问题,好歹能看到一条错误提示。
接下来我们完全禁用Lanman Server并重启计算机来彻底让Windows自带的SMB服务程序让出445端口。Lanman Workstation似乎并不影响445端口的监听,因为它只是个客户端程序。

接下来,是时候将非默认端口的SMB共享的地址转发到回环地址的445端口上了。
修改第三方portproxy的配置文件config.toml,例如这样。
[[proxy]]
listen = "127.0.0.1:445"
connect = "域名或IP:非默认端口"
然后以管理员身份启动第三方portproxy。
./portproxy.exe -c config.toml
到此为止,我们本地计算机的445端口应该处于监听状态。非默认端口的共享已被第三方端口代理映射到了本地的445端口。
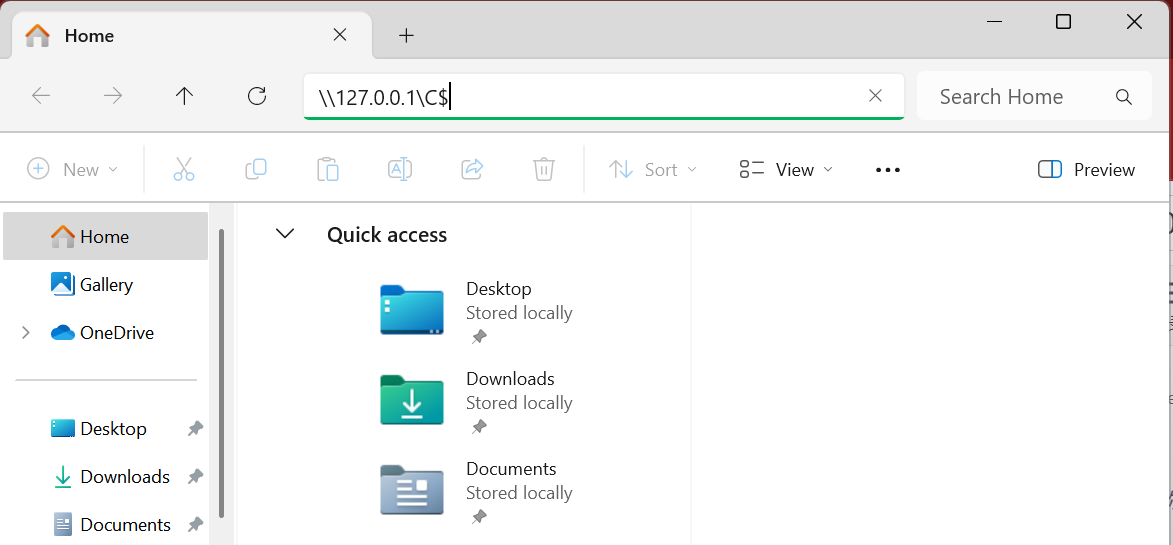
接下来,我们就可以手动连接位于\\127.0.0.1\的共享了。仅需在文件资源管理器中输入地址即可。你还可以将它映射到一个本地盘符,例如X:。
使用Powershell映射共享
有时,你可能选择使用Powershell而非手动映射共享到一个本地盘符。
你可以使用命令New-SmbMapping。
这时,有几点需要注意
- 使用
-GlobalMapping参数。否则,该映射只能通过Powershell被访问,而不会显示在,例如,文件资源管理器的界面中。另一种方法是直接使用New-SmbGlobalMapping命令。 - 如果你想将新建映射的过程放入一个脚本,并想让脚本在映射出错时停止,请为该命令添加
-erroraction stop参数。由于某种未知bug,即使你在脚本开头添加了$ErrorActionPreference = 'Stop',执行到该命令时也会完全忽略。 - 如果你想删除映射却提示“该映射不存在”,请使用Powershell命令
Remove-SmbGlobalMapping,因为这是一个全局映射,必须使用针对全局映射的命令删除。 - 如果你在成功添加完映射后,看到它不出现在文件资源管理器中,或删除后不从文件资源管理器中消失,请使用
taskkill /f /im explorer.exe && start explorer.exe来重启explorer.exe。这些更改只有在每次Explorer被重启时才会更新。多么诡异的行为。
结语
Windows的怪异设计给我们造成了极大的麻烦。主要的困难并不来自于协议本身,而更多地来自于Windows,包括即使在网络上连接成功,使用Powershell映射到本地盘符时的怪异行为。


 1万+
1万+

 被折叠的 条评论
为什么被折叠?
被折叠的 条评论
为什么被折叠?
 到【灌水乐园】发言


