
NanoBananaで、イラストの肌を「同人誌っぽく塗ってみた」

はじめに
前回のnoteはたくさんの方に見ていただけて感謝です。
いただいた言葉としては、
・「1つずつ作業していく工程」
・「プロンプトを言葉にする能力」
みたいなものを褒めていただいて。
これね。(スキの数が絶賛記録更新中です。。)
なので、今回はそういうところを中心に。
そして自分のやりたいことに応用してもらえらばと思います。
※私はフィーリング派なので「適当でもできる」ということが伝われば。
早速、昨日あげたこちらから。
同人誌っぽい塗りを試しています。
— kanesi (@ai_image123) November 30, 2025
どう?どう?#AIart pic.twitter.com/nwlBKhhWNJ
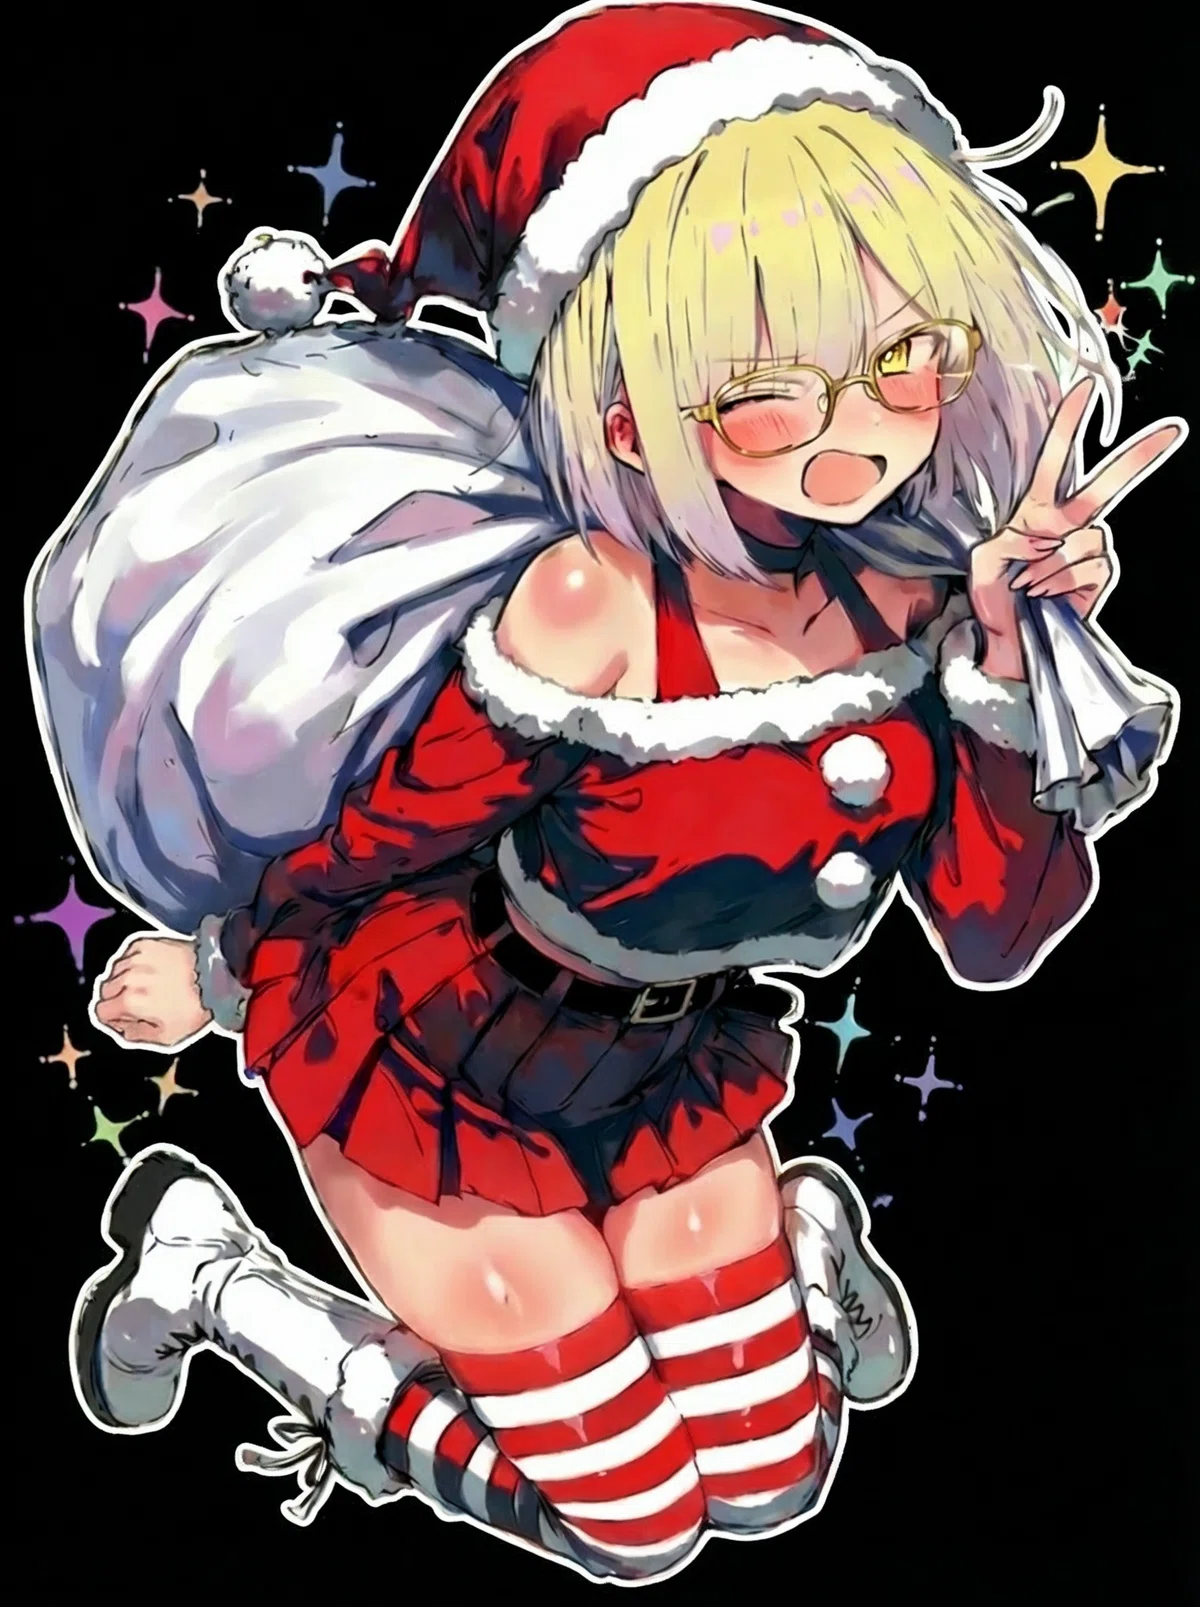
一部から、センスが古いとの声も上がっていましたが、
同人誌的な色の塗り方を目的地にしていました。
確かにこんな、コッテリじゃないよね。
元絵がこちら。
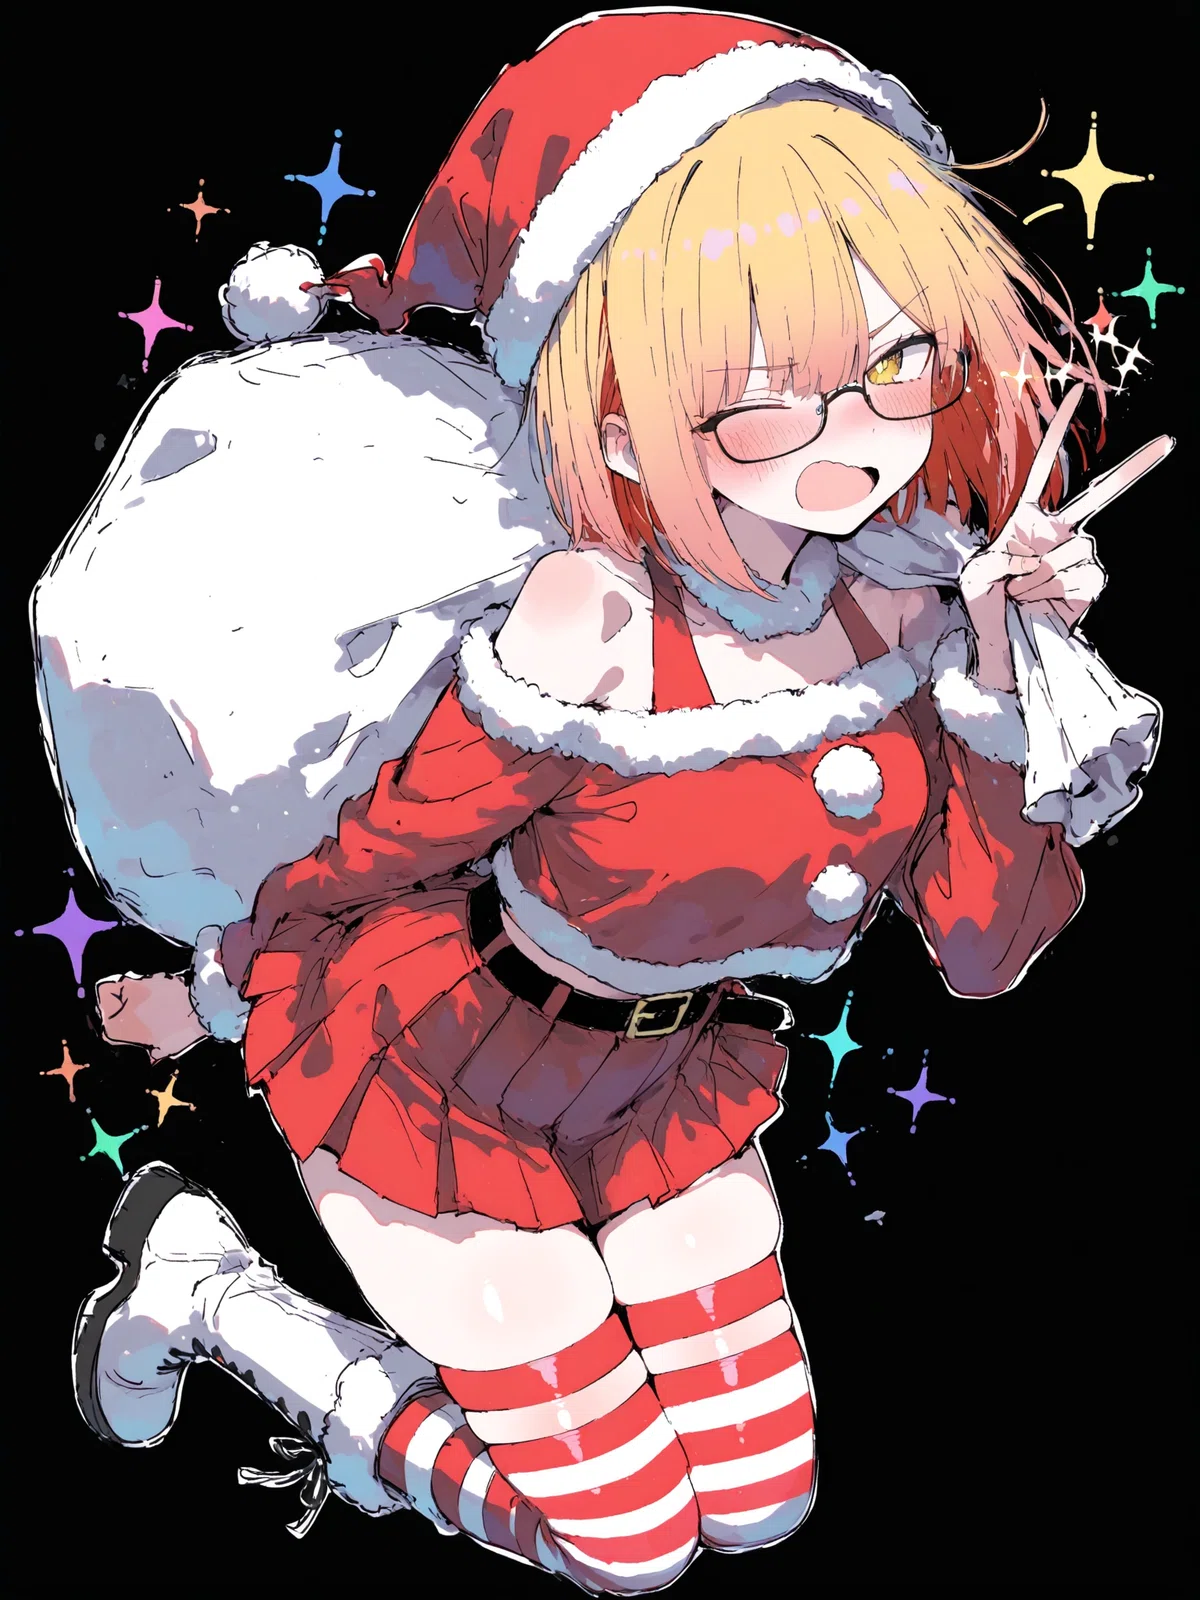
この時点でも十分可愛いですね。
むしろこれでいい気がする。
「同人誌塗りかよ」「叡智なイラストかよ」
とは言わずに、過程を見ていきましょう。
おさらい:同人誌的な塗りとは?
定義があるわけではありませんが、今回目指したところとしては、
血行の良い肌感
ハイライト部分のピンクの強調 (コレは元絵にもありますね。肩とか指先のピンクです。)
上記を前提に、「線の修正 → 影 → 血行の良さ修正」を進めていきます。
1. 線の修正
まずは気になった箇所の修正と、線の直しからです。
気になった箇所は……
キャラの眼鏡のフレームを金色にしたい
首元のファーのみって衣装として、なんか変じゃない?
左手のピースサインと、荷物袋の貫通も気になる(けど難しいので、若干よくなればOK)
ひとまず手を修正して、お茶を濁しましょう。
▼使用したプロンプト
Subject: @img1 (The character's glasses, right hand, hat fur, and choker)
Action: Change the glasses to gold and refine the line work in key areas to improve clarity and definition.

Strategy 1: Gold Glasses
* Detail: Change the color of the glasses frames from black to shiny gold metal.
* Detail: Add realistic metallic reflections and highlights to the new gold frames to give them texture.

Strategy 2: Refine Hand Lines
* Detail: Sharpen and smooth the outlines of the right hand (peace sign).
* Detail: Specifically, clean up the tips of the index and middle fingers, and define the folded shapes of the ring and pinky fingers, removing any jagged edges.

Strategy 3: Additional Line Cleanup (Fur & Choker)
* Detail: Refine the boundary contour of the white fur trim on the Santa hat where it meets the hair and forehead, giving it more defined fluffiness.
* Detail: Sharpen the edges of the black choker on the neck, making the boundary with the skin distinct and clean.

Preservation:
* Strictly Keep: The original painterly style, the character's expression, pose, and the entire background.
(日本語訳)
件名: @img1(眼鏡、右手、帽子のファー、チョーカー)
アクション: 眼鏡を金色に変更し、主要部分の線画を洗練させて鮮明さを向上させる。
戦略1:金の眼鏡
黒いフレームを輝くゴールドメタルに変更し、リアルな金属反射を追加。
戦略2:手の線を整える
右手の輪郭(ピースサイン)をシャープで滑らかに。指先のガタつきを修正。
戦略3:追加の線画クリーンアップ(ファー&チョーカー)
サンタ帽の白いファーの輪郭を整え、モコモコ感を出す。
チョーカーの境界線をくっきりとさせる。
修正してこんな感じになりました。
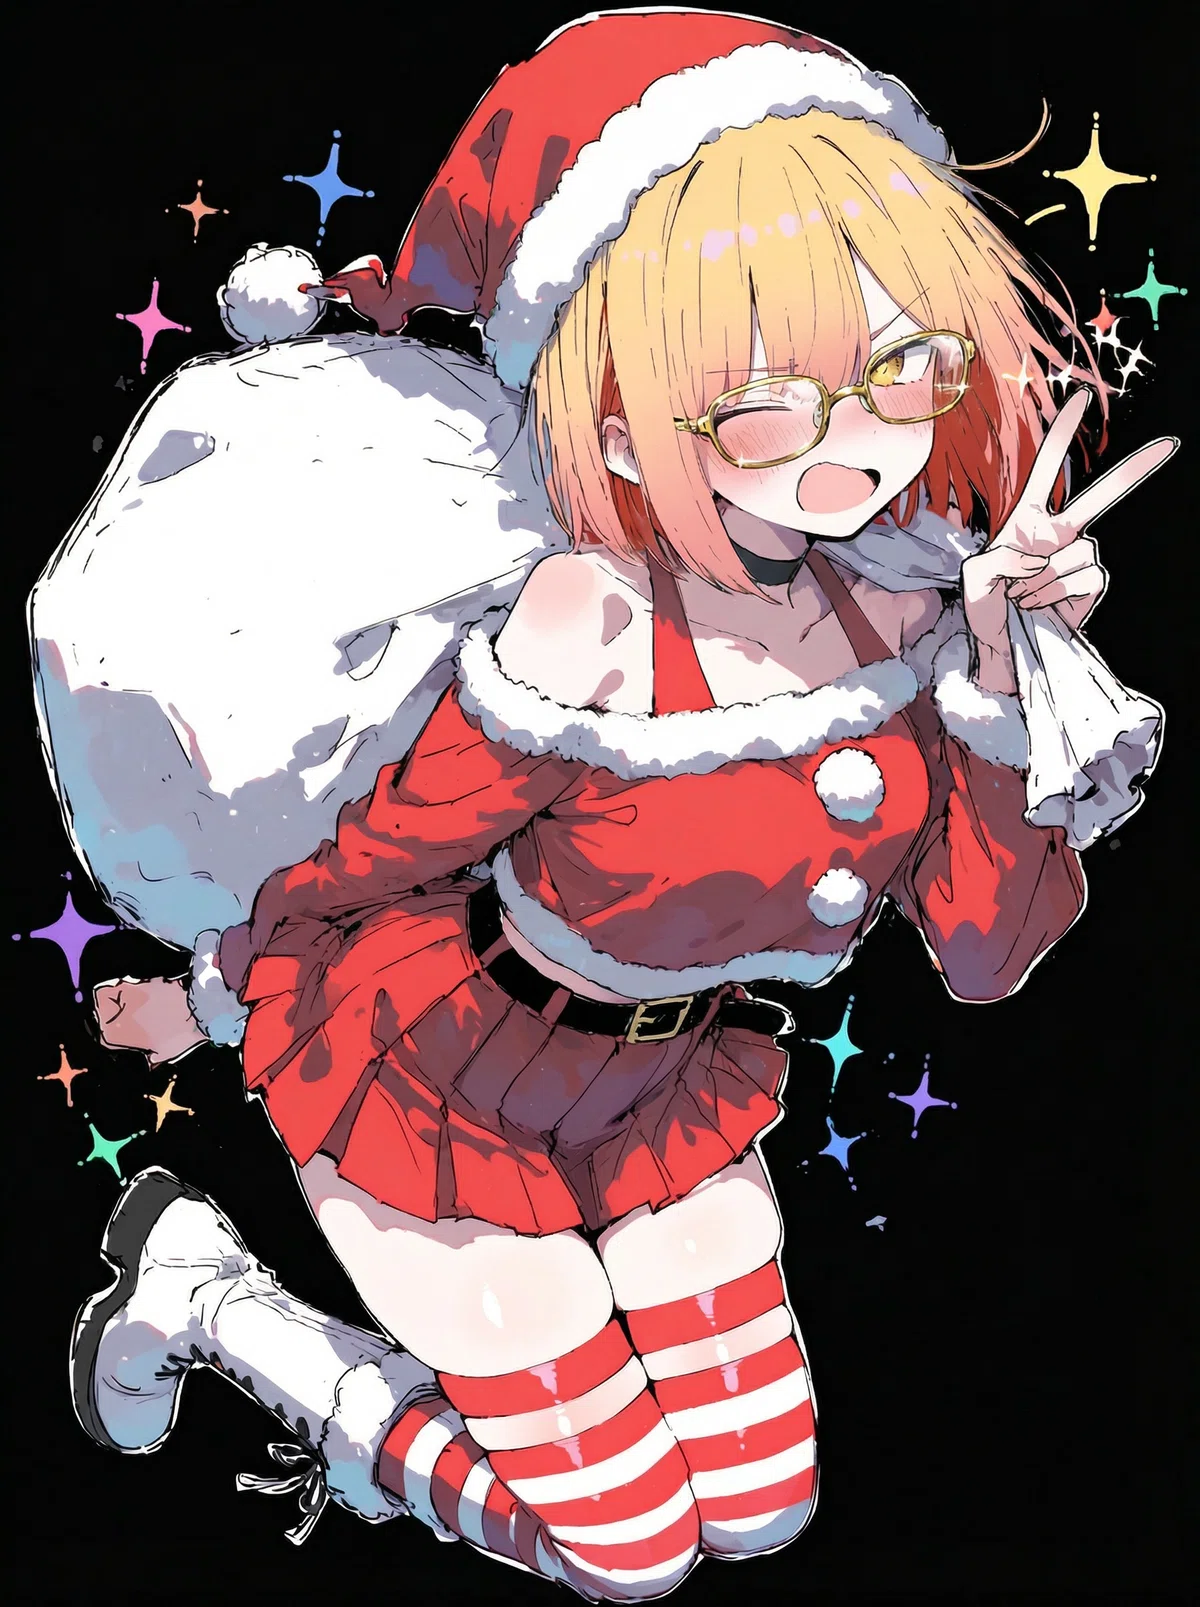
プロンプトが無事に反映されてます。
2. 血行を良くする(今回のメイン)
さっそくですが、今回のメイン、
「血行良くする塗り」を試してみたくなりました。
血色感の追加: 肩、頬、膝、指先などに、内側から滲むような赤み(Blush)を加える。
肌質の向上: しっとりとした質感(Soft Skin)にし、影に暖色系を混ぜる。
大人向け同人誌風: コントラストを強め、艶っぽく。
▼使用したプロンプト
Subject: @img1 (The character's skin, specifically shoulders, knees, cheeks, and thighs)
Action: Enhance the skin coloring to look "flush" and "alive" like high-quality adult doujinshi art, adding reddish accents to key areas.

Strategy 1: Flush & Redness (Blood Circulation)
* Detail: Add a soft reddish/pink flush (blush, redness) to the shoulders, knees, elbows, and fingertips.
* Detail: Intensify the natural redness of the skin in shadow areas (e.g., under the neck, inner thighs) to create a warm, fleshy look (subsurface scattering).

Strategy 2: Adult Doujinshi Style Coloring
* Detail: Change the skin texture to look soft, smooth, and slightly glossy (shiny skin, oily skin - subtle).
* Detail: Increase the contrast of the skin shading. Use warm, saturated colors for shadows (instead of grey) to make the skin look healthy and vibrant.

Preservation:
* Strictly Keep: The original pose, facial expression, the Santa outfit, and the background.
(日本語訳)
件名: @img1(肌、特に肩、膝、頬、太もも)
アクション: 肌の塗りを強化し、高品質な大人向け同人誌アートのように「火照った」「生き生きとした」外観にし、重要な部分に赤みのアクセントを追加する。
戦略1:火照りと赤み(血行)
肩、膝、肘、指先に柔らかな赤み/ピンクの火照り(チーク、赤み)を追加する。
影の部分(首の下、太ももの内側など)にある肌本来の赤みを強調し、温かみのある肉感的な外観(サブサーフェス・スキャタリング)を作り出す。
戦略2:大人向け同人誌風の塗り
肌の質感を柔らかく、滑らかで、わずかに光沢のあるものに変更する(輝く肌、オイリー肌 - 控えめに)。
肌の陰影のコントラストを上げる。
影には(グレーではなく)暖かみのある彩度の高い色を使用し、肌を健康的で鮮やかに見せる。
結果はこちら。
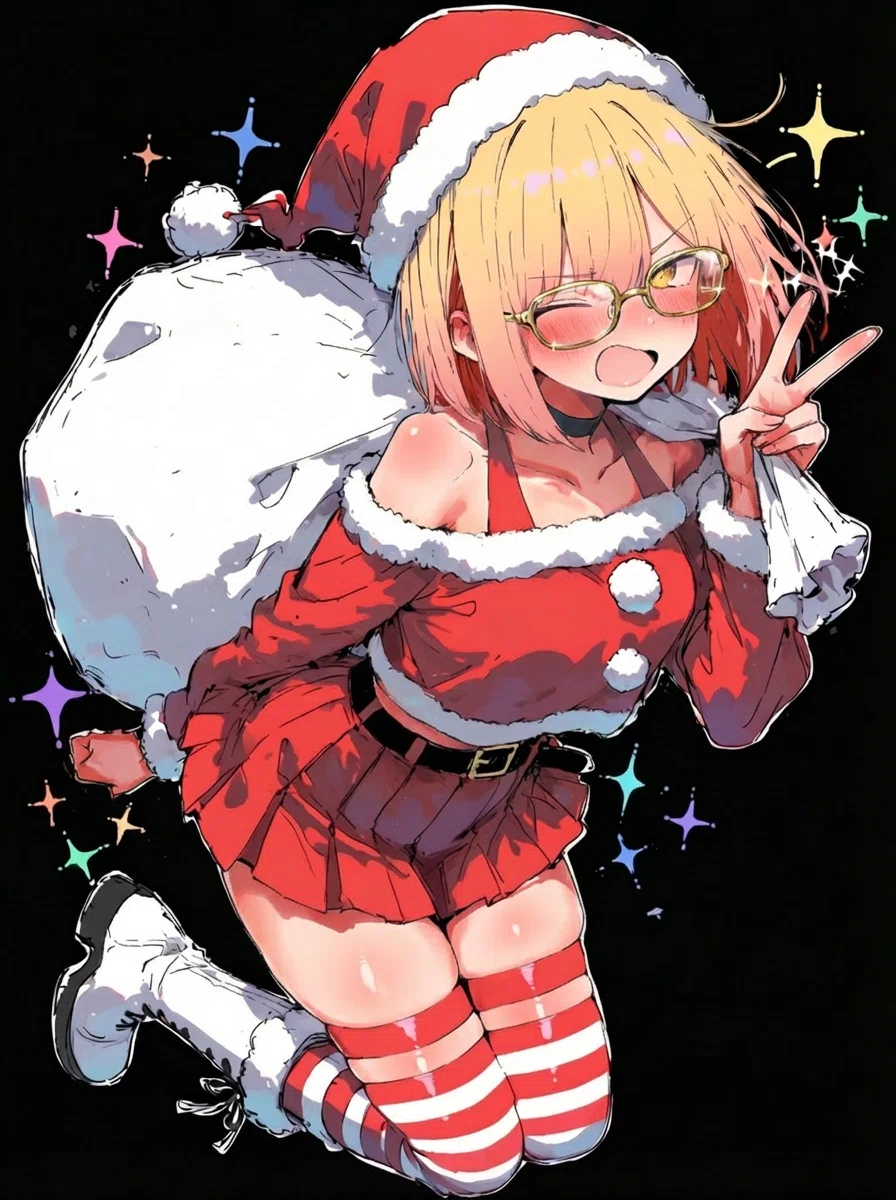
全体的に赤くなりすぎましたね。
虫刺されみたいです。
特にキャラの後方の崩れた右手はなかなかひどい有様。
ただ、この後の影の処理で、上手い事いくかもしれません。
続けていきます。
3. 影で立体感を出す
影を青系統でいれましょう。
ついでに同人誌的な感じに、胸も多少大きく見えるように。
(「胸を大きく」と直接書くと、リタッチされて描き直されるので気をつけます。あくまで影で表現します。)
赤みの調整: さっきやりすぎた赤みの強度を下げる。
胸の強調: 谷間に「濃い青」の影を落として、目の錯覚で奥行きを出す。
青い影の活用: 赤い服に黒い影だと濁るので、「青い影」で鮮やかに。
▼使用したプロンプト
Subject: @img1 (Character's skin tone, chest area, and overall shading)
Action: Slightly tone down the excessive redness on the skin, and use "deep blue shadows" to define the forms, specifically making the chest look larger.

Strategy 1: Balance Skin Tone (Natural Flush)
* Detail: Reduce the intensity of the red flush on the shoulders and face slightly. Keep it looking healthy and soft, but remove the "sunburned" or overly heated look.

Strategy 2: Volumetric Chest Shading
* Detail: Add deep, dark blue shadows (cool colored) specifically to the cleavage area and the underside of the breasts.
* Detail: By placing strong cool shadows against the warm skin, create a high-contrast visual effect that makes the chest curve look deeper and larger (volumetric).

Strategy 3: Deep Blue Artistic Shadows
* Detail: Apply rich, dark blue or navy shadows to other areas that need depth: under the chin, in the armpits, and within the folds of the red skirt.
* Detail: This cool shading will tighten the image and prevent the red outfit from looking flat.

Preservation:
* Strictly Keep: The original pose, facial expression, and the Santa outfit design.
(日本語訳)
件名: @img1(肌の色調、胸部、全体的な陰影)
アクション: 肌の過剰な赤みを少し抑え、「深い青の影」を使ってフォルムを際立たせ、特に胸を大きく見せる。
戦略1:肌色バランス(自然な火照り)肩と顔の赤みの強さを少し下げる。健康的で柔らかい印象は保ちつつ、「日焼け」や過度に熱を持ったような見た目を取り除く。
戦略2:胸の立体的な陰影
谷間と胸の下側に、深く暗い青の影(寒色系)を追加する。
暖かい肌に対して強い寒色の影を配置することで、胸のカーブをより深く大きく見せるハイコントラストな視覚効果(ボリューメトリック)を作り出す。
戦略3:深い青のアーティスティックな影
顎の下、脇の下、赤いスカートのひだなど、深さが必要な他の領域に、リッチなダークブルーまたはネイビーの影を適用する。
この寒色の陰影により、画像が引き締まり、赤い衣装が平面的に見えるのを防ぐ。
結果がこちら。
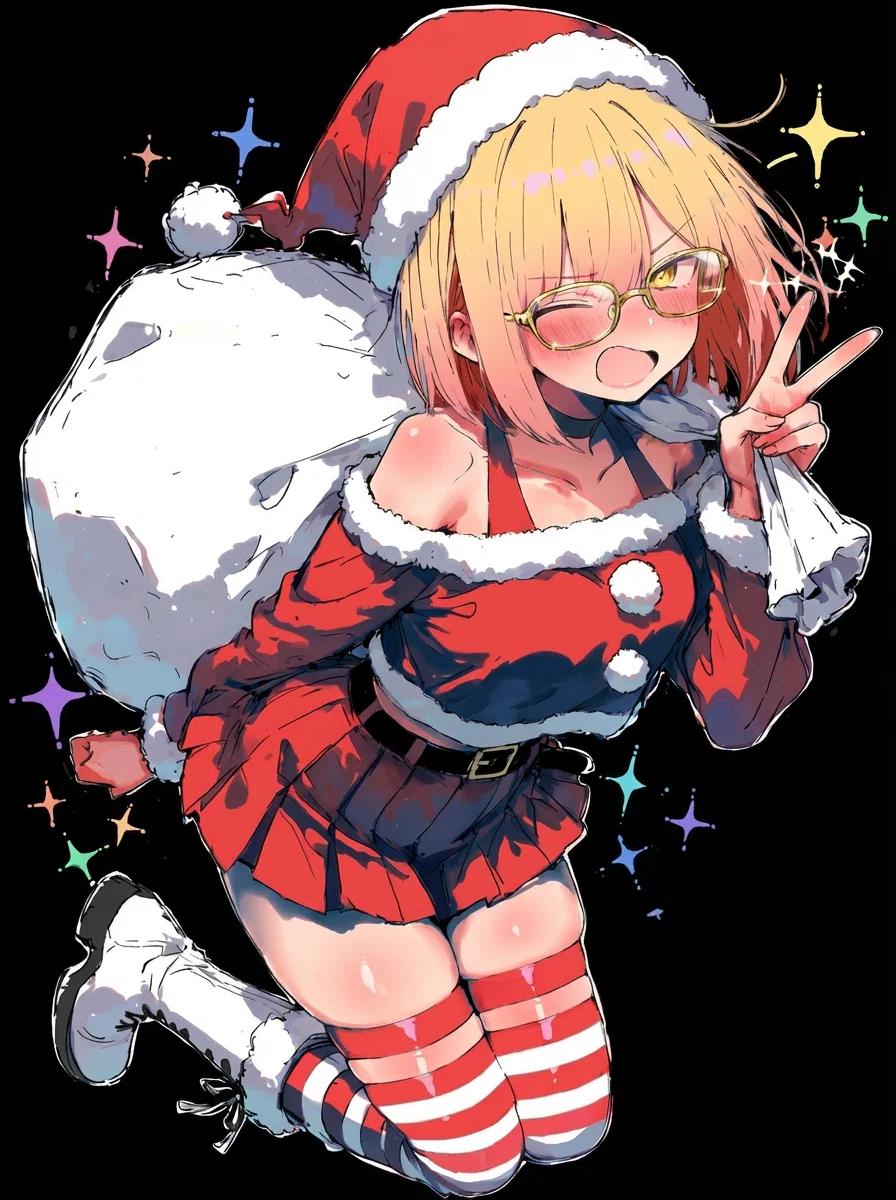
うん。赤は一度やり直しですね。
影が入った事で、立体的にはなりました。
ただ、やっぱり、この塗りは古いような気がします。
「センスが古い」と言われますので、気をつけましょう。
というわけで色直し。
4. 色直し(モダンな透明感へ)
というわけで色直し。
右手の修正: 過剰な赤みを除去し、太ももなどの正常な肌色と同期させる。
髪色の「キイロ化」: オレンジがかった影を排除し、「ペールイエロー × ラベンダーの影」へ。
顔の透明感: 赤みを引き、透明感(translucent)を優先させてモダンに。
これで、手も治り、顔周りも一気に垢抜けるはずです!
▼使用したプロンプト
Subject: @img1 (The character's right hand, hair, and face)
Action: Correct the discoloration of the right hand and refine the hair/face coloring to match the "modern pale" style.

Strategy 1: Fix Right Hand Color (Correction)
* Detail: Locate the character's right hand. Remove the excessive redness/burn effect. Change the skin tone to match the pale, healthy skin color.

Strategy 2: Hair Color Refinement (Pale Tone)
* Detail: Change the hair color to a "pale yellow" or "soft lemon". Remove heavy orange/red shading. Use subtle cool tones (pale lavender) for shadows.

Strategy 3: Face & Skin Clarity
* Detail: Ensure the face skin is pale and clear. Reduce the overall redness of the blush slightly to make it look cleaner.

Preservation:
* Strictly Keep: The Santa outfit redness, the pose, the bag, and the background.
(日本語訳)
件名: @img1(右手、髪、顔)
アクション: 右手の変色を修正し、髪と顔の色を「モダンなペールスタイル」に合わせて洗練させる。
戦略1:右手の色修正キャラの右手を特定し、過剰な赤み/火傷のような効果を除去する。肌の色調を太ももや顔の淡く健康的な肌色に合わせる。
戦略2:髪色の洗練(ペールトーン)
髪の色を**「ペールイエロー」または「ソフトレモン」に変更する。重いオレンジ/赤の陰影を取り除き、影には繊細な寒色系**(ペールラベンダー)を使用して透明感と空気感を出す。
戦略3:顔と肌の透明感
顔の肌が淡くクリアであることを確認する。チークの全体的な赤みをわずかに減らし、より清潔に見せる(透明感のある肌)。
そんなわけで恥ずかしながら戻って参りました。
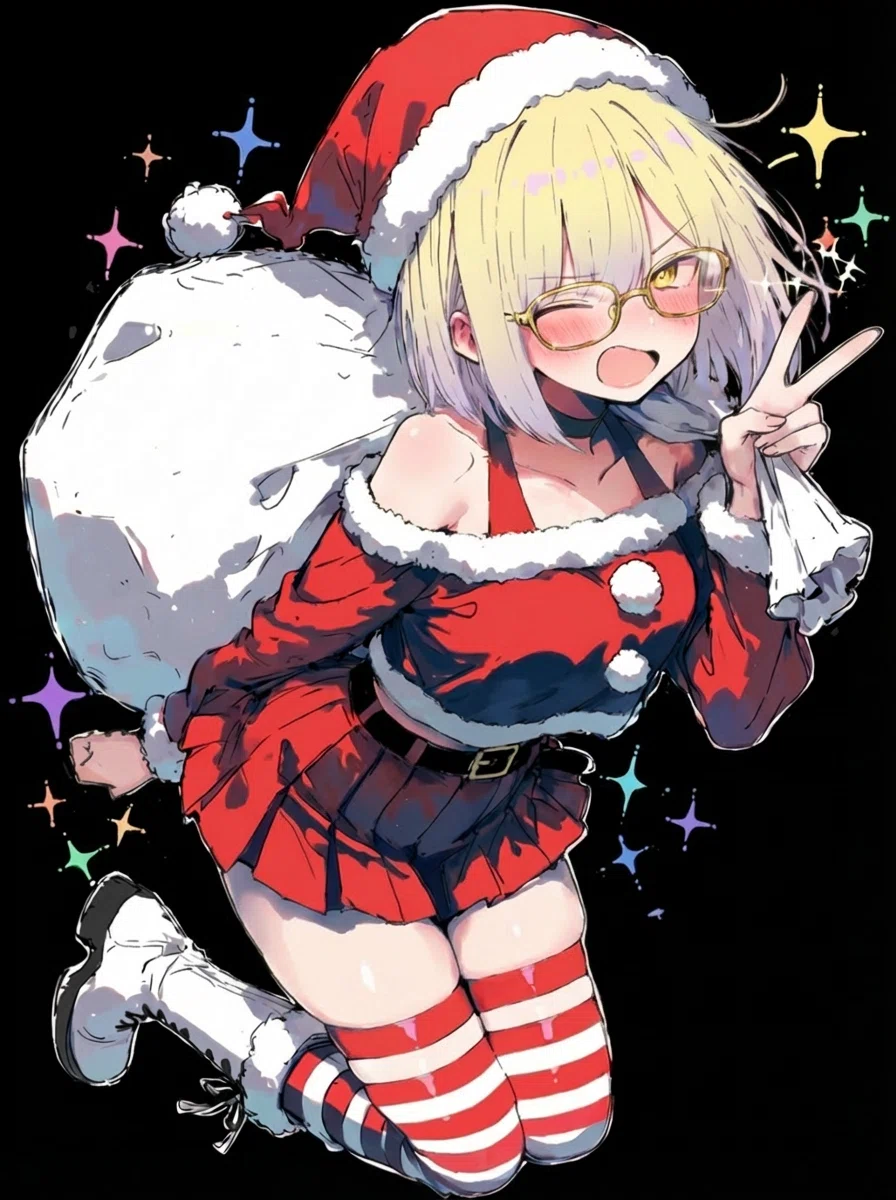
一気に垢抜けましたね。
5. 小物のディテールアップ
キャラの影が増したことでディテールが増えた分、
サンタ帽のシンプルさが気になります。
ついでに荷物袋も修正しましょうか。
小物なので、正直いらないですが、練習だと思って。
袋の立体感: 白い袋に「青やラベンダーの影」を落として、重みを出す。
帽子の質感: 白いファー部分は、影を入れることで「モコモコした凹凸」を強調。
▼使用したプロンプト
Subject: @img1 (The large white sack and the Santa hat)
Action: Deepen the shading and increase the detail of the sack and hat to match the rich, volumetric style of the character.

Strategy 1: Sack Volume & Texture
* Detail: Add deep, cool-toned shadows to the folds and creases of the large white sack.
* Detail: Enhance the fabric texture. Define the wrinkles to show the "weight" and volume.

Strategy 2: Hat Detail
* Detail: Deepen the shading on the red part of the hat.
* Detail: Add detail to the white fur trim and pom-pom. Use soft shadows to define the "fluffy" texture.

Preservation:
* Strictly Keep: The character's face, hair, skin coloring, and the pose.
(日本語訳)
件名: @img1(大きな白い袋とサンタ帽)
アクション: 袋と帽子の陰影を深め、ディテールを増やして、キャラクターのリッチで立体的なスタイルに合わせる。
戦略1:袋のボリュームと質感大きな白い袋のひだやしわに、深く寒色系の影(ペールブルー、ラベンダー、またはネイビー)を追加する。
生地の質感を強調する。平坦な白い形ではなく、しわを定義して袋の「重さ」とボリュームを示す。
戦略2:帽子のディテール
帽子の赤い部分の陰影を深める。
白いファーの縁取りとポンポンにディテールを追加する。柔らかな影を使って「ふわふわ」した質感を定義する。
で、こんな感じ
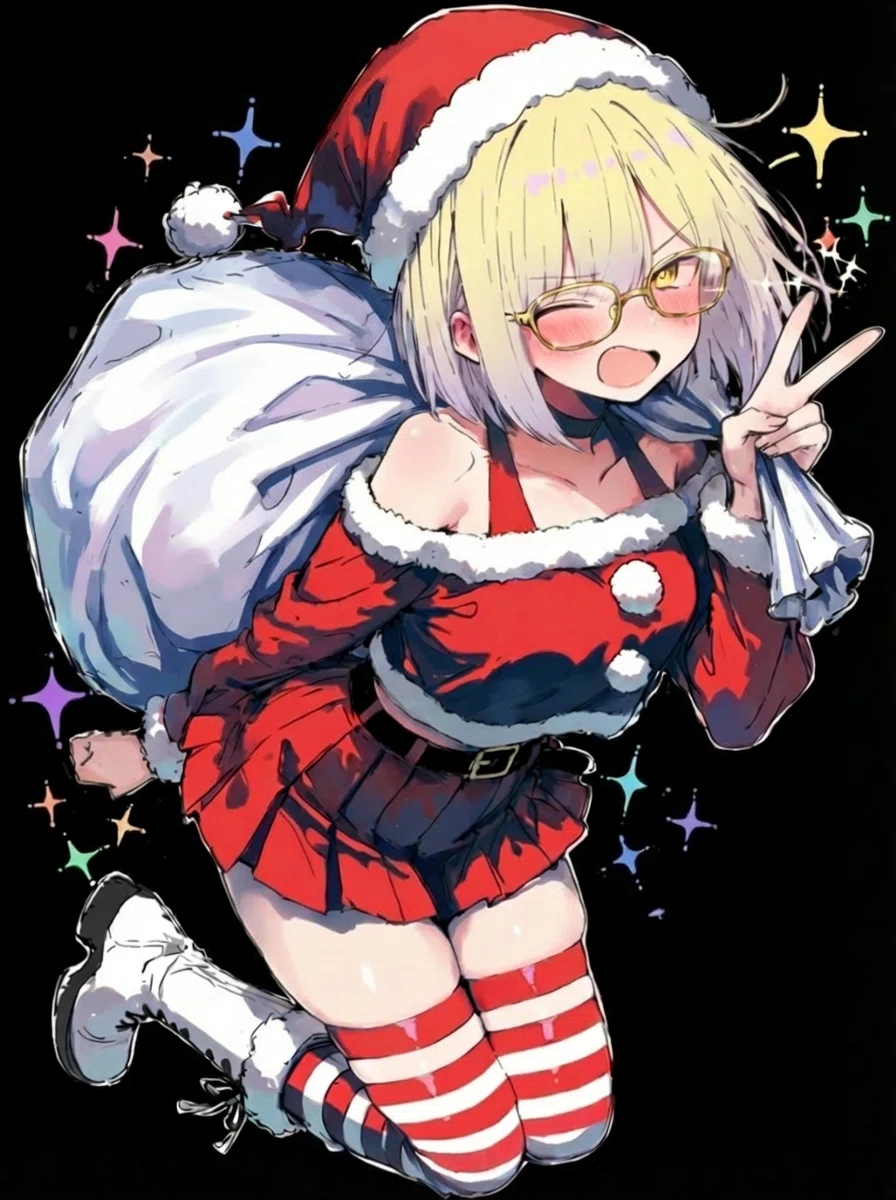
プロンプトは効いている様子。
6. 足元と右手の修正
そうしたら、足元です。
ブーツが一つしか見えていないのが、若干おかしい気がしてきました。
キャラで隠れていると言えばそれもそうなのですが、
練習ですし足しておきましょう。
▼使用したプロンプト
Subject: @img1 (The character's legs and boots)
Action: Add a matching WHITE boot to the left leg and align both lower legs to be side-by-side, while strictly maintaining the current composition.

Strategy 1: Add Missing White Boot
* Detail: Draw the missing lower left leg and foot, wearing a white Santa boot that matches the existing right one perfectly.

Strategy 2: Align Legs (Cute Pose)
* Detail: Adjust the pose of the lower legs so they are aligned together. Show both lower legs bent backward or hanging down together in a cute, symmetrical "kneeling" or "jumping" pose.

Preservation:
* Strictly Keep: The ORIGINAL COMPOSITION. Do not zoom in or crop.
(日本語訳)
件名: @img1(脚とブーツ)
アクション: 左足にお揃いの白いブーツを追加し、現在の構図を厳密に維持しながら、両足の膝下を揃える。
戦略1:欠けている白いブーツの追加欠けている左の膝下と足を描き、既存の右足と完璧にマッチする白いサンタブーツを履かせる。
戦略2:脚を揃える(可愛いポーズ)
両足の膝下が一緒に揃うようにポーズを調整する。片足が後ろに跳ね上がり、もう片方が隠れているのではなく、両足が後ろに曲がっているか、一緒にぶら下がっている、左右対称の可愛い「膝立ち」や「ジャンプ」のポーズにする。
できたのがこちら。
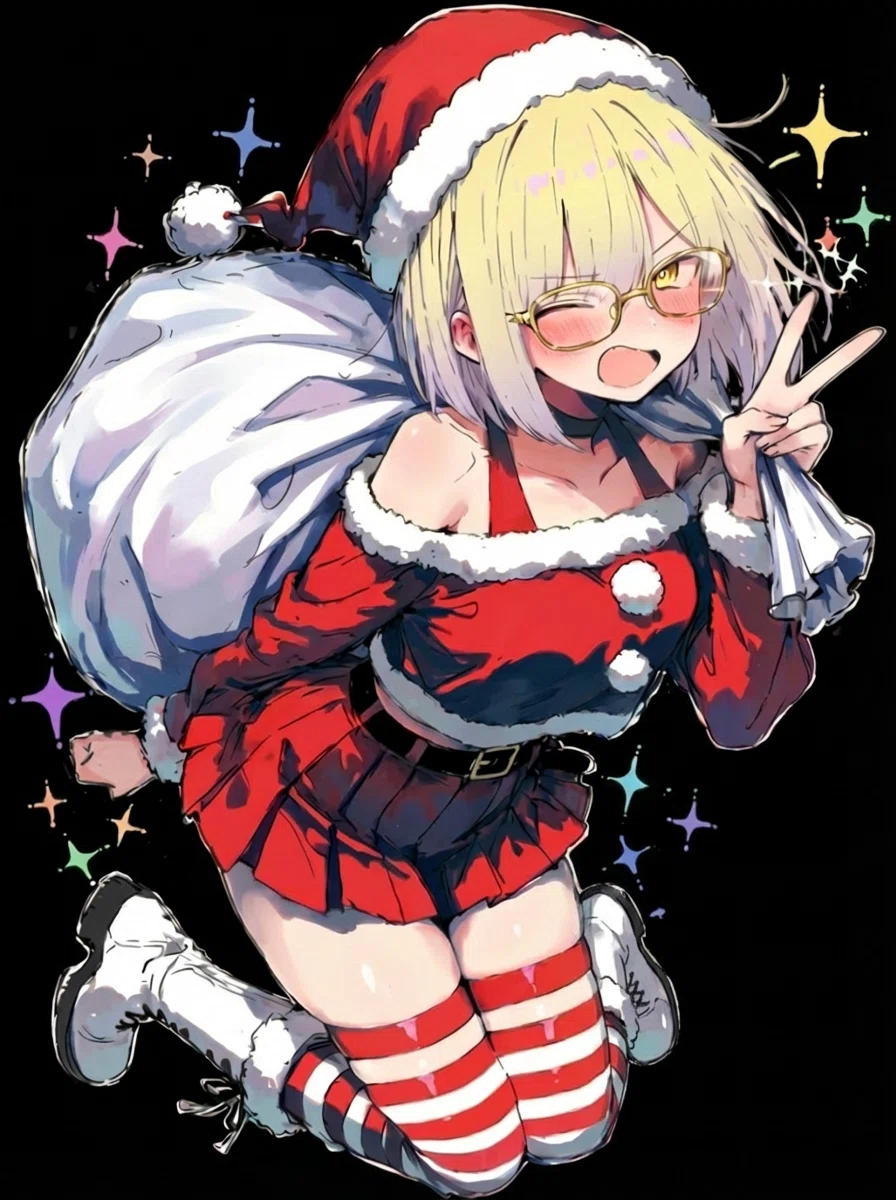
いいですね。
違和感ない感じに足されています。
塗りのリベンジ
さて、血行を良くする塗りの再開です。
まずは肩から。
「赤みはショルダースポット(頂点)だけに小さく入れて」と指示します。
Subject: @img1
Action: Add small accents of red.

Strategy 1: Localized Shoulder Treatment
* Details: Reduce the redness of the shoulders to a small, soft spot at the top/roundest part of the shoulder curve.

Preserve:
* Strictly Preserve: The overall pale skin tone of the rest of the body, face, dress, bag, and background. Redness should be limited to small points.
(日本語訳)
件名: @img1 アクション: 小さな赤のアクセントを追加する。
戦略1:局所的な肩の処理肩の赤みを、肩のカーブの頂点/最も丸い部分にある、小さく柔らかなスポットに縮小する。
保存:
体の他の部分、顔、ドレス、袋、背景の全体的な淡い肌の色調を厳密に保存する。赤みは小さなポイントに限定する。
こんな感じ。
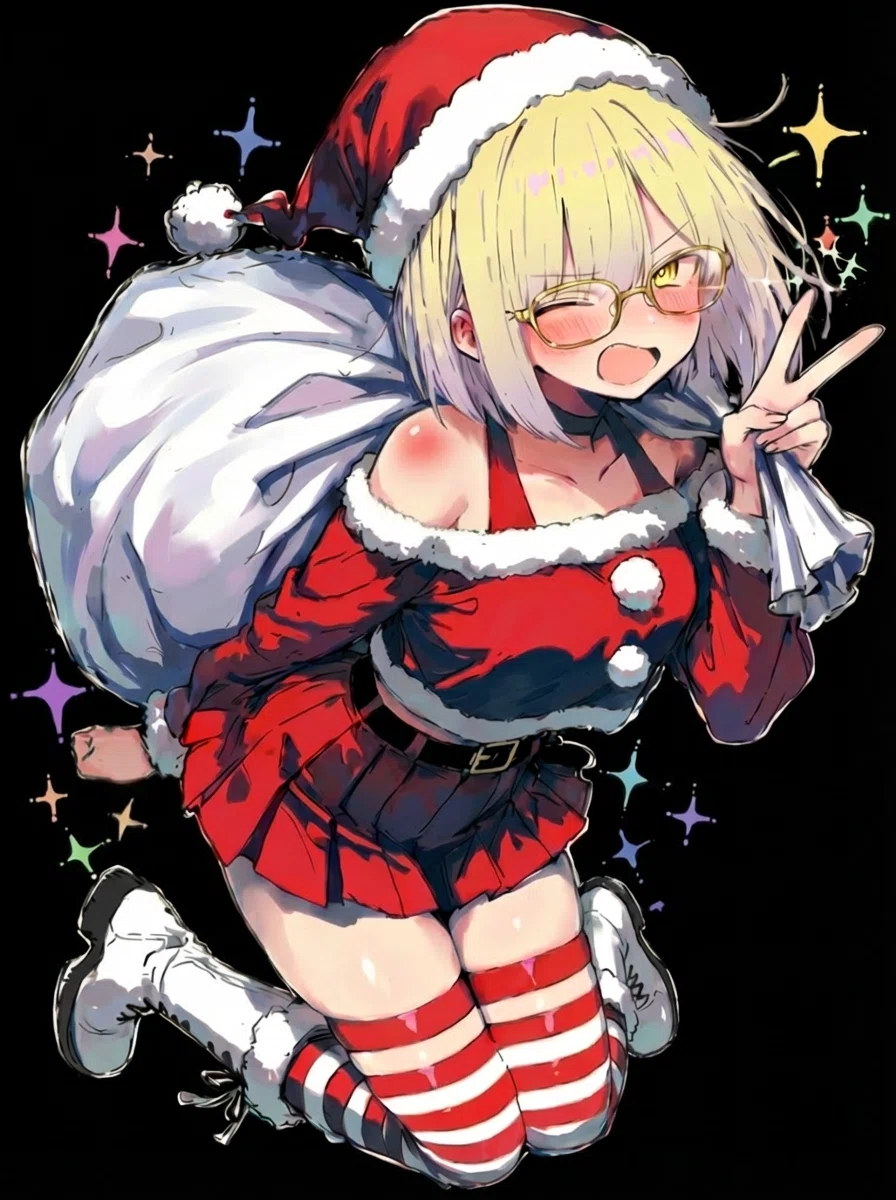
虫刺されくらい赤くなっちゃいましたね。
インペイントで、色味を抑えるようにリタッチしました。
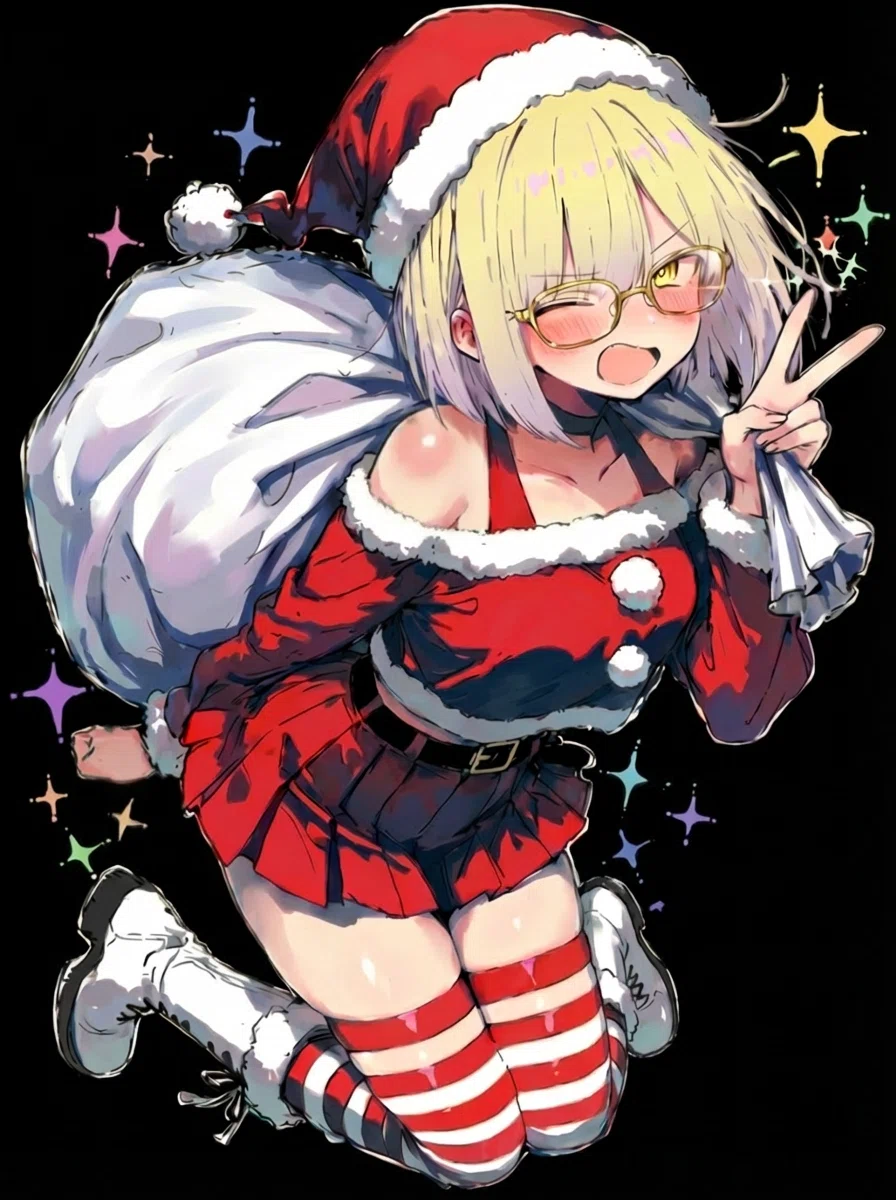
せっかくなので、後ろの手(右手)も修正しましょう。
崩れていたので、自然な握りこぶしに描き直します。
▼使用したプロンプト
Subject: @img1 (Right hand near character's butt/pouch)
Action: Maintain a clenched or grasping pose of the right hand, while modifying the anatomy and shape to make it appear natural and clear.

Strategy 1: Anatomical Modification (Right Hand)
* Details: Redraw the right hand into a properly clenched fist. Define knuckles and joints clearly.
(日本語訳)
件名: @img1(お尻/ポーチ近くの右手)
アクション: 右手の握り拳や掴んでいるポーズを維持しつつ、解剖学的構造と形状を修正して自然で鮮明に見えるようにする。
戦略1:解剖学的修正(右手)右手を適切に握った拳に描き直す。
親指、人差し指、中指の関節と節を明確に定義する。
できたのがこちら
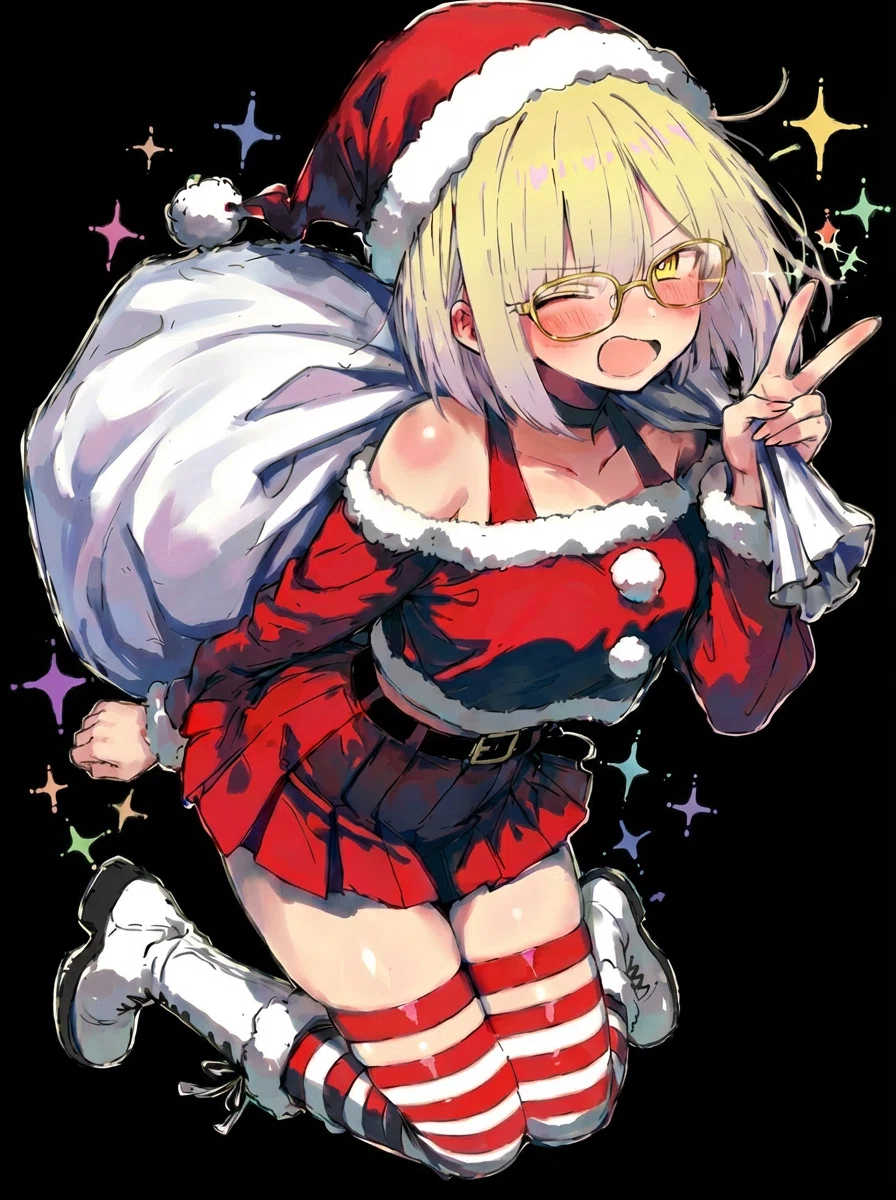
右手が治りました。
ただ、右手はイラスト的には目立たなくていい場所です。
少しぼんやりさせておきましょう。
そして、太ももへの赤い塗りをしてみます。
手のステルス化: 手を少し暗くして、主張を弱める。
太ももの演出: 一番光が当たる部分に「暖かい赤みの輝き」と「ツヤ」を重ねる。
これで、視線が自然と「顔→太もも」と動き、
手には目がいかなくなるはずです。
▼使用したプロンプト
Subject: @img1 (The right hand near the buttocks and the upper thigh area)
Action: Make the right hand less conspicuous by darkening/blurring it slightly, and add a "doujinshi-style" reddish highlight accent to the upper thigh.

Strategy 1: De-emphasize Right Hand
* Detail: Darken the right hand slightly or reduce its contrast. Blend it more into the background shadow.

Strategy 2: Doujinshi Accent on Thighs
* Detail: Focus on the upper thigh area. Add a soft, warm reddish glow (subsurface scattering) to the brightest highlight spot on the skin.
* Detail: Enhance the glossy "shine".
(日本語訳)
件名: @img1(お尻近くの右手と太ももの上部)
アクション: 右手を少し暗く/ぼかして目立たなくし、太ももの上部に「同人誌風」の赤みを帯びたハイライトアクセントを追加する。
戦略1:右手の強調を弱める右手を少し暗くするか、コントラストを下げる。背景の影に溶け込ませる。
戦略2:太ももへの同人誌アクセント
太ももの上部に焦点を当てる。肌の最も明るいハイライト部分に、柔らかく暖かい赤みの輝き(サブサーフェス・スキャタリング)を追加する。
光沢のある「輝き」を強調する。
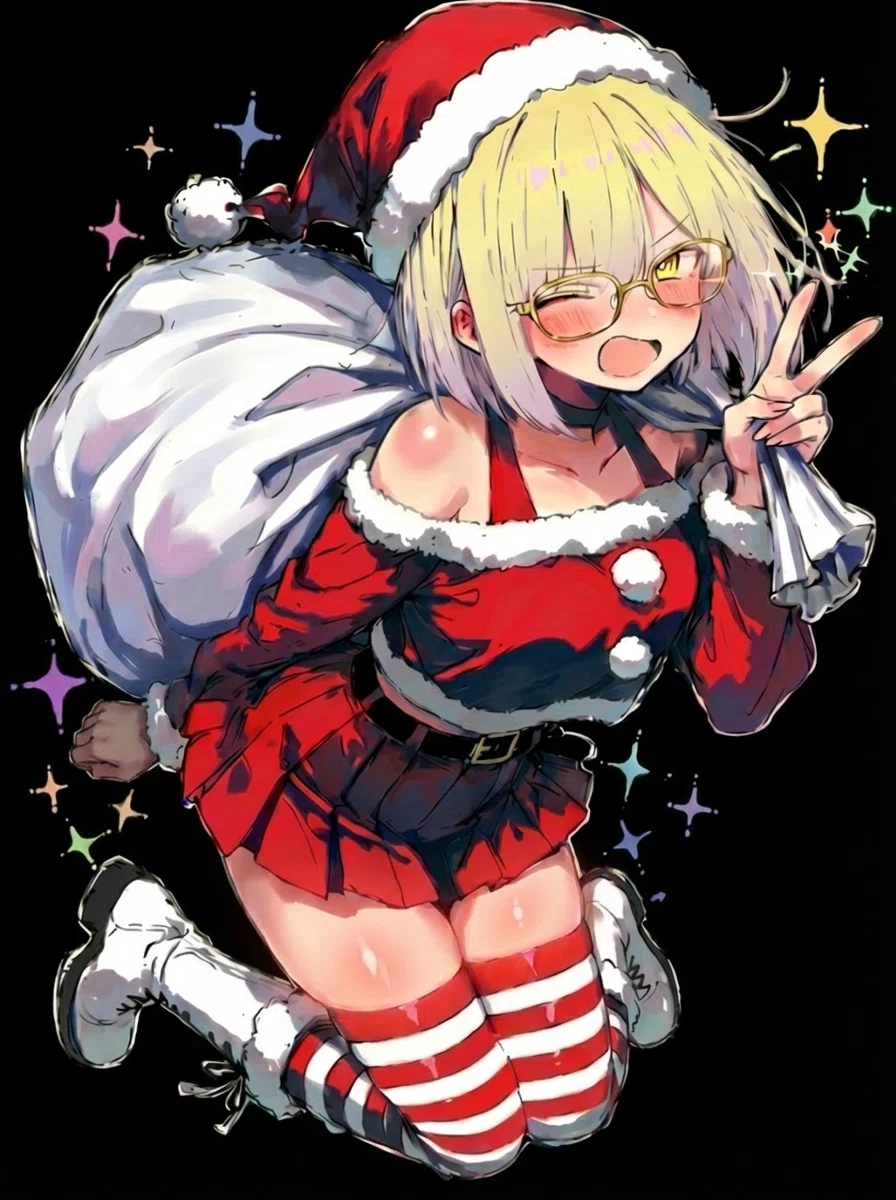
手は暗くしすぎですね。直します。
太ももは、正解が正直よくわからないのですが、
肩の塗りと合っているのでこのまま進めましょう。
7. 仕上げ(白フチと完成)
最後に、キャラを目立たせるためにホワイトのアウトラインを入れます。
暗くしすぎた手の色も戻しましょう。
キラキラが白フチと重なる場所は、白フチを奥にして、
キラキラが消えないようにします。
▼使用したプロンプト
Subject: @img1 (The entire character, specifically the right hand and the outer edge)
Action: Brighten the right hand to a natural skin color and add a thick solid white outline around the character, keeping background sparkles visible.

Strategy 1: Fix Right Hand Color (Brighten)
* Detail: Brighten the skin tone of the right hand to match the face and thighs.

Strategy 2: Solid White Outline (Sticker Effect)
* Detail: Draw a thick, continuous, SOLID pure white line around the outermost edge of the character.
* Detail: Allow the background sparkles and bokeh to overlap or sit ON TOP of this white outline where they intersect.
(日本語訳)
件名: @img1(キャラクター全体、特に右手と外縁)
アクション: 右手を自然な肌色に明るくし、キャラクターの周りに太い白の実線を追加する。背景のキラキラは見えるように保つ。
戦略1:右手の色修正(明るく)右手の肌のトーンを明るくし、顔や太ももに合わせる。
戦略2:白の実線アウトライン(ステッカー効果)
キャラクターの最も外側の縁に沿って、太く、途切れのない、純白の実線を描く。
背景のキラキラやボケが、交差する部分でこの白フチの上に重なる(ON TOP)ことを許可する。
できたのがこちら
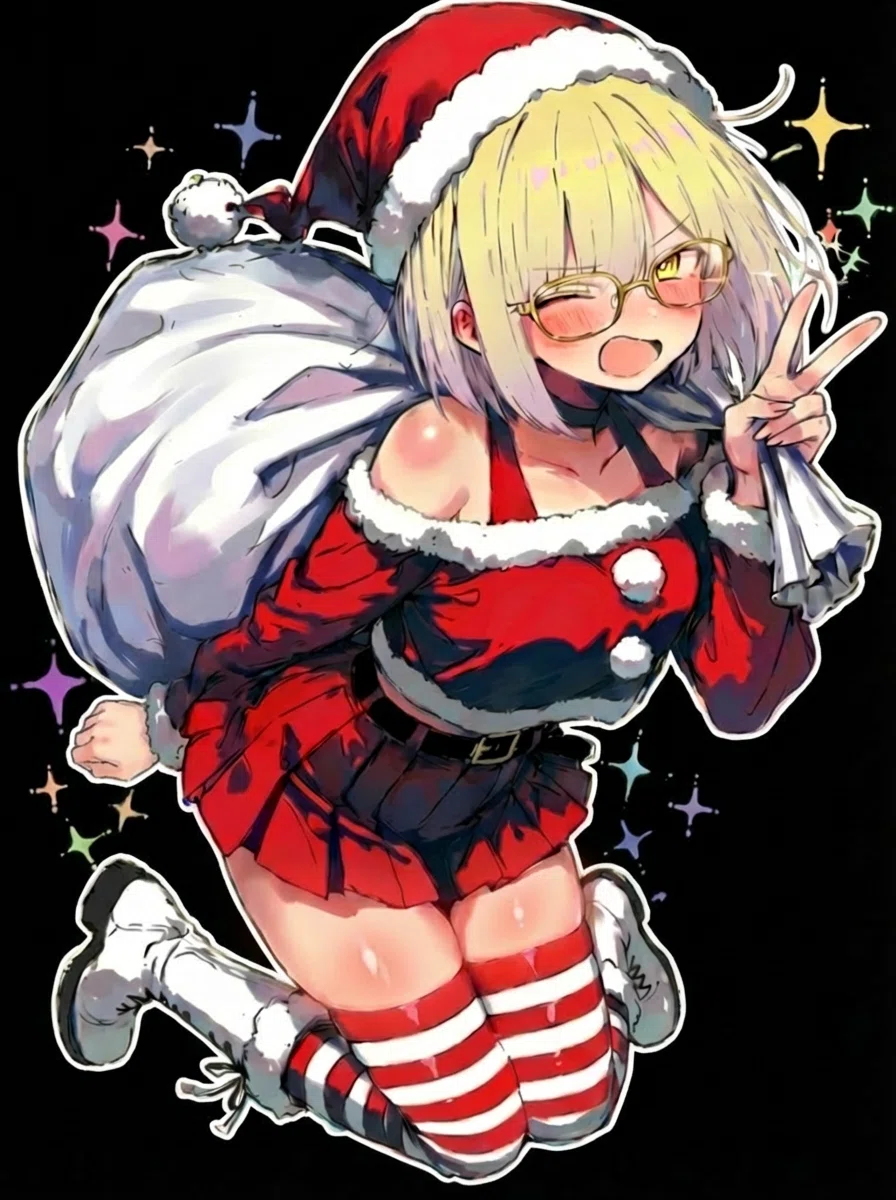
右手の色もホワイトラインもいい感じです。
で、アップスケールして完成したのがこちら。
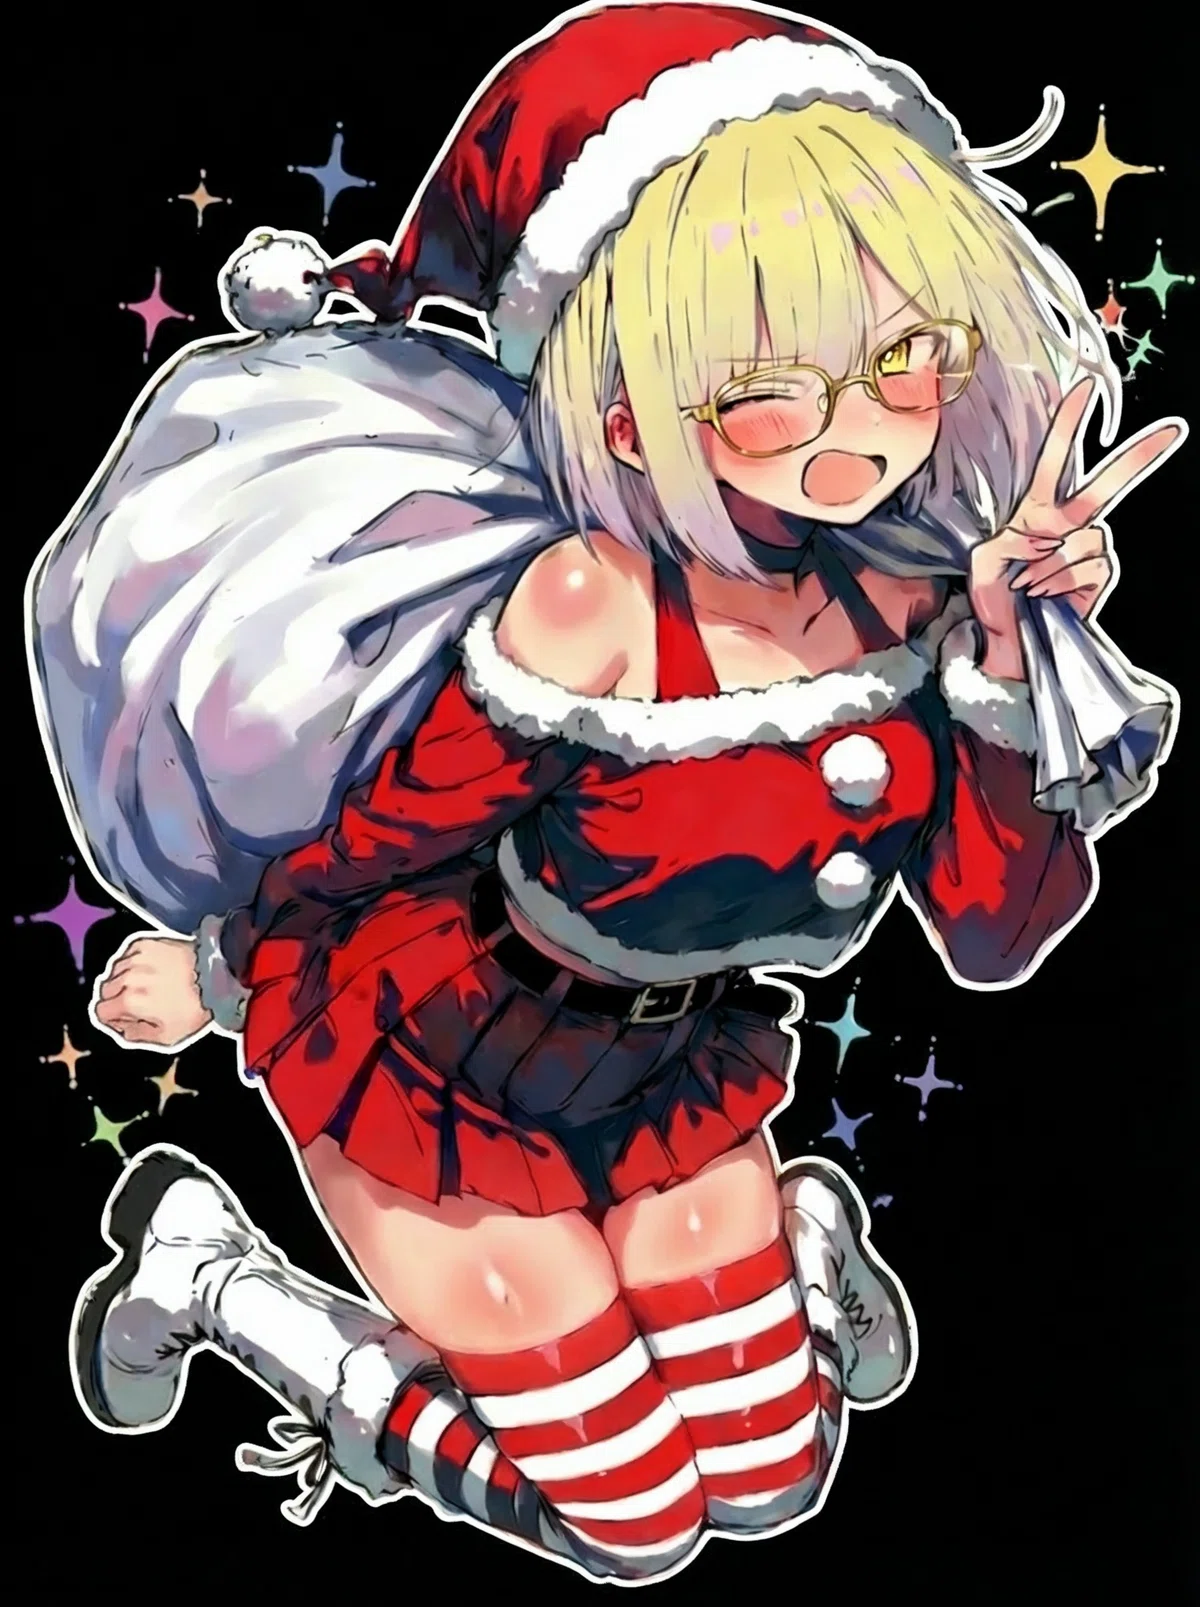
うーん。センスがひどい。
ともかく、作業の工程はこんな感じ。
おわりに
そんなわけで
気になったところを少しずつ直していって、
最終形に目標へ近づけるようにやっていってます。
逆に一気に仕上げるっていうのは難しいのかなと。
最初はGeminiなりChatGPTに
「この画像、どこが気になる??」
と聞いてみるのもいいかもしれません。
おかしなところを見つけるのは、
AIのほうが得意だったりしますからね。
本格的なことができるようになったぶん、
ちゃんと、塗りの勉強をしなくては。
おわり。
