A Material Top App Bar is a UI element located at the top of the screen, typically used for displaying the app title, navigation icon, and actions. It helps maintain consistency across an application while improving usability and accessibility. It works like a toolbar that includes navigation controls, action buttons, and branding elements. In this article, we will explore the Material Top App Bar, its benefits, best practices, and implementation.
Why Top App Bar used?
The top app bar appears on top of every activity of the application and disappears when scrolled. The top app bar displays the title of the activity and selected primary actions to be taken on the particular activity or the screen in the application. It can also be used for branding, screen titles, navigation, and actions.
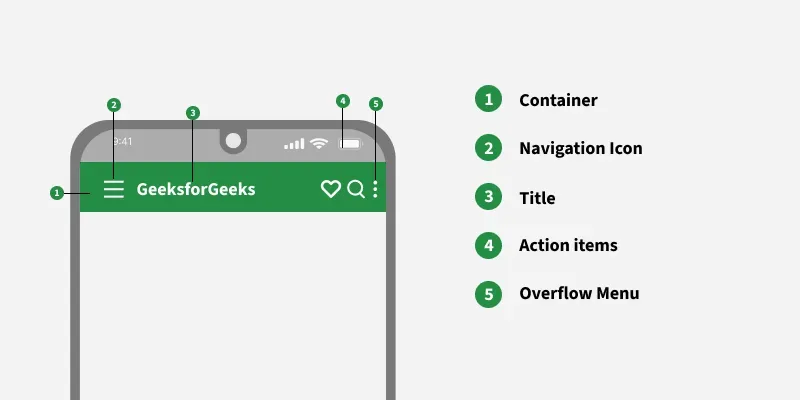
Anatomy of Top Action Bar
In the below anatomy of Material Design Top App bar Navigation Icon, Title, Action Menu, Overflow Menu are optional.
Steps to Implement the Material Top App Bar:
Step 1: Create an empty activity project
To create a new project in Android Studio please refer to How to Create/Start a New Project in Android Studio.
Step 2: Add Required Dependency
Include google material design components dependency in the build.gradle.kts file. After adding the dependencies don’t forget to click on the “Sync Now” button present at the top right corner.
implementation ("com.google.android.material:material:1.12.0")Note that while syncing your project you need to be connected to the network and make sure that you are adding the dependency to the app-level Gradle file as shown below.
Step 3: Creating menu items for Top App Bar
Navigate to app > res and create a menu resource folder inside the res folder.
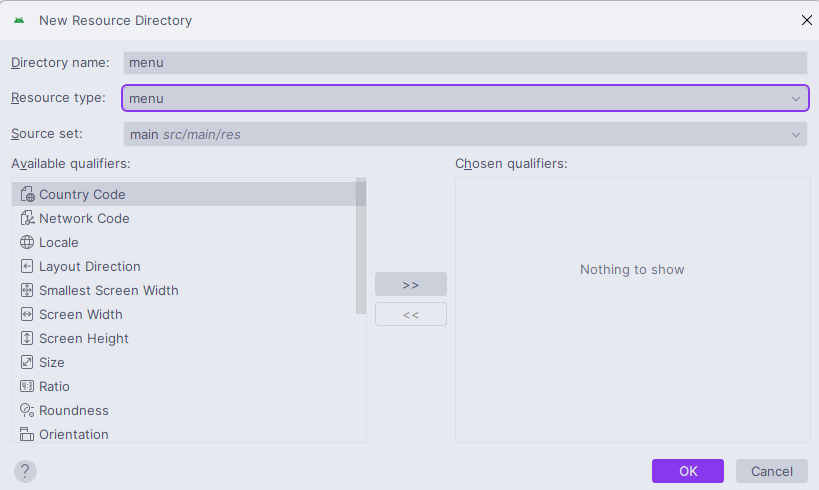
Right Click on the menu directory and create a new menu resource file in the menu folder with the name top_app_bar_menu.xml.
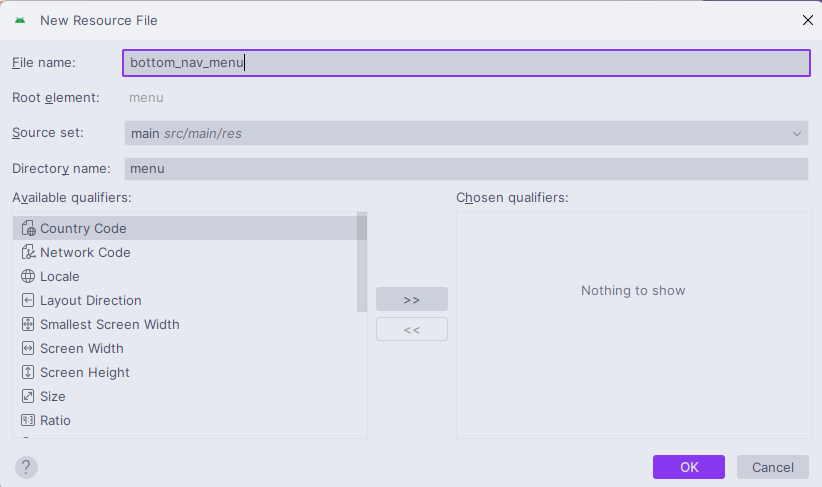
This is how the directory should look like:

Invokes the following code inside the top_app_bar_menu.xml file.
top_app_bar_menu.xml:
<?xml version="1.0" encoding="utf-8"?>
<menu xmlns:android="http://schemas.android.com/apk/res/android"
    xmlns:app="http://schemas.android.com/apk/res-auto">

    <item
        android:id="@+id/favorite"
        android:icon="@drawable/heart"
        android:title="Favourites"
        app:showAsAction="ifRoom" />

    <item
        android:id="@+id/search"
        android:icon="?android:attr/actionModeWebSearchDrawable"
        android:title="Search"
        app:showAsAction="ifRoom" />

    <item
        android:id="@+id/more"
        android:title="More Options"
        app:showAsAction="never" />

</menu>
Step 4: Working with the activity_main.xml file
The main layout of the application contains only the top bar. First of all the AppBarLayout needs to be nested inside the coordinator layout and inside the AppBarLayout, MaterialToolbar needs to be invoked. And the size of the MaterialToolbar needs to be the size of actionBarSize. To implement the same invoke the following code inside the activity_main.xml file.
activity_main.xml:
<androidx.coordinatorlayout.widget.CoordinatorLayout xmlns:android="http://schemas.android.com/apk/res/android"
    xmlns:app="http://schemas.android.com/apk/res-auto"
    xmlns:tools="http://schemas.android.com/tools"
    android:id="@+id/layout"
    android:layout_width="match_parent"
    android:layout_height="match_parent"
    android:background="@color/white"
    tools:context=".MainActivity">

    <com.google.android.material.appbar.AppBarLayout
        android:layout_width="match_parent"
        android:layout_height="wrap_content">

        <com.google.android.material.appbar.MaterialToolbar
            android:id="@+id/material_toolbar"
            style="@style/Widget.MaterialComponents.Toolbar.Primary"
            android:layout_width="match_parent"
            android:layout_height="?attr/actionBarSize"
            app:menu="@menu/top_app_bar_menu"
            app:navigationIcon="@drawable/ic_menu"
            app:title="GeeksforGeeks" />

    </com.google.android.material.appbar.AppBarLayout>

</androidx.coordinatorlayout.widget.CoordinatorLayout>
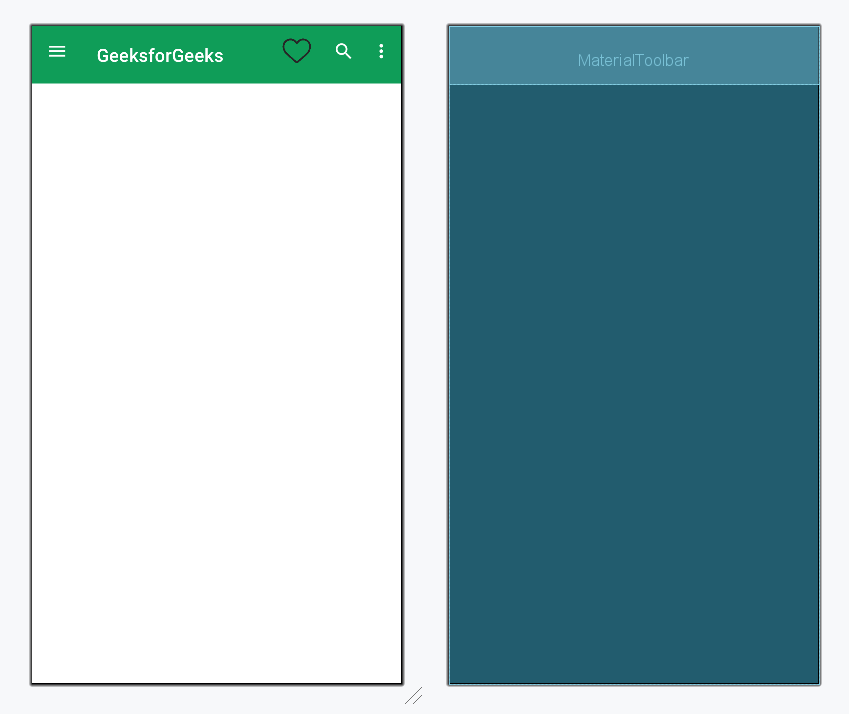
Design UI:
Step 5: Working with the MainActivity file
In the MainActivity file, a simple on menu item click listener is assigned to the instance of the material toolbar. To implement the same invoke the following code. However, one can also implement the navigation drawer for the toolbar, refer to Navigation Drawer in Android.
MainActivity file:
package org.geeksforgeeks.demo;
import android.os.Bundle;
import android.widget.Toast;
import androidx.appcompat.app.AppCompatActivity;
import com.google.android.material.appbar.MaterialToolbar;
public class MainActivity extends AppCompatActivity {
@Override
protected void onCreate(Bundle savedInstanceState) {
super.onCreate(savedInstanceState);
setContentView(R.layout.activity_main);
// Initialize the MaterialToolbar
MaterialToolbar materialToolbar = findViewById(R.id.material_toolbar);
// Set a menu item click listener on the toolbar
materialToolbar.setOnMenuItemClickListener(item -> {
switch (item.getItemId()) {
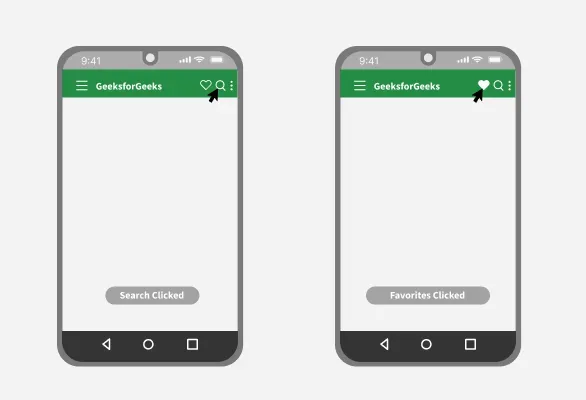
case R.id.favorite:
Toast.makeText(MainActivity.this, "Favorites Clicked", Toast.LENGTH_SHORT).show();
return true;
case R.id.search:
Toast.makeText(MainActivity.this, "Search Clicked", Toast.LENGTH_SHORT).show();
return true;
case R.id.more:
Toast.makeText(MainActivity.this, "More Options Clicked", Toast.LENGTH_SHORT).show();
return true;
default:
return false;
}
});
}
}
package org.geeksforgeeks.demo

import android.os.Bundle
import android.widget.Toast
import androidx.appcompat.app.AppCompatActivity
import com.google.android.material.appbar.MaterialToolbar

class MainActivity : AppCompatActivity() {

    override fun onCreate(savedInstanceState: Bundle?) {
        super.onCreate(savedInstanceState)
        setContentView(R.layout.activity_main)

        // create instance of the material toolbar
        val materialToolbar: MaterialToolbar = findViewById(R.id.material_toolbar)

        // assign the functionalities on menu item click listener
        materialToolbar.setOnMenuItemClickListener {
            when (it.itemId) {
                R.id.favorite -> {
                    Toast.makeText(this, "Favorites Clicked", Toast.LENGTH_SHORT).show()
                    true
                }
                R.id.search -> {
                    Toast.makeText(this, "Search Clicked", Toast.LENGTH_SHORT).show()
                    true
                }
                R.id.more -> {
                    Toast.makeText(this, "More Options Clicked", Toast.LENGTH_SHORT).show()
                    true
                }
                else -> false
            }
        }
    }
}
