Jinja2 is a templating engine used by Ansible to create dynamic content. It allows you to embed variables, apply filters, and use loops/conditions inside configuration files. Templates are usually written as .j2 files (Jinja2 format) and placed inside the templates/ directory of your role or playbook.
Why Use Jinja2 with Ansible?
Ansible variables make playbooks dynamic, and Jinja2 extends that power by allowing:
- Variable substitution inside files
- Conditional rendering (
if/else) - Iteration using loops (
for) - Using filters (
default,upper,lower, etc.) - Generating different configurations for different servers/environments.
Example: Creating a Template
1. Template File (nginx.conf.j2)
server {
    listen {{ http_port }};
    server_name {{ server_name }};

    location / {
        proxy_pass http://{{ backend_host }}:{{ backend_port }};
    }
}
2. Playbook Using the Template
- hosts: web
  vars:
    http_port: 80
    server_name: example.com
    backend_host: 127.0.0.1
    backend_port: 5000

  tasks:
    - name: Deploy nginx config from template
      template:
        src: nginx.conf.j2
        dest: /etc/nginx/sites-available/nginx.conf
- Variables (
http_port,server_name, etc.) are defined in the playbook. - Template module copies the
.j2file to the target system, replacing Jinja2 placeholders ({{ variable }}) with actual values. - Result → Each server gets its own customized
nginx.conf.
Dynamic Templates
- Dynamic Content: This is the content of a template generated or modified during run-time, depending on input variables and logic defined in the template.
- Context: A set of variables and their values used by a Jinja2 template at rendering time. The context defines the resulting output that is obtained from a template.
Rendering
- Render: The process of operating a Jinja2 template, with an environment and variables, up to the final output. This encompasses variable replacement, applying filters, and possibly going as far as evaluating loops and conditionals.
- YAML: YAML (YAML Ain't Markup Language) A human-readable serialization format that is typically used for configuration files and data interchange between programming languages with dissimilar data structures, of which YAML is a superset. Ansible playbooks are expressed in YAML.
Creating Dynamic Templates with Ansible and Jinja2
Step 1: Launch an EC2 Instance
- Go to AWS console and login by using your credentials.
- Navigate to EC2 Dashboard and launch an ec2 instance.

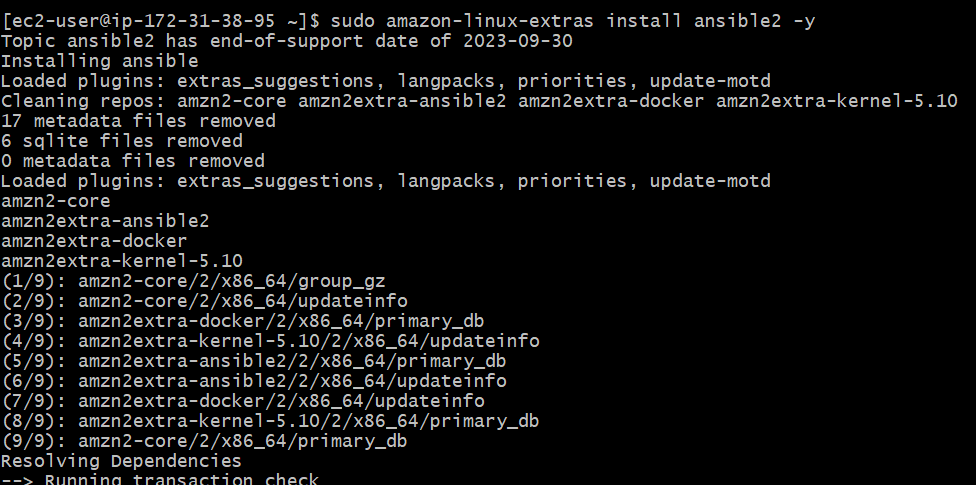
Step 2: Install Ansible
- Now, install ansible in our local machine.
Step 3: Setup Host Details
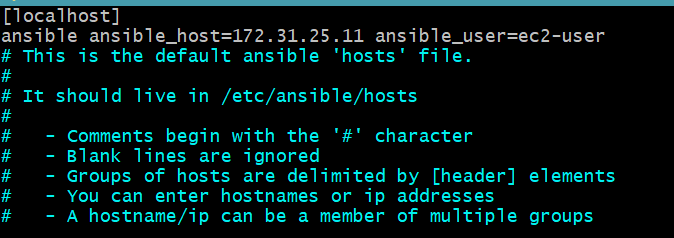
Step 4: Set Up the Project Directory
- Create a project directory and navigate into it.
mkdir ansible-jinja2-demo
cd ansible-jinja2-demo

Step 5: Write the Playbook for Creating Your First Jinja2 Template in Ansible
- Create a playbook file named demo.yml.
- name: Deploy Nginx configuration
  hosts: webservers
  become: yes
  vars_files:
    - vars.yml
  tasks:
    - name: Copy Nginx configuration file
      template:
        src: templates/nginx.conf.j2
        dest: /etc/nginx/nginx.conf
      notify: restart nginx
  handlers:
    - name: restart nginx
      service:
        name: nginx
        state: restarted
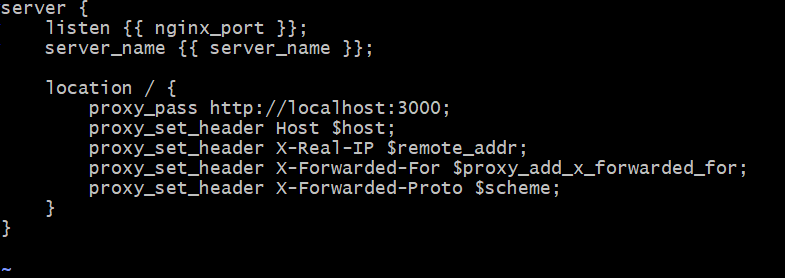
Step 6: Create the Jinja2 Template
- Create a directory for your templates and add a Jinja2 template for the Nginx configuration:
mkdir templates- Create a file named nginx.conf.j2 inside the templates directory:
server {
    listen {{ nginx_port }};
    server_name {{ server_name }};


    location / {
        proxy_pass http://localhost:3000;
        proxy_set_header Host $host;
        proxy_set_header X-Real-IP $remote_addr;
        proxy_set_header X-Forwarded-For $proxy_add_x_forwarded_for;
        proxy_set_header X-Forwarded-Proto $scheme;
    }
}
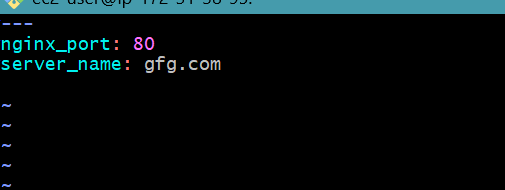
Step 7: Define Variables in an Ansible Playbook
- Create a variables file named vars.yml:
nginx_port: 80
server_name: gfg.com #change your server name
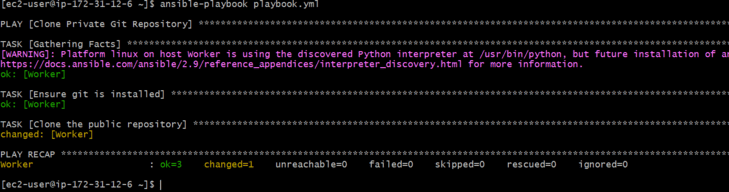
Step 8: Run the Playbook
ansible-playbook demo.yml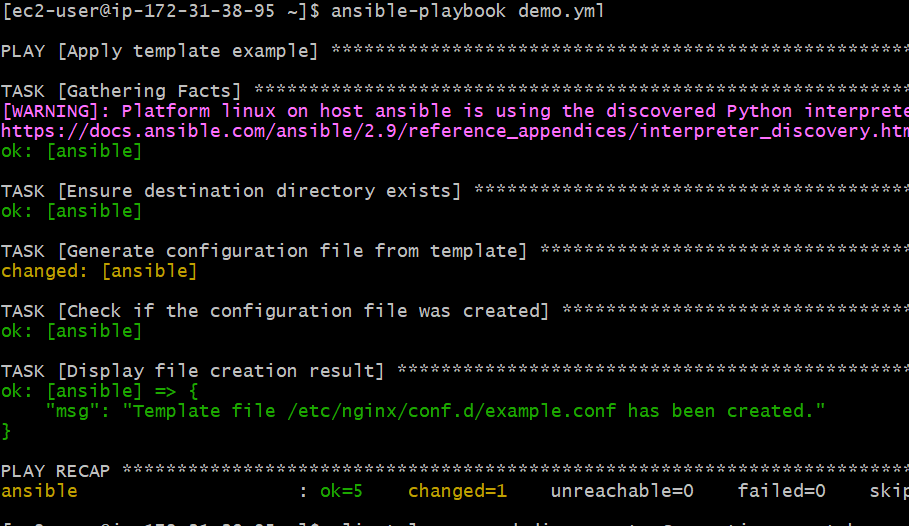
Step 9: Verify the Deployment
- We can check our deployment by using following command
cat /etc/nginx/nginx.conf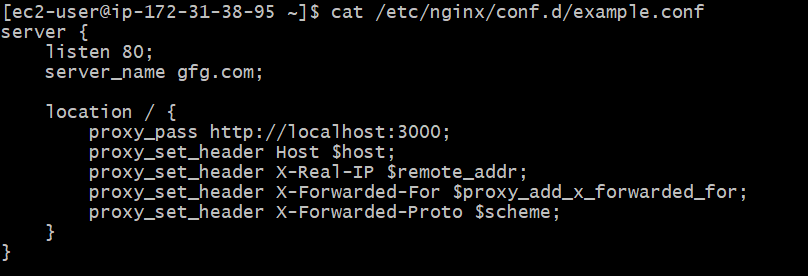
Looping Through Data with Jinja2 in Ansible
Create a Jinja2 Template with a Loop:
{% for item in items %}
- {{ item }}
{% endfor %}
Define Variables in an Ansible Playbook:
- Here is the example playbook
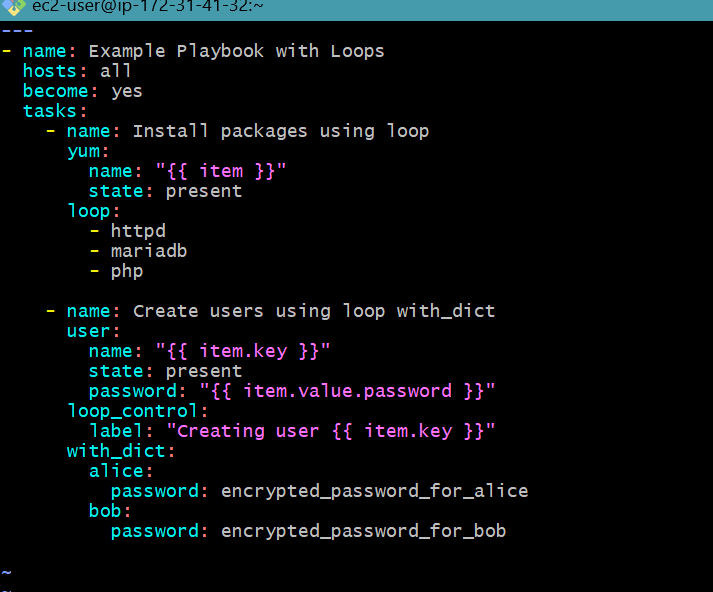
- name: Example Playbook with Loops
  hosts: all
  become: yes
  vars:
    packages:
      - httpd
      - mariadb
      - php
    users:
      alice:
        password: encrypted_password_for_alice
      bob:
        password: encrypted_password_for_bob
  tasks:
    - name: Install packages using loop
      yum:
        name: "{{ item }}"
        state: present
      loop: "{{ packages }}"
    - name: Create users using loop with_dict
      user:
        name: "{{ item.key }}"
        state: present
        password: "{{ item.value.password }}"
      with_dict: "{{ users }}"
      loop_control:
        label: "Creating user {{ item.key }}"
Run the Playbook
ansible-playbook use_template.yml.png)
Error Handling in Templates
Handling errors in Jinja2 templates ensures that your playbooks can gracefully handle missing or invalid data.
Create a Jinja2 Template with Error Handling:
Hello, {{ name | default("Guest") }}!Define Variables in an Ansible Playbook:
- hosts: localhost
  vars:
    # name is intentionally omitted
  tasks:
    - name: Render Jinja2 template with error handling
      template:
        src: error_handling_template.j2
        dest: /tmp/error_handling_output.txt
Run the Playbook:
ansible-playbook use_template.ymlVerify the Output:
cat /tmp/error_handling_output.txtYou should see:
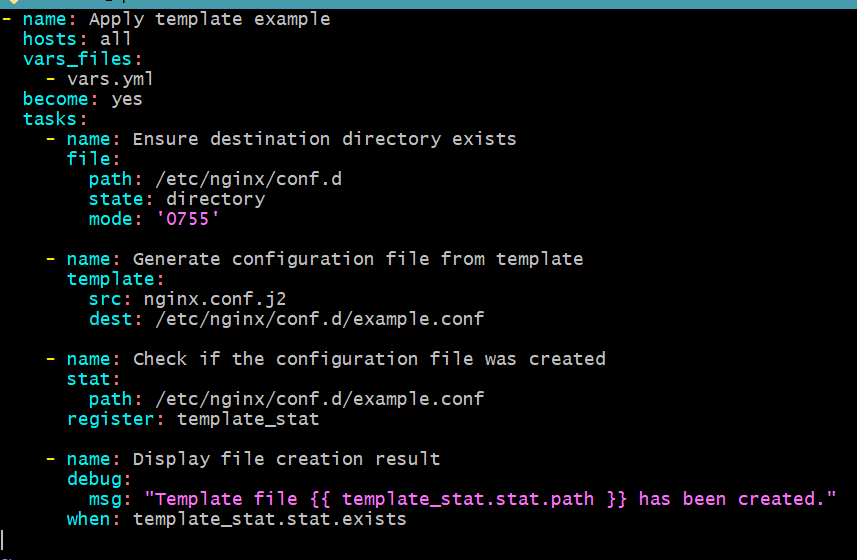
Hello, Guest!Integrating Templates into Ansible Playbooks
- Integrating Jinja2 templates into Ansible playbooks allows you to generate dynamic content based on your playbook's data.
Create a Jinja2 Template:
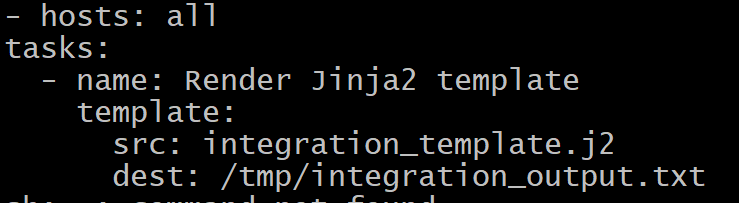
Server name: {{ inventory_hostname }}Create an Ansible Playbook:
- hosts: all
  tasks:
    - name: Render Jinja2 template
      template:
        src: integration_template.j2
        dest: /tmp/integration_output.txt
Run the Playbook
ansible-playbook playbook.yml