DVWA (Damn Vulnerable Web Application) is a PHP/MySQL web application designed for security testing and training purposes. It is intentionally designed with multiple security flaws so that beginners and professionals can practice web penetration testing, ethical hacking, and vulnerability exploitation in a safe environment.
- IDVWA is an open-source and easy-to-set-up on XAMPP, WAMP, or Docker.
- It has a login system and an admin panel to manage settings.
- DVWA provides multiple security levels: Low, Medium, High, and Impossible.
How to Set It Up?
Follow the step-by-step process to set up the DVWA
Step 1: Download DVWA
Go to your web server folder (e.g., /var/www/html/) and clone DVWA from GitHub.
- Open Kali Linux in VM
- Go to the web server folder
cd var/www/html/- Download DVWA
git clone https://github.com/digininja/DVWA.git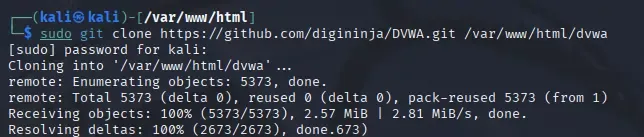
Step 2: Set Permissions
Give the folder proper permissions (commonly chmod 777 or assign to www-data).
- Check the folder content
ls- Change the Permission
sudo chmod -R 777 DVWA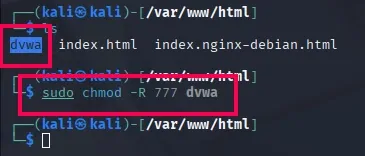
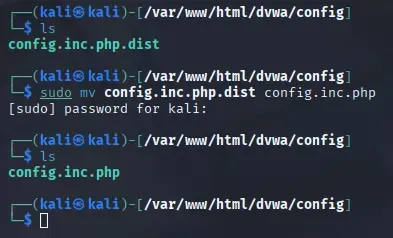
Step 3: Configure DVWA
Go inside the DVWA folder and check the config files.
cd dwva
ls
config.inc.php.dist

Step4: Rename the config file
Rename config.inc.php.dist to config.inc.php.
ls
sudo mv config.inc.php.dist config.inc.php
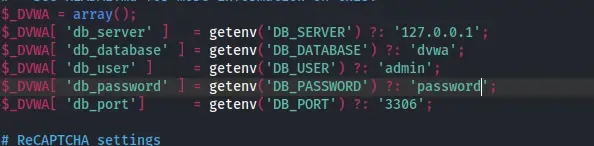
Step 5: Edit the config file
Open it and change the database user and password.
sudo config.inc.php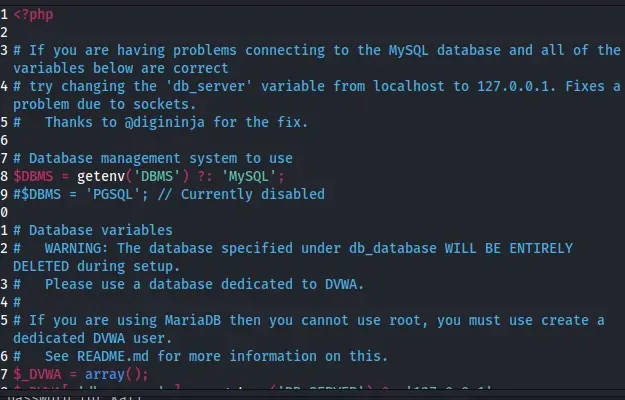
Change the 'db_user & db_password' as whatever you want
I will prefer my user as admin and password as password
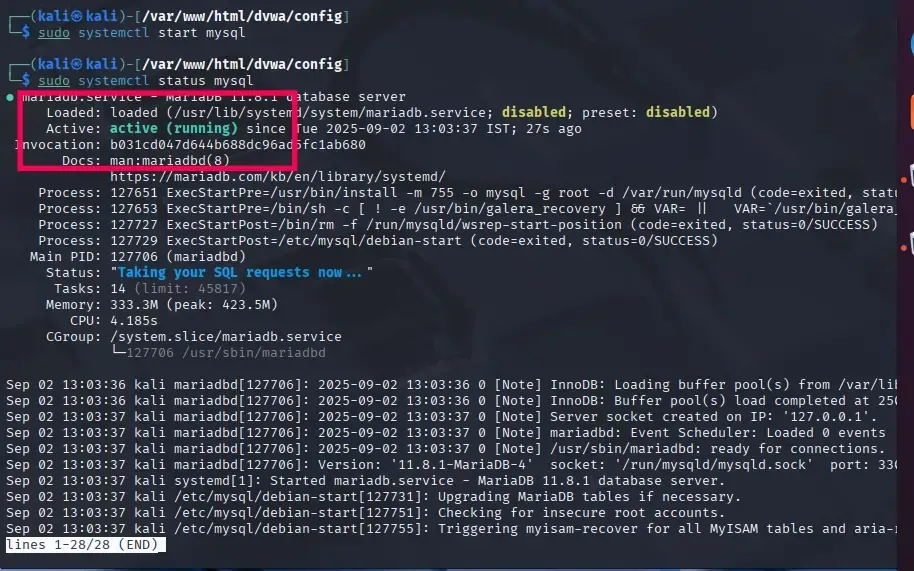
Step 6: Configure the database
Start the MySQL service on your machine.
sudo systemctl start mysql
sudo systemctl status mysql
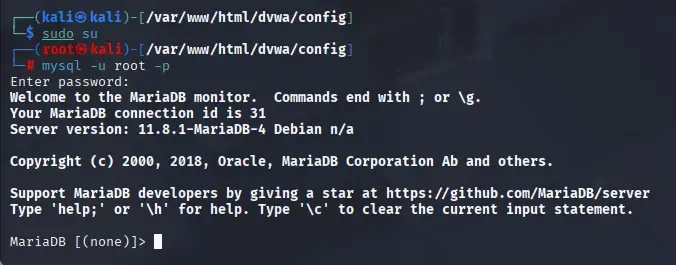
Step 7: Set up MySQL Databse
Log in to MySQL using mysql -u root -p (press Enter if no password).
sudo su
my sql -u root -p
- After Writing this command it will ask you about password but you do not have any apssword so just press enter and it should be logged in.
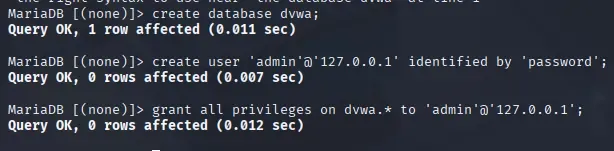
Step 8: Create the Database
Create the dvwa database and a user (like admin:password).
create database dvwa;
create user 'admin'@'127.0.0.1' identified by 'password';
grant all privileges on dvwa.* to 'admin'@'127.0.0.1';
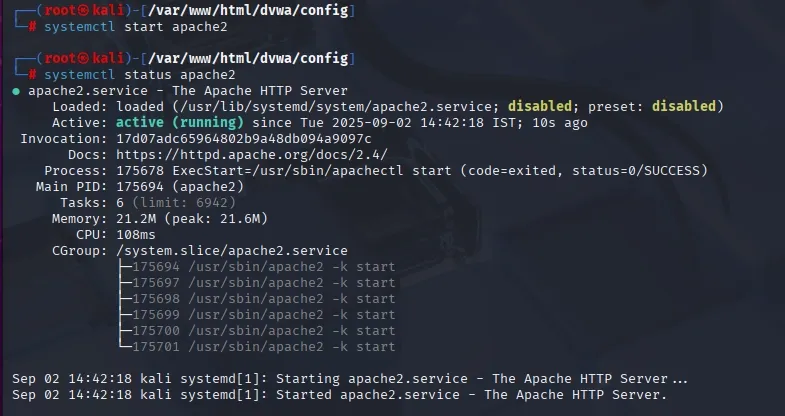
Step 9: Start & Configure the Web Server
Start and check Apache status
- Start and check the status of web server
systemctl start apache2
systemctl status apache2
- Configure the Server
cd /etc/php
cd 8.4
cd apache2
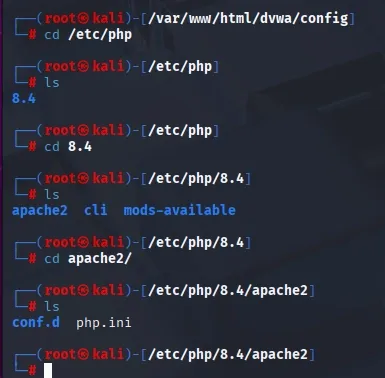
- Edit the file
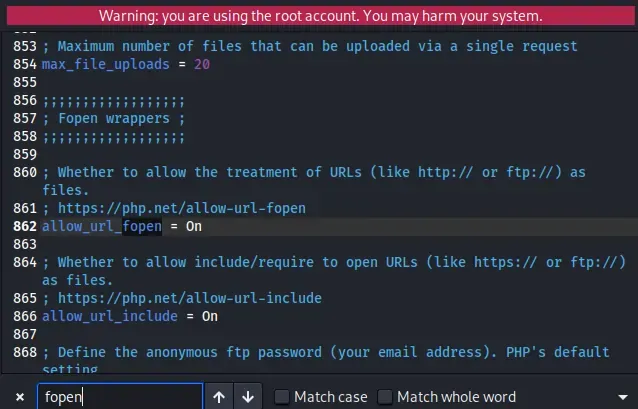
mousepad php.iniOpen the file and search for the keyword fopen using Ctrl + F. Locate the directives allow_url_fopen and allow_url_include. Ensure that allow_url_include is set to On. If it is currently set to Off, change it to On. Save the file with Ctrl+S and quit the file.
Step 10: Restart the Web Server
Enable allow_url_include in php.ini.
systemctl restart apache2
Step 11: Start DVWA
Go to the browser and type
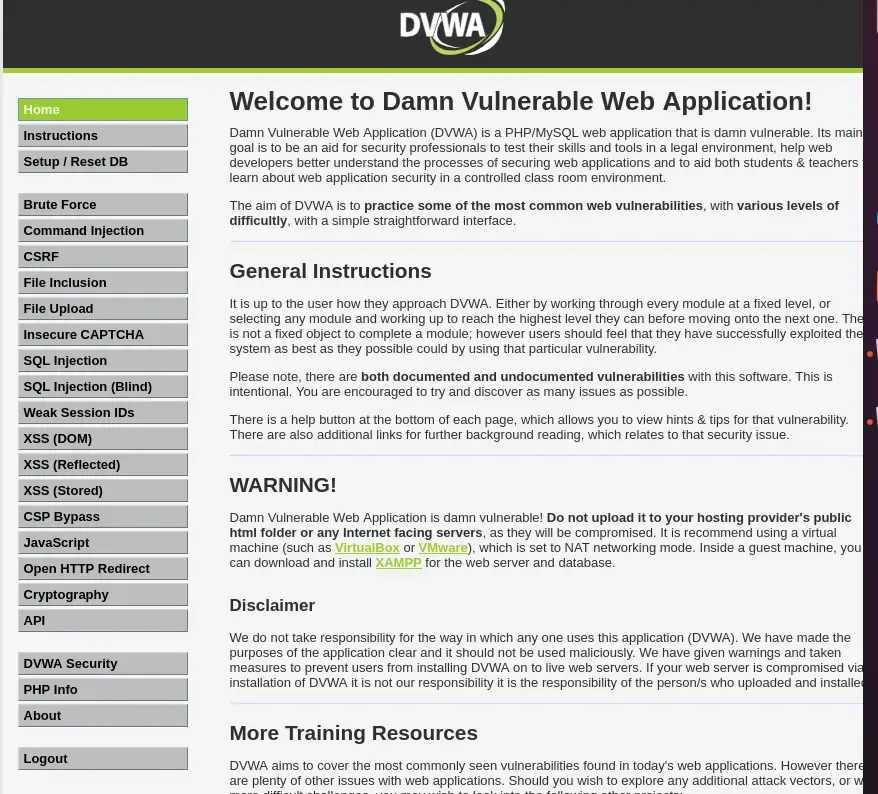
127.0.0.1/dvwaand you will be in the login page
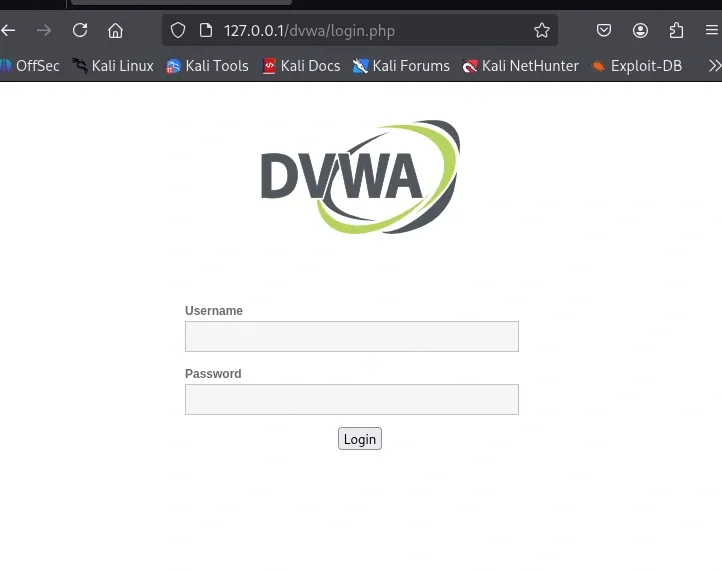
- Type the user name and password which has you saved
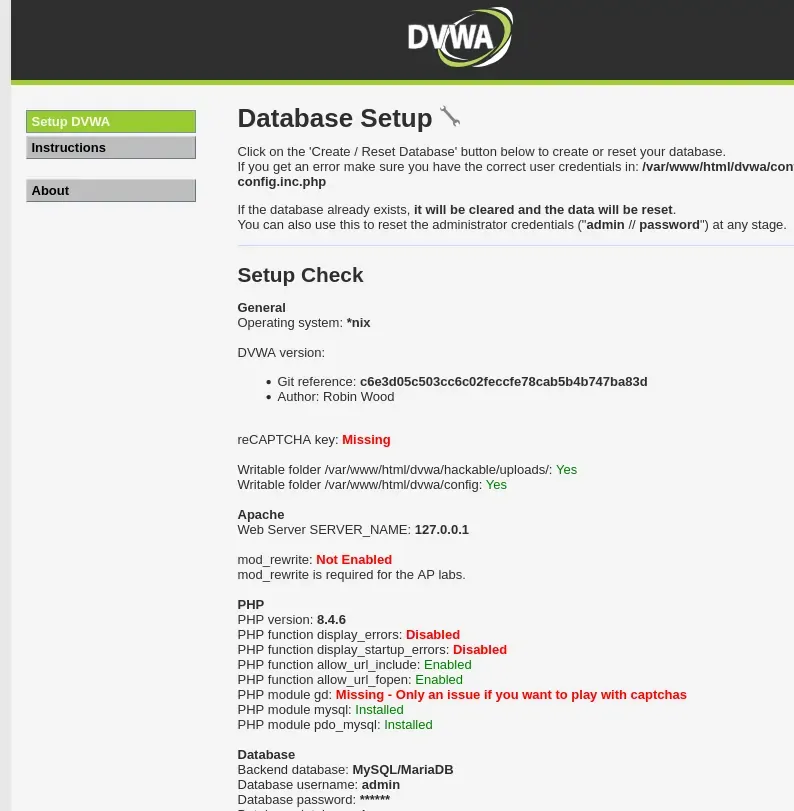
- Click on Create / Reset Database and it will further ask for user name and password
Why Use DVWA?
- Learning tool: Great for students, bug bounty beginners, and security researchers.
- Safe environment: No risk of breaking real websites.
- Skill development: Helps practice both attacking and securing applications.
- Comparison: You can test your exploit on Low/Medium/High security and see how defenses stop it.
Vulnerabilities You Can Practice
DVWA includes almost all OWASP Top 10 security issues. For example:
- SQL Injection: Testing how attackers can steal database data.
- Command Injection: Running system commands via web input.
- File Inclusion: Exploiting Local/Remote File Inclusion (LFI/RFI).
- Cross-Site Scripting (XSS): Stealing cookies, injecting malicious scripts.
- Brute Force: Cracking weak login credentials.
- CSRF (Cross-Site Request Forgery): Forcing users to take unintended actions.
- File Upload: Uploading malicious files (like shells).
- Weak Session IDs: Exploiting poor session management.
