Creating a Java project in Eclipse IDE is the first step toward developing Java applications. Eclipse is a powerful IDE that simplifies project creation, code management, and application execution through its built-in development tools. In this guide, we'll create a Java project and run a simple program step by step.
- Creates a well-organized project structure for Java applications.
- Provides built-in tools for code editing, debugging, and error detection.
- Automatically compiles Java source files whenever you save your code.
Java Project
A Java project is a collection of Java source files, packages, libraries, and configuration files organized into a single workspace. A typical Java project contains:
- src : Java source files
- JRE System Library : Java runtime libraries
- bin : Compiled .class files (created automatically)
Step-by-Step Implementation To Create a Simple Java Project in Eclipse IDE
Follow these below steps to create a simple java project to run your first program on eclipse.
Step 1: Open Eclipse IDE
Launch Eclipse IDE from your desktop shortcut or installation directory. When Eclipse starts for the first time, it prompts you to select a Workspace, which is the location where all your Java projects and related files will be stored.
- Open Eclipse IDE.
- Choose a workspace directory to store your projects.
- Click Launch to start Eclipse with the selected workspace.
Step 2: Create a New Java Project
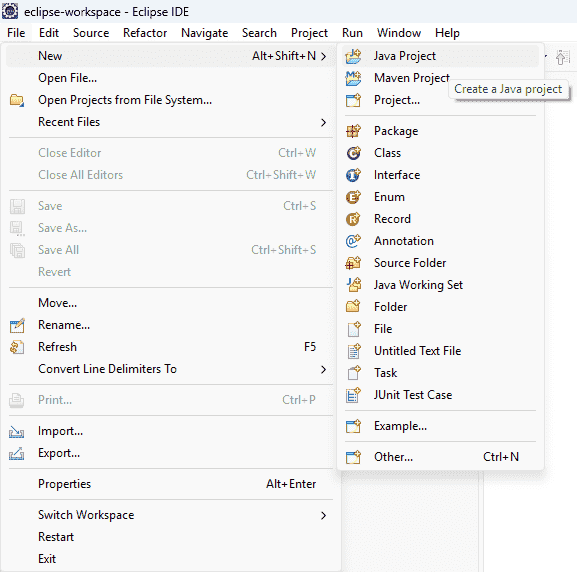
To create a new Java project in Eclipse, navigate to the File menu and select New -> Java Project. If the Java Project option is not visible, you can access it through the Project wizard.
- Click File -> New -> Java Project.
- If not available, click File -> New -> Project -> Java -> Java Project.
- Enter a project name and click Finish to create the project.
Step 3: Enter Project Details
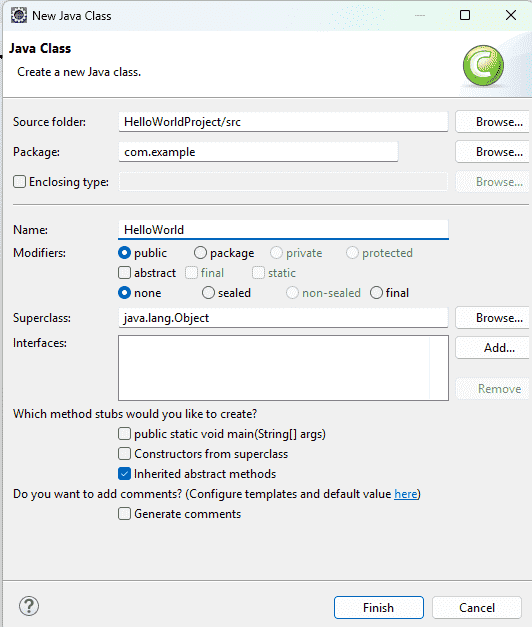
After selecting Java Project, the New Java Project wizard opens. Fill in the following details:
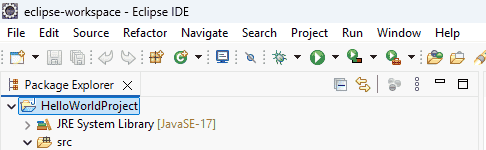
- Project Name: HelloWorldProject
- JRE: Select the installed JDK.
- Other Settings: Leave the remaining options as default.
Finally, click Finish to create the Java project.

Below is the final project structure in the below image.
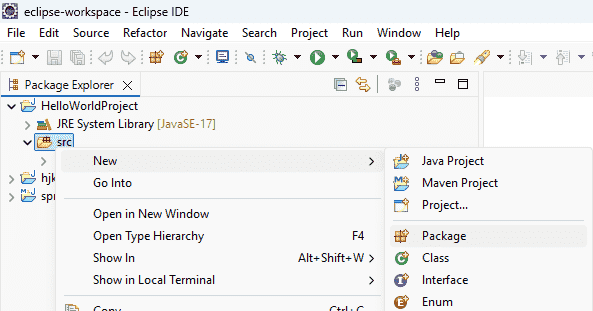
Step 4: Create a Package
Right-click on src and select New - Package.
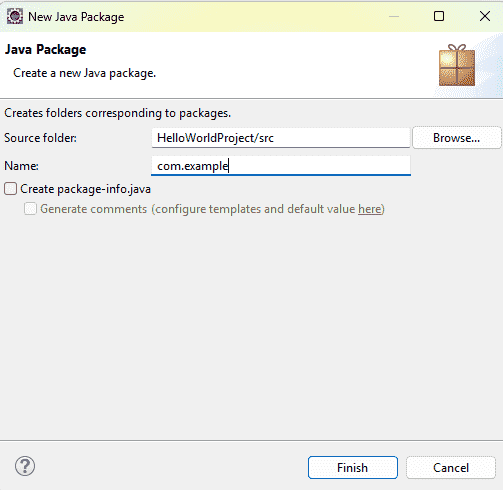
Enter package name and Click Finish
Step 5: Create a Java Class
Right-click on the package and Select New - Class
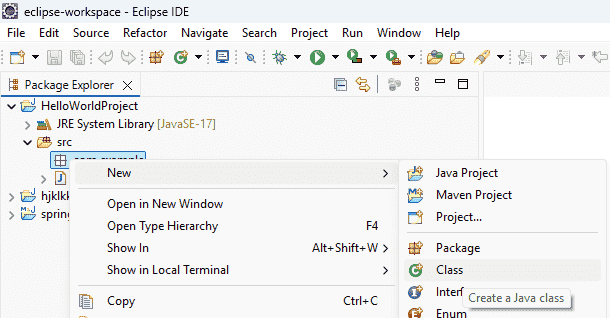
Enter the class name and click Finish. Eclipse automatically generates the class.
Step 6: Write Java Code
Now here we Write our First Program code To print Hello World
public class HelloWorld {
  public static void main(String[] args) {
         System.out.println("Hello, World!");
    }
}
Output
Hello, World!
Step 7: Save the File
Press the following commands to save your file.
Ctrl + S
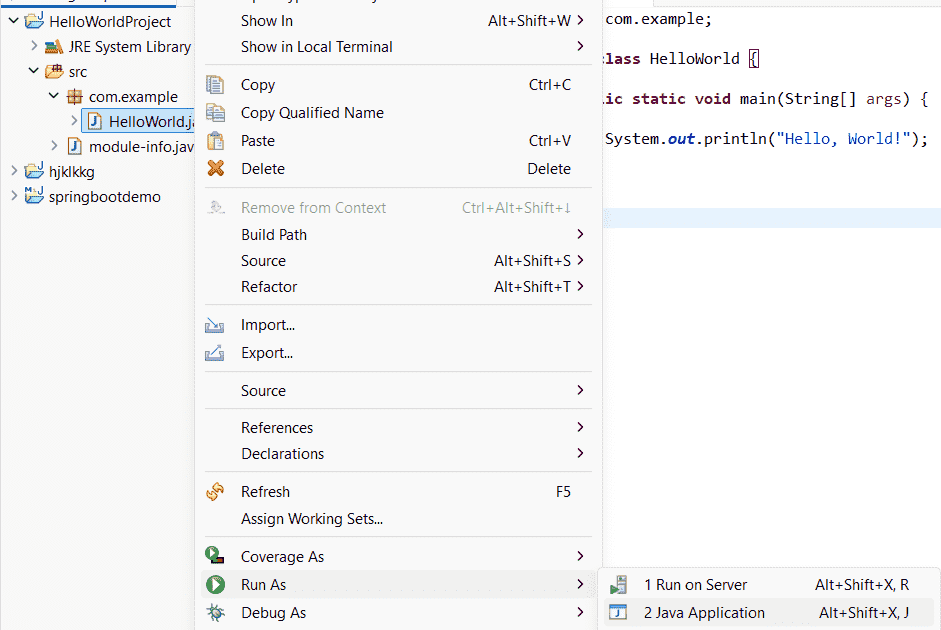
Step 8: Run the Java Program
- Right-click the Java file.
- Select Run As - Java Application OR Click the Run (▶) button from the toolbar.
After running the program the console window displays:
Output:

Explanation: Creating a Java project in Eclipse is a straightforward process that involves setting up a workspace, creating a project, adding packages and classes, writing Java code, and running the application. Eclipse automates compilation and provides powerful development features to built java Application.
