Spring MVC supports multiple View Resolvers, allowing the framework to resolve views using different strategies. When more than one view resolver is configured, Spring checks them based on their order (priority) until it finds a matching view. This makes it easy to combine different view technologies such as JSP, XML-based views, Thymeleaf, and more in a single application.
- Supports multiple view resolvers in the same application.
- Uses the order property to define resolver priority.
- Falls back to the next resolver if the current resolver cannot resolve the view.
How Multiple View Resolver Works
Spring resolves a view in the following order:
- The controller returns a logical view name.
- Spring checks the view resolvers based on their order value.
- If the first resolver cannot resolve the view, Spring tries the next resolver.
- Once a resolver successfully finds the view, the remaining resolvers are ignored.
Steps to Implement Multiple View Resolver Mapping
Follow these steps to create a multiple view resolver in Spring Mvc.
Step 1: Create a Maven Project
- Open STS IDE / ECLIPSE IDE
- Click File -> New -> Maven Project.

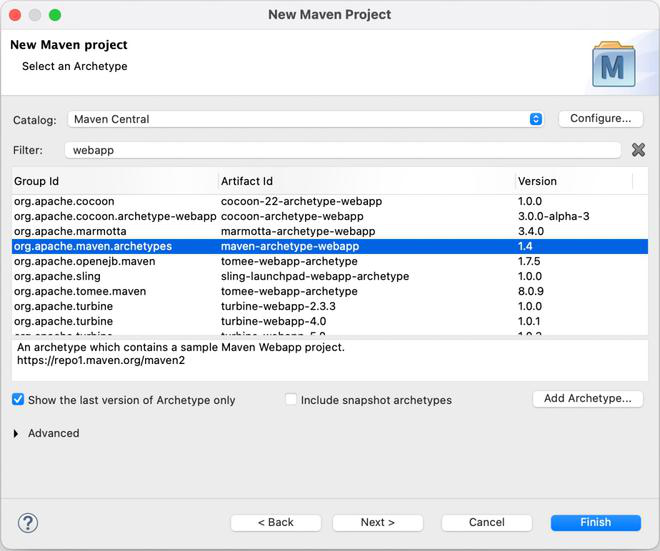
Select Create a simple project (Select archetype ) and click Next.
Then Enter the following details:
- Group Id: com.gfg
- Artifact Id: SpringMVCMultipleViewResolver
- Packaging: war
Click Finish.

Below is the final project structure of the Spring MVC project in the below image.

Step 2: Add Required Dependencies
Add the following maven dependencies and plugin to your pom.xml file.
<project xmlns="https://maven.apache.org/POM/4.0.0" xmlns:xsi="https://www.w3.org/2001/XMLSchema-instance"
  xsi:schemaLocation="https://maven.apache.org/POM/4.0.0 https://maven.apache.org/xsd/maven-4.0.0.xsd">
  <modelVersion>4.0.0</modelVersion>
  <groupId>com.mkyong.common</groupId>
  <artifactId>SpringMVC</artifactId>
  <packaging>war</packaging>
  <version>1.0-SNAPSHOT</version>
  <name>SpringMVC Maven Webapp</name>
  <url>http://maven.apache.org</url>
  <dependencies>
    <dependency>
      <groupId>junit</groupId>
      <artifactId>junit</artifactId>
      <version>3.8.1</version>
      <scope>test</scope>
    </dependency>

    <!-- Spring framework -->
    <dependency>
        <groupId>org.springframework</groupId>
        <artifactId>spring</artifactId>
        <version>2.5.6</version>
    </dependency>

    <!-- Spring MVC framework -->
    <dependency>
        <groupId>org.springframework</groupId>
        <artifactId>spring-webmvc</artifactId>
        <version>2.5.6</version>
    </dependency>

    <!-- JSTL -->
    <dependency>
        <groupId>javax.servlet</groupId>
        <artifactId>jstl</artifactId>
        <version>1.1.2</version>
    </dependency>

    <dependency>
        <groupId>taglibs</groupId>
        <artifactId>standard</artifactId>
        <version>1.1.2</version>
    </dependency>

  </dependencies>
  <build>
    <finalName>SpringMVC</finalName>
  </build>
</project>
Below is the final project structure of the Spring MVC project in the below image.

Step 3: Configure DispatcherServlet (web.xml)
The web.xml file registers the DispatcherServlet, maps incoming requests, and loads the Spring configuration file.
<web-app id="WebApp_ID" version="2.4"
    xmlns="http://www.oracle.com/webfolder/technetwork/jsc/xml/ns/j2ee/index.html"
    xmlns:xsi="https://www.w3.org/2001/XMLSchema-instance"
    xsi:schemaLocation="http://www.oracle.com/webfolder/technetwork/jsc/xml/ns/j2ee/index.html
    http://www.oracle.com/webfolder/technetwork/jsc/xml/ns/j2ee/web-app_2_4.xsd">

  <display-name>Spring MVC</display-name>

  <listener>
    <listener-class>
      org.springframework.web.context.ContextLoaderListener
    </listener-class>
  </listener>

  <servlet>
      <servlet-name>gfg</servlet-name>
    <servlet-class>org.springframework.web.servlet.DispatcherServlet</servlet-class>
    <load-on-startup>1</load-on-startup>
  </servlet>

  <servlet-mapping>
     <servlet-name>gfg</servlet-name>
    <url-pattern>*.htm</url-pattern>
  </servlet-mapping>

  <context-param>
    <param-name>contextConfigLocation</param-name>
    <param-value>/WEB-INF/gfg-servlet.xml</param-value>
  </context-param>

</web-app>
Step 4: Configure Multiple View Resolvers(gfg-servlet.xml)
The gfg-servlet.xml file is the main Spring MVC configuration file. It scans controller classes, registers multiple view resolvers, and defines their execution priority using the order property.
<beans xmlns="http://www.springframework.org/schema/beans/"
    xmlns:xsi="https://www.w3.org/2001/XMLSchema-instance"
    xsi:schemaLocation="http://www.springframework.org/schema/beans/
    http://www.springframework.org/schema/beans//spring-beans-2.5.xsd">

    <bean class="org.springframework.web.servlet.mvc.support.ControllerClassNameHandlerMapping" />
    <bean class="com.gfg.controller.WelcomeController" />

  <bean id="viewResolver"
          class="org.springframework.web.servlet.view.InternalResourceViewResolver" >
          <property name="prefix">
              <value>/WEB-INF/pages/</value>
           </property>
          <property name="suffix">
             <value>.jsp</value>
          </property>
          <property name="order" value="1" />
    </bean>

    <bean class="org.springframework.web.servlet.view.XmlViewResolver">
       <property name="location">
           <value>/WEB-INF/spring-views.xml</value>
       </property>
       <property name="order" value="0" />
    </bean>

    <bean class="org.springframework.web.servlet.handler.SimpleUrlHandlerMapping">
        <property name="mappings">
            <props>
                <prop key="/welcomePage.htm">welomecontroller</prop>
            </props>
        </property>
    </bean>

    <bean id="welcomeController"
        class="org.springframework.web.servlet.mvc.ParameterizableViewController">
        <property name="viewName" value="welcomepage" />
    </bean>


</beans>
Step 5: Configure XML Views (spring-views.xml)
The spring-views.xml file contains XML-based view definitions that are resolved by XmlViewResolver.
<beans xmlns="http://www.springframework.org/schema/beans/"
    xmlns:xsi="https://www.w3.org/2001/XMLSchema-instance"
    xsi:schemaLocation="http://www.springframework.org/schema/beans/
    http://www.springframework.org/schema/beans//spring-beans-2.5.xsd">

    <bean id="welcomeRedirect"
       class="org.springframework.web.servlet.view.RedirectView">
       <property name="url" value="welcomepage.htm" />
    </bean>

</beans>
Step 6: Create the Controller(WelcomeController.java)
Create the WelcomeController class to handle incoming requests and redirect them to the appropriate view.
// Java Program to Illustrate WelcomeController Class

package com.gfg.controller;

// Importing required classes
import javax.servlet.http.HttpServletRequest;
import javax.servlet.http.HttpServletResponse;
import org.springframework.web.servlet.ModelAndView;
import org.springframework.web.servlet.mvc.AbstractController;

// Class
// Extending AbstractController interface
public class WelcomeController extends AbstractController {

    @Override
    protected ModelAndView
    handleRequestInternal(HttpServletRequest request,
                          HttpServletResponse response)
        throws Exception
    {

        return new ModelAndView("redirect:welcomepage.htm");
    }
}
Step 7: Run the Application
- Right-click the project.
- Select Run As - Run on Server.
- Choose Apache Tomcat Server.
- Click Finish.
After that use the following URL to run your controller.
http://localhost:8080/SpringMvcMultipleViewResolver/welcomepage.htm
Output:

Explanation: When the application runs, Spring first checks the XmlViewResolver because it has the highest priority. If it cannot resolve the view, Spring automatically uses the InternalResourceViewResolver to render the JSP page.
Advantages
- Supports multiple view technologies in one project.
- Easy to configure resolver priority.
- Provides fallback if one resolver cannot resolve the view.
- Improves flexibility in large applications.
Limitations
- Incorrect resolver order may resolve the wrong view.
- Multiple resolvers add extra configuration.
- Can slightly increase view resolution time.
Multiple Controller vs Multiple View Resolver in Spring MVC
| Multiple Controller | Multiple View Resolver |
|---|---|
| Handles incoming HTTP requests using multiple controller classes. | Resolves the logical view name using multiple view resolvers. |
| Focuses on request handling. | Focuses on view resolution. |
Uses multiple classes annotated with @Controller. | Uses multiple ViewResolver beans such as InternalResourceViewResolver and XmlViewResolver. |
| Maps different URLs to different controller methods. | Resolves the returned view using the configured resolver priority (order). |
| Each controller processes business logic and returns a view name. | Each resolver attempts to resolve the returned view until one succeeds. |
| Useful for organizing application functionality into separate controllers. | Useful for supporting multiple view technologies (JSP, XML, Thymeleaf, etc.) in the same application. |
