Spring MVC integrates with the Apache Tiles framework to create reusable page layouts. Instead of repeating common sections such as the header, footer, navigation menu, and sidebar on every JSP page, Tiles allows you to define a common layout template and display only the page-specific content. This improves code reusability, simplifies maintenance, and ensures a consistent user interface across the application.
- Creates reusable layouts using common JSP components.
- Reduces duplicate code by sharing headers, footers, and menus.
- Maintains a consistent user interface across multiple pages.
Why Use Tiles in Spring MVC?
Without Tiles:
- Every JSP contains its own header, menu, and footer.
- Any layout change must be updated in every JSP page.
With Tiles:
- Common components are defined once.
- Layout changes are made in a single template.
- Every page automatically uses the updated layout.
Note: Apache Tiles is no longer actively maintained and is mainly used in legacy Spring MVC applications. Modern Spring applications typically use Thymeleaf, JSP layouts, or frontend frameworks for templating.
Steps to Implement Apache Tiles in Spring MVC
Follw these steps to implements a tiles framework in Spring Mvc.
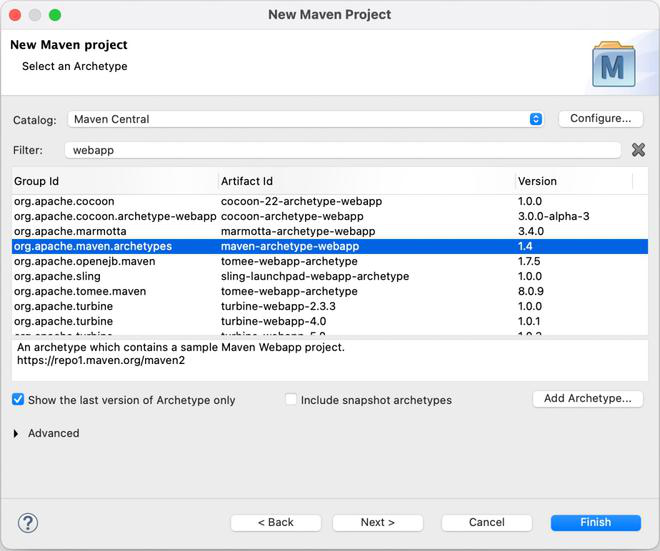
Step 1: Create a Maven Project
- Open STS IDE / ECLIPSE IDE
- Click File -> New -> Maven Project.

Select Create a simple project (Select Archetype ) and click Next.
Then Enter the following details:
- Group Id: com.gfg
- Artifact Id: SpringMVCTiles
- Packaging: war
Click Finish.
Below is the final project structure of the Spring MVC project in the below image.

Step 2: Add Required Dependencies
Open pom.xml and add the required Spring MVC, Apache Tiles, JSTL, and Servlet dependencies.
<project xmlns="https://maven.apache.org/POM/4.0.0"
         xmlns:xsi="https://www.w3.org/2001/XMLSchema-instance"
  xsi:schemaLocation="https://maven.apache.org/POM/4.0.0
                      https://maven.apache.org/xsd/maven-4.0.0.xsd">
  <modelVersion>4.0.0</modelVersion>
  <groupId>com.javatpoint</groupId>
  <artifactId>SpringMVCTiles</artifactId>
  <packaging>war</packaging>
  <version>0.0.1-SNAPSHOT</version>
  <name>SpringMVCTiles Maven Webapp</name>
  <url>http://maven.apache.org</url>
  <dependencies>
    <dependency>
        <groupId>junit</groupId>
        <artifactId>junit</artifactId>
        <version>3.8.1</version>
        <scope>test</scope>
    </dependency>

    <!-- https://mvnrepository.com/artifact/org.springframework/spring-webmvc -->
    <dependency>
        <groupId>org.springframework</groupId>
        <artifactId>spring-webmvc</artifactId>
        <version>5.1.1.RELEASE</version>
    </dependency>

      <!-- https://mvnrepository.com/artifact/javax.servlet/javax.servlet-api -->
    <dependency>
        <groupId>javax.servlet</groupId>
        <artifactId>servlet-api</artifactId>
        <version>3.0-alpha-1</version>
    </dependency>

    <!-- https://mvnrepository.com/artifact/javax.servlet/jstl -->
    <dependency>
        <groupId>javax.servlet</groupId>
        <artifactId>jstl</artifactId>
        <version>1.2</version>
    </dependency>

    <!-- https://mvnrepository.com/artifact/org.apache.tomcat/tomcat-jasper -->
    <dependency>
        <groupId>org.apache.tomcat</groupId>
        <artifactId>tomcat-jasper</artifactId>
        <version>9.0.12</version>
  </dependency>

   <!-- https://mvnrepository.com/artifact/org.apache.tiles/tiles-jsp -->
  <dependency>
        <groupId>org.apache.tiles</groupId>
        <artifactId>tiles-jsp</artifactId>
        <version>3.0.5</version>
  </dependency>

    <!-- https://mvnrepository.com/artifact/org.apache.tiles/tiles-servlet -->
    <dependency>
        <groupId>org.apache.tiles</groupId>
        <artifactId>tiles-servlet</artifactId>
        <version>3.0.5</version>
    </dependency>

    <!-- https://mvnrepository.com/artifact/org.apache.tiles/tiles-core -->
    <dependency>
        <groupId>org.apache.tiles</groupId>
        <artifactId>tiles-core</artifactId>
        <version>3.0.5</version>
    </dependency>

    <!-- https://mvnrepository.com/artifact/org.apache.tiles/tiles-el -->
    <dependency>
        <groupId>org.apache.tiles</groupId>
        <artifactId>tiles-el</artifactId>
        <version>3.0.5</version>
    </dependency>

  </dependencies>
  <build>
    <finalName>SpringMVCTiles</finalName>
  </build>
</project>
Step 3: Create the Bean Class(Contact.java)
Create a Contact class to store the contact form details entered by the user.
package com.geeksforgeeks.form;
public class Contact {

    private String firstname;
    private String lastname;
    private String email;
    private String telephone;

    public String getEmail() {
        return email;
    }
    public String getTelephone() {
        return telephone;
    }
    public void setEmail(String email) {
        this.email = email;
    }
    public void setTelephone(String telephone) {
        this.telephone = telephone;
    }
    public String getFirstname() {
        return firstname;
    }
    public String getLastname() {
        return lastname;
    }
    public void setFirstname(String firstname) {
        this.firstname = firstname;
    }
    public void setLastname(String lastname) {
        this.lastname = lastname;
    }
}
Step 4: Create Controller(HelloWorld.java)
It display the Hello page.
package com.geeksforgeeks.controller;
import org.springframework.stereotype.Controller;
import org.springframework.ui.Model;
import org.springframework.web.bind.annotation.RequestMapping;

@Controller
public class HelloWorld
{
    @RequestMapping("/hello")
    public String helloWorld(Model m)
    {
        String message = "Hello geeksforgeeks";
        m.addAttribute("message", message);
        return "hello";
    }
}
Step 5: Configure Spring and Tiles(spring-servlet.xml)
This file Enables component scanningand configures the Tiles view resolver and registers the Tiles configuration file.
<?xml version="1.0" encoding="UTF-8"?>

<beans xmlns="http://www.springframework.org/schema/beans"
       xmlns:xsi="http://www.w3.org/2001/XMLSchema-instance"
       xmlns:context="http://www.springframework.org/schema/context"
       xmlns:mvc="http://www.springframework.org/schema/mvc"
       xsi:schemaLocation="
           http://www.springframework.org/schema/beans
           https://www.springframework.org/schema/beans/spring-beans.xsd
           http://www.springframework.org/schema/context
           https://www.springframework.org/schema/context/spring-context.xsd
           http://www.springframework.org/schema/mvc
           https://www.springframework.org/schema/mvc/spring-mvc.xsd">

    <!-- Scan Controller Classes -->
    <context:component-scan base-package="com.geeksforgeeks.controller"/>

    <!-- Enable Annotation Support -->
    <mvc:annotation-driven/>

    <!-- Configure Apache Tiles -->
    <bean id="tilesConfigurer"
          class="org.springframework.web.servlet.view.tiles3.TilesConfigurer">
        <property name="definitions">
            <list>
                <value>/WEB-INF/tiles.xml</value>
            </list>
        </property>
    </bean>

    <!-- Tiles View Resolver -->
    <bean id="viewResolver"
          class="org.springframework.web.servlet.view.UrlBasedViewResolver">
        <property name="viewClass"
                  value="org.springframework.web.servlet.view.tiles3.TilesView"/>
        <property name="order" value="0"/>
    </bean>

    <!-- Fallback JSP View Resolver -->
    <bean class="org.springframework.web.servlet.view.InternalResourceViewResolver">
        <property name="prefix" value="/WEB-INF/views/"/>
        <property name="suffix" value=".jsp"/>
        <property name="order" value="1"/>
    </bean>

</beans>
Step 6: Create Controller(ContactController.java)
It display the contact form and processes the submitted data.
package com.geeksforgeeks.controller;
import org.springframework.stereotype.Controller;
import org.springframework.ui.Model;
import org.springframework.validation.BindingResult;
import org.springframework.web.bind.annotation.ModelAttribute;
import org.springframework.web.bind.annotation.RequestMapping;
import org.springframework.web.bind.annotation.RequestMethod;
import org.springframework.web.bind.annotation.SessionAttributes;
import com.geeksforgeeks.form.Contact;

@Controller
@SessionAttributes
public class ContactController
{
    @RequestMapping(value = "/addContact", method = RequestMethod.POST)
    public String addContact(@ModelAttribute("contact")    Contact contact, BindingResult result)
    {
        // write the code here to add contact
        return "redirect:contact.html";
    }

    @RequestMapping("/contact")
    public String showContacts(Model m)
    {
        m.addAttribute("command", new Contact());
        return "contact";
    }
}
Step 7: Configure DispatcherServlet(web.xml)
Configure the DispatcherServlet in the web.xml file to handle all incoming requests.
<?xml version="1.0" encoding="UTF-8"?>
<web-app>
  <display-name>SpringTiles</display-name>
  <welcome-file-list>
    <welcome-file>index.jsp</welcome-file>
  </welcome-file-list>
  <servlet>
    <servlet-name>spring</servlet-name>
    <servlet-class>
            org.springframework.web.servlet.DispatcherServlet
        </servlet-class>
    <load-on-startup>1</load-on-startup>
  </servlet>
  <servlet-mapping>
    <servlet-name>spring</servlet-name>
    <url-pattern>*.html</url-pattern>
  </servlet-mapping>
</web-app>
Step 8: Create the Common Layout
index.jsp
The application's home page that provides links to the available modules
<a href="hello.html">Hello geeksforgeeks </a>  |
<a href="contact.html">Contact us page</a>
hello.jsp
Displays a welcome message returned by the HelloWorldController.
<html>
<head>
    <title>Spring MVC Example</title>
</head>
<body>
    <h1>Welcome to GeeksForGeeks</h1>
</body>
</html>
contact.jsp
Displays the contact form where users can enter and submit their details.
<%@taglib uri="http://www.springframework.org/tags/form" prefix="form"%>
<html>
<head>
    <title>Spring Tiles Contact Form</title>
</head>
<body>
<center>
<h1> GFG Contact Manager</h1>
<form:form method="post" action="addContact.html">

    <table>
    <tr>
        <td><form:label path="firstname">Enter your firstname</form:label></td>
        <td><form:input path="firstname" /></td>
    </tr>
    <tr>
        <td><form:label path="lastname">Enter your lastname</form:label></td>
        <td><form:input path="lastname" /></td>
    </tr>
    <tr>
        <td><form:label path="lastname">Enter your email</form:label></td>
        <td><form:input path="email" /></td>
    </tr>
    <tr>
        <td><form:label path="lastname">Enter your mobile.no</form:label></td>
        <td><form:input path="telephone" /></td>
    </tr>
    <tr>
        <td colspan="2">
            <input type="submit" value="Submit"/>
        </td>
    </tr>
</table>

</form:form>
</center>
</body>
</html>
header.jsp
Displays the common header section, such as the application title or logo, at the top of every page.
<h2>GEEEKSFORGEEKS</h2>
<hr/>
footer.jsp
Displays the common footer section, such as copyright information or footer text, at the bottom of every page.
<hr/>

<p>Thank you for visiting this site</p>
menu.jsp
Contains the navigation menu with links that allow users to move between different pages.
<p>Menu 1</p>


<p>Menu 2</p>
layout.jsp
Acts as the main layout template. It combines the header, menu, body, and footer into a single page structure using Apache Tiles, ensuring a consistent layout across all pages.
<%@ taglib uri="https://tiles.apache.org/tags-tiles" prefix="tiles"%>
<!DOCTYPE HTML PUBLIC "-//W3C//DTD HTML 4.01 Transitional//EN"
"http://www.w3.org/TR/html4/loose.dtd">
<html>
<head>
<meta http-equiv="Content-Type" content="text/html; charset=UTF-8">
<title><tiles:insertAttribute name="title" ignore="true" /></title>
</head>
<body>
        <div><tiles:insertAttribute name="header" /></div>
        <div style="float:left;padding:10px;width:15%;"><tiles:insertAttribute name="menu" /></div>
        <div style="float:left;padding:10px;width:80%;border-left:3px solid black;">
        <tiles:insertAttribute name="body" /></div>
        <div style="clear:both"><tiles:insertAttribute name="footer" /></div>

</body>
</html>
Step 9: Create Tiles Configuration (tiles.xml)
This file defines the common page layout and maps each view to the reusable template.
<?xml version="1.0" encoding="UTF-8"?>
<!DOCTYPE tiles-definitions PUBLIC
"-//Apache Software Foundation//DTD Tiles Configuration 3.0//EN"
"http://tiles.apache.org/dtds/tiles-config_3_0.dtd">

<tiles-definitions>

    <definition name="base.layout"
        template="/WEB-INF/views/layout.jsp">

        <put-attribute name="header"
            value="/WEB-INF/views/header.jsp"/>

        <put-attribute name="menu"
            value="/WEB-INF/views/menu.jsp"/>

        <put-attribute name="footer"
            value="/WEB-INF/views/footer.jsp"/>
    </definition>

    <definition name="hello"
        extends="base.layout">

        <put-attribute name="title"
            value="Hello Page"/>

        <put-attribute name="body"
            value="/WEB-INF/views/hello.jsp"/>

    </definition>

    <definition name="contact"
        extends="base.layout">

        <put-attribute name="title"
            value="Contact Page"/>

        <put-attribute name="body"
            value="/WEB-INF/views/contact.jsp"/>

    </definition>

</tiles-definitions>
Step 10: Run the Application
- Right-click the project.
- Select Run As -> Run on Server.
- Choose Apache Tomcat.
- Click Finish.
After that use the following URL to run your controller.
http://localhost:8080/SpringMVCTiles/
Output:

After clicking the "Hello geeksforgeeks" link following page will be shown

And after clicking on contact us this page will be shown

Explanation: When a user sends a request, the DispatcherServlet forwards it to the appropriate controller. The controller returns a Tiles view name, and Tiles combines the common layout (header, menu, footer) with the requested page content before rendering the final JSP page in the browser.
