Linux is a multi-user operating system that allows multiple users to work on the same system securely and efficiently. User groups in Linux make it easier to manage permissions by applying access rules to multiple users at once.
- A user group is a collection of users managed together for permission and access control.
- Groups simplify administration by allowing permissions to be assigned once and applied to all group members.
- System administrators use groups to manage files, directories, and system resources efficiently.
- When a new user is created, Linux automatically creates a primary group with the same name as the user.
- Group-based management reduces manual configuration and improves system security.
Example: Create a user named demoUser3 to demonstrate how user groups can be checked in Linux.
Commands:
sudo groupadd demo_group
sudo useradd demo_user
sudo groupmod -a -U demo_user demo_group
groups demo_user
When a new user is created, a new group with the same name is created and the user is added to it. This group is called the primary group of the user.
Output:

- A new group demo_group is created, then a user demo_user is added to the system using administrative (sudo) privileges.
- The user demo_user is added to demo_group as a secondary group using the groupmod -a -U command.
- The groups demo_user command confirms that demo_user belongs to both its default group and demo_group, verifying successful group assignment.
Linux Methods to Check User Groups
Method 1: The "groups" command
The groups command is the simplest and most commonly used way to list all groups (both primary and secondary) that a user belongs to.
- It is part of GNU coreutils
- It comes pre-installed on almost all Linux systems
- No setup or configuration is required
You can start using it immediately from the terminal.
Command:
groups --versionOutput:
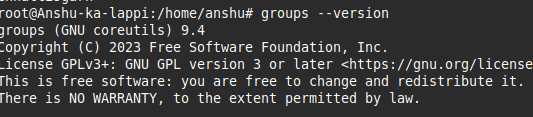
This command prints version information, it confirms that groups is installed and working correctly.
Syntax:
groups [<username>]- If you provide a username, it shows the groups for that user
- If you do not provide a username, it shows the groups of the currently logged-in user
Example 1: Check groups for a specific user
It is used to display all the groups that the user liveuser belongs to.
Command:
groups liveuserOutput:

This means:
- liveuser is the user
- wheel is a secondary group (often used for sudo/admin access)
Example 2: Check groups for another user
Command:
groups demoUser1This shows that demoUser1 belongs to multiple groups, which is common in real systems.
Output:

Example 3: Check groups for the current user
Command:
groups- This displays the groups of the user currently logged into the terminal.
- This is very useful when debugging permission issues for yourself.
Output:

Method 2: The "id" command
The id command is another built-in Linux command that shows user identity information, including user ID (UID), group ID (GID), and group memberships. It is especially useful when you want structured output or are writing scripts.
Syntax:
id -G -n username- -G: The -G flag retrieves all the group IDs of the user and
- -n: The -n flag tells to output the names of groups (otherwise it would output group IDs).
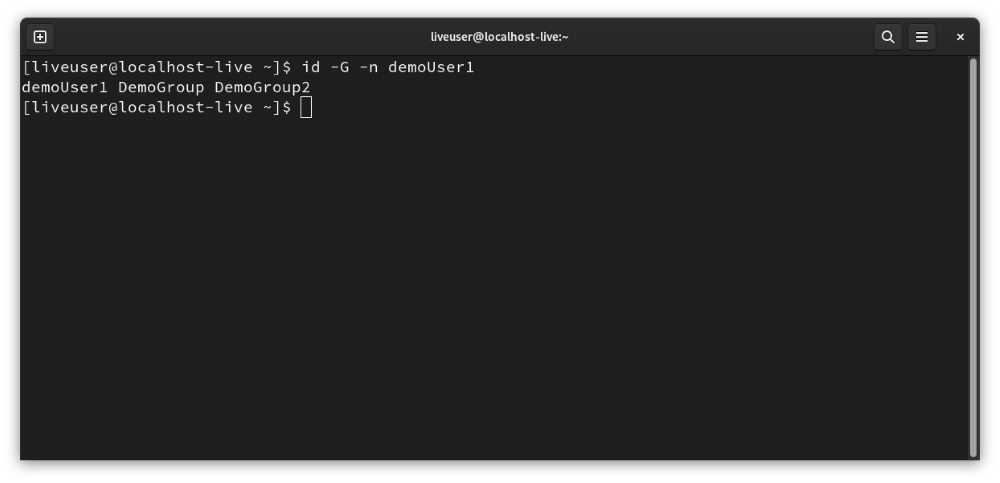
Example:
id -G -n demoUser1This confirms all groups associated with the user.
Output:
Method 3: Using the /etc/group File
The /etc/group file stores all group information on the system. Every group has an entry in this file.
1. Entry format in /etc/group file
group_name:x:group_id:user1,user2,user3- group_name: Name of the group
- group_id: Numeric group ID (GID)
- user list: Users who belong to this group
2. Manually searching /etc/group file
less /etc/group
cat /etc/group
more /etc/group
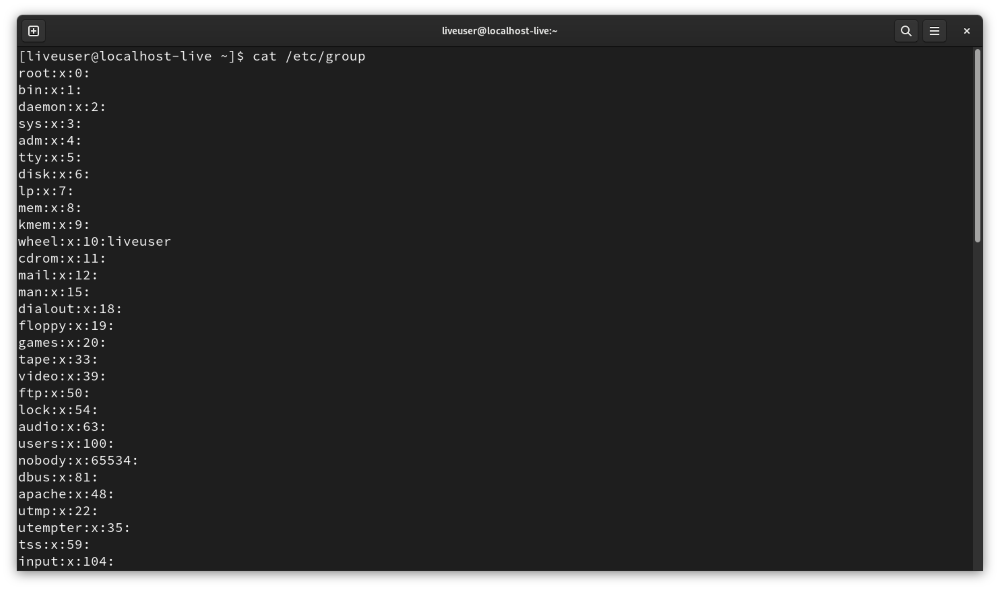
However, manual searching is not recommended on production systems because the file can be very large.
Better approach: Use grep to filter results
Instead of scrolling, you can search only the lines that contain a specific username.
Syntax:
grep -w username /etc/group- The -w flag ensures an exact match for the username
Example: Using the grep command for searching
Even the grep command is pre-installed hence no installation is required. grep command is used for pattern matching in strings. We use it here to print only those lines from the /etc/group file where our concerned username appears.
Command:
grep -w demoUser1 /etc/groupThis is used to see all groups the user belongs to.
Output:

Method 4: The "getent" command
The getent command retrieves information from system databases such as:
- /etc/group
- LDAP
- NIS
This makes it very useful in enterprise environments where users and groups may not be stored locally.
Basic command:
getent groupThis prints all group entries, which can be large and hard to read.
Recommended approach: Combine getent with grep
Syntax:
getent group | grep -w usernameExample:
getent group|grep -w demoUser1This displays only the groups where demoUser1 is a member.

