Ubuntu does not come with Google Chrome pre-installed; instead, it includes browsers like Firefox or Chromium by default. However, many users prefer Google Chrome for its speed, strong security, and wide extension support. In this guide, you’ll learn simple and reliable ways to download and install Google Chrome on Ubuntu, whether you prefer using the graphical interface or the terminal.
Prerequisites: Before proceeding, make sure you have
- Administrative access
- Active internet connection
- Ubuntu 20.04, 22.04, or 24.04
- 64-bit Ubuntu OS (Chrome does not support 32-bit systems)
Methods to Install Google Chrome on Ubuntu
There are two safe and official methods to install Google Chrome:
- GUI method (recommended for beginners)
- Terminal / command-line method (fast and efficient)
Method 1: Install Chrome on Ubuntu Using GUI
This is the easiest method, ideal for users who prefer not to use the terminal. Here’s how you can do it step-by-step:
Step 1: Download Google Chrome (.deb package)
- Open Firefox (pre-installed on Ubuntu)
- Visit the official Google Chrome download page
Note: Here we have used the browser Firefox, which comes pre-installed on Ubuntu

- Select 64-bit .deb (For Debian/Ubuntu)
- Click Accept and Install
-300.png)

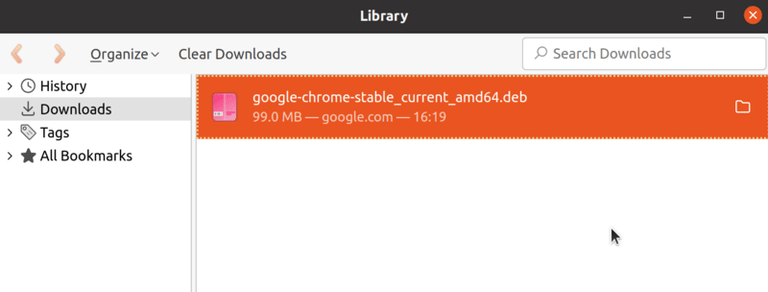
Step 2: Open the Downloaded File
- Go to Downloads
- Double-click
google-chrome-stable_current_amd64.deb - It will open in Ubuntu Software Center
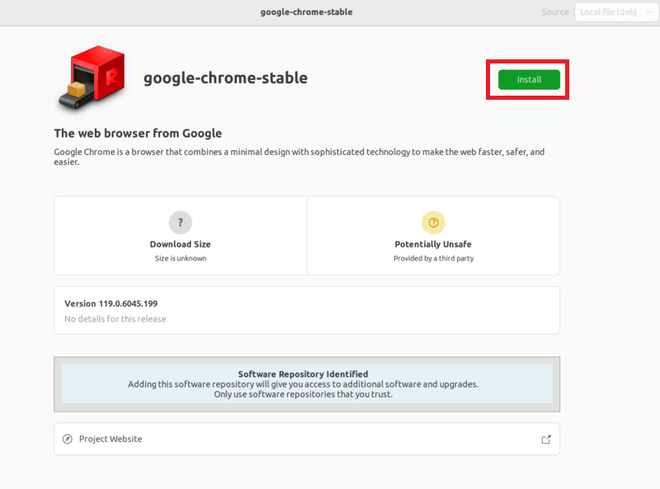
Step 3: Install Google Chrome
- Click Install
- Enter your system password when prompted
Step 4: Launch Google Chrome
- Press Super (Windows key)
- Search for Chrome
- Click the Chrome icon to launch
Method 2: Install Google Chrome Using Terminal (Command Line)
This method is preferred by advanced users or those managing systems remotely.
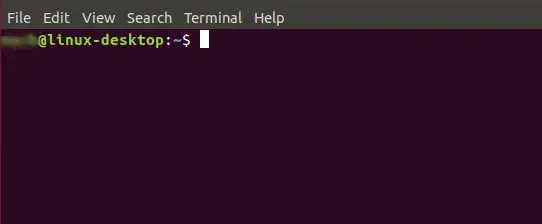
Step 1: Open Terminal
- Use the shortcut key CTRL + ALT + T to Open Terminal
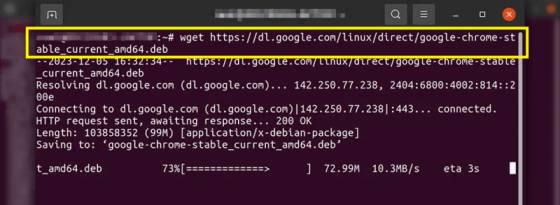
Step 2: Download the Google Chrome .deb file
- Use the
wgetcommand to download the latest version of Google Chrome’s.debpackage directly from Google’s website. - This command downloads the installation file to your current directory.
wget https://dl.google.com/linux/direct/google-chrome-stable_current_amd64.deb%3C/span>
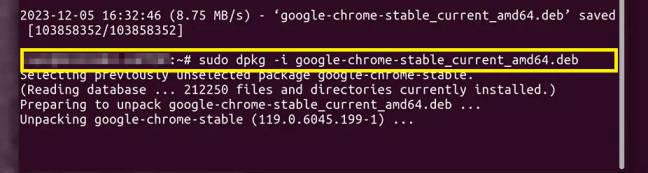
Step 3: Use "apt" to Install Google Chrome .deb file
- Now, install the downloaded
.debpackage using theaptpackage manager. If any dependencies are missing, this command will attempt to resolve them.
sudo dpkg -i google-chrome-stable_current_amd64.deb
Note: You will be required "Admin Password" or "User Password" to execute these commands > Enter the password to proceed.
Step 4: Launch Google Chrome
- Once the installation is complete, you can start Google Chrome by typing:
google-chrome
Install Google Chrome Using Official Repository (Alternative)
This method ensures automatic updates directly from Google. Here's a detailed, step-by-step guide including the necessary information for each step:
Step 1: Open Terminal
- You can open the terminal by searching for it in your system's application launcher or by pressing
Ctrl + Alt + T.
Step 2: Download Google’s Signing Key
- Google signs its software packages to verify their authenticity. Before installing Chrome, you must add Google’s GPG signing key to your system to ensure the packages are safe to install.
Run the following command in the terminal:
wget -q -O - https://dl.google.com/linux/linux_signing_key.pub | sudo apt-key add -
- This command uses
wgetto download the signing key and pipes it toapt-key add -, which adds the key to your system's list of trusted software providers.
Step 3: Set up the Repository
- After adding the signing key, you need to add the Google Chrome repository to your system’s software sources.
Execute the following command:
sudo sh -c 'echo "deb [arch=amd64] http://dl.google.com/linux/chrome/deb/ stable main" >> /etc/apt/sources.list.d/google-chrome.list'
- This command creates a new file in
/etc/apt/sources.list.d/containing the repository information. It specifies that you are adding a repository that contains software for 64-bit systems (arch=amd64) and is for stable versions of software.
Step 4: Update Package List
- Before installing Chrome, update your package list to include the new repository information:
sudo apt update
- This command tells your system to fetch the latest list of software from all repositories, including the newly added Google Chrome repository.
Step 5: Install Google Chrome
- Now that your system knows about the Google Chrome repository and trusts its signing key, you can install Chrome:
sudo apt install google-chrome-stable
- This installs the stable version of Google Chrome.
Step 6: Launch Google Chrome
Once the installation is complete, you can start Google Chrome from your application menu, or by typing google-chrome in the terminal.
How to Update Google Chrome on Ubuntu
Method 1: Automatic Updates via System Update
Google Chrome configures itself to receive updates through the standard Ubuntu system update process. To manually check for all system updates, which will include Chrome if an update is available, follow these steps:
Step 1: Open the Terminal
- You can open the terminal by pressing
Ctrl + Alt + Tor by searching for it in the Ubuntu applications menu.
Step 2: Update Package List
- First, update your package list to make sure you have the latest information on available updates. Run:
sudo apt update
Step 3: Upgrade Packages
- To upgrade all the software on your system, including Chrome, use:
sudo apt upgrade
If you want to specifically update only Chrome, you can target it with:
sudo apt install --only-upgrade google-chrome-stable
Method 2: Using the GUI Software Updater
For users who prefer a graphical interface for managing updates:
- Open Software Updater
- Install available updates (Chrome updates appear automatically)
How to Check Chrome Version in Ubuntu
If you are thinking about "What version of Google Chrome do I have?"
To verify if your Chrome is up to date follow the below steps to check your current version of chrome in Ubuntu:
- Open Chrome
- Click on three dot (⋮) > Help > About Google Chrome
- Chrome checks for updates automatically
How to Uninstall Google Chrome from Ubuntu
Now, in case you want to uninstall Chrome from Ubuntu, you can uninstall it by a few simple steps. Here are the detailed two methods:
Method 1: Uninstall Chrome Using GUI
If you prefer using a graphical interface, here’s how to uninstall Google Chrome:
Step 1: Open Ubuntu Software Center
- Find the Ubuntu Software Center in your applications menu and open it.
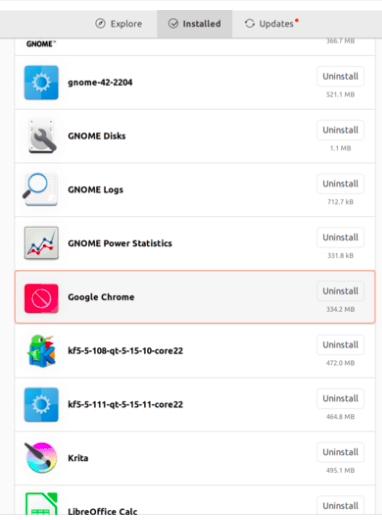
Step 2: Locate Google Chrome
- Click on the "Installed" tab to see all your installed applications.
- Use the search bar to find Google Chrome quickly.
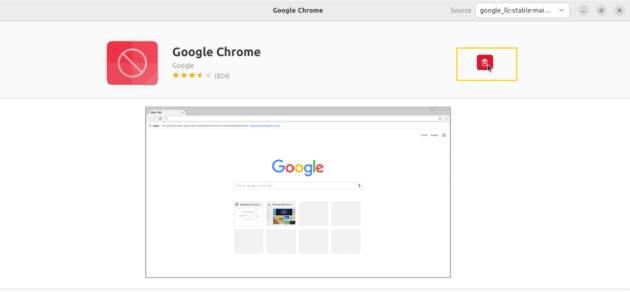
Step 3: Uninstall Google Chrome
- Click on the Google Chrome entry in the list to open its details page.
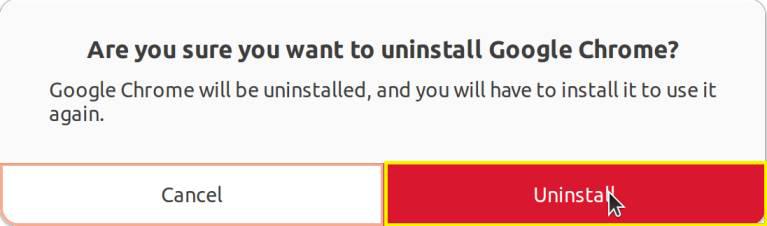
- You will see a "Remove" button. Click it, and a confirmation dialog will appear.
- Confirm that you want to uninstall by clicking "Remove" again.
Method 2: Uninstall Google Chrome Using Terminal in Ubuntu
Uninstalling Google Chrome from Ubuntu using the terminal is an efficient method that gives you control over the process and ensures that the software is completely removed. Here’s how to do it step-by-step:
Step 1: Open Terminal
- Open a terminal window by pressing
Ctrl + Alt + Ton your keyboard. Alternatively, you can search for "Terminal" in your Ubuntu system's application launcher.
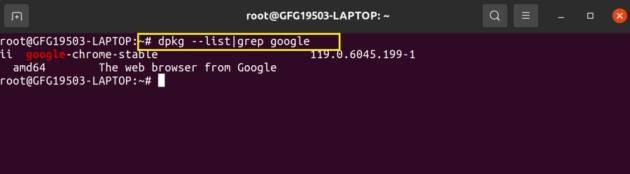
Step 2: Check All Packages Currently Installed
- Copy and paste the following command to get all packages currently installed.
dpkg --list | grep google
Step 3: Uninstall Google Chrome
- Now, Copy and paste the following command to remove Google Chrome from your system:
sudo apt --purge remove google-chrome-stable
Note: The
purgecommand is used instead ofremoveto ensure that Google Chrome and all its configuration files are completely deleted from your system.
.webp)
Step 4: Remove Unused Dependencies
- After uninstalling Google Chrome, it’s a good practice to remove any packages that were installed with Chrome and are no longer needed. Run the following command to clean up unused dependencies:
sudo apt-get autoremove
This command helps free up space by removing packages that were automatically installed to satisfy dependencies for Chrome and are no longer needed.
Step 5: Confirm Removal
- To ensure that Google Chrome has been successfully uninstalled, you can try launching it from the terminal by typing:
google-chrome
If the uninstallation was successful, you will see an error message stating that Chrome cannot be found, indicating that it is no longer installed on your system.
