Testing is a part of building reliable Spring Boot applications. It ensures components work correctly, configurations load properly and business logic behaves as expected.
Spring Boot provides testing support through:
- JUnit 5 (Jupiter): for unit and integration testing.
- Spring Test: for context loading and Spring-specific testing features.
- Mockito: for mocking dependencies.
- AssertJ : Fluent assertions
- Testcontainers: for integration tests against real databases/services.
Example: Testing a Spring Boot Application
We’ll create a Spring Boot project, add the spring-boot-starter-test dependency and run a predefined test from the application class.
Step-by-Step Implementation:
Step 1: Create a Spring Boot Project
In this step, we will create a Spring Boot project. For this, we will use Spring Initializr and once we create the project, we will import it into our Eclipse IDE.
- Spring Boot Version: 3.x
- Java Version: 17
- Dependencies: Spring Web, Spring Boot Starter Test
Below is the screenshot is given for the spring boot project configuration. Once you are done with your configuration click on Generate button, it will automatically generate a zip file for our project.

Step 2: Import Spring Boot Project in Eclipse IDE
Once we will have the zip file for our project we will import it into our IDE. For this Go to File -> Import.
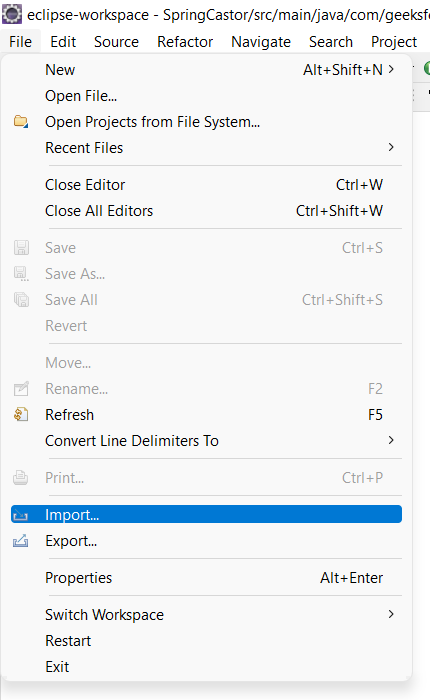
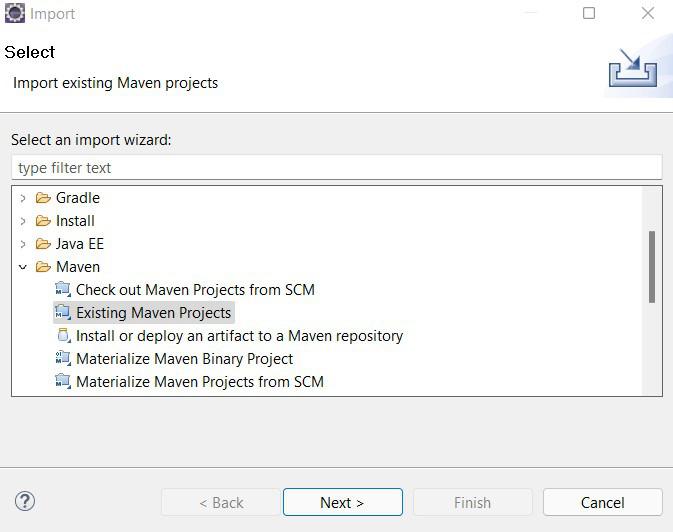
After this go to Maven Projects -> Existing Maven Project then click on the Next button.
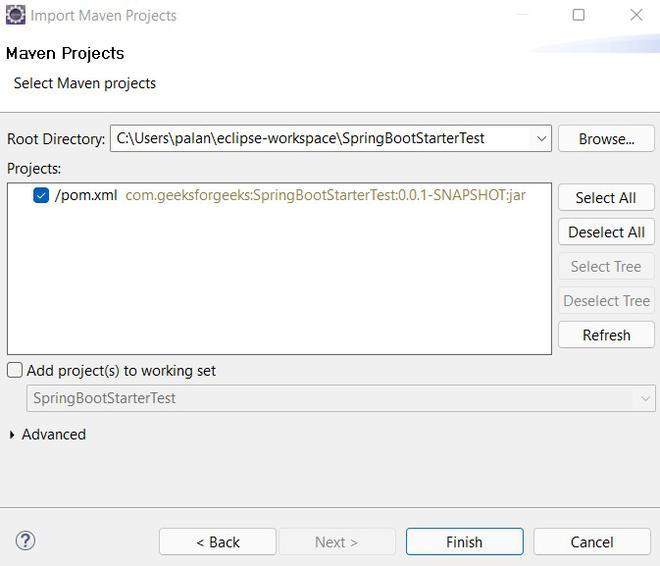
Now we need to browse to the project location and select the project directory and click on the Finish button.
Step 3: Verify Dependencies
Once we will create a spring boot project and import it into our IDE, we will find there is a file pom.xml that holds the dependencies of the project. In the pom.xml, there is already a dependency is present for the spring boot starter test.
Note: Ensure that the spring-boot-starter-test dependency is present in your pom.xml.
<dependencies>
    <dependency>
        <groupId>org.springframework.boot</groupId>
        <artifactId>spring-boot-starter</artifactId>
    </dependency>

    <dependency>
        <groupId>org.springframework.boot</groupId>
        <artifactId>spring-boot-starter-test</artifactId>
        <scope>test</scope>
    </dependency>
Explanation:
- <scope>test</scope> means the dependency is available only during testing
- Test dependencies are not included in the final production JAR/WAR
- Spring Boot 3.x uses JUnit 5 by default
Step 4: Default Test Class
After the dependencies are added and the application is successfully built. We can look is our project root path, we will find classes for the test. In our case it is named "SpringBootStarterTestApplicationTests". It is present at the src/test/java root path.

Step 5: Running the Test Class
- Right-click the test class -> Run As -> JUnit Test.
- The contextLoads() method verifies the application context loads successfully.
import org.junit.jupiter.api.Test;
import org.springframework.boot.test.context.SpringBootTest;
// @SpringBootTest annotation is used to mark a standard Spring test
@SpringBootTest
class SpringBootStarterTestApplicationTests {
    // @Test annotation marks a method as a test method
    @Test
    void contextLoads() {
    }
}
Explanation:
- @SpringBootTest: Boots up the entire application context for testing.
- @Test: Marks a method as a test case.
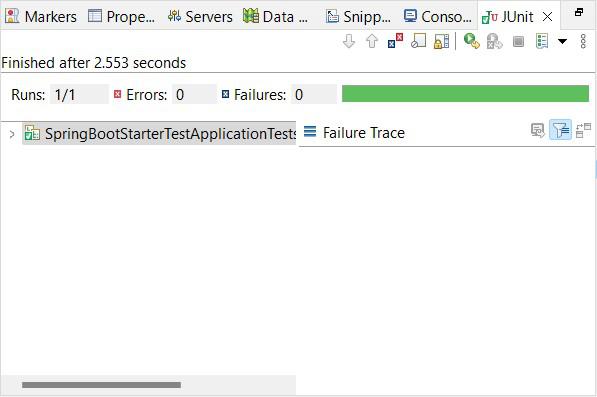
Output
- Successful test run shows green checkmarks in Eclipse or IntelliJ.
- Console output confirms context initialization.
Additional Best Practices
1. Using @TestInstance(Lifecycle.PER_CLASS)
Use @TestInstance(Lifecycle.PER_CLASS) to create a single instance of the test class for all test methods.
import org.junit.jupiter.api.TestInstance;
import org.junit.jupiter.api.TestInstance.Lifecycle;
@TestInstance(Lifecycle.PER_CLASS)
class MyTestClass {
    // Test methods
}
2. Using @AutoConfigureMockMvc for Web Tests
Use @AutoConfigureMockMvc for efficient testing of Spring MVC controllers.
@SpringBootTest
@AutoConfigureMockMvc
class MyControllerTest {
    @Autowired
    private MockMvc mockMvc;
    // Test methods using mockMvc
}
3. Using Sliced Tests for Better Performance
Use sliced tests like @WebMvcTest and @DataJpaTest to test specific layers of the application.
import org.springframework.boot.test.autoconfigure.web.servlet.WebMvcTest;
import org.springframework.test.web.servlet.MockMvc;
@WebMvcTest(MyController.class)
class MyControllerTest {
    @Autowired
    private MockMvc mockMvc;
    // Test methods
}
4. Testcontainers for Integration Testing
Testcontainers allows running tests against real databases and services using Docker.
Note: Docker must be running on the system for Testcontainers-based tests to execute successfully.
Step 1: Add Testcontainers BOM and Dependencies
<dependencyManagement>
<dependencies>
<dependency>
<groupId>org.testcontainers</groupId>
<artifactId>testcontainers-bom</artifactId>
<version>1.19.7</version>
<type>pom</type>
<scope>import</scope>
</dependency>
</dependencies>
</dependencyManagement>
<dependencies>
<dependency>
<groupId>org.testcontainers</groupId>
<artifactId>junit-jupiter</artifactId>
<scope>test</scope>
</dependency>
<dependency>
<groupId>org.testcontainers</groupId>
<artifactId>postgresql</artifactId>
<scope>test</scope>
</dependency>
</dependencies>
Step 2: PostgreSQL Integration Test Example
@Testcontainers
@SpringBootTest
class MyIntegrationTest {

    @Container
    static PostgreSQLContainer<?> postgres =
            new PostgreSQLContainer<>("postgres:15-alpine");

    @DynamicPropertySource
    static void configureProperties(DynamicPropertyRegistry registry) {
        registry.add("spring.datasource.url", postgres::getJdbcUrl);
        registry.add("spring.datasource.username", postgres::getUsername);
        registry.add("spring.datasource.password", postgres::getPassword);
    }

    @Test
    void contextLoads() {
    }
}
Explanation:
- @Testcontainers: enables container lifecycle management
- @Container: starts PostgreSQL before tests
- @DynamicPropertySource: injects container values into Spring Boot
5. AssertJ for Fluent Assertions
Use AssertJ for more readable assertions.
import static org.assertj.core.api.Assertions.assertThat;
@Test
void testAssertions() {
    String result = myService.doSomething();
    assertThat(result).isEqualTo("expectedValue");
}
6. Mockito for Mocking Dependencies
Use Mockito for mocking dependencies in unit tests.
import org.junit.jupiter.api.Test;
import org.junit.jupiter.api.extension.ExtendWith;
import org.mockito.InjectMocks;
import org.mockito.Mock;
import org.mockito.junit.jupiter.MockitoExtension;
@ExtendWith(MockitoExtension.class)
class MyServiceTest {
    @Mock
    private MyRepository myRepository;
    @InjectMocks
    private MyService myService;
    @Test
    void testServiceMethod() {
        when(myRepository.findById(anyLong())).thenReturn(Optional.of(new MyEntity()));
        // Test logic
    }
}
