








If you’ve spent a significant amount of time in Salesforce, chances are you’ve also probably been building Flows for a while now. Consistent Flow building naturally builds confidence and helps you learn your way around the tool. However, there’s still a good chance you don’t know everything it can do – and anytime is a great time to learn some handy tips and tricks.
When you’re heads-down building and troubleshooting, it’s easy to overlook smaller features that can save you a surprising amount of time and frustration. Here are some Flow Builder tricks that can help clean up your canvas, speed up development, and make you feel a little more like a Flow power user (yes, even if you’ve never considered yourself one).
1. Copying and Pasting Multiple Elements
This one’s simple. Some may already be familiar with it, but it’s worth highlighting because it’s genuinely useful. Did you know you can select multiple elements at once and copy them as a group?
First, make sure you’re in Auto-layout mode and click the Select Elements icon on the upper left. Then, click the plus sign for every element you want copied. When done, click the Copy Elements button. This then adds your selection to the clipboard.
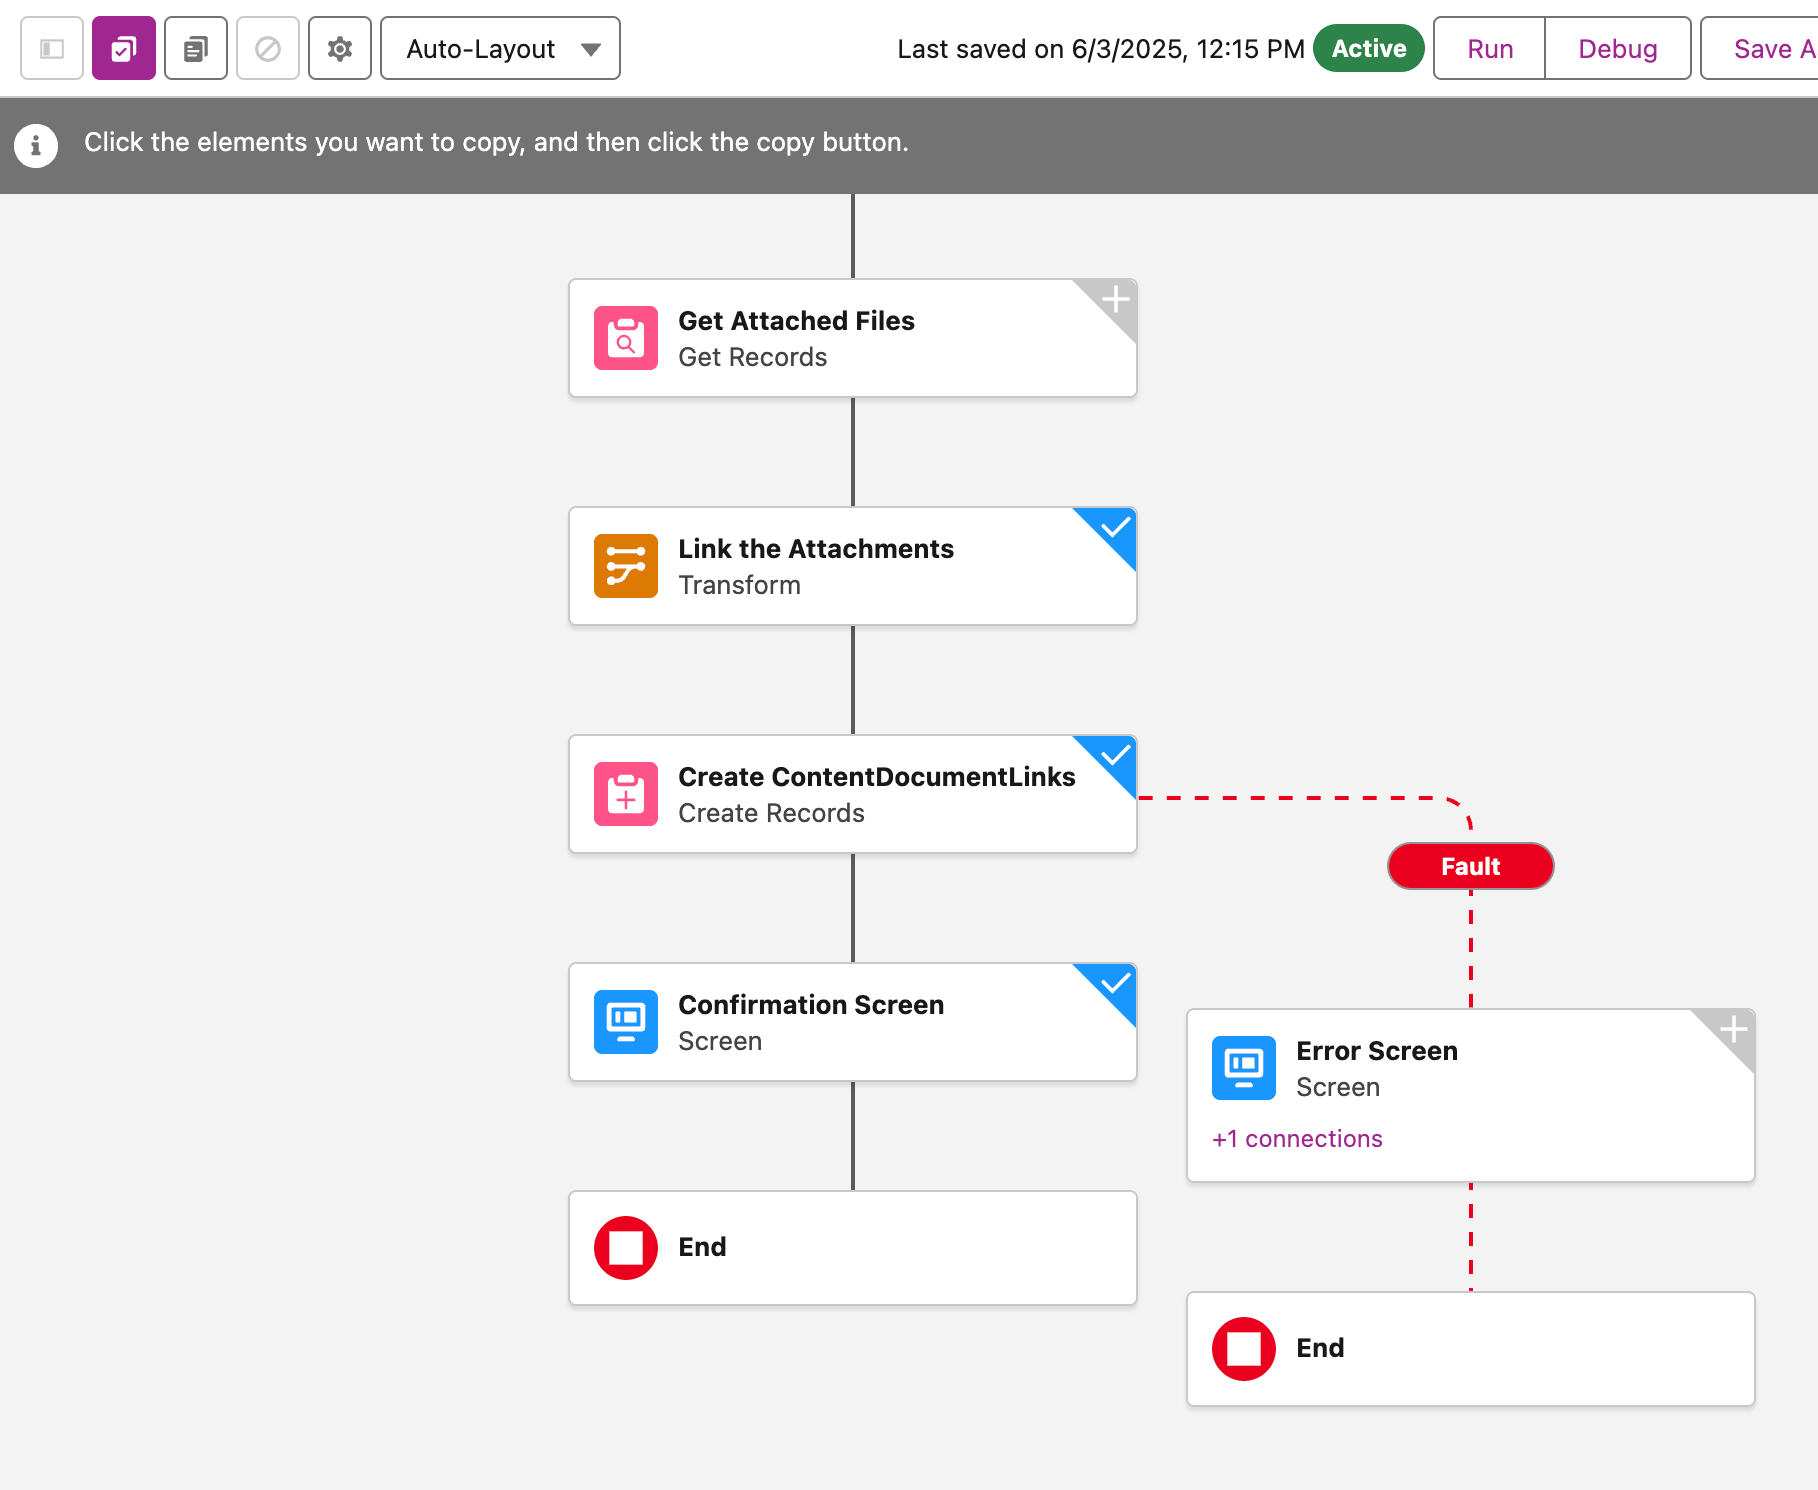

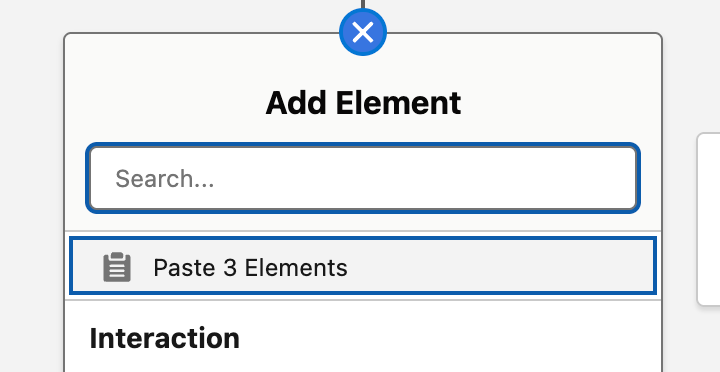
Pasting is just as easy – just click the plus sign anywhere on the canvas, and it automatically gives you the option to paste your copied elements in one go.
One thing to keep in mind, though, is that when selecting multiple elements, they need to be connected to each other. So if you’re trying to grab one element from one branch of a Decision element and another from a different branch, Flow Builder won’t let you do that in the same selection.
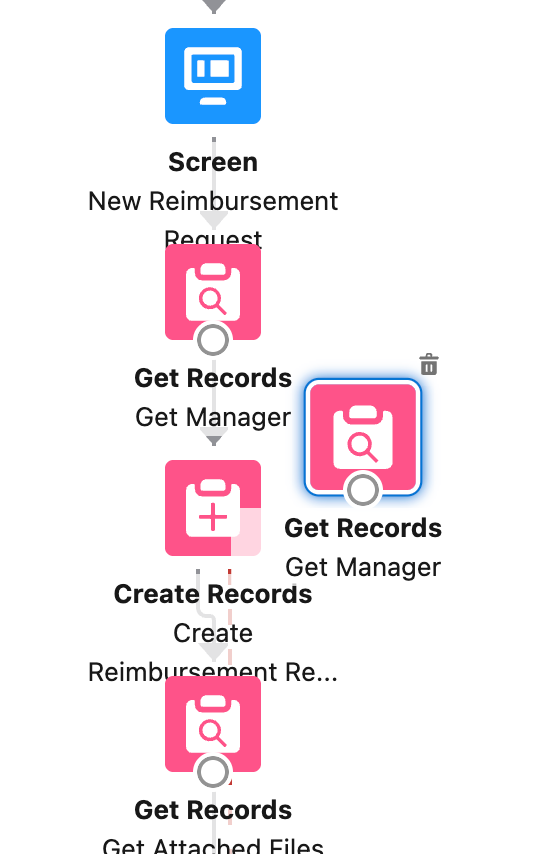
Another thing to note is that if you’re working in Freeform mode, copy-pasting works differently. You can’t copy multiple elements at once, as you’ll need to duplicate each element one by one by selecting it then clicking the duplicate button.
2. Reroute a Branch (Without Copy-Pasting)
The copy-paste method above can be used to reroute a group of elements to another decision element branch, but here’s another way to do the exact same thing without copying and pasting anything at all.
If you’re still in Auto-layout, switch to Freeform mode. Delete the connector for the branch where your elements currently are. Now, you’ll have the option to add a new connector pointing to an entirely different branch. Add that connector, and the whole chain of elements moves over to the new connector.
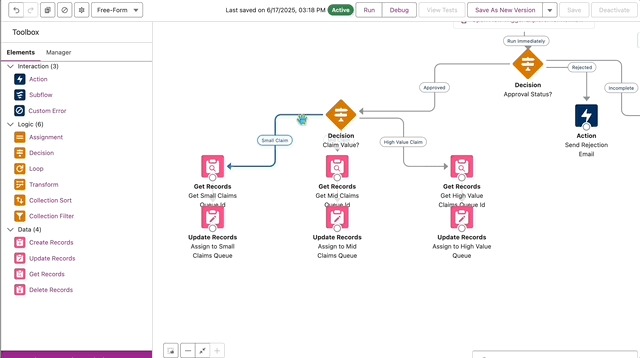
Switch back to Auto-layout to see the new placements.
3. Collapse Branches
If you’re working on a mature org, then chances are you’ve inherited some pretty complex flows from admins past (you know, those that have grown into a total spaghetti mess).
Following Spring ‘26, Flow Builder lets you collapse Decision element branches so you can stay focused on the parts of the flow that matter in the moment. Say, for example, you’re presenting the flow to a co-admin. You can keep everyone’s attention on a single Decision element at a time without the rest of the canvas cluttering the view. Plus, you won’t need to drag your flow around the canvas so much!
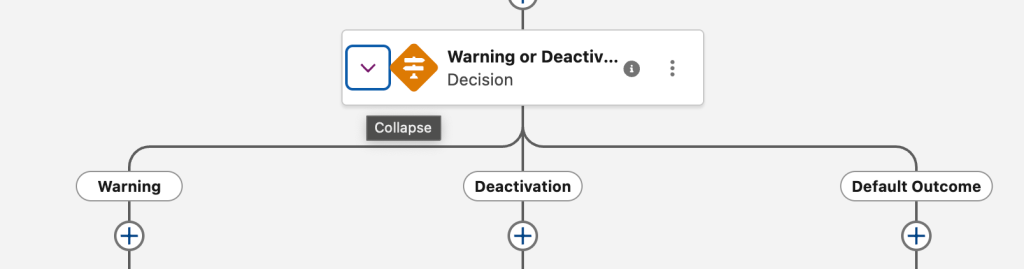
And as of Summer ’26, this also extends to fault paths! So you can collapse those too and keep them out of the way when you’re focused on the main flow logic. Expand them only when you actually need to review or edit them. Less visual noise all around is always a win.
Another useful trait of this feature is that it remembers which branches you had collapsed the last time the Flow was opened (considering you’re using the same device and browser). So the next time you open the flow, it picks up right where you left off. It’s also your personal view, so collapsing branches doesn’t affect anyone else working in the same flow.
4. Flow Builder Keyboard Shortcuts
Thank heavens we’ve evolved past using typewriters, as I usually get a lot of typos when writing and Ctrl + Z is my favorite keyboard shortcut of all time. But did you know that familiar shortcuts like Ctrl + Z also work inside Flow Builder?
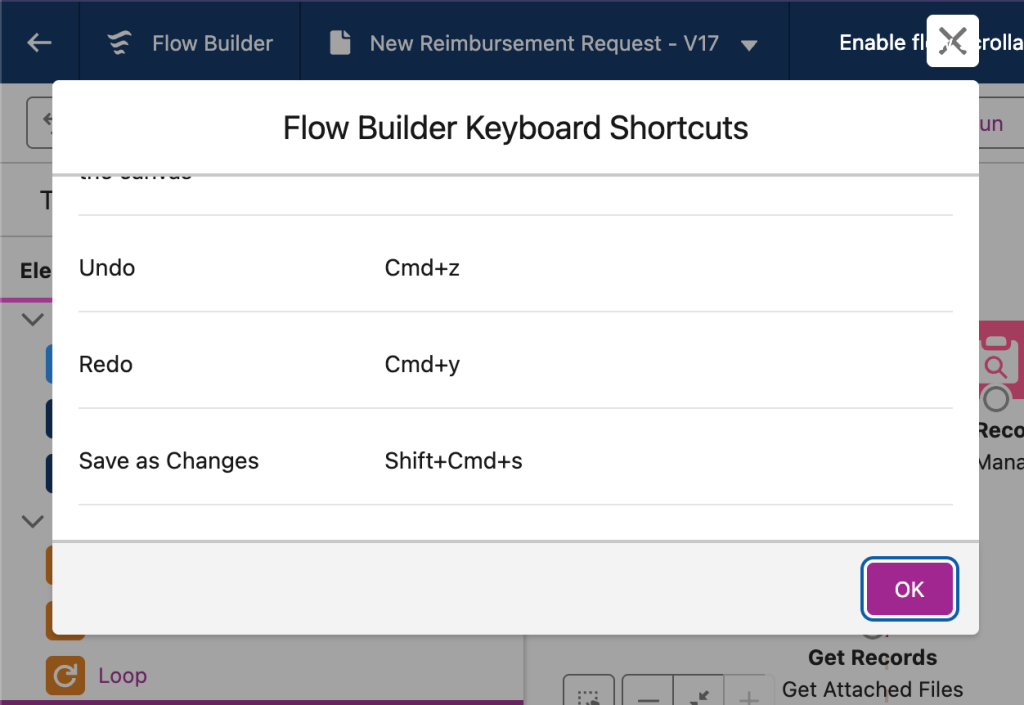
A lot of the shortcuts are about navigating and adjusting your canvas view, such as zooming in or out or even viewing an element’s description without having to open its full configuration.
To see the full list of available keyboard shortcuts, just press Ctrl + / (or Command + / for Mac) while inside Flow Builder. It’s a quick way to discover shortcuts you didn’t know existed! Once you start using them, navigating larger flows gets a lot less painful.
5. Compare Flow Versions
If you’ve been building and troubleshooting a single flow for a while, you know it’s easy to rack up a lot of versions. And if you’re still opening multiple browser tabs to compare two versions side by side – there’s a better way!
Flow Builder has a built-in version comparison tool. When going through your list of flow versions on the upper part of the canvas, scroll down until you get to the very first version.
Below it, you should see “Compare Versions”. Click it, and it should take you to the tool where you can pick two versions of the same flow. Click “Compare Versions” and Flow Builder does the analysis for you. If you’ve been exhausted hunting through Decision element branches or individual elements trying to figure out what changed between versions, this will feel like a massive time-saver.
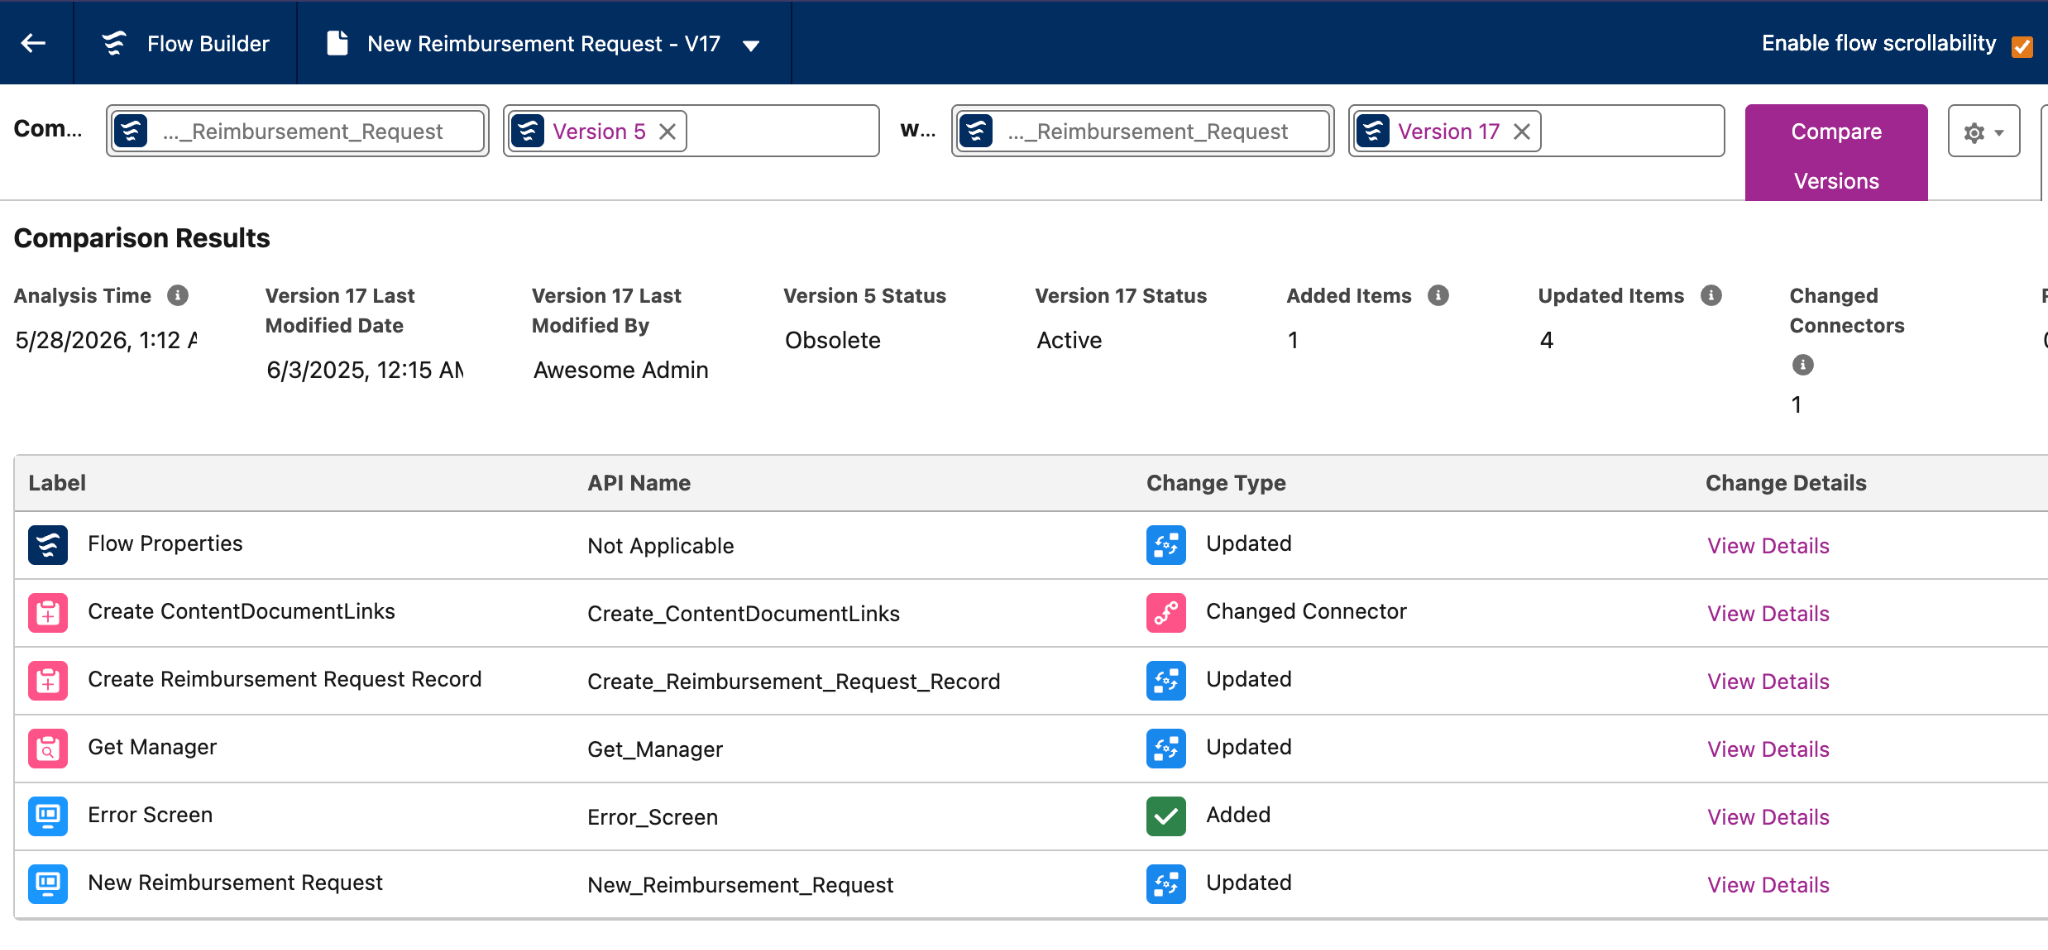
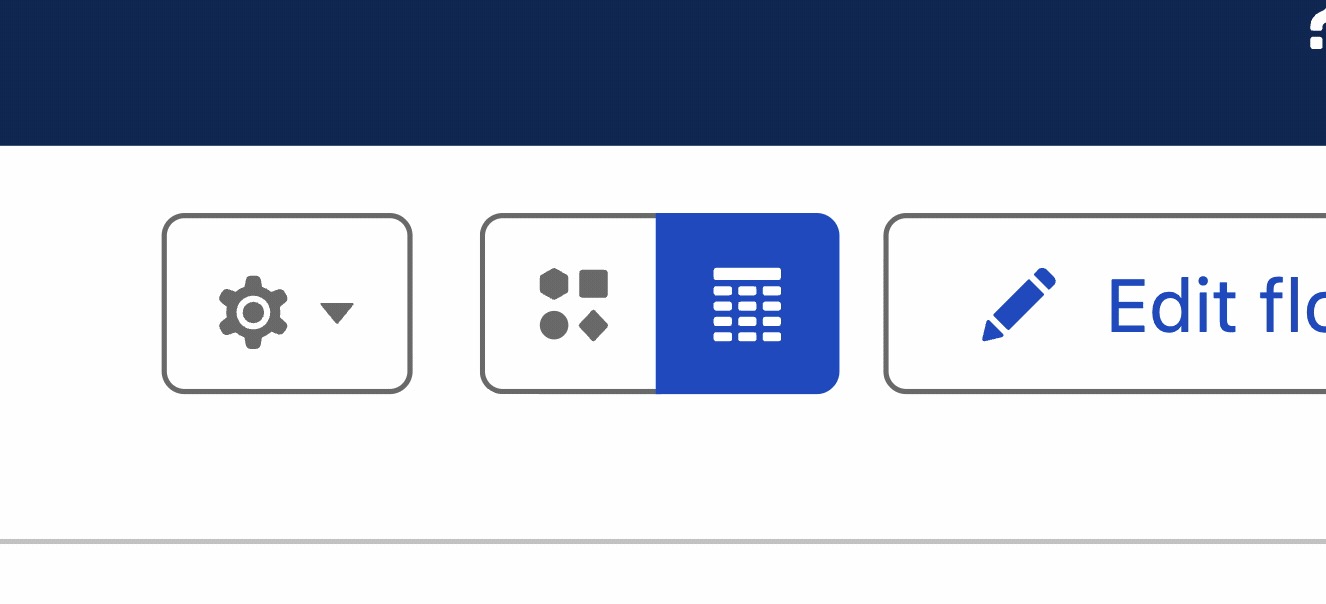
Salesforce’s latest development with this comparison tool is adding a visual version of it as well as support for the Transform element. What more could we ask for?
Bonus: Naming Conventions and Descriptions
I know this is more of a best practice than a tip or trick, but if it saves you time and headaches, then it’s a trick in my book!
When you’re busy building flows, it’s so easy to get lost in it and just add element after element. Get into the habit of naming your elements clearly and filling in the Description field – yes, even if it’s just one sentence explaining what the element does and why it’s there.
I know this feels like a boring, tedious step in the moment. But we all know it’s a basic thing to do, and it can potentially save you a lot of time six months from now when you’re back in this flow trying to remember why you built it this way. Or, what if someone else has to maintain it in the future? That little description will definitely save a lot of confusion.
As for naming conventions: make it a habit to come up with a standard naming pattern across your org. Opt for a format that tells you the object and the purpose in a single glance. For example: Opportunity_Update_Stage tells you the Flow is on the Opportunity object and that it updates the Opportunity Stage. One glance, and you already know what you’re working with. It’s simple, but it adds clarity that compounds over time, especially as your org’s automation layer grows.
Summary
And that’s a wrap on some of my favorite Flow Builder tricks! Some of these might’ve been sitting just one click away from you this whole time. But really, isn’t that part of working with Salesforce? Sometimes you discover a feature and immediately think, “Wait… I could’ve been doing it this way all along!”
Judging by the number of significant Flow advancements that Salesforce keeps rolling out with every release, we know that Flow Builder will only get better with time. With three major releases each year, it can get quite difficult to keep up with every new feature and setting.
Still, some of these smaller tricks can make a surprisingly big difference in day-to-day admin life. The hardest part is often just knowing they exist, which is exactly why I wanted to put this list together.
If any of these were new to you, try one out the next time you’re in Flow Builder and let me know how it goes. And if you’ve been sitting on a Flow trick of your own that didn’t make this list, drop it in the comments! I’m always on the lookout for more, and honestly, some of the best tips I’ve ever picked up came straight from the community. Let’s keep sharing and help each other build smarter – one flow at a time.