


Tiny and inexpensive, the Raspberry Pi is a great addition to your computing space if you want a highly versatile SBC to bring a host of impressive projects to life. While the Raspberry Pi is pretty capable on its own, you can boost its functionality by plugging in additional modules – like a sensor capable of displaying the temperature, air pressure, and even humidity values.
While a Raspberry Pi-powered weather station sounds like a fun project, it can get rather confusing at times, especially if you're new to the dazzling world of SBCs. So, we’ve created a step-by-step guide to help you out with the task!
What you’ll need
It goes without saying that a Raspberry Pi will serve as the heart of the project. Although you can grab any mainline Raspberry Pi model for the weather station, owners of certain RPi Zero boards will need to solder GPIO pins onto their SBCs before they can attach a weather sensor.
Speaking of the sensor, we’ll be going with the affordable BME280 module from Waveshare, which comes with a set of jumper cables. Another benefit of Waveshare's BME280 kit is that it has all the pins pre-soldered on the sensor board, so you don’t have to spend an entire afternoon making the sensor battle-ready with the help of a soldering station.
Finally, you’ll require a microSD card with a minimum capacity of 8GB. We’ll assume you’ve already flashed a Debian-based operating system onto the card. I’ll be using the Raspberry Pi OS for the tutorial, and you can easily flash it by following the general procedure outlined in our Ubuntu installation guide.
-
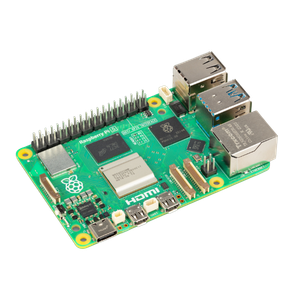
Raspberry Pi 5
- CPU
- Arm Cortex-A76 (quad-core, 2.4GHz)
- Memory
- Up to 8GB LPDDR4X SDRAM
- Operating System
- Raspberry Pi OS (official)
- Ports
- 2× USB 3.0, 2× USB 2.0, Ethernet, 2x micro HDMI, 2× 4-lane MIPI transceivers, PCIe Gen 2.0 interface, USB-C, 40-pin GPIO header
- GPU
- VideoCore VII
- Starting Price
- $60
-

Connecting the BME280 module to the Raspberry Pi
Before you can start dabbling with the software aspect of the project, you’ll need to physically connect the BME280 sensor to your Raspberry Pi board.
1. Attach the jumper cables to the BME280 sensor.
2. Open the Raspberry Pi pinout diagram on your PC or smartphone. All mainline RPi boards have identical pin placement, so you can use the same diagram for reference regardless of your model.

3. With the help of the pinout diagram, carefully connect each jumper cable to its correct GPIO pin on the Raspberry Pi.

Here’s a quick rundown of the connections in my setup: I paired the VCC pin on the BME280 module (the red cable) to the 5V Power GPIO connector (pin 4) on my Raspberry Pi. Similarly, I attached the SCL/SCK pin (yellow wire) to the SCL/GPIO 3 (pin 5), the SDA/MOSI pin (blue cable) to SDA/GPIO 2 (pin 3), and the GND pin (black wire) to the Ground GPIO pin. However, I left the ADDR/MISO (address) and CS (chip select) pins unplugged, as there was no need to use them in this project.
4. Insert the microSD card containing the Raspberry Pi OS into your RPi board before powering it on.
Enabling the I2C bus in the Raspberry Pi OS
Next, you’ll have to switch on the I2C interface in your Raspberry Pi’s operating system before you can access the BME280 sensor.
1. Launch the terminal app.

2. Open the Raspberry Pi Configuration Tool using the raspi-config command:
sudo raspi-config

3. Head to the Interface Options tab.

4. Select the I2C setting and press OK when prompted to enable the interface.

5. Scroll over to the Finish button and press Enter to exit the configuration menu.
6. Execute the i2cdetect command to check whether the BME280 sensor is detected by the Raspberry Pi.
i2cdetect -y 1

If the terminal displays 0x76 or 0x77 on the address table, you’re clear to proceed ahead. Otherwise, you’ll have to replug the connectors and try again.
Setting up the weather station
With the BME280 sensor connected to your Raspberry Pi, it’s time to install the packages required for the weather station. The BME280 package is essential if you want to write your own Python script for the weather station. Meanwhile the WiringPi repository is necessary since we'll be using certain functions from its library in this tutorial.
1. If you’re on the Bookworm version of the Raspberry Pi OS, the EXTERNALLY-MANAGED file can cause issues when you attempt to install packages via pip. As such, you should execute these commands to insert the break-system-packages variable into the pip.conf file and set its value to true.
grep -q '\[global\]' /etc/pip.conf 2> /dev/null || printf '%b' '[global]\n' | sudo tee -a /etc/pip.conf > /dev/nullsudo sed -i '/^\[global\]/a\break-system-packages=true' /etc/pip.conf

2. Install the BME280 package by running this command:

3. Head to the release page of WiringPi and download the latest version of the repository.
4. Inside the terminal, use the cd command to navigate to the Downloads folder.
cd Downloads

5. Execute the following command to install WiringPi:
sudo apt install ./wiringpi_version

After you’ve installed both packages, you’re free to download your favorite Python code repository from GitHub to turn the Raspberry Pi into a weather station… or even write the script from scratch if you’re well-versed in programming. We’ll go with the official documentation provided by Waveshare to keep things simple.
1. Scroll down to the Code section on Waveshare’s website, download the Demo Code, and extract it to your preferred location.

2. Use the cd command followed by the directory of the extracted folder.
cd /home/user/BME280_directory_location

3. Open the main.c file using the Nano editor and make sure the value after ADDR_SEC reads 0x77.

If the terminal displayed 76 when you ran the i2cdetect command earlier, be sure to replace 0x77 with 0x76.
4. Once you’re done, press Ctrl+X to head back to the terminal.
5. Compile the main.c script by executing the following commands:
sudo make cleansudo make

6. Finally, run the following command to execute the weather monitoring script you compiled in the last step.
sudo ./bme280

Keeping a weather eye on the environmental parameters with your Raspberry Pi

Assuming you followed everything correctly, the bme280 script should run without any issues, and you'll be able to view the temperature, pressure, and humidity readings inside the terminal. By default, the script will display new values every second, but you can modify the main.c file to change the frequency of the updates.
But if you're unable to get the hang of setting up the weather station, then it's best to start with a simple project and work your way back to this article once you're comfortable using the Raspberry Pi. I recommend going through our guides on creating a Raspberry Pi-powered firewall and an FM radio as they'll help you get familiar with the ins-and-outs of the SBC.
