Auditing with Hibernate Envers in Spring Boot allows automatic tracking of entity changes such as insert, update, and delete operations. It maintains historical data without requiring manual audit logic or separate tracking code.
- Automatically creates audit tables to store entity history
- Uses annotations like
@Auditedfor easy configuration - Helps track who changed data and when (with timestamps)
Key Components of Auditing
- Change Tracking: Monitoring what changes are made to the data.
- Versioning: Maintaining different versions of the data over time.
- Metadata Recording: Capturing who made the changes and when they were made.
- Historical Data Access: Providing mechanisms to retrieve past states of the data.
Why Auditing is Required?
Auditing serves multiple critical purposes in applications:
- Compliance and Regulatory Requirements: Many industries, such as finance, healthcare, and government, are subject to strict regulations that mandate data auditing. Ensuring compliance helps avoid legal penalties and maintains trust with stakeholders.
- Data Integrity and Security: Auditing helps detect unauthorized or malicious access by providing a trail of who accessed or modified data, ensuring that data remains accurate and reliable over time.
- Troubleshooting and Debugging: When issues arise, audit logs can provide valuable insights into the sequence of events leading to the problem, facilitating efficient troubleshooting and debugging.
- Historical Analysis and Reporting: Auditing data allows for historical analysis, trend identification, and comprehensive reporting, which can inform business decisions and strategies.
- Accountability and Transparency: Auditing fosters accountability by attributing data changes to specific users or processes, promoting transparency within the organization.
Unique Facts About Auditing Using Hibernate Envers
Hibernate Envers simplifies the auditing process by automatically tracking entity changes and maintaining audit tables. Here’s what makes Hibernate Envers unique:
- Seamless Integration with Hibernate ORM: Envers integrates tightly with Hibernate ORM, leveraging its mapping and session management capabilities. This ensures efficient and consistent auditing without significant overhead.
- Annotation-Based Configuration: Using annotations like
@Audited, developers can easily specify which entities and fields should be audited, reducing configuration complexity. - Automatic Audit Table Creation: Envers automatically generates and manages the audit tables corresponding to audited entities. These tables store the historical records of entity changes without manual intervention.
- Versioning Support: Envers maintains different versions of the entities, allowing retrieval of entity states at any revision. This facilitates comprehensive historical data access.
- Flexible Querying: It provides APIs to query historical data, such as retrieving revisions, tracking changes over time, and comparing different versions of entities.
- Minimal Boilerplate Code: It handles auditing logic internally, minimizing the need for boilerplate code and allowing developers to focus on business logic.
- Customization Capabilities: While Envers offers sensible defaults, it allows customization of auditing behavior, such as defining custom revision entities or excluding specific fields from auditing.
Using the In-built Auditing Mechanism in Spring Boot
Spring Boot, combined with Hibernate Envers and Spring Data JPA, provides robust auditing capabilities. Below are the steps to implement auditing in a Spring Boot application using Hibernate Envers.
Step 1: Create a New Spring Boot Project
Create a new Spring Boot project using IntelliJ IDEA. Choose the following options:
- Name:
spring-boot-audit-example - Language: Java
- Type: Maven
- Packaging: Jar
Click on the Next button.

Step 2: Add the Dependencies
Add the following dependencies into the Spring Boot.
- Spring Web
- Spring Data JPA
- MySQL Driver
- Spring Boot DevTools
Click on the Create button.

External Dependency:
<!-- https://mvnrepository.com/artifact/org.hibernate/hibernate-envers -->
<dependency>
   <groupId>org.hibernate</groupId>
   <artifactId>hibernate-envers</artifactId>
   <version>3.5.3-Final</version>
</dependency>
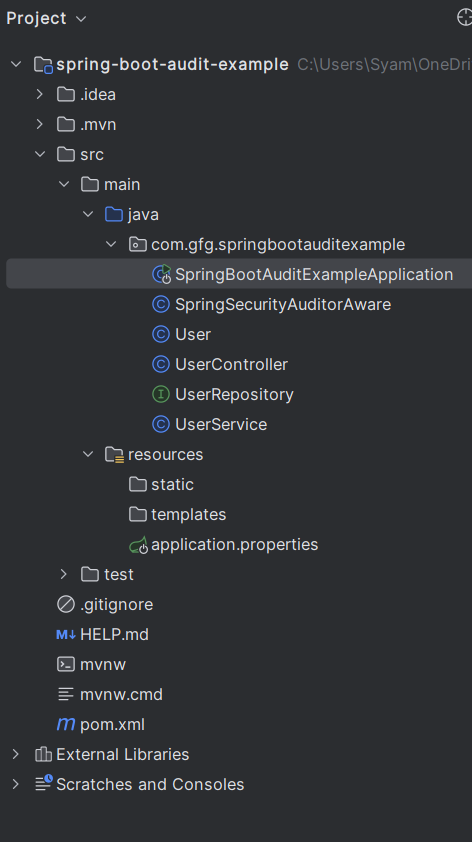
Project Structure
After the project creation done, the folder structure will look like the below image:
Step 3: Configure Application Properties
Open the application.properties file and add the following configuration for MySQL and Hibernate Envers properties:
spring.application.name=spring-boot-audit-example
spring.datasource.url=jdbc:mysql://localhost:3306/audit_example
spring.datasource.username=root
spring.datasource.password=mypassword
spring.jpa.hibernate.ddl-auto=update
spring.jpa.show-sql=true
spring.jpa.properties.hibernate.ejb.interceptor=org.hibernate.envers.event.EnversIntegrator
Step 4: Create the User Class
Create the User entity that will be audited in your Spring Boot project.
User.java:
package com.gfg.springbootauditexample;


import jakarta.persistence.Entity;
import jakarta.persistence.GeneratedValue;
import jakarta.persistence.GenerationType;
import jakarta.persistence.Id;
import lombok.AllArgsConstructor;
import lombok.Data;
import lombok.NoArgsConstructor;
import org.hibernate.envers.Audited;
import org.springframework.data.annotation.CreatedDate;
import org.springframework.data.annotation.LastModifiedDate;


import java.time.LocalDateTime;

@Entity
@Audited
@Data
@AllArgsConstructor
@NoArgsConstructor
public class User {

    @Id
    @GeneratedValue(strategy = GenerationType.IDENTITY)
    private Long id;

    private String name;

    private String email;
    @CreatedDate
    private LocalDateTime createdDate;

    @LastModifiedDate
    private LocalDateTime lastModifiedDate;

}
Step 5: Create the UserRepository Interface
package com.gfg.springbootauditexample;

import org.springframework.data.jpa.repository.JpaRepository;

public interface UserRepository extends JpaRepository<User, Long> {
}
Step 6: Create the UserService Class
Create the UserService class to handle user-related operations in the Spring Boot application.
UserService.java:
package com.gfg.springbootauditexample;


import org.springframework.beans.factory.annotation.Autowired;
import org.springframework.stereotype.Service;

import java.util.List;

@Service
public class UserService {

    @Autowired
    private UserRepository userRepository;

    public User saveUser(User user) {
        return userRepository.save(user);
    }

    public List<User> getAllUsers() {
        return userRepository.findAll();
    }

    public User getUserById(Long id) {
        return userRepository.findById(id).orElse(null);
    }

    public void deleteUser(Long id) {
        userRepository.deleteById(id);
    }
}
Step 7: Create the UserController Class
Create the UserController class to expose the user API endpoints of the Spring Boot application.
UserController.java:
package com.gfg.springbootauditexample;


import org.springframework.beans.factory.annotation.Autowired;
import org.springframework.http.ResponseEntity;
import org.springframework.web.bind.annotation.*;

import java.util.List;

@RestController
@RequestMapping("/api/users")
public class UserController {

    @Autowired
    private UserService userService;

    @PostMapping
    public ResponseEntity<User> createUser(@RequestBody User user) {
        return ResponseEntity.ok(userService.saveUser(user));
    }

    @GetMapping
    public List<User> getAllUsers() {
        return userService.getAllUsers();
    }

    @GetMapping("/{id}")
    public ResponseEntity<User> getUserById(@PathVariable Long id) {
        return ResponseEntity.ok(userService.getUserById(id));
    }

    @DeleteMapping("/{id}")
    public ResponseEntity<Void> deleteUser(@PathVariable Long id) {
        userService.deleteUser(id);
        return ResponseEntity.noContent().build();
    }
}
Step 8: Main Class
No changes are required in the main class.
package com.gfg.springbootauditexample;

import org.springframework.boot.SpringApplication;
import org.springframework.boot.autoconfigure.SpringBootApplication;
import org.springframework.data.jpa.repository.config.EnableJpaAuditing;

@SpringBootApplication
@EnableJpaAuditing
public class SpringBootAuditExampleApplication {

    public static void main(String[] args) {
        SpringApplication.run(SpringBootAuditExampleApplication.class, args);
    }

}
pom.xml File:
<?xml version="1.0" encoding="UTF-8"?>
<project xmlns="https://maven.apache.org/POM/4.0.0" xmlns:xsi="https://www.w3.org/2001/XMLSchema-instance"
         xsi:schemaLocation="https://maven.apache.org/POM/4.0.0 https://maven.apache.org/xsd/maven-4.0.0.xsd">
    <modelVersion>4.0.0</modelVersion>
    <parent>
        <groupId>org.springframework.boot</groupId>
        <artifactId>spring-boot-starter-parent</artifactId>
        <version>3.3.4</version>
        <relativePath/> <!-- lookup parent from repository -->
    </parent>
    <groupId>com.gfg</groupId>
    <artifactId>spring-boot-audit-example</artifactId>
    <version>0.0.1-SNAPSHOT</version>
    <name>spring-boot-audit-example</name>
    <description>spring-boot-audit-example</description>
    <url/>
    <licenses>
        <license/>
    </licenses>
    <developers>
        <developer/>
    </developers>
    <scm>
        <connection/>
        <developerConnection/>
        <tag/>
        <url/>
    </scm>
    <properties>
        <java.version>17</java.version>
    </properties>
    <dependencies>
        <dependency>
            <groupId>org.springframework.boot</groupId>
            <artifactId>spring-boot-starter-data-jpa</artifactId>
        </dependency>
        <dependency>
            <groupId>org.springframework.boot</groupId>
            <artifactId>spring-boot-starter-web</artifactId>
        </dependency>
        <!-- https://mvnrepository.com/artifact/org.hibernate/hibernate-envers -->
        <dependency>
            <groupId>org.hibernate</groupId>
            <artifactId>hibernate-envers</artifactId>
            <version>3.5.3-Final</version>
        </dependency>


        <dependency>
            <groupId>org.springframework.boot</groupId>
            <artifactId>spring-boot-devtools</artifactId>
            <scope>runtime</scope>
            <optional>true</optional>
        </dependency>
        <dependency>
            <groupId>com.mysql</groupId>
            <artifactId>mysql-connector-j</artifactId>
            <scope>runtime</scope>
        </dependency>
        <dependency>
            <groupId>org.projectlombok</groupId>
            <artifactId>lombok</artifactId>
            <optional>true</optional>
        </dependency>
        <dependency>
            <groupId>org.springframework.boot</groupId>
            <artifactId>spring-boot-starter-test</artifactId>
            <scope>test</scope>
        </dependency>
    </dependencies>

    <build>
        <plugins>
            <plugin>
                <groupId>org.springframework.boot</groupId>
                <artifactId>spring-boot-maven-plugin</artifactId>
                <configuration>
                    <excludes>
                        <exclude>
                            <groupId>org.projectlombok</groupId>
                            <artifactId>lombok</artifactId>
                        </exclude>
                    </excludes>
                </configuration>
            </plugin>
        </plugins>
    </build>

</project>
Step 9: Run the Application
Once the project will be completed, it will run and start at port 8080. It will automatically create the necessary database tables, including the audit tables.
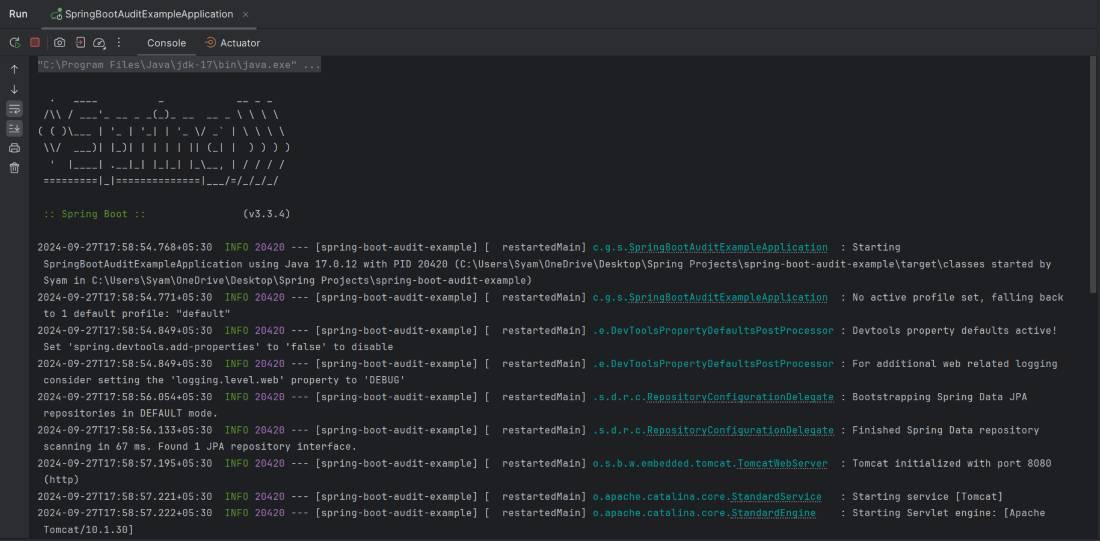
Console Logs:

Step 10: Testing the Application
To test the auditing functionality, you can use tools like Postman or cURL to interact with the API endpoints:
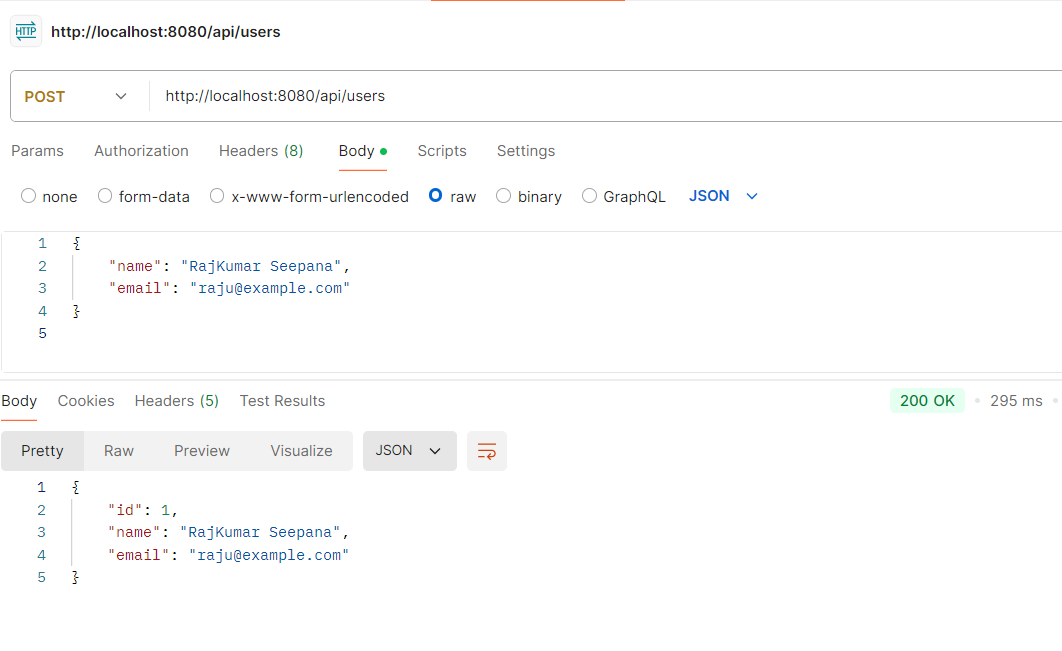
1. Create a User
Make a POST request to /api/users with a JSON body.
POST http://localhost:8080/api/usersOutput:
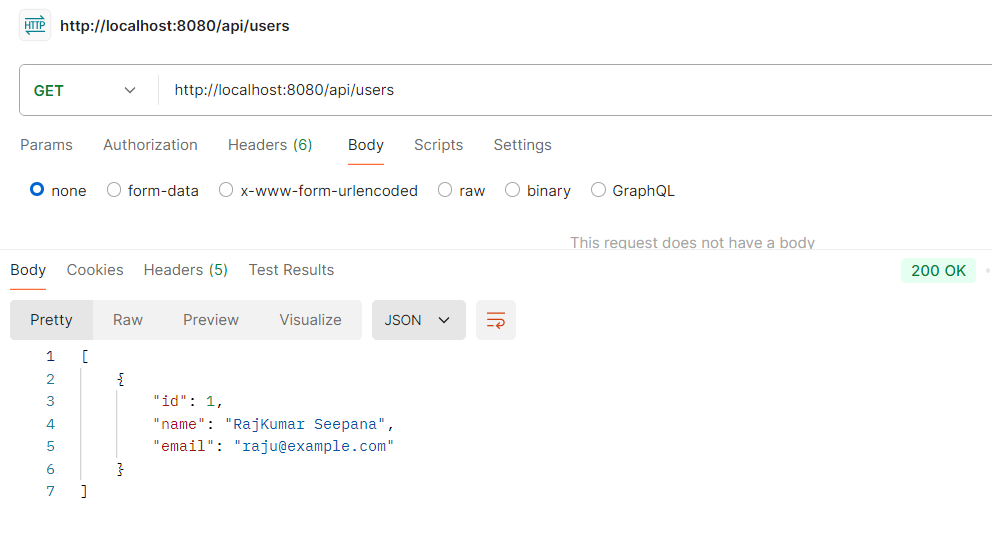
2. Get All Users
Make a GET request to /api/users to retrieve all users.
GET http://localhost:8080/api/usersOutput:
3. Get a User by ID
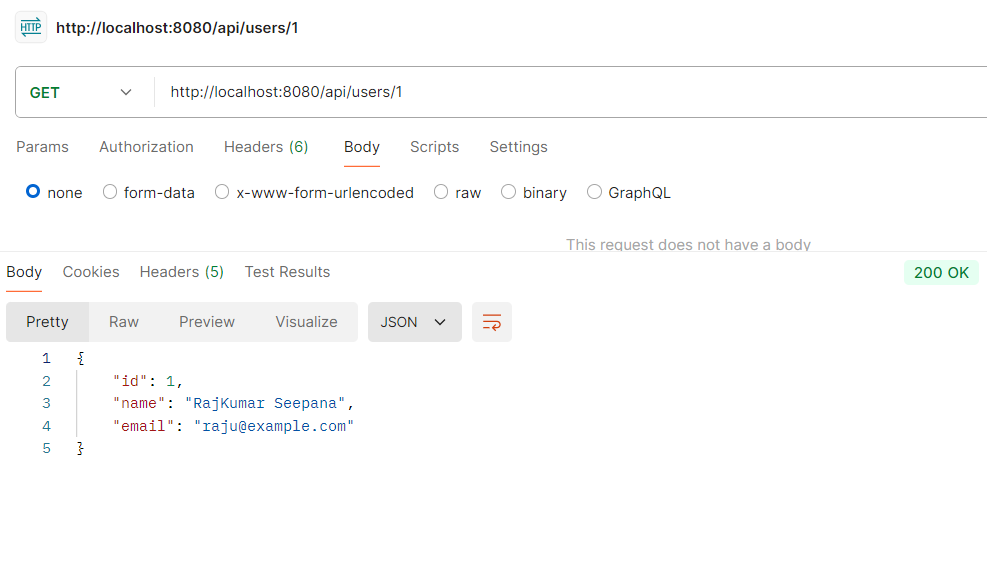
Make a GET request to /api/users/{id} to retrieve a specific user.
GET http://localhost:8080/api/users/1Output:
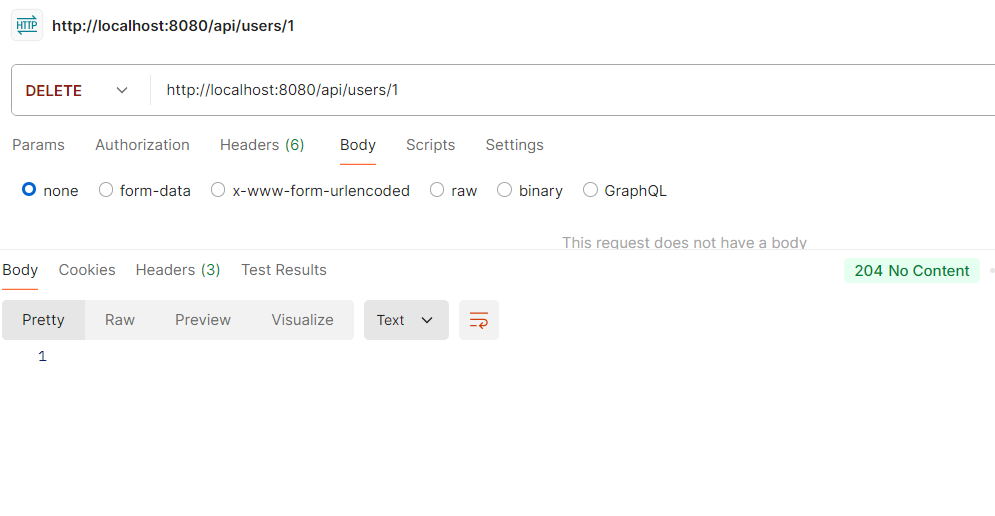
4. Delete User
Make a DELETE request to /api/users/{id} to delete a user.
DELETE http://localhost:8080/api/users/1
Note: After deleting a user, the record is removed from the main table, but Hibernate Envers stores the last state in the audit table (e.g.,
user_AUD) with a delete revision (REVTYPE = DEL). This allows tracking deleted data.
Output:
User Table:

Hibernate Envers automatically creates an audit table (e.g., user_AUD) that stores all changes including insert, update, and delete operations. Even if a user is deleted, its historical data remains available here.
Accessing Deleted Data from Audit Table
AuditReader reader = AuditReaderFactory.get(entityManager);
User user = reader.find(User.class, userId, revisionNumber);
This allows retrieving past versions of an entity, even after it has been deleted.
