In Spring Boot, filters can process incoming requests before they reach the controller and modify responses before sending them to the client. We often need to inject (autowire) Spring-managed beans into filters to access services or configurations. Spring does not manage servlet filters by default, so extra configuration is required to autowire Spring beans into them.
This article will guide you through how to autowire a Spring bean into servlet filters with step-by-step implementation and code examples.
Servlet Filters
A servlet filter is an object that can intercept HTTP requests to pre-process them before they reach the servlet, or post-process responses before they are sent back to the client. Servlet filters can modify requests, responses, or both.
However, by default, servlet filters are managed by the servlet container (like Tomcat) and not by Spring, making it difficult to inject Spring beans directly. We will show how to configure Spring to manage servlet filters and allow autowiring of beans into them.
Autowiring Beans into Servlet Filters
Since servlet filters are managed by the servlet container (e.g., Tomcat), they are not part of the Spring context, and hence do not support Spring’s dependency injection out of the box. However, in Spring Boot, we can register the filter as a Spring-managed bean and enable Spring to inject the required dependencies.
Steps to Autowire a Spring Bean in a Filter
- Create a Service: A simple service that will be autowired into the filter.
- Create a Custom Filter: Implement a custom filter and use constructor injection to autowire the service.
- Register the Filter: Use
FilterRegistrationBeanto register the custom filter within the Spring context. - Create a Controller: Create a controller to test the filter's functionality.
- Run and Test: Verify that the filter is correctly intercepting requests and autowiring the service.
Implementation to Autowire a Spring Bean in a Servlet Filter
To autowire the Spring bean into a Servlet filter, we need to configure the Servlet filter as Spring-managed bean, enabling the dependency injection within the filter.
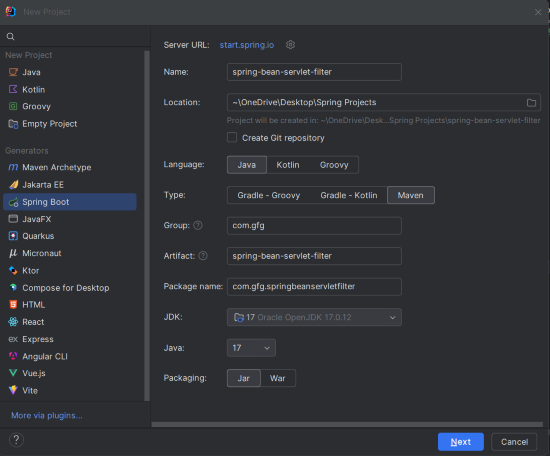
Step 1: Create a New Spring Boot Project
Open IntelliJ IDEA and create a new Spring Boot project with the following settings:
- Name:
spring-bean-servlet-filter - Language: Java
- Type: Maven
- Packaging: Jar
Click on the Next button.
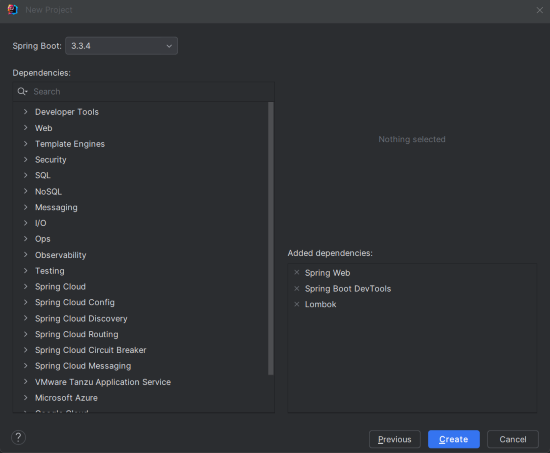
Step 2: Add the Dependencies
We need the following dependencies in our pom.xml:
- Spring Web
- Spring Boot DevTools
- Lombok
Create the Create button.
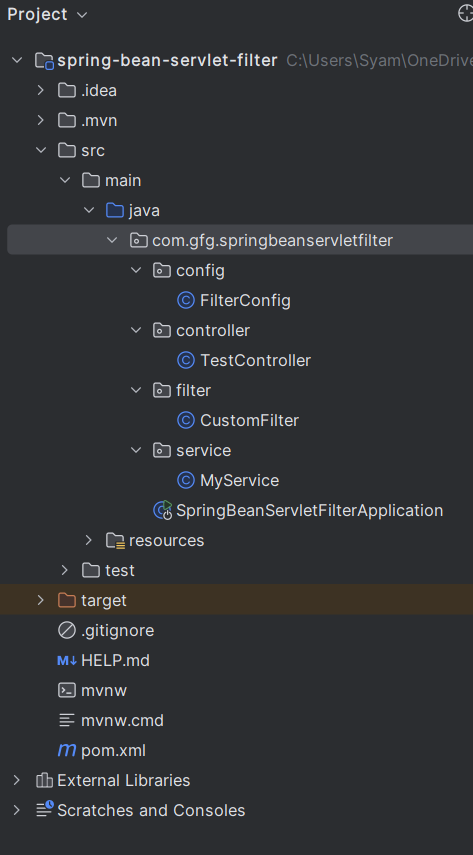
Project Structure
After successfully creating the project, the folder structure will look like the below image:
Step 3: Configure Application Properties
We configure a simple application name in application.properties:
spring.application.name=spring-bean-servlet-filter
spring.main.allow-bean-definition-overriding=true
This configuration helps in logging the application name during startup.
Step 4: Create and Register the Filter
To inject the Spring-managed service into a filter, we need to make the filter itself a Spring bean. This can be done using the FilterRegistrationBean provided by Spring.
FilterConfig.java
package com.gfg.springbeanservletfilter.config;

import com.gfg.springbeanservletfilter.filter.CustomFilter;
import com.gfg.springbeanservletfilter.service.MyService;
import org.springframework.boot.web.servlet.FilterRegistrationBean;
import org.springframework.context.annotation.Bean;
import org.springframework.context.annotation.Configuration;

@Configuration
public class FilterConfig {

    // Register the CustomFilter as a Spring bean and inject MyService via constructor
    @Bean
    public CustomFilter customFilter(MyService myService) {
        return new CustomFilter(myService);  // Passing MyService to the filter
    }

    // Use FilterRegistrationBean to register CustomFilter and map it to specific URLs
    @Bean
    public FilterRegistrationBean<CustomFilter> registerCustomFilter(CustomFilter customFilter) {
        FilterRegistrationBean<CustomFilter> registrationBean = new FilterRegistrationBean<>();
        registrationBean.setFilter(customFilter);  // Register the custom filter
        registrationBean.addUrlPatterns("/api/*");  // Apply filter to URLs under /api/*
        return registrationBean;
    }
}
- The
FilterConfigclass configures and registers the custom filter usingFilterRegistrationBean. customFilter()registers theCustomFilterclass and injectsMyServiceinto it via the constructor.
Step 5: Create the Custom Filter Class
Here is the custom filter that intercepts HTTP requests and uses the MyService to process them.
CustomFilter.java
package com.gfg.springbeanservletfilter.filter;

import com.gfg.springbeanservletfilter.service.MyService;
import jakarta.servlet.*;
import jakarta.servlet.http.HttpServletRequest;
import org.springframework.stereotype.Component;

import java.io.IOException;

@Component
public class CustomFilter implements Filter {

    private final MyService myService;

    // Constructor-based dependency injection of MyService
    public CustomFilter(MyService myService) {
        this.myService = myService;
    }

    @Override
    public void doFilter(ServletRequest request, ServletResponse response, FilterChain chain)
            throws IOException, ServletException {
        // Cast ServletRequest to HttpServletRequest to get request URI
        HttpServletRequest httpRequest = (HttpServletRequest) request;

        // Log the request URI and use MyService to process the request
        System.out.println("Request URI: " + httpRequest.getRequestURI());
        System.out.println(myService.processRequest());  // Invoke service method

        // Proceed with the next filter in the chain
        chain.doFilter(request, response);
    }

    @Override
    public void init(FilterConfig filterConfig) {
        // Initialization logic if needed
    }

    @Override
    public void destroy() {
        // Cleanup logic if needed
    }
}
- CustomFilter intercepts incoming requests and logs the request URI.
myService.processRequest()is called, demonstrating howMyServiceis injected into the filter and used to process requests.
Step 6: Create the MyService Class
This is the simple service that we will autowire into our filter.
MyService.java
package com.gfg.springbeanservletfilter.service;

import org.springframework.stereotype.Service;

@Service
public class MyService {

    // A simple method to simulate processing a request
    public String processRequest() {
        return "Request processed by MyService";
    }
}
MyServicecontains a method that returns a string message.- This class is annotated with
@Service, making it a Spring-managed bean available for autowiring.
Step 7: Create a Controller to Test the Filter
Let’s create a simple controller that exposes an API endpoint for testing the filter.
TestController.java
package com.gfg.springbeanservletfilter.controller;

import org.springframework.web.bind.annotation.GetMapping;
import org.springframework.web.bind.annotation.RestController;

@RestController
public class TestController {

    // API endpoint that will trigger the filter when accessed
    @GetMapping("/api/test")
    public String testFilter() {
        return "Filter applied successfully!";
    }
}
The TestController has an endpoint at /api/test. When this URL is accessed, the custom filter will be triggered.
Step 8: Main Class
The main class for your Spring Boot application remains unchanged. It serves as the entry point for running the application.
SpringBeanServletFilterApplication.java
package com.gfg.springbeanservletfilter;

import org.springframework.boot.SpringApplication;
import org.springframework.boot.autoconfigure.SpringBootApplication;
import org.springframework.context.annotation.ComponentScan;

@SpringBootApplication
@ComponentScan(basePackages = "com.gfg.springbeanservletfilter")
public class SpringBeanServletFilterApplication {

    public static void main(String[] args) {
        SpringApplication.run(SpringBeanServletFilterApplication.class, args);
    }

}
pom.xml File
<?xml version="1.0" encoding="UTF-8"?>
<project xmlns="https://maven.apache.org/POM/4.0.0" xmlns:xsi="https://www.w3.org/2001/XMLSchema-instance"
         xsi:schemaLocation="https://maven.apache.org/POM/4.0.0 https://maven.apache.org/xsd/maven-4.0.0.xsd">
    <modelVersion>4.0.0</modelVersion>
    <parent>
        <groupId>org.springframework.boot</groupId>
        <artifactId>spring-boot-starter-parent</artifactId>
        <version>3.3.4</version>
        <relativePath/> <!-- lookup parent from repository -->
    </parent>
    <groupId>com.gfg</groupId>
    <artifactId>spring-bean-servlet-filter</artifactId>
    <version>0.0.1-SNAPSHOT</version>
    <name>spring-bean-servlet-filter</name>
    <description>spring-bean-servlet-filter</description>
    <url/>
    <licenses>
        <license/>
    </licenses>
    <developers>
        <developer/>
    </developers>
    <scm>
        <connection/>
        <developerConnection/>
        <tag/>
        <url/>
    </scm>
    <properties>
        <java.version>17</java.version>
    </properties>
    <dependencies>
        <dependency>
            <groupId>org.springframework.boot</groupId>
            <artifactId>spring-boot-starter-web</artifactId>
        </dependency>

        <dependency>
            <groupId>org.springframework.boot</groupId>
            <artifactId>spring-boot-devtools</artifactId>
            <scope>runtime</scope>
            <optional>true</optional>
        </dependency>
        <dependency>
            <groupId>org.projectlombok</groupId>
            <artifactId>lombok</artifactId>
            <optional>true</optional>
        </dependency>
        <dependency>
            <groupId>org.springframework.boot</groupId>
            <artifactId>spring-boot-starter-test</artifactId>
            <scope>test</scope>
        </dependency>
    </dependencies>

    <build>
        <plugins>
            <plugin>
                <groupId>org.springframework.boot</groupId>
                <artifactId>spring-boot-maven-plugin</artifactId>
                <configuration>
                    <excludes>
                        <exclude>
                            <groupId>org.projectlombok</groupId>
                            <artifactId>lombok</artifactId>
                        </exclude>
                    </excludes>
                </configuration>
            </plugin>
        </plugins>
    </build>

</project>
Step 9: Run the Application
Run the application using your IDE or from the command line:
mvn spring-boot:runOutput:
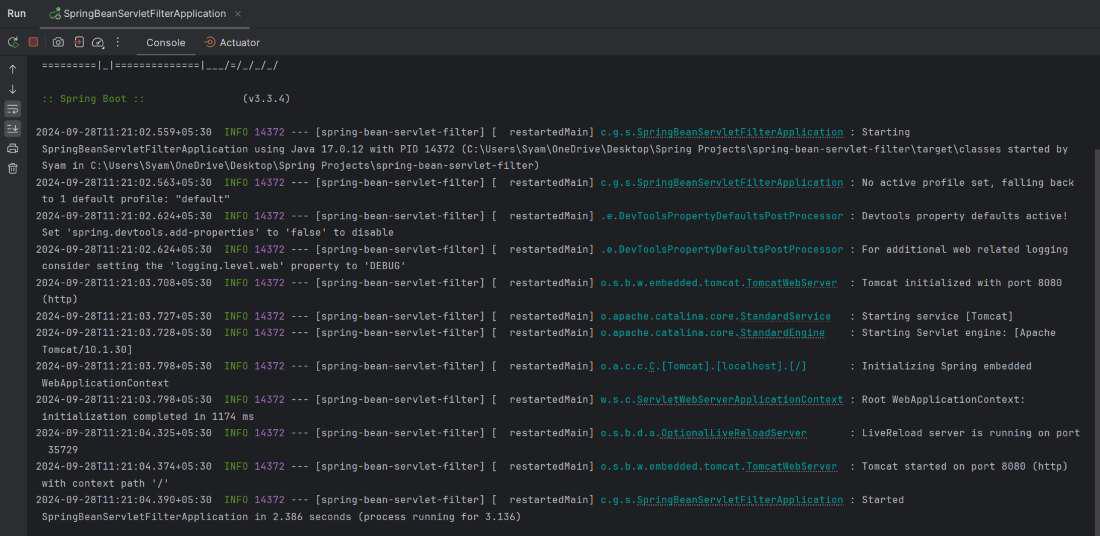
The application will start at port 8080 (the default port).
Step 10: Test the Filter
Use Postman or any HTTP client to send a request to the /api/test endpoint:
GET http://localhost:8080/api/testIf everything is set up correctly, the response will be:
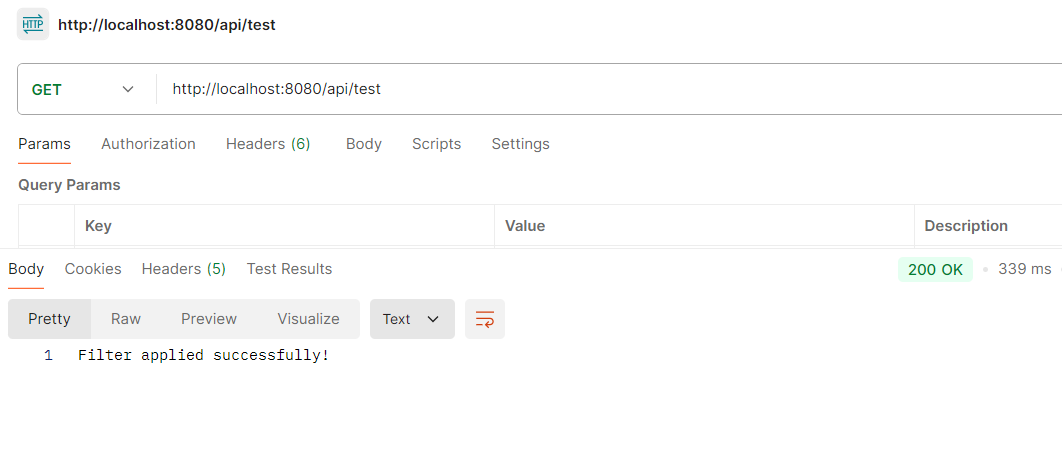
Application Log Response:
Additionally, you will see the following logs in the console:
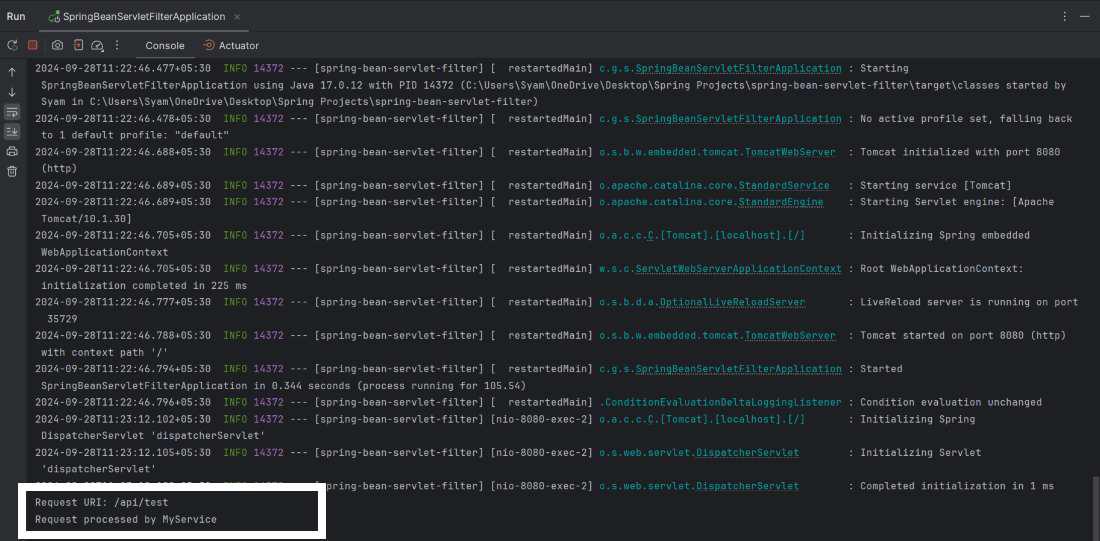
This confirms that the custom filter intercepted the request, and MyService was autowired and used within the filter.
Conclusion
In this article, we learned how to autowire Spring beans into servlet filters in a Spring Boot application. By registering the filter as a Spring-managed bean using FilterRegistrationBean, we enabled dependency injection inside filters. This pattern allows for cleaner and more modular code by reusing existing Spring services inside filters, making it easier to manage and test your application.
