JPA Map Mapping is a feature that allows storing data in key-value pair format using Java Map. It helps map collections of basic or embeddable types to a separate database table. This makes handling dynamic and structured data more flexible and efficient.
- Uses Map<K, V> to store key-value relationships in database
- Implemented using @ElementCollection and @MapKeyColumn
- Stores data in a separate collection table for better organization
Steps to Implement Map Mapping in JPA
- Define entity classes like Employee and Department using @Entity and relationships (@OneToMany, @ManyToOne).
- Map the Map<K, V> using @ElementCollection or @OneToMany with @CollectionTable, @MapKeyColumn, and @Column.
- Perform operations using EntityManager to add key-value pairs and persist the entity within a transaction.
- (Optional) Use bidirectional mapping with mappedBy to enable access from both sides.
Steps to Implement Map Mapping in JPA
Foloow below steps to implement Map mapping in JPA, showing how to store and manage key-value pairs using entity classes and annotations.
Step 1: Create Maven Project
- Open IntelliJ IDEA
- Create a New Maven Project
- Name: jpa-map-mapping-demo
- Choose Java version (11 or above)
Step 2: Add Dependencies
Add the following dependencies into the created JPA project.
Dependencies:
<dependency>
            <groupId>org.hibernate.orm</groupId>
            <artifactId>hibernate-core</artifactId>
            <version>6.0.2.Final</version>
        </dependency>
        <dependency>
            <groupId>org.glassfish.jaxb</groupId>
            <artifactId>jaxb-runtime</artifactId>
            <version>3.0.2</version>
        </dependency>
        <dependency>
            <groupId>mysql</groupId>
            <artifactId>mysql-connector-java</artifactId>
            <version>8.0.28</version>
        </dependency>
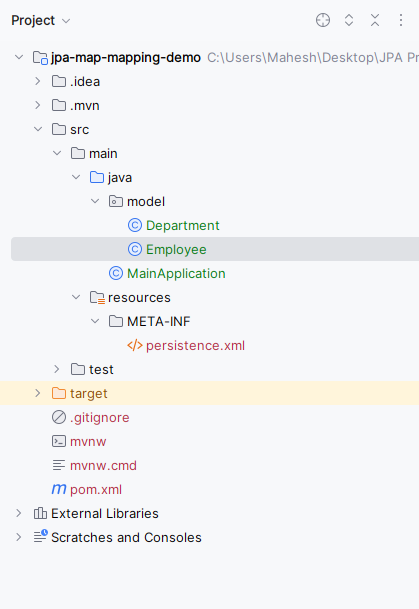
Now the project structure will look like:
Step 3: Configure persistence.xml
- Define persistence unit.
- Configure DB: URL, username, password
- Add Hibernate properties:
hbm2ddl.auto = update
Open the persistance.xml file and write the below code for MYSQL database configuration of the database.
<?xml version="1.0" encoding="UTF-8" standalone="yes"?>
<persistence xmlns="https://jakarta.ee/xml/ns/persistence/"
             xmlns:xsi="https://www.w3.org/2001/XMLSchema-instance"
             xsi:schemaLocation="https://jakarta.ee/xml/ns/persistence/ https://jakarta.ee/xml/ns/persistence//persistence_3_0.xsd"
             version="3.0">
    <persistence-unit name="example">

        <properties>
            <property name="javax.persistence.jdbc.url" value="jdbc:mysql://localhost:3306/example"/>
            <property name="javax.persistence.jdbc.user" value="root"/>
            <property name="javax.persistence.jdbc.password" value=""/>
            <property name="javax.persistence.jdbc.driver" value="com.mysql.jdbc.Driver"/>
            <property name="hibernate.dialect" value="org.hibernate.dialect.MySQL5Dialect"/>
            <property name="hibernate.hbm2ddl.auto" value="update"/>
        </properties>

    </persistence-unit>
</persistence>
Step 4: Create Employee Entity
- Create a package named model and create an entity class inside that package named as Employee.
- Go to src > main > java > model > Employee and write the below code file..
package model;

import jakarta.persistence.*;

import java.util.HashMap;
import java.util.Map;

@Entity
public class Employee {
    @Id
    private Long id;
    private String name;

    @ElementCollection
    @CollectionTable(name="employee_department",
            joinColumns=@JoinColumn(name="employee_id"))
    @MapKeyColumn(name="department_key")
    @Column(name="department_value")
    private Map<String, String> departments = new HashMap<>();

    // Constructors, getters, and setters


    public Long getId() {
        return id;
    }

    public void setId(Long id) {
        this.id = id;
    }

    public String getName() {
        return name;
    }

    public void setName(String name) {
        this.name = name;
    }

    public Map<String, String> getDepartments() {
        return departments;
    }

    public void setDepartments(Map<String, String> departments) {
        this.departments = departments;
    }
}
In the Employee Entity class:
- @ElementCollection: This annotation is used to map a collection of basic types or embeddable objects in the application.
- @CollectionTable: It specifies the name of the table used to store the collection of departments.
- @MapKeyColumn: It specifies the column name for the map key.
- @Column: It specifies the column name for the map value
Step 5: Create Department Entity
- Create the new Java package named as model. In that package, create a new entity class named Department.
- Go to src > main > java > model > Department and put the below code.
package model;

import jakarta.persistence.Entity;
import jakarta.persistence.Id;

@Entity
public class Department {
    @Id
    private Long id;
    private String name;

    // Constructors, getters, and setters


    public Long getId() {
        return id;
    }

    public void setId(Long id) {
        this.id = id;
    }

    public String getName() {
        return name;
    }

    public void setName(String name) {
        this.name = name;
    }
}
The above class can represents the Department with the id and name attributes.
Step 6: Create Main Application
- Create a new Java class and named as the MainApplication.
- Go to src > main > java > MainApplication and put the below code.
import jakarta.persistence.EntityManager;
import jakarta.persistence.EntityManagerFactory;
import jakarta.persistence.Persistence;
import model.Employee;

import java.util.HashMap;
import java.util.Map;

public class MainApplication {
    public static void main(String[] args) {
        EntityManagerFactory emf = Persistence.createEntityManagerFactory("example");
        EntityManager em = emf.createEntityManager();

        em.getTransaction().begin();

        // Create and persist employee
        Employee employee = new Employee();
        employee.setId(1L);
        employee.setName("Mahesh");

        Map<String, String> departments = new HashMap<>();
        departments.put("IT", "Information Technology");
        departments.put("HR", "Human Resources");

        employee.setDepartments(departments);

        em.persist(employee);

        em.getTransaction().commit();

        // Retrieve employee from database
        Employee retrievedEmployee = em.find(Employee.class, 1L);

        // Output retrieved employee details
        if (retrievedEmployee != null) {
            System.out.println("Retrieved Employee:");
            System.out.println("ID: " + retrievedEmployee.getId());
            System.out.println("Name: " + retrievedEmployee.getName());
            System.out.println("Departments:");
            for (Map.Entry<String, String> entry : retrievedEmployee.getDepartments().entrySet()) {
                System.out.println(entry.getKey() + ": " + entry.getValue());
            }
        } else {
            System.out.println("Employee not found.");
        }

        em.close();
        emf.close();
    }
}
In the MainApplication class:
- After the persisting the employee, we can retrieve the same employee from the database using the EntityManager.find() method of the application.
- We can print the details of the retrieved the employee and it can including its the ID, name and departments.
Step 7: Run Application
- Run MainApplication
- Output shows: Employee details , Department key-value pairs
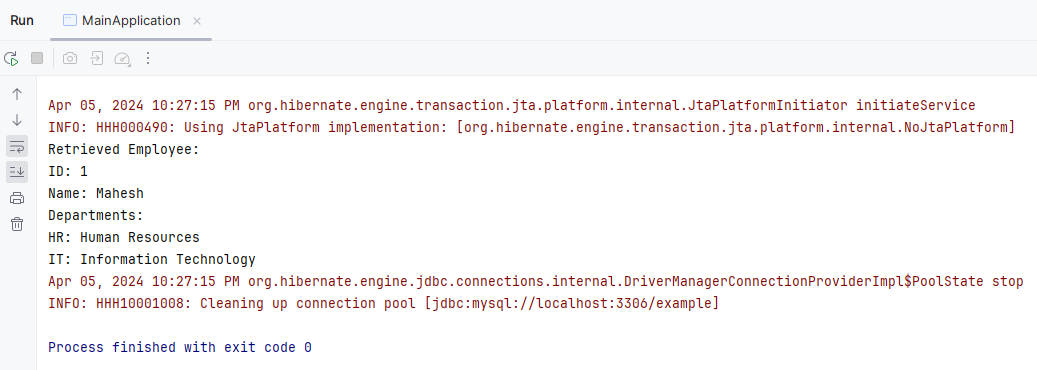
The above example demonstrates a simple Java application using JPA for the Map mapping and it includes the entity classes for the Employee and Department along with the JPA utility class for the managing the EntityManager instances.
