Subscribing to a Kafka topic from a Java application requires setting up a Kafka consumer that reads messages from a specific topic. This is a key part of many microservice architectures where services must process messages asynchronously. Apache Kafka provides a robust and scalable platform for building such message-driven applications.
Kafka consumers are responsible for reading messages from Kafka topics. The customer subscribes to the topic and always polls for new messages. The key components involved in setting up a Kafka consumer include:
- Consumer Configuration: Define properties such as the Kafka server address, group ID, key deserializer, and value deserializer.
- Kafka Listener: An annotation provided by Spring Kafka to mark a method as a listener for a specific topic.
- Consumer Group: A group of consumers that work together to consume messages from a topic. Each message is delivered to only one consumer in the group.
Implementation to Subscribe to the Topic in Apache Kafka from the Java application
Below are the implementation steps to subscribe to the topic in Apache Kafka from the Java application.
Step 1: Setup the Apache Kafka
Refer to this link to confirm that Kafka is installed and running on your local system.
Step 2: Create the Spring Boot Project
Create the Spring Boot project using the Spring Initializr and add the below required dependencies.
- Spring Web
- Spring For Apache Kafka
- Lombok
- Spring DevTools
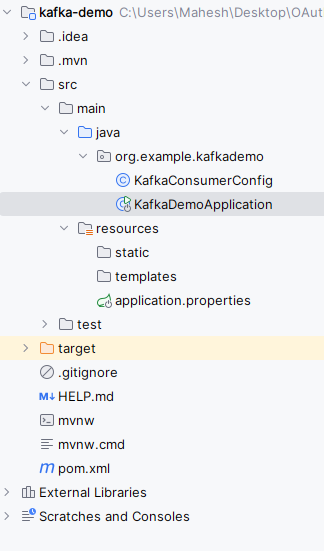
After completing this step, the project structure will be like below:
Step 3: Configure the application properties
Open the application.properties and add the below properties for configuration of the server port.
spring.application.name=kafka-demo
server.port=8080
Step 4: Consumer Kafka Configuration
Now, we will create the KafkaConsumerConfig class that can configure the configuration of the Consumer service.
Go to src > main > java > org.example.kafkademo > KafkaConsumerConfig and put the below code.
package org.example.kafkademo;


import org.apache.kafka.clients.consumer.ConsumerConfig;
import org.apache.kafka.clients.consumer.KafkaConsumer;
import org.apache.kafka.common.serialization.StringDeserializer;

import java.util.HashMap;
import java.util.Map;
import java.util.Properties;

public class KafkaConsumerConfig {

    public static Properties getConsumerProperties() {
        Properties props = new Properties();
        props.put(ConsumerConfig.BOOTSTRAP_SERVERS_CONFIG, "localhost:9092");
        props.put(ConsumerConfig.GROUP_ID_CONFIG, "my-group");
        props.put(ConsumerConfig.KEY_DESERIALIZER_CLASS_CONFIG, StringDeserializer.class.getName());
        props.put(ConsumerConfig.VALUE_DESERIALIZER_CLASS_CONFIG, StringDeserializer.class.getName());
        props.put(ConsumerConfig.AUTO_OFFSET_RESET_CONFIG, "earliest");
        return props;
    }
}
Step 5: Main Class
Open the main class to subscribe the topic of the Kafka in the Spring application.
Go to src > main > java > org.example.kafkademo > KafkaDemoApplication and put the below code.
package org.example.kafkademo;

import org.apache.kafka.clients.consumer.ConsumerRecord;
import org.apache.kafka.clients.consumer.ConsumerRecords;
import org.apache.kafka.clients.consumer.KafkaConsumer;
import org.springframework.boot.SpringApplication;
import org.springframework.boot.autoconfigure.SpringBootApplication;

import java.time.Duration;
import java.util.Collections;

@SpringBootApplication
public class KafkaDemoApplication {

    public static void main(String[] args) {
        KafkaConsumer<String, String> consumer = new KafkaConsumer<>(KafkaConsumerConfig.getConsumerProperties());
        consumer.subscribe(Collections.singletonList("kafka-topic"));

        try {
            while (true) {
                ConsumerRecords<String, String> records = consumer.poll(Duration.ofMillis(100));
                for (ConsumerRecord<String, String> record : records) {
                    System.out.printf("Consumed record with key %s and value %s%n", record.key(), record.value());
                }
            }
        } finally {
            consumer.close();
        }
    }
}
pom.xml:
<?xml version="1.0" encoding="UTF-8"?>
<project xmlns="https://maven.apache.org/POM/4.0.0" xmlns:xsi="https://www.w3.org/2001/XMLSchema-instance"
    xsi:schemaLocation="https://maven.apache.org/POM/4.0.0 https://maven.apache.org/xsd/maven-4.0.0.xsd">
    <modelVersion>4.0.0</modelVersion>
    <parent>
        <groupId>org.springframework.boot</groupId>
        <artifactId>spring-boot-starter-parent</artifactId>
        <version>3.2.5</version>
        <relativePath/> <!-- lookup parent from repository -->
    </parent>
    <groupId>org.example</groupId>
    <artifactId>kafka-demo</artifactId>
    <version>0.0.1-SNAPSHOT</version>
    <name>kafka-demo</name>
    <description>kafka-demo</description>
    <properties>
        <java.version>17</java.version>
    </properties>
    <dependencies>
        <dependency>
            <groupId>org.springframework.boot</groupId>
            <artifactId>spring-boot-starter-web</artifactId>
        </dependency>
        <dependency>
            <groupId>org.springframework.kafka</groupId>
            <artifactId>spring-kafka</artifactId>
        </dependency>

        <dependency>
            <groupId>org.springframework.boot</groupId>
            <artifactId>spring-boot-starter-test</artifactId>
            <scope>test</scope>
        </dependency>
        <dependency>
            <groupId>org.springframework.kafka</groupId>
            <artifactId>spring-kafka-test</artifactId>
            <scope>test</scope>
        </dependency>
    </dependencies>

    <build>
        <plugins>
            <plugin>
                <groupId>org.springframework.boot</groupId>
                <artifactId>spring-boot-maven-plugin</artifactId>
            </plugin>
        </plugins>
    </build>

</project>
Step 6: Run the Application
After completing all the above steps, now run the application and it will start at port 8080.

Step 7: Sending Messages to the Topic
Now, we will use the Kafka producer to send the messages to the topic for testing. We can use the below Kafka command line tool.
.\bin\windows\kafka-topics.bat --create --topic kafka-topic --bootstrap-server localhost:9092 --partitions 1 --replication-factor 1Output:

Type the message:
bin/kafka-console-producer.bat --broker-list localhost:9092 --topic kafka-topic
>hello kafka message
Output:

Spring Boot Console Output:

By the following these steps, we can set up the Kafka consumer in the Spring Boot application and it allows microservices to process messages asynchronously and efficiently.
