In Spring Framework, the @Transactional annotation provides a declarative approach for transaction management. It ensures that operations within a method are executed as a single unit of work, either all succeed or all fail. Understanding transaction propagation and isolation is essential for maintaining data consistency and managing concurrent database operations effectively.
Transaction Propagation and Isolation
Transaction Propagation
Transaction propagation defines how transactions relate to each other when multiple transactional methods are called. Spring supports several propagation behaviors:
- REQUIRED: The default propagation. If a transaction exists, it will join it; otherwise, a new transaction will be created.
- REQUIRES_NEW: Suspends the current transaction and creates a new one.
- SUPPORTS: Runs with a transaction if one exists; otherwise, it runs non-transactionally.
- NOT_SUPPORTED: Runs the method non-transactionally and suspends any existing transaction.
- MANDATORY: Requires an existing transaction; throws an exception if none is present.
- NEVER: Runs without a transaction; throws an exception if one exists.
- NESTED: Runs within a nested transaction if one exists; otherwise, it starts a new transaction.
Transaction Isolation
Transaction isolation defines how data integrity is maintained when multiple transactions occur concurrently.
- DEFAULT: Uses the database's default isolation level.
- READ_UNCOMMITTED: Allows reading uncommitted changes made by other transactions, leading to dirty reads.
- READ_COMMITTED: Ensures no dirty reads but still allows non-repeatable reads and phantom reads.
- REPEATABLE_READ: Prevents dirty and non-repeatable reads but allows phantom reads.
- SERIALIZABLE: The most restrictive level, preventing dirty reads, non-repeatable reads, and phantom reads. Ensures complete isolation but may reduce concurrency.
Implementation of Transaction Propagation and Isolation in Spring Boot
Step 1: Create a New Spring Boot Project
Create a Spring Boot project using Spring Initializr or your IDE.
Project Details:
- Name: transaction-demo
- Type: Maven
- Language: Java
- Packaging: Jar
- Java Version: 17

Step 2: Add the Dependencies
Include the following dependencies in your pom.xml:
<dependencies>
    <dependency>
        <groupId>org.springframework.boot</groupId>
        <artifactId>spring-boot-starter-data-jpa</artifactId>
    </dependency>
    <dependency>
        <groupId>org.springframework.boot</groupId>
        <artifactId>spring-boot-starter-web</artifactId>
    </dependency>
    <dependency>
        <groupId>com.mysql</groupId>
        <artifactId>mysql-connector-j</artifactId>
        <scope>runtime</scope>
    </dependency>
    <dependency>
        <groupId>org.projectlombok</groupId>
        <artifactId>lombok</artifactId>
        <optional>true</optional>
    </dependency>
</dependencies>
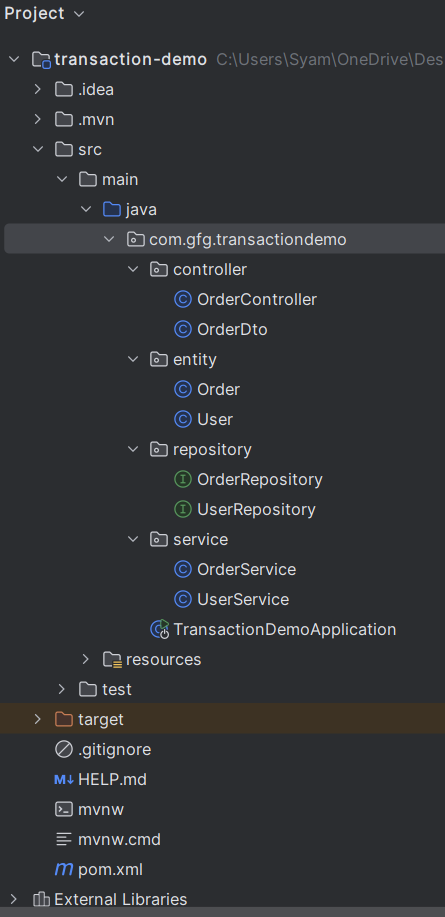
Project Structure
Ensure your project structure looks similar to the following:
Step 3: Configure application.properties
spring.application.name=transaction-demo
# Database Configuration
spring.datasource.url=jdbc:mysql://localhost:3306/transaction_demo
spring.datasource.username=root
spring.datasource.password=mypassword
spring.datasource.driver-class-name=com.mysql.cj.jdbc.Driver
# JPA and Hibernate
spring.jpa.hibernate.ddl-auto=update
spring.jpa.show-sql=true
spring.jpa.properties.hibernate.dialect=org.hibernate.dialect.MySQL8Dialect
Step 4: Create Entities
Order Entity
package com.gfg.transactiondemo.entity;

import jakarta.persistence.*;
import lombok.*;

@Entity
@Data
@AllArgsConstructor
@NoArgsConstructor
@Table(name = "orders")
public class Order {
    @Id
    @GeneratedValue(strategy = GenerationType.IDENTITY)
    private Long id;
    private String orderId;

    public Order(String orderId) {
        this.orderId = orderId;
    }
}
User Entity
package com.gfg.transactiondemo.entity;

import jakarta.persistence.*;
import lombok.*;

@Entity
@Data
@AllArgsConstructor
@NoArgsConstructor
@Table(name = "users")
public class User {
    @Id
    @GeneratedValue(strategy = GenerationType.IDENTITY)
    private Long id;
    private String username;

    public User(String username) {
        this.username = username;
    }
}
Step 5: Create Repositories
OrderRepository
package com.gfg.transactiondemo.repository;

import com.gfg.transactiondemo.entity.Order;
import org.springframework.data.jpa.repository.JpaRepository;

public interface OrderRepository extends JpaRepository<Order, Long> {
}
UserRepository
package com.gfg.transactiondemo.repository;

import com.gfg.transactiondemo.entity.User;
import org.springframework.data.jpa.repository.JpaRepository;

public interface UserRepository extends JpaRepository<User, Long> {
}
Step 6: Service Layer
UserService
package com.gfg.transactiondemo.service;

import com.gfg.transactiondemo.entity.User;
import com.gfg.transactiondemo.repository.UserRepository;
import org.springframework.beans.factory.annotation.Autowired;
import org.springframework.stereotype.Service;
import org.springframework.transaction.annotation.*;

@Service
public class UserService {

    @Autowired
    private UserRepository userRepository;

    @Transactional(propagation = Propagation.REQUIRED, isolation = Isolation.REPEATABLE_READ)
    public void createUser(User user) {
        userRepository.save(user);
    }
}
This method uses Propagation.REQUIRED, so it will join an existing transaction or start a new one. The isolation level is REPEATABLE_READ, ensuring consistent reads during the transaction.
OrderService
package com.gfg.transactiondemo.service;

import com.gfg.transactiondemo.entity.Order;
import com.gfg.transactiondemo.entity.User;
import com.gfg.transactiondemo.repository.OrderRepository;
import org.springframework.beans.factory.annotation.Autowired;
import org.springframework.stereotype.Service;
import org.springframework.transaction.annotation.*;

@Service
public class OrderService {

    @Autowired
    private OrderRepository orderRepository;

    @Autowired
    private UserService userService;

    @Transactional(propagation = Propagation.REQUIRES_NEW, isolation = Isolation.SERIALIZABLE)
    public void createOrder(Order order, User user) {
        userService.createUser(user);
        orderRepository.save(order);
    }
}
Step 7: Create DTO Class
package com.gfg.transactiondemo.controller;

public class OrderDto {
    private String username;
    private String orderId;

    public OrderDto() {}
    public OrderDto(String username, String orderId) {
        this.username = username;
        this.orderId = orderId;
    }

    public String getUsername() { return username; }
    public void setUsername(String username) { this.username = username; }

    public String getOrderId() { return orderId; }
    public void setOrderId(String orderId) { this.orderId = orderId; }
}
Step 8: Create Controller
package com.gfg.transactiondemo.controller;

import com.gfg.transactiondemo.entity.*;
import com.gfg.transactiondemo.service.OrderService;
import org.springframework.beans.factory.annotation.Autowired;
import org.springframework.http.ResponseEntity;
import org.springframework.web.bind.annotation.*;

@RestController
@RequestMapping("/api")
public class OrderController {

    @Autowired
    private OrderService orderService;

    @PostMapping("/orders")
    public ResponseEntity<String> createOrder(@RequestBody OrderDto dto) {
        User user = new User(dto.getUsername());
        Order order = new Order(dto.getOrderId());
        orderService.createOrder(order, user);
        return ResponseEntity.ok("Order created successfully");
    }
}
Step 9: Main Application Class
No changes are required in the main class. This is the entry point of the application.
package com.gfg.transactiondemo;

import org.springframework.boot.SpringApplication;
import org.springframework.boot.autoconfigure.SpringBootApplication;

@SpringBootApplication
public class TransactionDemoApplication {

    public static void main(String[] args) {
        SpringApplication.run(TransactionDemoApplication.class, args); // Launches the Spring Boot application
    }
}
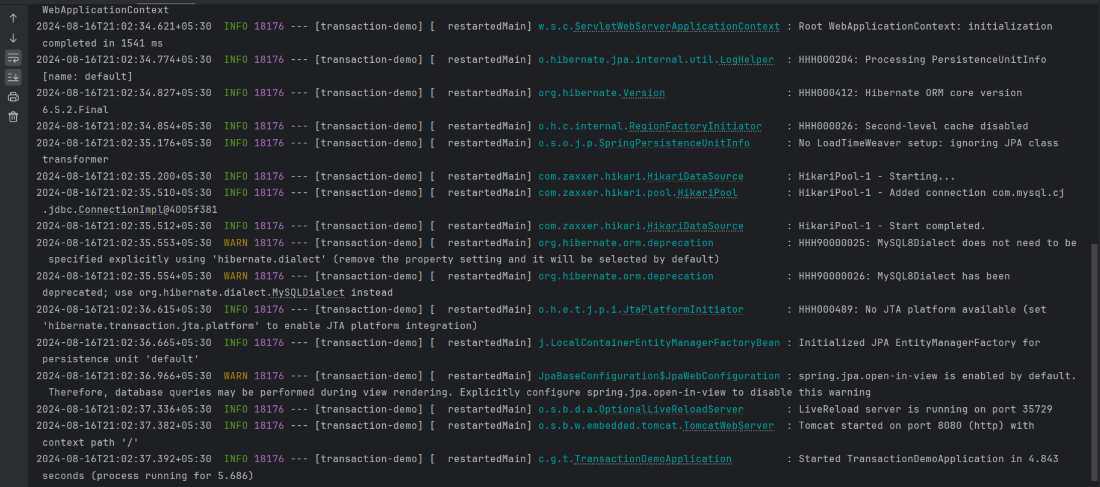
Step 10: Run the Application
Run the application using:
mvn spring-boot:run
Step 11: Test the Endpoint
Use a tool like Postman to send a POST request
Endpoint:
POST: http://localhost:8080/createOrder
Request Body and Response:
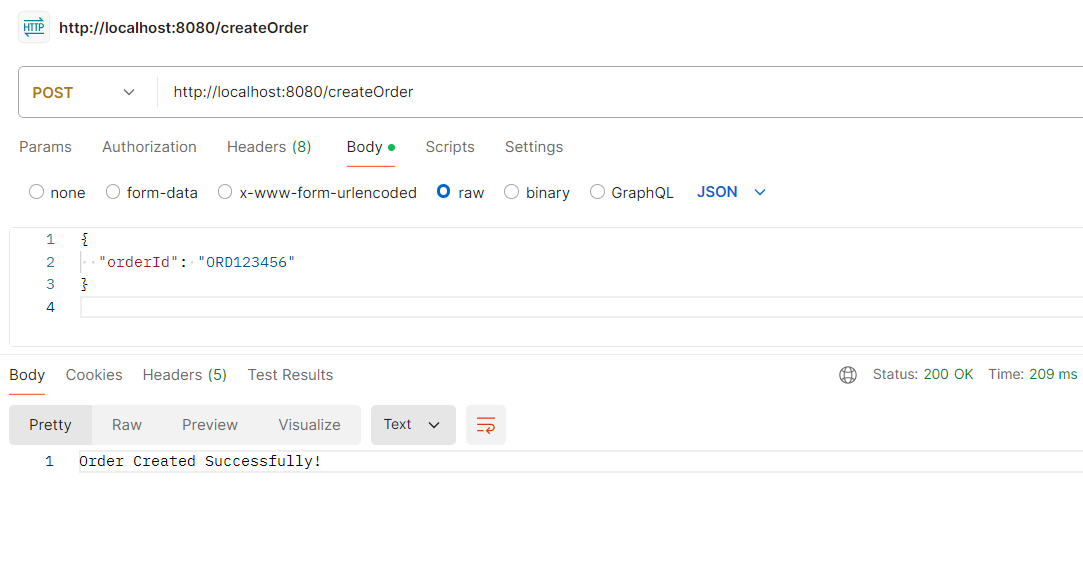
This demonstrates how transaction propagation and isolation work together when creating a user and order within different transactional contexts.
